WordPress es un sistema de administración de contenido (CMS) que se usa ampliamente para crear blogs, sitios web, portales de comercio electrónico y mucho más. Está escrito en lenguaje PHP y utiliza MariaDB o MySQL como base de datos.
WordPress potencia más de 60 millones de sitios web, incluido el 33 % de los 10 millones de sitios web principales.
Aquí está el tutorial sobre cómo instalar WordPress con Nginx en CentOS 8 / RHEL 8.
Instalar la pila LEMP
Antes de continuar, configure la pila LEMP usando el siguiente enlace.
Instalar LEMP Stack (Nginx, MariaDB y PHP) en CentOS 8/RHEL 8
Instalar extensiones de PHP
Se requieren las siguientes extensiones para instalar WordPress en CentOS 8 / RHEL 8.
yum install -y php-mysqlnd php-dom php-simplexml php-xml php-xmlreader php-curl php-exif php-ftp php-gd php-iconv php-json php-mbstring php-posix php-sockets php-tokenizer
Configurar el bloque del servidor Nginx para WordPress
Vamos a crear un bloque de servidor para la instalación de WordPress. Los archivos de configuración del host virtual se pueden encontrar en el directorio /etc/nginx/conf.d.
Estoy creando un bloque de servidor para lo siguiente,
Nombre de dominio: www.itzgeek.net
Número de puerto: 80
Raíz del documento: /sites/www.itzgeek.net/public_html
Registros: /sites/www.itzgeek.net/logs
Primero, cree un archivo de host virtual.
vi /etc/nginx/conf.d/www.itzgeek.net.conf
Coloque el siguiente contenido.
server {
	listen 80;
	server_name www.itzgeek.net;

	root /sites/www.itzgeek.net/public_html/;

	index index.html index.php;

	access_log /sites/www.itzgeek.net/logs/access.log;
	error_log /sites/www.itzgeek.net/logs/error.log;

	# Don't allow pages to be rendered in an iframe on external domains.
	add_header X-Frame-Options "SAMEORIGIN";

	# MIME sniffing prevention
	add_header X-Content-Type-Options "nosniff";

	# Enable cross-site scripting filter in supported browsers.
	add_header X-Xss-Protection "1; mode=block";

	# Prevent access to hidden files
	location ~* /\.(?!well-known\/) {
		deny all;
	}

	# Prevent access to certain file extensions
	location ~\.(ini|log|conf)$ {
		deny all;
	}

        # Enable WordPress Permananent Links
	location / {
		try_files $uri $uri/ /index.php?$args;
	}

	location ~ \.php$ {
        include /etc/nginx/fastcgi_params;
        fastcgi_pass 127.0.0.1:9000;
        fastcgi_index index.php;
        fastcgi_param SCRIPT_FILENAME $document_root$fastcgi_script_name;
	}

}
Cree la raíz del documento y el directorio de registros.
sudo mkdir -p /sites/www.itzgeek.net/public_html/

sudo mkdir -p /sites/www.itzgeek.net/logs/
Verifique los archivos de configuración.
nginx -t
El siguiente resultado confirma que no hay ningún error de sintaxis en el bloque del servidor.
nginx: the configuration file /etc/nginx/nginx.conf syntax is ok
nginx: configuration file /etc/nginx/nginx.conf test is successful
Reinicie los servicios.
systemctl restart nginx

systemctl restart php-fpm
Si obtiene algún error al reiniciar el servicio Nginx, deshabilite SELinux en su máquina.
setenforce 0
Instalar Let's Encrypt SSL para WordPress (Opcional)
Hoy en día, casi todos los sitios web usan HTTPS (certificado SSL) para la autenticidad, la seguridad y para mantener privadas las comunicaciones de los usuarios. Google pidió a los propietarios el año pasado que cambiaran a HTTPS por seguridad y mejoraran las clasificaciones.
Instalar Certbot
Debe instalar un cliente Certbot ACME en su sistema para la emisión de certificados y la instalación de un certificado sin tiempo de inactividad.
El cliente de Certbot no está disponible en los repositorios de Red Hat. Entonces, necesitamos descargar un cliente Certbot desde su sitio oficial.
curl -O https://dl.eff.org/certbot-auto

mv certbot-auto /usr/local/bin/certbot-auto

chmod 0755 /usr/local/bin/certbot-auto
Actualizar/Cambiar Registro DNS
Vaya a su registrador de dominios y cree/actualice el registro A/CNAME para su dominio.

Espere un tiempo para permitir que el registro DNS se propague y luego proceda a instalar Let's Encrypt SSL.
Instalar el certificado SSL de Let's Encrypt
Utilice el comando certbot para crear e instalar un certificado de Let's Encrypt.
/usr/local/bin/certbot-auto --nginx
En la primera ejecución, el cliente de certbot instalará los paquetes rpm necesarios para configurar un entorno virtual de Python para generar certificados.
Salida:
Saving debug log to /var/log/letsencrypt/letsencrypt.log
Plugins selected: Authenticator nginx, Installer nginx
Enter email address (used for urgent renewal and security notices) (Enter 'c' to
cancel): [email protected]  << Enter email id to receive notification

- - - - - - - - - - - - - - - - - - - - - - - - - - - - - - - - - - - - - - - -
Please read the Terms of Service at
https://letsencrypt.org/documents/LE-SA-v1.2-November-15-2017.pdf. You must
agree in order to register with the ACME server at
https://acme-v02.api.letsencrypt.org/directory
- - - - - - - - - - - - - - - - - - - - - - - - - - - - - - - - - - - - - - - -
(A)gree/(C)ancel: A  << Accept Terms of Service

- - - - - - - - - - - - - - - - - - - - - - - - - - - - - - - - - - - - - - - -
Would you be willing to share your email address with the Electronic Frontier
Foundation, a founding partner of the Let's Encrypt project and the non-profit
organization that develops Certbot? We'd like to send you email about our work
encrypting the web, EFF news, campaigns, and ways to support digital freedom.
- - - - - - - - - - - - - - - - - - - - - - - - - - - - - - - - - - - - - - - -
(Y)es/(N)o: Y  << Subscribe to newsletter

Which names would you like to activate HTTPS for?
- - - - - - - - - - - - - - - - - - - - - - - - - - - - - - - - - - - - - - - -
1: www.itzgeek.net
- - - - - - - - - - - - - - - - - - - - - - - - - - - - - - - - - - - - - - - -
Select the appropriate numbers separated by commas and/or spaces, or leave input
blank to select all options shown (Enter 'c' to cancel): 1  << Install SSL certificate for www.itzgeek.net
Obtaining a new certificate
Performing the following challenges:
http-01 challenge for www.itzgeek.net
Waiting for verification...
Cleaning up challenges
Deploying Certificate to VirtualHost /etc/nginx/conf.d/wordpress.conf

Please choose whether or not to redirect HTTP traffic to HTTPS, removing HTTP access.
- - - - - - - - - - - - - - - - - - - - - - - - - - - - - - - - - - - - - - - -
1: No redirect - Make no further changes to the webserver configuration.
2: Redirect - Make all requests redirect to secure HTTPS access. Choose this for
new sites, or if you're confident your site works on HTTPS. You can undo this
change by editing your web server's configuration.
- - - - - - - - - - - - - - - - - - - - - - - - - - - - - - - - - - - - - - - -
Select the appropriate number [1-2] then [enter] (press 'c' to cancel): 2  << Redirect HTTP traffic to HTTPS site
Redirecting all traffic on port 80 to ssl in /etc/nginx/conf.d/wordpress.conf

- - - - - - - - - - - - - - - - - - - - - - - - - - - - - - - - - - - - - - - -
Congratulations! You have successfully enabled https://www.itzgeek.net

You should test your configuration at:
https://www.ssllabs.com/ssltest/analyze.html?d=www.itzgeek.net
- - - - - - - - - - - - - - - - - - - - - - - - - - - - - - - - - - - - - - - -

IMPORTANT NOTES:
 - Congratulations! Your certificate and chain have been saved at:
   /etc/letsencrypt/live/www.itzgeek.net/fullchain.pem
   Your key file has been saved at:
   /etc/letsencrypt/live/www.itzgeek.net/privkey.pem
   Your cert will expire on 2019-12-17. To obtain a new or tweaked
   version of this certificate in the future, simply run certbot-auto
   again with the "certonly" option. To non-interactively renew *all*
   of your certificates, run "certbot-auto renew"
 - Your account credentials have been saved in your Certbot
   configuration directory at /etc/letsencrypt. You should make a
   secure backup of this folder now. This configuration directory will
   also contain certificates and private keys obtained by Certbot so
   making regular backups of this folder is ideal.
 - If you like Certbot, please consider supporting our work by:

   Donating to ISRG / Let's Encrypt:   https://letsencrypt.org/donate
   Donating to EFF:                    https://eff.org/donate-le
Redirigir solicitudes HTTP que no sean www a www HTTPS con Nginx
Necesitamos redirigir el tráfico procedente de un sitio HTTP que no sea www al sitio www HTTPS. Para mi sitio, es http://itzgeek.net>> https://www.itzgeek.net .
vi /etc/nginx/conf.d/www.itzgeek.net.conf
Agregue el bloque de redirección a continuación al final del archivo.
# Redirect NON-WWW HTTP to WWW HTTPS
server {
    if ($host = itzgeek.net) {
        return 301 https://www.itzgeek.net$request_uri;
    }


   server_name itzgeek.net;
    listen 80;
    return 404;

}
Reinicie el servicio Nginx.
systemctl restart nginx
Crear base de datos para WordPress
Inicie sesión en MariaDB.
mysql -u root -p
Cree la base de datos deseada para la instalación de WordPress.
CREATE DATABASE wordpress;
Crea un usuario.
CREATE USER 'wpuser'@'localhost' IDENTIFIED BY 'wppassword';
Otorgue permiso completo al usuario creado para acceder a la base de datos de WordPress recién creada.
GRANT ALL PRIVILEGES ON wordpress.* TO 'wpuser'@'localhost';
Salga del shell de MariaDB.
exit
Descargar WordPress
Descarga la última versión de WordPress.
curl -O https://wordpress.org/latest.tar.gz
Extráigalo.
tar -zxvf latest.tar.gz
Muévalo a la raíz de nuestro documento.
mv wordpress/* /sites/www.itzgeek.net/public_html/
Copie el archivo wp-sample-config.php y conviértalo en el archivo wp-config.php.
cp /sites/www.itzgeek.net/public_html/wp-config-sample.php /sites/www.itzgeek.net/public_html/wp-config.php
Edite el archivo de configuración y actualice la información de la base de datos.
vi /sites/www.itzgeek.net/public_html/wp-config.php
Modifique las entradas de acuerdo con la base de datos creada, el usuario y la contraseña.
// ** MySQL settings - You can get this info from your web host ** //
/** The name of the database for WordPress */
define( 'DB_NAME', 'wordpress' );

/** MySQL database username */
define( 'DB_USER', 'wpuser' );

/** MySQL database password */
define( 'DB_PASSWORD', 'wppassword' );

/** MySQL hostname */
define( 'DB_HOST', 'localhost' );
Haga que el usuario de Nginx sea el propietario del directorio de WordPress.
chown -R apache:apache /sites/www.itzgeek.net/public_html/
Instalar WordPress
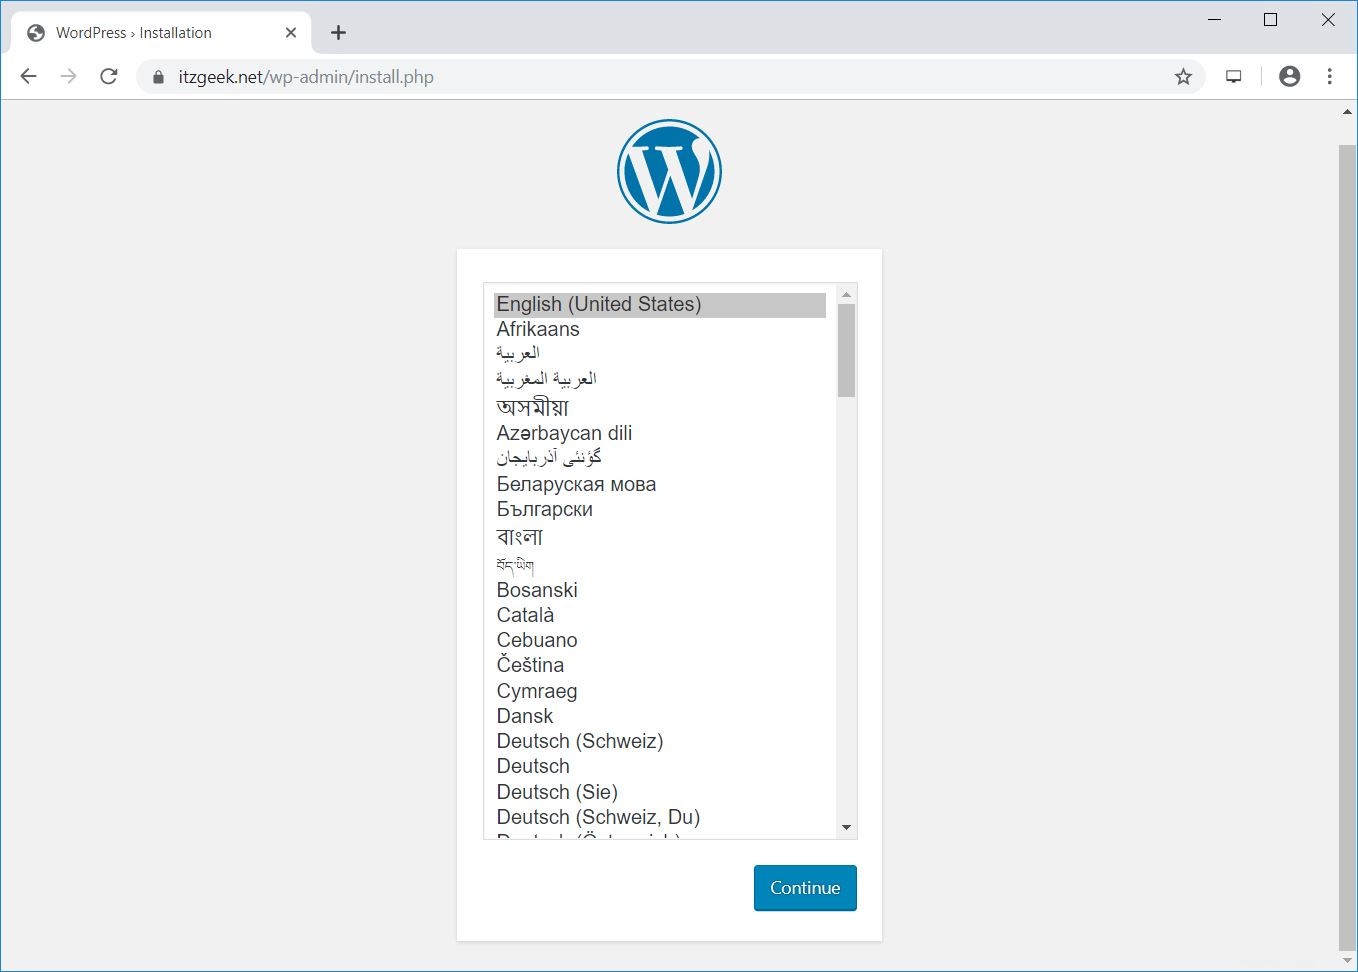
Abre tu navegador y visita
http://url-de-su-sitio-webElija un idioma para su instalación de WordPress.
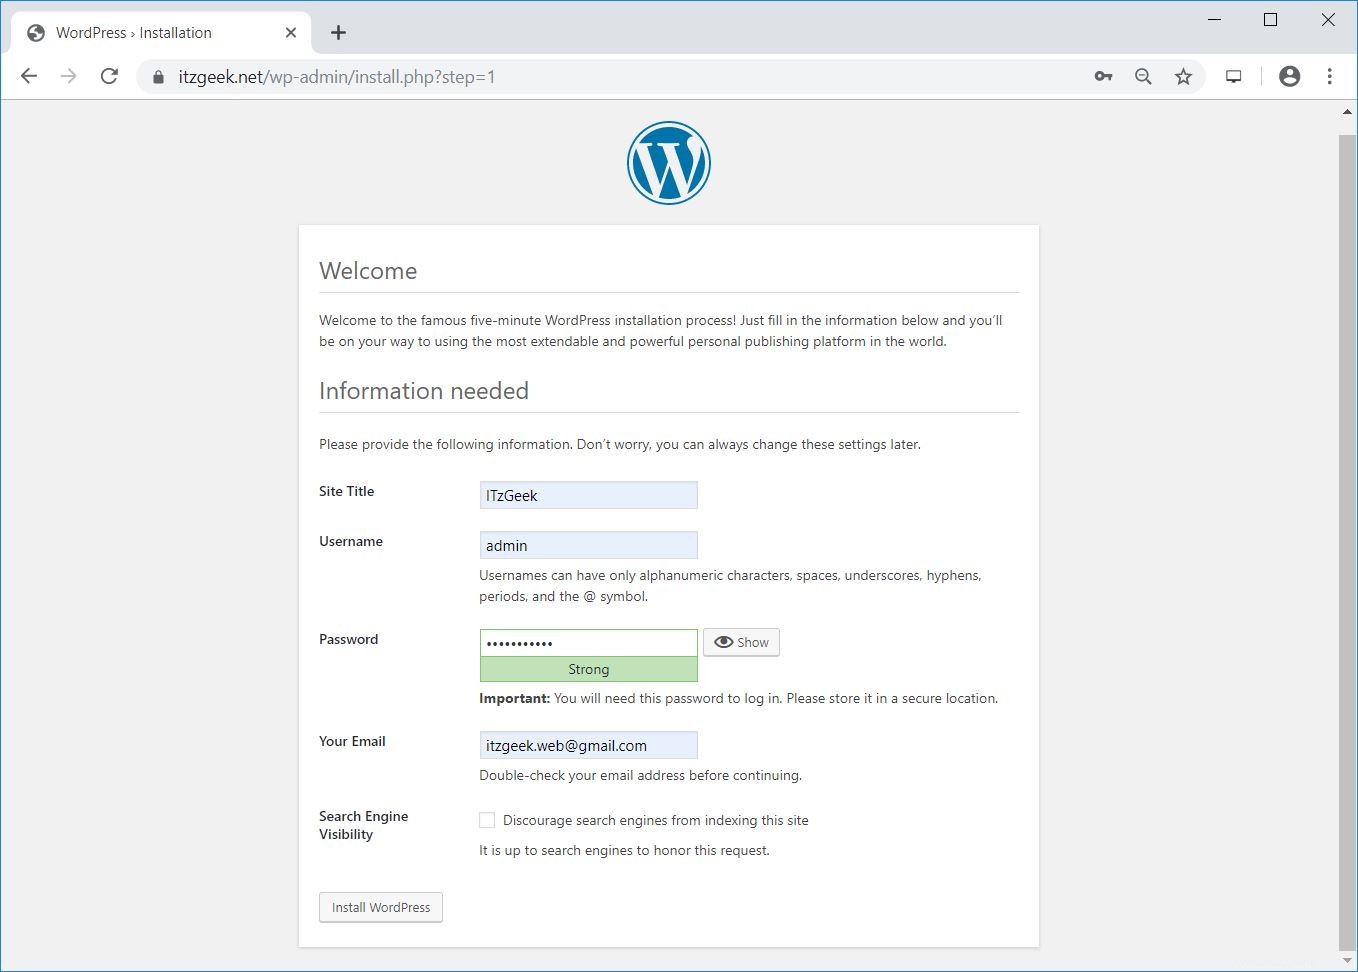
Ingrese la información de su sitio y haga clic en Instalar WordPress.
Verá la página siguiente, como a continuación.
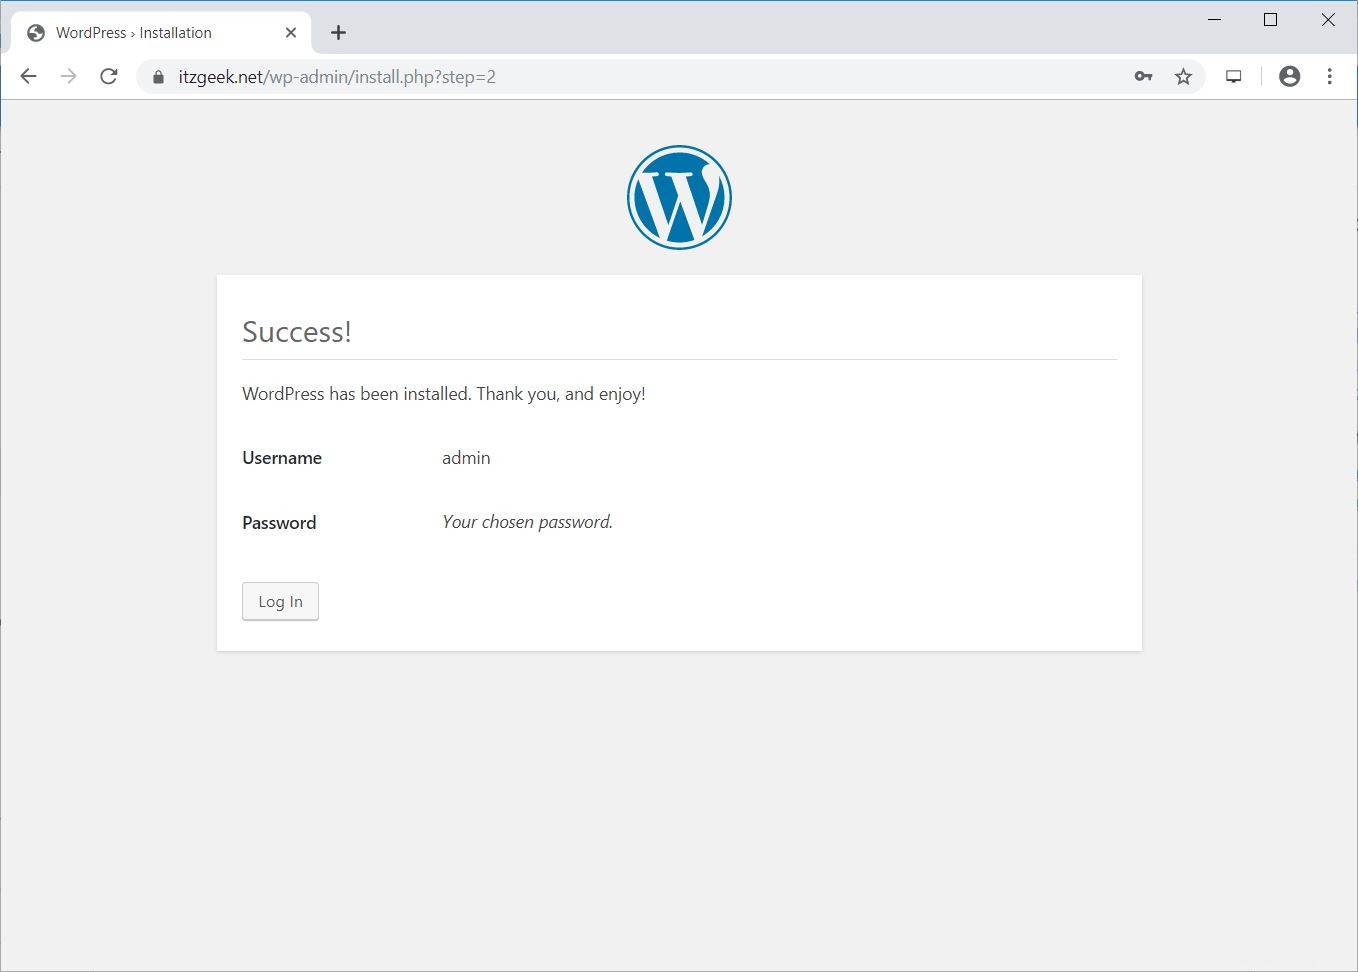
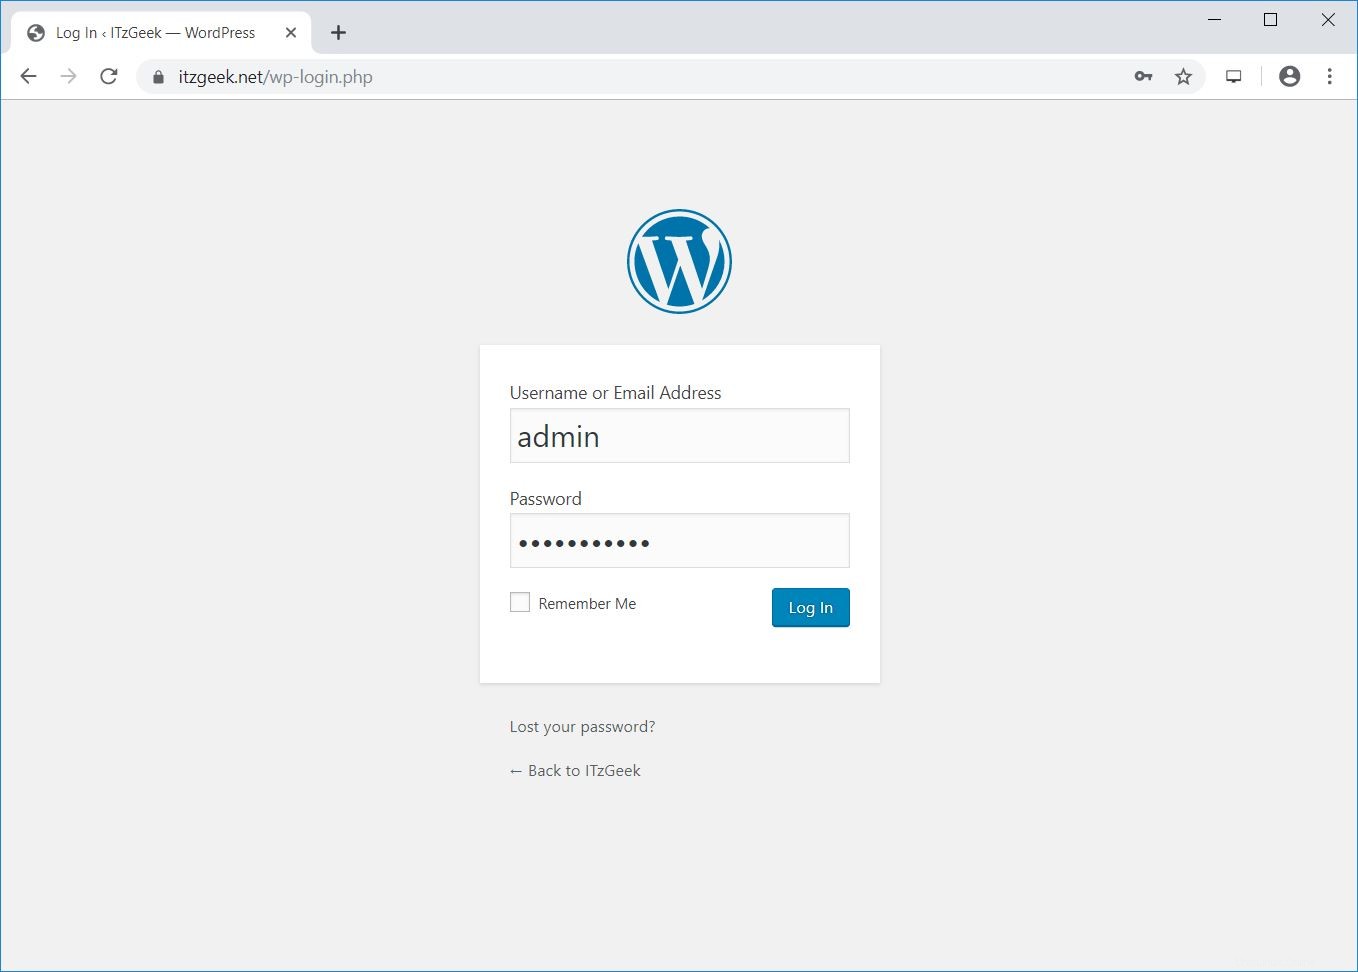
Si hace clic en Iniciar sesión, se le pedirá que ingrese la contraseña para acceder al administrador de WordPress.
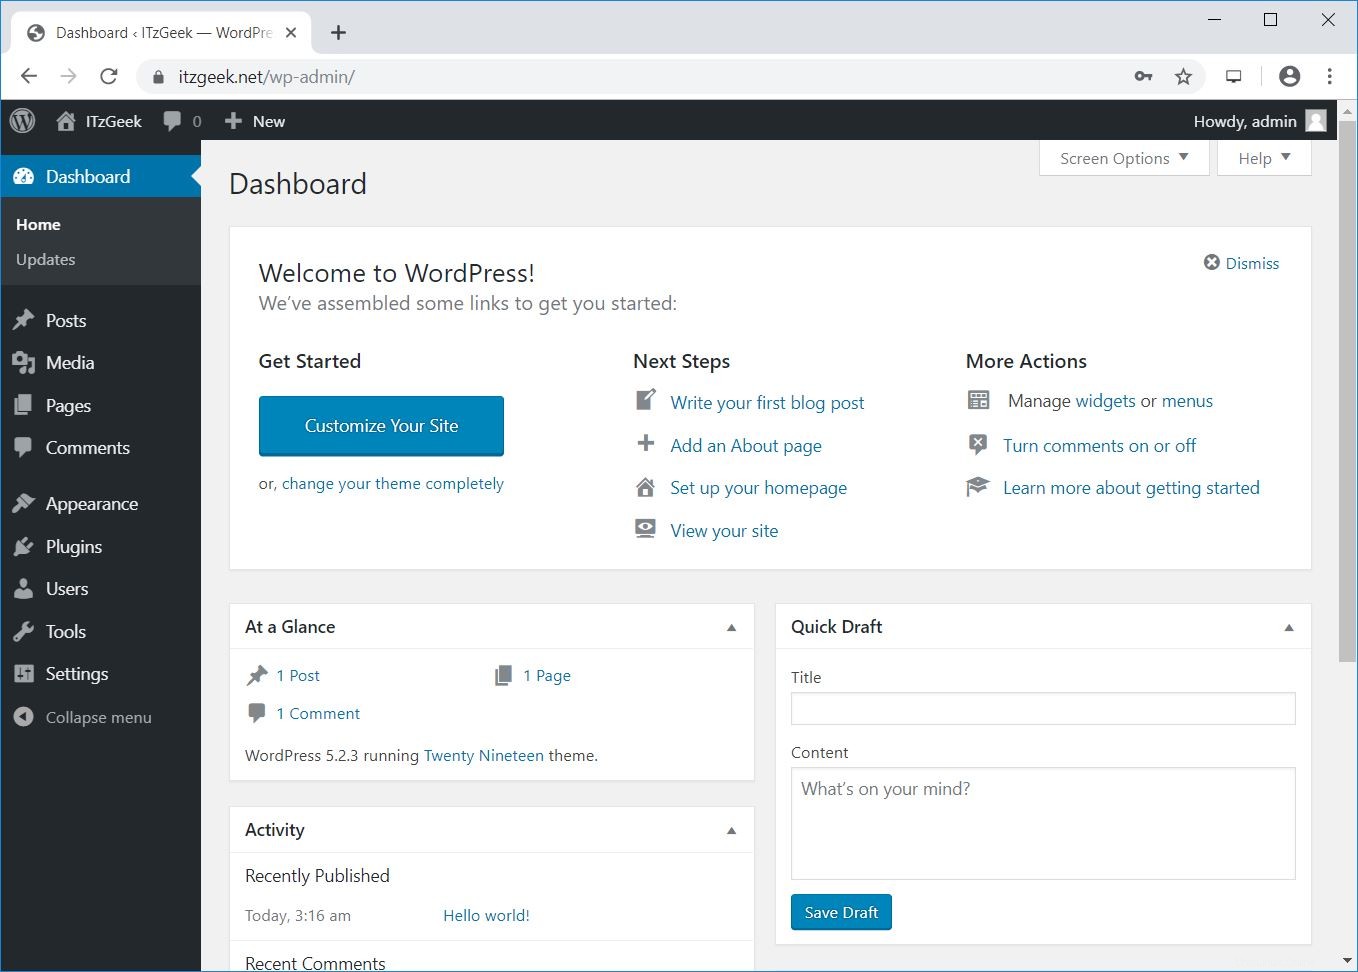
Panel de administración de WordPress:
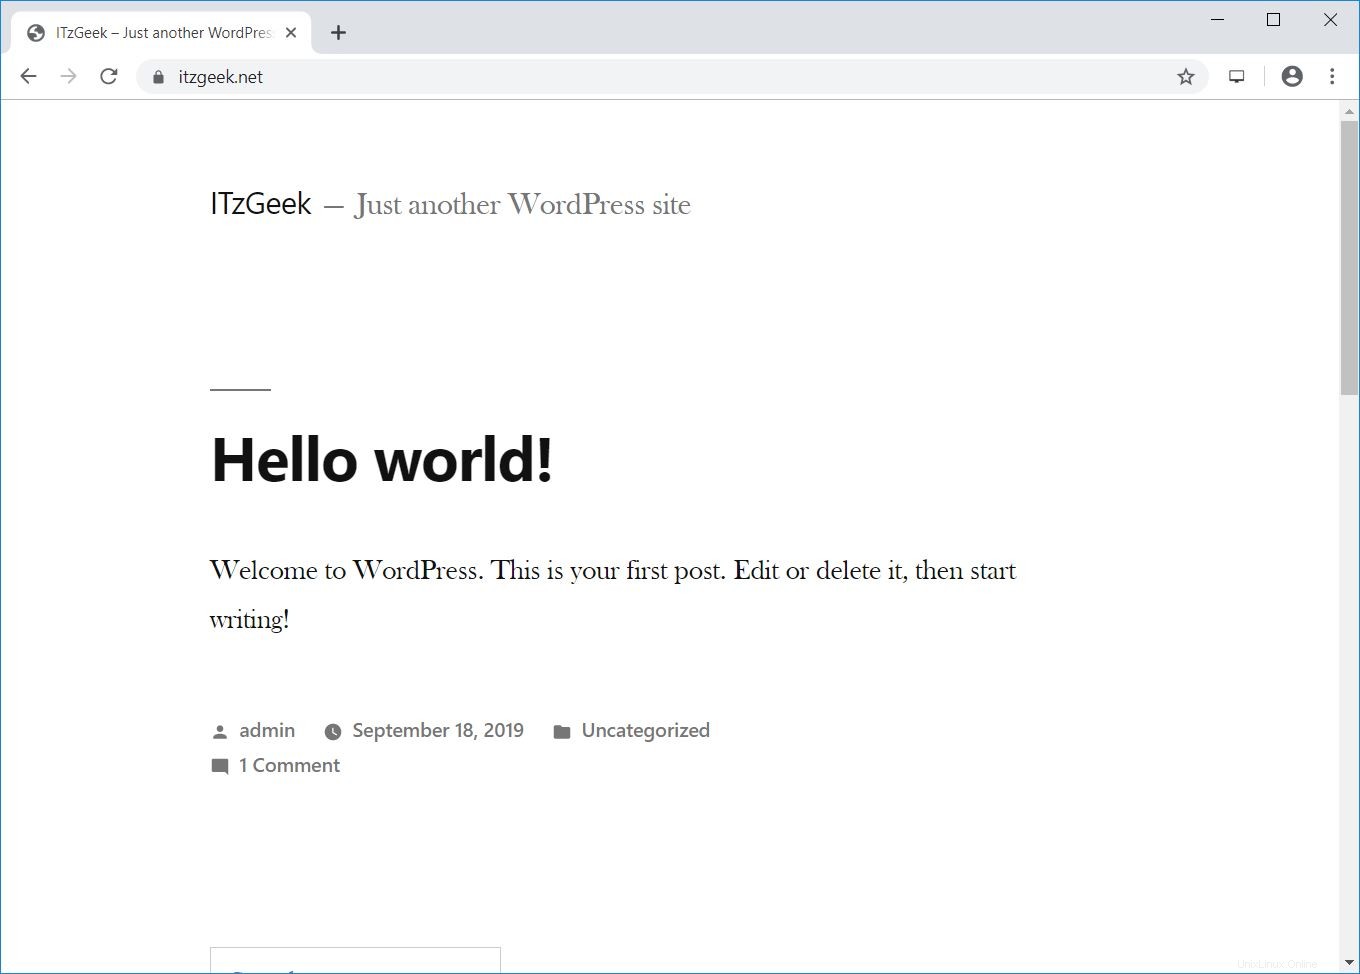
Interfaz de WordPress:
Pocas configuraciones adicionales
Configurar carga máxima de tamaño de archivo para WordPress
De forma predeterminada, PHP no permite la carga de archivos de más de 2 MB. Para permitir cargas de archivos más grandes, configure la opción upload_max_filesize en php.ini.
vi /etc/php.ini
Cambie el tamaño de carga del archivo según sus requisitos
; Maximum allowed size for uploaded files.
; http://php.net/upload-max-filesize
upload_max_filesize = 256M
Reinicie el servicio php-fpm.
systemctl restart php-fpm
Establecer client_max_body_size en Nginx para WordPress
Es posible que reciba el siguiente error incluso si ha cambiado el tamaño de archivo máximo de carga en el paso anterior.
2019/09/18 03:37:17 [error] 11773#11773: *121 client intended to send too large body: 9872781 bytes, client: 49.207.143.143, server: www.itzgeek.net, request: "POST /wp-admin/update.php?action=upload-theme HTTP/1.1", host: "www.itzgeek.net", referrer: "https://www.itzgeek.net/wp-admin/theme-install.php?browse=featured"
Agregue el módulo principal client_max_body_size en el archivo de configuración de Nginx.
vi /etc/nginx/nginx.conf
La directiva se puede agregar al bloque http (para todos los sitios), un bloque de servidor en particular o en el contexto de ubicación.
Aquí, estoy agregando la directiva al bloque http que establece el valor para todos los sitios que se ejecutan en este servidor.
http {
....

    client_max_body_size 256M;

....
}
Además, tenemos que cambiar el valor de post_max_size en el archivo php.ini.
vi /etc/php.ini
Cambie el tamaño de carga según sus requisitos.
post_max_size = 256M
Reinicie los servicios.
systemctl restart php-fpm

systemctl restart nginx
Conclusión
Eso es todo. Espero que ahora pueda ejecutar su WordPress con Nginx en CentOS 8/RHEL 8. Comparta sus comentarios en la sección de comentarios.