Hoy vamos a aprender Cómo Instalar LAMP Stack en AlmaLinux 8 / Rocky Linux 8, Un LAMP stack es un grupo de software de código abierto que normalmente se instalan juntos para permitir que un servidor aloje sitios web y aplicaciones web dinámicos. Este término es en realidad un acrónimo que representa el sistema operativo Linux, con el servidor web Apache. Los datos del sitio se almacenan en una base de datos MySQL y PHP procesa el contenido dinámico.
Instalar servidor web Apache en AlmaLinux 8 / Rocky Linux 8
Primero, comenzaremos instalando el servidor web Apache. Para completar la instalación, use el siguiente comando.
yum install httpd httpd-toolsSalida:
[[email protected] ~]# yum install httpd
AlmaLinux 8.3 - BaseOS                           14 MB/s | 2.6 MB     00:00
AlmaLinux 8.3 - AppStream                        21 MB/s | 6.5 MB     00:00
AlmaLinux 8.3 - PowerTools                      8.0 MB/s | 1.9 MB     00:00
AlmaLinux 8.3 - Extras                           12 kB/s | 1.2 kB     00:00
Dependencies resolved.
================================================================================
 Package     Arch   Version                                     Repo       Size
================================================================================
Installing:
 httpd       x86_64 2.4.37-30.module_el8.3.0+2016+8bf57d29.alma appstream 1.4 M
Una vez completada la instalación, habilite Apache (para que se inicie automáticamente al arrancar el sistema), inicie el servidor web y verifique el estado con los comandos a continuación.
systemctl enable httpd

systemctl start httpd

systemctl status httpd
Salida:
 [[email protected] ~]# systemctl status httpd
● httpd.service - The Apache HTTP Server
   Loaded: loaded (/usr/lib/systemd/system/httpd.service; enabled; vendor prese>
   Active: active (running) since Mon 2021-02-08 15:03:51 EST; 5s ago
     Docs: man:httpd.service(8)
 Main PID: 26398 (httpd)
   Status: "Started, listening on: port 80"
    Tasks: 213 (limit: 23680)
   Memory: 29.1M
   CGroup: /system.slice/httpd.service
           ├─26398 /usr/sbin/httpd -DFOREGROUND
           ├─26399 /usr/sbin/httpd -DFOREGROUND
Para que sus páginas estén disponibles al público, deberá editar las reglas de su cortafuegos para permitir solicitudes HTTP y HTTPS en su servidor web utilizando los siguientes comandos.
firewall-cmd --permanent --zone=public --add-service=http

firewall-cmd --permanent --zone=public --add-service=https

firewall-cmd --reload
Salida:
[[email protected] ~]# firewall-cmd --permanent --zone=public --add-service=http
success
[[email protected] ~]# firewall-cmd --permanent --zone=public --add-service=https
success
[[email protected] ~]# firewall-cmd --reload
success
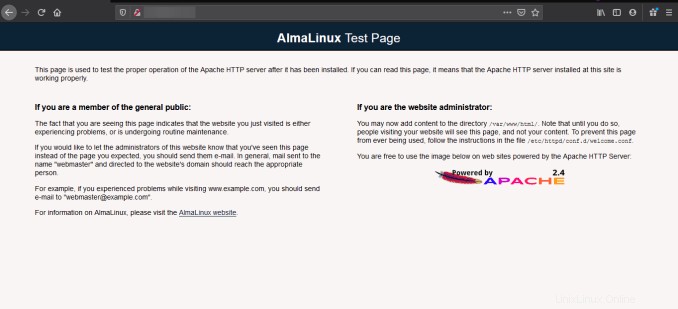
Verifique que el servidor web esté funcionando y sea accesible accediendo a la dirección IP de su servidor.
echo "Hello there, Apache webserver is now running" > /var/www/html/index.htmlY reinicie el servidor web para reflejar los cambios realizados.
systemctl restart httpd Desde su navegador,
http://IP_address
Cómo instalar Linux Kernel 5.13 en Rocky Linux 8 / AlmaLinux 8/CentOS 8
Instalar PHP en AlmaLinux 8 / Rocky Linux 8
Para instalar PHP en su RHEL 8, use el siguiente comando.
yum install -y php-mysqlnd php-dom php-simplexml php-xml php-xmlreader php-curl php-exif php-ftp php-gd php-iconv php-json php-mbstring php-posix php-sockets php-tokenizerAhora reinicie su servidor web para que Apache sepa que también atenderá las solicitudes de PHP.
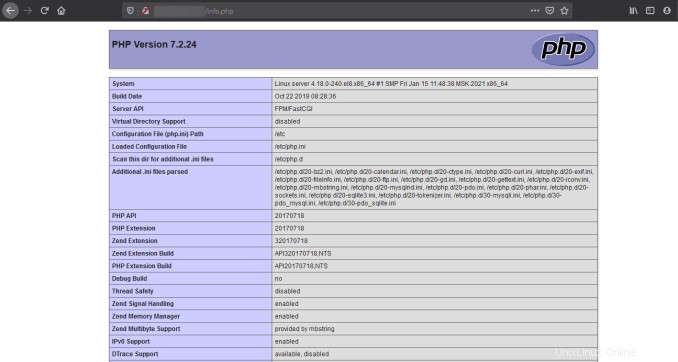
systemctl restart httpd Pruebe su PHP creando un archivo info.php simple con un phinfo() en él. El archivo debe colocarse en el directorio raíz de su servidor web, que es /var/www/html.
Para crear el archivo use:
echo "<?php phpinfo() ?>" > /var/www/html/info.phpAhora nuevamente, acceda a http://localhost/info.php o http://yourserver-ip-address/info.php. Debería ver una página similar a la siguiente.

Activar Servicio SSH en Rocky Linux 8 / CentOS 8
Instalar servidor MariaDB AlmaLinux 8 / Rocky Linux 8
MariaDB es un servidor de base de datos popular. La instalación es simple y requiere solo unos pocos pasos, como se muestra.
yum install mariadb-server mariadbSalida:
[[email protected] ~]# yum install mariadb-server mariadb
Last metadata expiration check: 0:05:56 ago on Mon 08 Feb 2021 03:03:08 PM EST.
Dependencies resolved.
================================================================================
 Package                    Arch   Version                      Repo       Size
================================================================================
Installing:
 mariadb                    x86_64 3:10.3.27-3.module_el8.3.0+2028+5e3224e9
                                                                appstream 6.0 M
 mariadb-server             x86_64 3:10.3.27-3.module_el8.3.0+2028+5e3224e9
                                                                appstream  16 M
Installing dependencies:
 mariadb-common             x86_64 3:10.3.27-3.module_el8.3.0+2028+5e3224e9
Una vez que se complete la instalación, habilite MariaDB (para que se inicie automáticamente al iniciar el sistema), inicie MariaDB y verifique el estado con los siguientes comandos.
systemctl enable mariadb

systemctl start mariadb

systemctl status mariadb
Salida:
[[email protected] ~]# systemctl status mariadb
● mariadb.service - MariaDB 10.3 database server
   Loaded: loaded (/usr/lib/systemd/system/mariadb.service; enabled; vendor pre>
   Active: active (running) since Mon 2021-02-08 15:10:12 EST; 5s ago
     Docs: man:mysqld(8)
           https://mariadb.com/kb/en/library/systemd/
  Process: 30138 ExecStartPost=/usr/libexec/mysql-check-upgrade (code=exited, s>
  Process: 30004 ExecStartPre=/usr/libexec/mysql-prepare-db-dir mariadb.service>
  Process: 29979 ExecStartPre=/usr/libexec/mysql-check-socket (code=exited, sta>
 Main PID: 30107 (mysqld)
Finalmente, querrá asegurar su instalación de MariaDB emitiendo el siguiente comando.
mysql_secure_installationSalida:
[[email protected] ~]# mysql_secure_installation

NOTE: RUNNING ALL PARTS OF THIS SCRIPT IS RECOMMENDED FOR ALL MariaDB
      SERVERS IN PRODUCTION USE!  PLEASE READ EACH STEP CAREFULLY!

In order to log into MariaDB to secure it, we'll need the current
password for the root user.  If you've just installed MariaDB, and
you haven't set the root password yet, the password will be blank,
so you should just press enter here.

Enter current password for root (enter for none):
OK, successfully used password, moving on...

Setting the root password ensures that nobody can log into the MariaDB
root user without the proper authorisation.

Set root password? [Y/n] asdfghjkl
Set root password? [Y/n] y
New password:
Re-enter new password:
Password updated successfully!
Reloading privilege tables..
 ... Success!
Una vez asegurado, puede conectarse a MySQL y revisar las bases de datos existentes en su servidor de base de datos usando el siguiente comando.
mysql -e "SHOW DATABASES;" -pSalida:
[[email protected] ~]# mysql -e "SHOW DATABASES;" -p
Enter password:
+--------------------+
| Database           |
+--------------------+
| information_schema |
| mysql              |
| performance_schema |
+--------------------+
¡Listo!