GitLab es una plataforma DevOps gratuita y de código abierto que permite a los equipos iterar más rápido e innovar juntos. Es una herramienta basada en web desarrollada por GitLab Inc. Es muy similar a GitHub y proporciona un administrador de repositorio Git que proporciona wiki, seguimiento de problemas e integración e implementación continuas. La edición comunitaria de GitLab está disponible de forma totalmente gratuita para entornos de desarrollo y producción.
En este tutorial, le mostraré cómo instalar GitLab con Nginx y Let's Encrypt SSL en Debian 11.
Requisitos
- Un servidor que ejecute Debian 11 con un mínimo de 8 GB de RAM.
- Un nombre de dominio válido apuntado con la IP del servidor.
- Se configura una contraseña raíz en el servidor.
Cómo empezar
Antes de comenzar, se recomienda actualizar la memoria caché de su paquete a la última versión. Puedes hacerlo con el siguiente comando:
apt-get update -y
Una vez que haya terminado, instale otras dependencias requeridas usando el siguiente comando:
apt-get install curl ca-certificates apt-transport-https gnupg2 -y
Una vez que todas las dependencias requeridas estén instaladas, puede continuar con el siguiente paso.
Añadir repositorio de GitLab
De forma predeterminada, el paquete de GitLab no está disponible en el repositorio predeterminado de Debian. Por lo tanto, deberá agregar el repositorio de GitLab a APT.
Puede agregarlo ejecutando el siguiente script:
curl -s https://packages.gitlab.com/install/repositories/gitlab/gitlab-ce/script.deb.sh | bash
Esto agregará el repositorio de GitLab al archivo de la lista de fuentes de APT.
Al momento de escribir este artículo, el paquete GitLab no está disponible para Debian 11. Por lo tanto, deberá editar el archivo fuente de GitLab y reemplazar el nombre de código de Debian 11 con Debian 10:
nano /etc/apt/sources.list.d/gitlab_gitlab-ce.list
Encuentra las siguientes líneas:
deb https://packages.gitlab.com/gitlab/gitlab-ce/debian/ bullseye main
deb-src https://packages.gitlab.com/gitlab/gitlab-ce/debian/ bullseye main
Las reemplazó con las siguientes líneas:
deb https://packages.gitlab.com/gitlab/gitlab-ce/debian/ buster main
deb-src https://packages.gitlab.com/gitlab/gitlab-ce/debian/ buster main
Guarde y cierre el archivo y luego actualice el repositorio con el siguiente comando:
apt-get update -y
Instalar GitLab CE
Ahora puede instalar GitLab CE ejecutando el siguiente comando:
apt-get install gitlab-ce -y
Una vez que se haya instalado GitLab, debería obtener el siguiente resultado:
It looks like GitLab has not been configured yet; skipping the upgrade script.

       *.                  *.
      ***                 ***
     *****               *****
    .******             *******
    ********            ********
   ,,,,,,,,,***********,,,,,,,,,
  ,,,,,,,,,,,*********,,,,,,,,,,,
  .,,,,,,,,,,,*******,,,,,,,,,,,,
      ,,,,,,,,,*****,,,,,,,,,.
         ,,,,,,,****,,,,,,
            .,,,***,,,,
                ,*,.


     _______ __  __          __
    / ____(_) /_/ /   ____ _/ /_
   / / __/ / __/ /   / __ `/ __ \
  / /_/ / / /_/ /___/ /_/ / /_/ /
  \____/_/\__/_____/\__,_/_.___/


Thank you for installing GitLab!
GitLab was unable to detect a valid hostname for your instance.
Please configure a URL for your GitLab instance by setting `external_url`
configuration in /etc/gitlab/gitlab.rb file.
Then, you can start your GitLab instance by running the following command:
  sudo gitlab-ctl reconfigure

For a comprehensive list of configuration options please see the Omnibus GitLab readme
https://gitlab.com/gitlab-org/omnibus-gitlab/blob/master/README.md

Help us improve the installation experience, let us know how we did with a 1 minute survey:
https://gitlab.fra1.qualtrics.com/jfe/form/SV_6kVqZANThUQ1bZb?installation=omnibus&release=14-3
Configurar GitLab
En este punto, GitLab está instalado en su sistema pero aún no está configurado. Puede configurarlo editando el siguiente archivo:
nano /etc/gitlab/gitlab.rb
Cambie la siguiente línea con su nombre de dominio:
external_url 'https://gitlab.linuxbuz.com'
A continuación, cambie las siguientes líneas para habilitar Let's Encrypt SSL:
# Enable the Let's encrypt SSL
letsencrypt['enable'] = true

# This is optional to get SSL related alerts
letsencrypt['contact_emails'] = ['[email protected]']

# This example renews every 7th day at 02:00 AM
letsencrypt['auto_renew_hour'] = "2"
letsencrypt['auto_renew_minute'] = "0"
letsencrypt['auto_renew_day_of_month'] = "*/7"
Guarde y cierre el archivo, luego vuelva a configurar GitLab usando el siguiente comando:
gitlab-ctl reconfigure
Una vez que se reconfigure GitLab, debería obtener el siguiente resultado que contiene la contraseña de acceso a GitLab:
Notes:
Default admin account has been configured with following details:
Username: root
Password: You didn't opt-in to print initial root password to STDOUT.
Password stored to /etc/gitlab/initial_root_password. This file will be cleaned up in first reconfigure run after 24 hours.

NOTE: Because these credentials might be present in your log files in plain text, it is highly recommended to reset the password following https://docs.gitlab.com/ee/security/reset_user_password.html#reset-your-root-password.

gitlab Reconfigured!
A continuación, recupere la contraseña de acceso de GitLab con el siguiente comando:
cat /etc/gitlab/initial_root_password
Debería ver el siguiente resultado:
# WARNING: This value is valid only in the following conditions
#          1. If provided manually (either via `GITLAB_ROOT_PASSWORD` environment variable or via `gitlab_rails['initial_root_password']` setting in `gitlab.rb`, it was provided before database was seeded for the first time (usually, the first reconfigure run).
#          2. Password hasn't been changed manually, either via UI or via command line.
#
#          If the password shown here doesn't work, you must reset the admin password following https://docs.gitlab.com/ee/security/reset_user_password.html#reset-your-root-password.

Password: WBgnk2SH4xK5FeJVsJX0Qo79IeyE5LSTGWm3EjDVEkw=

# NOTE: This file will be automatically deleted in the first reconfigure run after 24 hours.
Acceder a GitLab
Ahora puede acceder al panel de GitLab usando la URL https://gitlab.linuxbuz.com . Será redirigido a la página de inicio de sesión de GitLab:

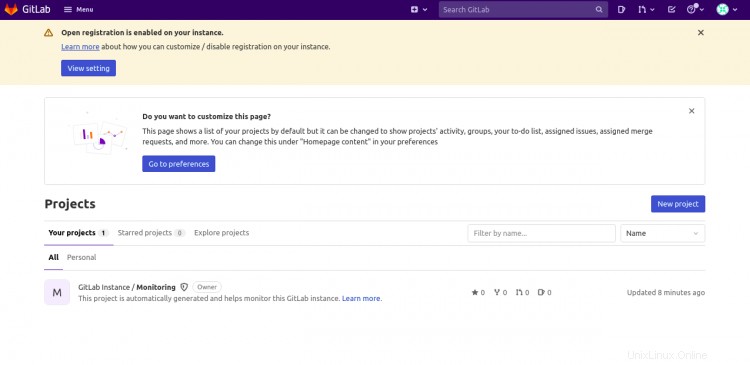
Proporcione su nombre de usuario, contraseña y haga clic en Iniciar sesión botón. Debería ver el panel de control de GitLab en la siguiente pantalla:
Configurar copia de seguridad de GitLab
Después de la instalación, se recomienda realizar una copia de seguridad completa de GitLab. Puedes hacerlo con el siguiente comando:
gitlab-rake gitlab:backup:create
También puede programar la copia de seguridad editando el archivo /etc/crontab:
nano /etc/crontab
Agregue la siguiente línea:
0 22 * * * root gitlab-rake gitlab:backup:create
Guarde y cierre el archivo cuando haya terminado.
Conclusión
¡Felicidades! ha instalado correctamente GitLab con Nginx y Let's Encrypt SSL en Debian 11. Ahora puede implementar GitLab en el entorno de desarrollo para acelerar el proceso de desarrollo de software. Siéntase libre de preguntarme si tiene alguna pregunta.