Attendize es una venta de entradas y gestión de eventos gratuita y de código abierto escrita en PHP sobre el marco de Laravel. Attendize ofrece una solución simple para administrar eventos de admisión general, sin pagar cargos adicionales. Con Attendize, puede administrar fácilmente múltiples organizadores/eventos y estadísticas de eventos en tiempo real. Attendize admite múltiples pasarelas de pago como Stripe, PayPal y muchas más. Attendize le permite incrustar un widget de venta de entradas en su blog de WordPress existente.
En este tutorial, explicaremos cómo instalar Attendize en el servidor Ubuntu 18.04 LTS.
Requisitos
- Un servidor con Ubuntu 18.04.
- PHP versión 7.1.3 o superior con extensiones OpenSSL, PDO, Mbstring, Fileinfo, GD y Tokenizer.
- Se ha configurado una contraseña raíz en su servidor.
Instalar Nginx, MariaDB y PHP
Attendize se ejecuta en un servidor web, escrito en PHP y utiliza MariaDB para almacenar sus datos. Por lo tanto, deberá instalar Nginx, MariaDB, PHP y las extensiones PHP requeridas en su servidor. Puede instalarlos todos ejecutando el siguiente comando:
apt-get install apache2 mariadb-server php7.2 php7.2-cli php7.2-fpm php7.2-common php7.2-mysql php7.2-curl php7.2-json php7.2-zip php7.2-gd php7.2-xml php7.2-mbstring php7.2-opcache php7.2-pgsql curl git unzip -y
Una vez que todos los paquetes necesarios estén instalados, inicie el servicio Nginx y MariaDB y habilítelos para que se inicien al reiniciar el sistema con el siguiente comando:
systemctl start nginx
 systemctl enable nginx
 systemctl start mariadb
 systemctl enable mariadb
Una vez que haya terminado, puede continuar con el siguiente paso.
Configurar base de datos
De forma predeterminada, MariaDB no está protegido. Por lo tanto, deberá asegurarlo primero. Puede proteger MariaDB con el siguiente script:
mysql_secure_installation
Responda todas las preguntas como se muestra a continuación:
In order to log into MariaDB to secure it, we'll need the current
password for the root user.  If you've just installed MariaDB, and
you haven't set the root password yet, the password will be blank,
so you should just press enter here.

Enter current password for root (enter for none):
OK, successfully used password, moving on...

Setting the root password ensures that nobody can log into the MariaDB
root user without the proper authorisation.

You already have a root password set, so you can safely answer 'n'.

Change the root password? [Y/n] n
 ... skipping.

By default, a MariaDB installation has an anonymous user, allowing anyone
to log into MariaDB without having to have a user account created for
them.  This is intended only for testing, and to make the installation
go a bit smoother.  You should remove them before moving into a
production environment.

Remove anonymous users? [Y/n] Y
 ... Success!

Normally, root should only be allowed to connect from 'localhost'.  This
ensures that someone cannot guess at the root password from the network.

Disallow root login remotely? [Y/n] Y
 ... Success!

By default, MariaDB comes with a database named 'test' that anyone can
access.  This is also intended only for testing, and should be removed
before moving into a production environment.

Remove test database and access to it? [Y/n] Y
 - Dropping test database...
 ... Success!
 - Removing privileges on test database...
 ... Success!

Reloading the privilege tables will ensure that all changes made so far
will take effect immediately.

Reload privilege tables now? [Y/n] Y
 ... Success!

Cleaning up...

All done!  If you've completed all of the above steps, your MariaDB
installation should now be secure.

Thanks for using MariaDB!
Una vez que MariaDB esté protegida, inicie sesión en el shell de MariaDB con el siguiente comando:
mysql -u root -p
Proporcione su contraseña de root cuando se le solicite. Luego, cree una base de datos y un usuario para Attendize con el siguiente comando:
MariaDB [(none)]> CREATE DATABASE attendizedb;
 MariaDB [(none)]> GRANT ALL PRIVILEGES ON attendizedb.* TO 'attendize'@'localhost' IDENTIFIED BY "password";
A continuación, elimine los privilegios y salga del shell de MariaDB con el siguiente comando:
MariaDB [(none)]> FLUSH PRIVILEGES;
 MariaDB [(none)]> EXIT;
Una vez creada la base de datos, puede continuar con el siguiente paso.
Instalar Attendize
Antes de descargar Attendize, deberá instalar Composer en su sistema. Puede instalar Composer simplemente ejecutando el siguiente comando:
curl -sS https://getcomposer.org/installer -o composer-setup.php
 php composer-setup.php --install-dir=/usr/local/bin --filename=composer
Después de instalar Composer, puede verificar la versión de Composer con el siguiente comando:
composer --version
El resultado debe ser similar al siguiente:
Composer version 1.8.6 2019-06-11 15:03:05
A continuación, descargue la última versión de Attendize desde el repositorio de Git al directorio raíz web de Nginx con el siguiente comando:
cd /var/www/html/
 git clone https://github.com/Attendize/Attendize attendize
A continuación, cambie el directorio para atender y cambie el nombre del archivo .env.example:
cd attendize
 mv .env.example .env
A continuación, abra el archivo .env con su editor de texto favorito:
nano .env
Defina la configuración de su base de datos como se muestra a continuación:
DB_TYPE=mysql
DB_HOST=db
DB_PORT=3306
DB_DATABASE=attendizedb
DB_USERNAME=attendize
DB_PASSWORD=password
Guarde y cierre el archivo cuando haya terminado. Luego, otorgue los permisos adecuados al directorio de asistencia con el siguiente comando:
chown -R www-data:www-data /var/www/html/attendize
 chmod -R 755 /var/www/html/attendize
Una vez que haya terminado, puede continuar con el siguiente paso.
Configurar Nginx para Attendize
A continuación, cree un archivo de host virtual Nginx para Attendize.
nano /etc/nginx/sites-available/attendize.conf
Agregue las siguientes líneas:
server {
    listen 80;
    listen [::]:80;

    server_name example.com;
    root /var/www/html/attendize/public;

    index index.php;

    location / {
        try_files $uri $uri/ /index.php$is_args$args;
    }

    location ~ \.php$ {
        try_files $uri =404;
        fastcgi_pass unix:/var/run/php/php7.2-fpm.sock; # Check this
        fastcgi_param SCRIPT_FILENAME $document_root$fastcgi_script_name;
        include fastcgi_params;
    }
}
Guarde y cierre el archivo. Luego, habilite el archivo de host virtual con el siguiente comando:
ln -s /etc/nginx/sites-available/attendize.conf /etc/nginx/sites-enabled/
A continuación, compruebe si hay algún error de sintaxis en Nginx con el siguiente comando:
nginx -t
El resultado debe ser similar al siguiente:
nginx: the configuration file /etc/nginx/nginx.conf syntax is ok
nginx: configuration file /etc/nginx/nginx.conf test is successful
Finalmente, vuelva a cargar el servicio Nginx y PHP-FPM para aplicar todos los cambios de configuración:
systemctl reload nginx
 systemctl restart php7.2-fpm
Puede verificar el estado de Nginx con el siguiente comando:
systemctl status nginx
Debería ver el siguiente resultado:
? nginx.service - A high performance web server and a reverse proxy server
   Loaded: loaded (/lib/systemd/system/nginx.service; enabled; vendor preset: enabled)
   Active: active (running) since Mon 2019-07-22 05:07:19 UTC; 3s ago
     Docs: man:nginx(8)
  Process: 17781 ExecStop=/sbin/start-stop-daemon --quiet --stop --retry QUIT/5 --pidfile /run/nginx.pid (code=exited, status=0/SUCCESS)
  Process: 17793 ExecStart=/usr/sbin/nginx -g daemon on; master_process on; (code=exited, status=0/SUCCESS)
  Process: 17783 ExecStartPre=/usr/sbin/nginx -t -q -g daemon on; master_process on; (code=exited, status=0/SUCCESS)
 Main PID: 17794 (nginx)
    Tasks: 2 (limit: 1114)
   CGroup: /system.slice/nginx.service
           ??17794 nginx: master process /usr/sbin/nginx -g daemon on; master_process on;
           ??17796 nginx: worker process

Jul 22 05:07:19 ubuntu1804 systemd[1]: Stopped A high performance web server and a reverse proxy server.
Jul 22 05:07:19 ubuntu1804 systemd[1]: Starting A high performance web server and a reverse proxy server...
Jul 22 05:07:19 ubuntu1804 systemd[1]: nginx.service: Failed to parse PID from file /run/nginx.pid: Invalid argument
Jul 22 05:07:19 ubuntu1804 systemd[1]: Started A high performance web server and a reverse proxy server.
Una vez que haya terminado, puede continuar con el siguiente paso.
Acceso a Asistencia
Ahora, abra su navegador web y escriba la URL http://example.com. Será redirigido a la siguiente página:
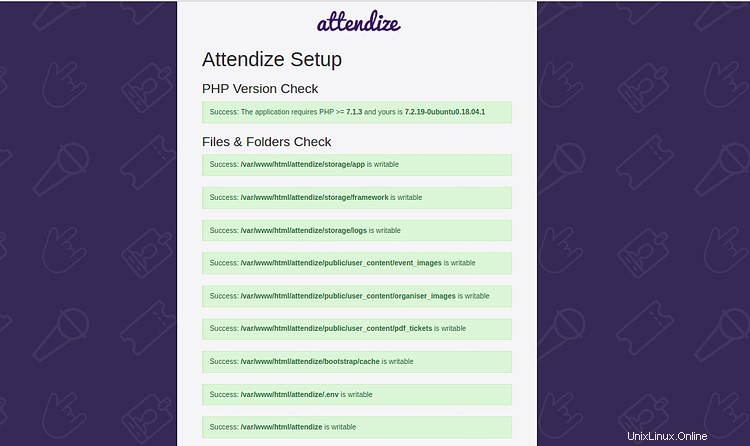
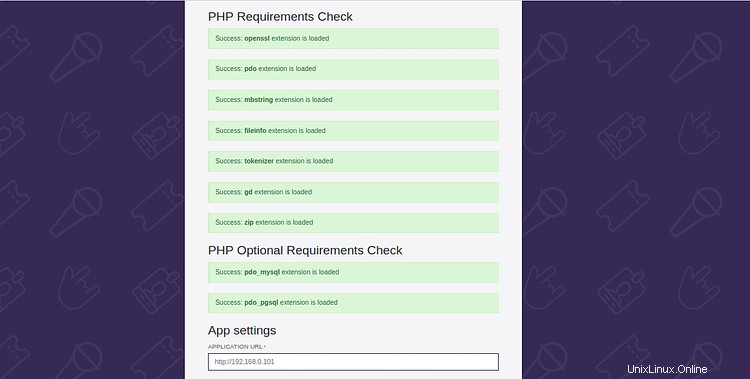
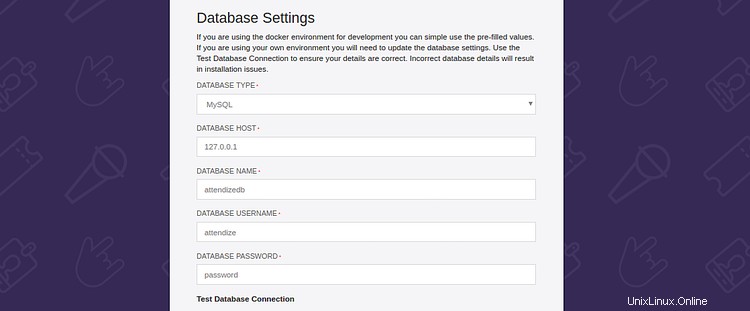
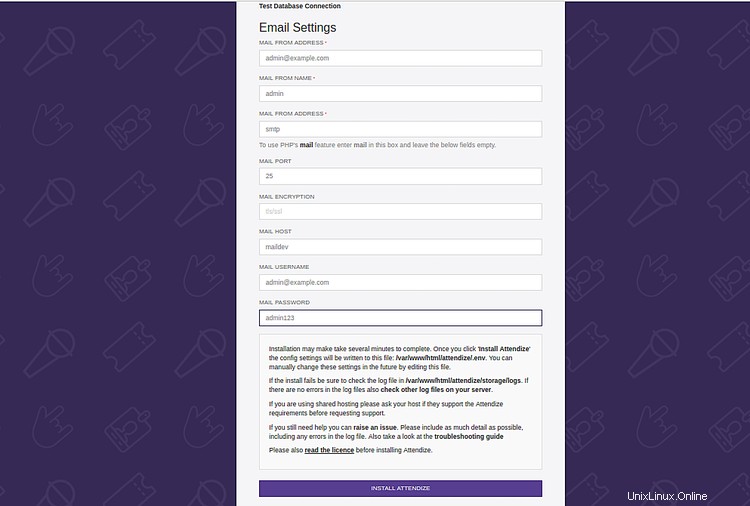
Asegúrese de que todas las extensiones requeridas estén instaladas. Luego, proporcione la información de su base de datos, información de correo electrónico y haga clic en INSTALAR ATTENDIZE botón. Debería ver la siguiente página:

Proporcione su nombre, dirección de correo electrónico y contraseña. Luego, haga clic en REGISTRARSE botón. Debería ver la siguiente página:
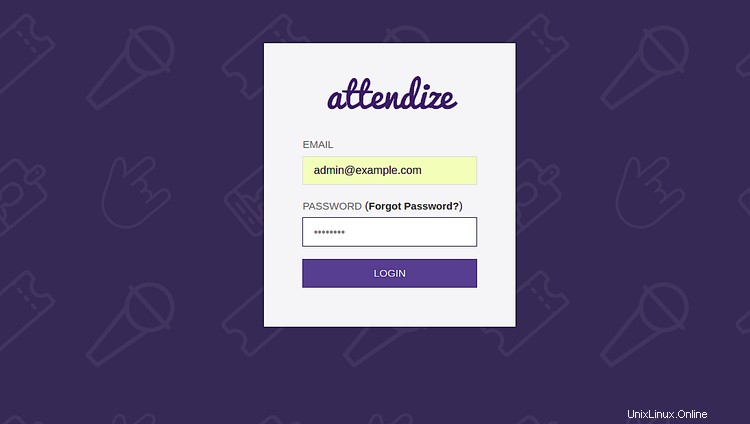
Ahora, proporcione sus datos de inicio de sesión y haga clic en INICIAR SESIÓN botón. Debería ver la siguiente página:
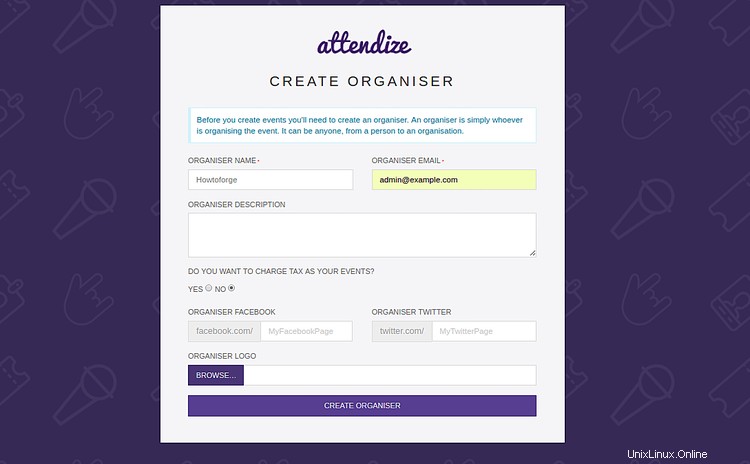
Ahora, proporcione su nombre de organizador, correo electrónico, descripción y haga clic en CREAR ORGANIZADOR botón. Debería ver la siguiente página:
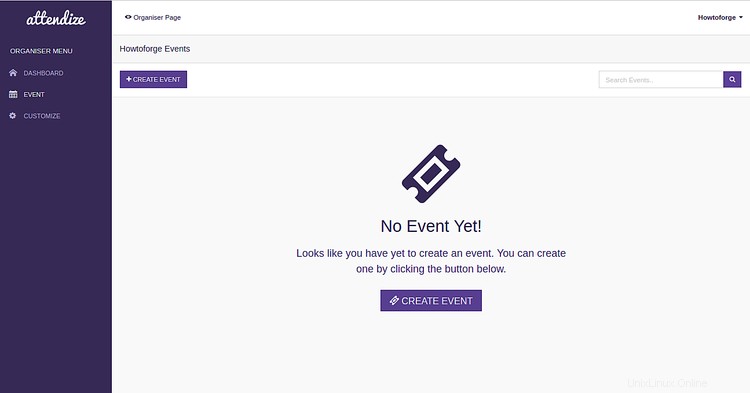
¡Felicidades! Ha instalado con éxito la aplicación de gestión de eventos y venta de entradas Attendize en su servidor Ubuntu 18.04. Ahora puede organizar y administrar un número ilimitado de eventos sin ningún costo adicional utilizando Attendize. Para obtener más información, puede visitar la documentación oficial de Attendize en Attendize Doc