GitBucket es una plataforma web Git de código abierto con tecnología de Scala. Proporciona funciones de interfaz de usuario similares a las de Github, como alojamiento de repositorio Git a través de HTTP y SSH, problemas, wiki, visor de repositorio y solicitudes de incorporación de cambios. Viene con un rico conjunto de características. Algunos de ellos se enumeran a continuación:
- IU intuitiva
- Soporte para GitLFS
- Admite repositorios Git públicos y privados
- Línea de tiempo de actividades y notificaciones por correo electrónico
- Compatibilidad de API con GitHub
- Administración de cuentas y grupos
En este tutorial, explicaremos cómo instalar GitBucket con Nginx en Ubuntu 20.04.
Requisitos
- Un servidor con Ubuntu 20.04 con 2 GB de RAM.
- Un nombre de dominio válido apuntado con su servidor.
- Se ha configurado una contraseña raíz en su servidor.
Instalar Java
GitBucket se basa en Java, por lo que deberá instalarlo en su sistema. Puede instalarlo con el siguiente comando:
apt-get install default-jdk -y
Una vez instalado, verifique la versión de Java usando el siguiente comando:
java -version
Deberías obtener el siguiente resultado:
openjdk version "11.0.7" 2020-04-14
OpenJDK Runtime Environment (build 11.0.7+10-post-Ubuntu-3ubuntu1)
OpenJDK 64-Bit Server VM (build 11.0.7+10-post-Ubuntu-3ubuntu1, mixed mode, sharing)
Una vez que haya terminado, puede continuar con el siguiente paso.
Instalar y configurar GitBucket
Antes de comenzar, es una buena idea crear un usuario y un grupo separados para ejecutar GitBucket. Puede crear un nuevo grupo y usuario llamado gitbucket con el siguiente comando:
groupadd -g 555 gitbucket
useradd -g gitbucket --no-user-group --home-dir /opt/gitbucket --no-create-home --shell /usr/sbin/nologin --system --uid 555 gitbucket
A continuación, cree un nuevo directorio para GitBucket con el siguiente comando:
mkdir /opt/gitbucket
A continuación, descargue la última versión de GitBucket dentro del directorio de GitBucket:
cd /opt/gitbucket
wget https://github.com/gitbucket/gitbucket/releases/download/4.33.0/gitbucket.war
A continuación, cambie la propiedad del directorio de GitBucket:
chown -R gitbucket:gitbucket /opt/gitbucket
GitBucket viene con una base de datos H2 integrada. Puede crear un nuevo archivo de configuración de la base de datos con el siguiente comando:
nano /opt/gitbucket/database.conf
Agregue las siguientes líneas:
db {
  url = "jdbc:h2:${DatabaseHome};MVCC=true"
  user = "sa"
  password = "sa"
}
Guarde y cierre el archivo cuando haya terminado.
Crear archivo de servicio Systemd para GitBucket
A continuación, deberá crear un archivo de servicio systemd para administrar el servicio GitBucket. Puedes crearlo usando el siguiente comando:
nano /etc/systemd/system/gitbucket.service
Agregue las siguientes líneas:
# GitBucket Service
[Unit]
Description=Manage Java service

[Service]
WorkingDirectory=/opt/gitbucket
ExecStart=/usr/bin/java -Xms128m -Xmx256m -jar gitbucket.war
User=gitbucket
Group=gitbucket
Type=simple
Restart=on-failure
RestartSec=10

[Install]
WantedBy=multi-user.target
Guarde y cierre el archivo cuando haya terminado. Luego, vuelva a cargar el demonio systemd usando el siguiente comando:
systemctl daemon-reload
A continuación, inicie el servicio GitBucket y habilítelo para que se inicie después de reiniciar el sistema con el siguiente comando:
systemctl start gitbucket
systemctl enable gitbucket
A continuación, verifique el estado del servicio de GitBucket con el siguiente comando:
systemctl status gitbucket
Deberías obtener el siguiente resultado:
? gitbucket.service - Manage Java service
     Loaded: loaded (/etc/systemd/system/gitbucket.service; enabled; vendor preset: enabled)
     Active: active (running) since Thu 2020-05-14 02:27:13 UTC; 10s ago
   Main PID: 93029 (java)
      Tasks: 36 (limit: 2282)
     Memory: 324.9M
     CGroup: /system.slice/gitbucket.service
             ??93029 /usr/bin/java -Xms128m -Xmx256m -jar gitbucket.war

May 14 02:27:19 ubuntu2004 java[93029]: 2020-05-14 02:27:19.868:INFO:oejs.session:main: DefaultSessionIdManager workerName=node0
May 14 02:27:19 ubuntu2004 java[93029]: 2020-05-14 02:27:19.868:INFO:oejs.session:main: No SessionScavenger set, using defaults
May 14 02:27:19 ubuntu2004 java[93029]: 2020-05-14 02:27:19.875:INFO:oejs.session:main: node0 Scavenging every 600000ms
May 14 02:27:20 ubuntu2004 java[93029]: 02:27:20.261 [main] INFO  com.zaxxer.hikari.HikariDataSource - HikariPool-1 - Starting...
May 14 02:27:20 ubuntu2004 java[93029]: 02:27:20.691 [main] INFO  com.zaxxer.hikari.HikariDataSource - HikariPool-1 - Start completed.
May 14 02:27:20 ubuntu2004 java[93029]: 02:27:20.697 [main] WARN  slick.util.AsyncExecutor - Having maxConnection > maxThreads can result in d>
May 14 02:27:20 ubuntu2004 java[93029]: 02:27:20.721 [main] INFO  g.core.servlet.InitializeListener - Check version
May 14 02:27:20 ubuntu2004 java[93029]: 02:27:20.721 [main] INFO  g.core.servlet.InitializeListener - Start schema update
May 14 02:27:22 ubuntu2004 java[93029]: 02:27:22.156 [main] INFO  l.servicelocator.ServiceLocator - Can not use class liquibase.parser.core.ya>
May 14 02:27:22 ubuntu2004 java[93029]: 02:27:22.161 [main] INFO  l.servicelocator.ServiceLocator - Can not use class liquibase.parser.core.js>
En este punto, GitBucket se está ejecutando y escuchando en el puerto 8080.
Configurar Nginx como proxy inverso
De forma predeterminada, GitBucket se ejecuta en el puerto 8080. Por lo tanto, es una buena idea configurar Nginx como un proxy inverso para GitBucket.
Primero, instale el servidor web Nginx con el siguiente comando:
apt-get install nginx -y
A continuación, cree un archivo de configuración de host virtual de Nginx para GitBucket:
nano /etc/nginx/sites-available/gitbucket
Agregue las siguientes líneas:
upstream gitbucket {
  server 127.0.0.1:8080 weight=100 max_fails=5 fail_timeout=5;
}

server {
  listen          80;
  server_name     gitbucket.linuxbuz.com;

  location / {
        proxy_set_header X-Forwarded-Host $host;
        proxy_set_header X-Forwarded-Server $host;
        proxy_set_header X-Forwarded-For $proxy_add_x_forwarded_for;
        proxy_pass http://gitbucket/;
  }
}
Guarde y cierre el archivo. Luego, cree un enlace simbólico al directorio habilitado para sitios:
ln -s /etc/nginx/sites-available/gitbucket /etc/nginx/sites-enabled/
A continuación, compruebe si hay algún error de sintaxis en Nginx con el siguiente comando:
nginx -t
Deberías obtener el siguiente resultado:
nginx: the configuration file /etc/nginx/nginx.conf syntax is ok
nginx: configuration file /etc/nginx/nginx.conf test is successful
Finalmente, reinicie el servicio Nginx para implementar los cambios:
systemctl restart nginx
GitBucket seguro con Let's Encrypt
A continuación, deberá instalar el cliente Certbot para proteger su GitBucket con Let's Encrypt SSL.
Primero, agregue el repositorio de Certbot usando el siguiente comando:
add-apt-repository ppa:ahasenack/certbot-tlssni01-1875471
A continuación, actualice el repositorio e instale el cliente Certbot con el siguiente comando:
apt-get update -y
apt-get install certbot python3-certbot-nginx -y
A continuación, ejecute el siguiente comando para descargar e instalar Let's Encrypt SSL para su sitio web:
certbot --nginx -d gitbucket.linuxbuz.com
Se le pedirá que proporcione su correo electrónico y acepte el término del servicio:
Saving debug log to /var/log/letsencrypt/letsencrypt.log
Plugins selected: Authenticator nginx, Installer nginx
Enter email address (used for urgent renewal and security notices) (Enter 'c' to
cancel): [email protected]

- - - - - - - - - - - - - - - - - - - - - - - - - - - - - - - - - - - - - - - -
Please read the Terms of Service at
https://letsencrypt.org/documents/LE-SA-v1.2-November-15-2017.pdf. You must
agree in order to register with the ACME server at
https://acme-v02.api.letsencrypt.org/directory
- - - - - - - - - - - - - - - - - - - - - - - - - - - - - - - - - - - - - - - -
(A)gree/(C)ancel: A

- - - - - - - - - - - - - - - - - - - - - - - - - - - - - - - - - - - - - - - -
Would you be willing to share your email address with the Electronic Frontier
Foundation, a founding partner of the Let's Encrypt project and the non-profit
organization that develops Certbot? We'd like to send you email about our work
encrypting the web, EFF news, campaigns, and ways to support digital freedom.
- - - - - - - - - - - - - - - - - - - - - - - - - - - - - - - - - - - - - - - -
(Y)es/(N)o: Y
Obtaining a new certificate
Performing the following challenges:
http-01 challenge for gitbucket.linuxbuz.com
Waiting for verification...
Cleaning up challenges
Deploying Certificate to VirtualHost /etc/nginx/sites-enabled/gitbucket
A continuación, seleccione si desea redirigir o no el tráfico HTTP a HTTPS:
Please choose whether or not to redirect HTTP traffic to HTTPS, removing HTTP access.
- - - - - - - - - - - - - - - - - - - - - - - - - - - - - - - - - - - - - - - -
1: No redirect - Make no further changes to the webserver configuration.
2: Redirect - Make all requests redirect to secure HTTPS access. Choose this for
new sites, or if you're confident your site works on HTTPS. You can undo this
change by editing your web server's configuration.
- - - - - - - - - - - - - - - - - - - - - - - - - - - - - - - - - - - - - - - -
Select the appropriate number [1-2] then [enter] (press 'c' to cancel): 2
Tipo 2 y pulsa Intro para finalizar la instalación.
Redirecting all traffic on port 80 to ssl in /etc/nginx/sites-enabled/gitbucket

- - - - - - - - - - - - - - - - - - - - - - - - - - - - - - - - - - - - - - - -
Congratulations! You have successfully enabled https://gitbucket.linuxbuz.com

You should test your configuration at:
https://www.ssllabs.com/ssltest/analyze.html?d=gitbucket.linuxbuz.com
- - - - - - - - - - - - - - - - - - - - - - - - - - - - - - - - - - - - - - - -

IMPORTANT NOTES:
 - Congratulations! Your certificate and chain have been saved at:
   /etc/letsencrypt/live/gitbucket.linuxbuz.com/fullchain.pem
   Your key file has been saved at:
   /etc/letsencrypt/live/gitbucket.linuxbuz.com/privkey.pem
   Your cert will expire on 2020-08-12. To obtain a new or tweaked
   version of this certificate in the future, simply run certbot again
   with the "certonly" option. To non-interactively renew *all* of
   your certificates, run "certbot renew"
 - If you like Certbot, please consider supporting our work by:

   Donating to ISRG / Let's Encrypt:   https://letsencrypt.org/donate
   Donating to EFF:                    https://eff.org/donate-le
Una vez que haya terminado, puede continuar con el siguiente paso.
Acceder a GitBucket
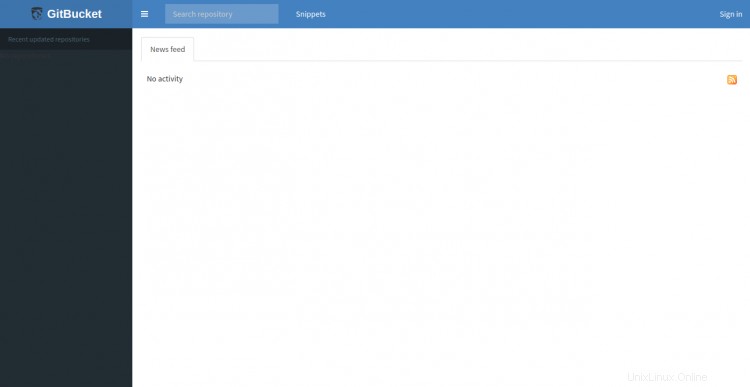
Ahora, abra su navegador web y escriba la URL https://gitbucket.linuxbuz.com. Será redirigido a la siguiente página:
Haga clic en Firmar en botón. Debería ver la página de inicio de sesión de GitBucket:
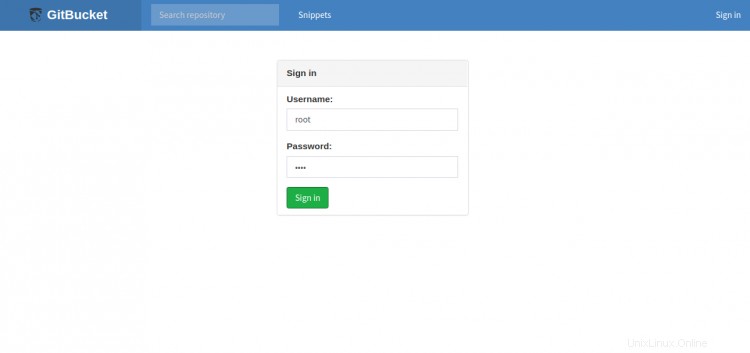
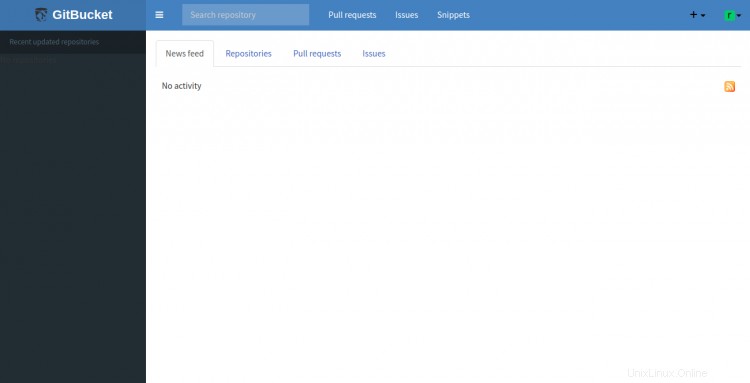
Proporcione el nombre de usuario predeterminado de GitBucket como root y la contraseña como root y haga clic en Firmar en botón. Debería ver el panel de control de GitBucket en la siguiente página:
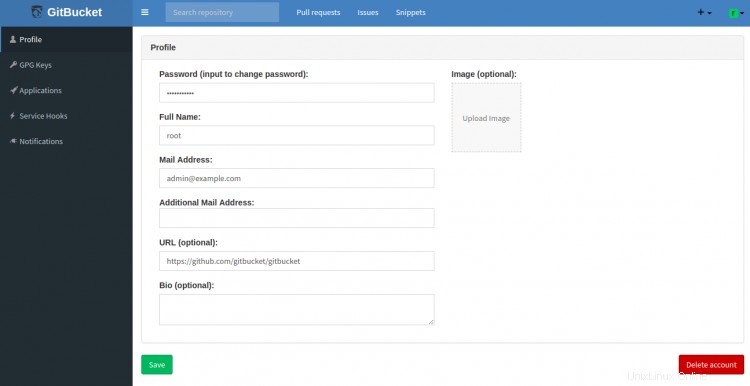
A continuación, haga clic en Cuenta Configuración en la esquina superior derecha para cambiar la contraseña raíz predeterminada:
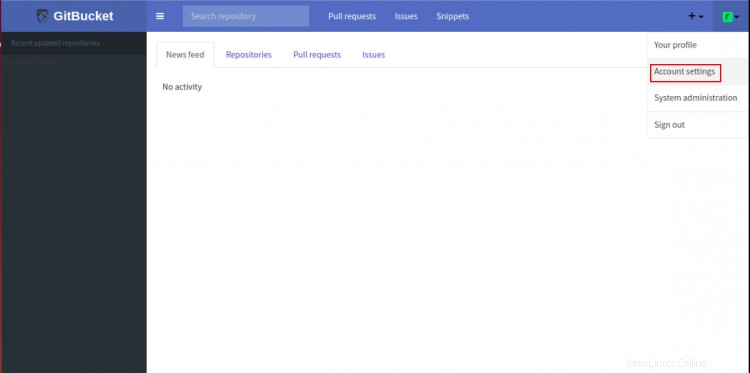
Proporcione una nueva contraseña segura y haga clic en Guardar botón para actualizar la contraseña de root.
Conclusión
¡Felicidades! ha instalado y asegurado correctamente GitBucket con Nginx como proxy inverso en Ubuntu 20.04. Ahora puede alojar su propio repositorio de Git utilizando GitBucket.