Ghost es una plataforma de blogs gratuita, de código abierto y liviana construida en Node.js. Es simple, personalizable y le permite crear y publicar su contenido en Internet. Está especialmente diseñado para blogs, por lo que es mucho más rápido que otras plataformas de blogs. Ofrece un amplio conjunto de características, algunas de ellas se enumeran a continuación:
- Editor de rebajas
- Publicación programada
- Proporcionar aplicación para Linux, Mac y Windows
- Proporciona cientos de temas premium y gratuitos
- Análisis integrado
- Proporcionar complemento de migración para migrar de WordPress a Ghost
Este tutorial explicará cómo instalar Ghost con Nginx y Let's Encrypt SSL en Ubuntu 20.04.
Requisitos
- Un servidor con Ubuntu 20.04.
- Un nombre de dominio válido dirigido a la IP de su servidor.
- Se ha configurado una contraseña raíz en su servidor.
Cómo empezar
Primero, se recomienda actualizar el caché del paquete APT a la última versión. Puede actualizarlo con el siguiente comando:
apt-get update -y
Una vez que se actualice la caché de APT, instale otras dependencias requeridas usando el siguiente comando:
apt-get install gnupg2 curl unzip git acl -y
A continuación, también deberá instalar Node.js en su sistema.
Primero, agregue el repositorio Node.js con el siguiente comando:
curl -sL https://deb.nodesource.com/setup_12.x | bash -
Una vez que el repositorio esté instalado, ejecute el siguiente comando para instalar Node.js en su sistema.
apt-get install nodejs -y
Una vez finalizada la instalación, verifique la versión de Node.js usando el siguiente comando:
node -v
Deberías obtener el siguiente resultado:
v12.22.1
A continuación, verifique la versión de NPM con el siguiente comando:
npm -v
Deberías obtener el siguiente resultado:
6.14.12
Instalar Nginx y MariaDB
A continuación, deberá instalar el servidor web Nginx y el servidor de base de datos MariaDB en su sistema. Puede instalar ambos paquetes con el siguiente comando:
apt-get install mariadb-server nginx -y
Una vez finalizada la instalación, asegure la instalación de MariaDB y configure la contraseña raíz de MariaDB con el siguiente comando:
mysql_secure_installation
Responda todas las preguntas para asegurar la instalación de MariaDB:
Enter current password for root (enter for none):
Set root password? [Y/n] Y
New password:
Re-enter new password:
Remove anonymous users? [Y/n] Y
Disallow root login remotely? [Y/n] Y
Remove test database and access to it? [Y/n] Y
Reload privilege tables now? [Y/n] Y
A continuación, inicie sesión en MariaDB con el siguiente comando:
mysql -u root -p
Una vez que inicie sesión, cree una base de datos y un usuario para Ghost con el siguiente comando:
MariaDB [(none)]> CREATE DATABASE ghostdb;
MariaDB [(none)]> CREATE USER 'ghostuser'@'localhost' IDENTIFIED BY 'password';
A continuación, otorgue todos los privilegios a la base de datos de Ghost con el siguiente comando:
MariaDB [(none)]> GRANT ALL ON ghostdb.* TO 'ghostuser'@'localhost';
A continuación, elimine los privilegios y salga de MariaDB con el siguiente comando:
MariaDB [(none)]> FLUSH PRIVILEGES;
MariaDB [(none)]> EXIT;
Una vez que haya terminado, puede continuar con el siguiente paso.
Instalar Ghost CLI
A continuación, deberá instalar Ghost CLI para instalar y administrar Ghost. Puede instalarlo usando el NPM como se muestra a continuación:
npm install -g [email protected]
Una vez instalado, verifique la versión instalada de Ghost CLI con el siguiente comando:
ghost version
Debería ver el siguiente resultado:
Ghost-CLI version: 1.16.3
Instalar fantasma
Primero, cree un usuario separado para Ghost con el siguiente comando:
adduser user1
A continuación, agregue user1 a sudo y www-data group con el siguiente comando:
adduser user1 sudo
adduser user1 www-data
A continuación, inicie sesión con usuario1 y cree un directorio para Ghost con el siguiente comando:
su - user1
sudo mkdir /var/www/ghost
A continuación, establezca el permiso y la propiedad adecuados con el siguiente comando:
sudo chown -R www-data:www-data /var/www/ghost
sudo chown -R www-data:www-data /var/www/
sudo chmod 775 /var/www/ghost
sudo setfacl -R -m u:user1:rwx /var/www/ghost/
A continuación, cambie el directorio a fantasma e instale la plataforma de blogs Ghost con el siguiente comando:
cd /var/www/ghost
ghost install
Se le pedirá que proporcione la URL de su blog, el nombre de la base de datos, el nombre de usuario, la contraseña y otra información, como se muestra a continuación:
? Enter your blog URL: https://ghost.linuxbuz.com
? Enter your MySQL hostname: localhost
? Enter your MySQL username: ghostuser
? Enter your MySQL password: [hidden]
? Enter your Ghost database name: ghostdb
? Configuring Ghost
? Setting up instance
+ sudo useradd --system --user-group ghost
+ sudo chown -R ghost:ghost /var/www/ghost/content
? Setting up "ghost" system user
? Setting up "ghost" mysql user [skipped]
? Do you wish to set up Nginx? Yes
+ sudo mv /tmp/ghost-linuxbuz-com/ghost.linuxbuz.com.conf /etc/nginx/sites-available/ghost.linuxbuz.com.conf
+ sudo ln -sf /etc/nginx/sites-available/ghost.linuxbuz.com.conf /etc/nginx/sites-enabled/ghost.linuxbuz.com.conf
+ sudo nginx -s reload
? Setting up SSL [skipped]
? Do you wish to set up Systemd? Yes
+ sudo mv /tmp/ghost-linuxbuz-com/ghost_ghost-linuxbuz-com.service /lib/systemd/system/ghost_ghost-linuxbuz-com.service
+ sudo systemctl daemon-reload
? Setting up Systemd
+ sudo systemctl is-active ghost_ghost-linuxbuz-com
? Do you want to start Ghost? (Y/n)
En este punto, Ghost está instalado e iniciado.
Secure Ghost con Let's Encrypt SSL
A continuación, deberá proteger Ghost con Let's Encrypt SSL.
Primero, instale el cliente Certbot con el siguiente comando:
sudo apt-get install certbot python3-certbot-nginx -y
Una vez instalado, ejecute el siguiente comando para descargar Let's Encrypt SSL y configure Nginx para usar esos certificados:
sudo certbot --nginx -d ghost.linuxbuz.com
Se le pedirá que proporcione su dirección de correo electrónico y acepte el término del servicio como se muestra a continuación:
Saving debug log to /var/log/letsencrypt/letsencrypt.log
Plugins selected: Authenticator nginx, Installer nginx
Enter email address (used for urgent renewal and security notices) (Enter 'c' to
cancel): [email protected]

- - - - - - - - - - - - - - - - - - - - - - - - - - - - - - - - - - - - - - - -
Please read the Terms of Service at
https://letsencrypt.org/documents/LE-SA-v1.2-November-15-2017.pdf. You must
agree in order to register with the ACME server at
https://acme-v02.api.letsencrypt.org/directory
- - - - - - - - - - - - - - - - - - - - - - - - - - - - - - - - - - - - - - - -
(A)gree/(C)ancel: A

- - - - - - - - - - - - - - - - - - - - - - - - - - - - - - - - - - - - - - - -
Would you be willing to share your email address with the Electronic Frontier
Foundation, a founding partner of the Let's Encrypt project and the non-profit
organization that develops Certbot? We'd like to send you email about our work
encrypting the web, EFF news, campaigns, and ways to support digital freedom.
- - - - - - - - - - - - - - - - - - - - - - - - - - - - - - - - - - - - - - - -
(Y)es/(N)o: Y
Obtaining a new certificate
Performing the following challenges:
http-01 challenge for ghost.linuxbuz.com
Waiting for verification...
Cleaning up challenges
Deploying Certificate to VirtualHost /etc/nginx/sites-enabled/ghost.linuxbuz.com.conf
A continuación, elija si desea redirigir o no el tráfico HTTP a HTTPS:
Please choose whether or not to redirect HTTP traffic to HTTPS, removing HTTP access.
- - - - - - - - - - - - - - - - - - - - - - - - - - - - - - - - - - - - - - - -
1: No redirect - Make no further changes to the webserver configuration.
2: Redirect - Make all requests redirect to secure HTTPS access. Choose this for
new sites, or if you're confident your site works on HTTPS. You can undo this
change by editing your web server's configuration.
- - - - - - - - - - - - - - - - - - - - - - - - - - - - - - - - - - - - - - - -
Select the appropriate number [1-2] then [enter] (press 'c' to cancel): 2
Escriba 2 y presione Entrar para completar la instalación.
Redirecting all traffic on port 80 to ssl in /etc/nginx/sites-enabled/ghost.linuxbuz.com.conf

- - - - - - - - - - - - - - - - - - - - - - - - - - - - - - - - - - - - - - - -
Congratulations! You have successfully enabled https://ghost.linuxbuz.com

You should test your configuration at:
https://www.ssllabs.com/ssltest/analyze.html?d=ghost.linuxbuz.com
- - - - - - - - - - - - - - - - - - - - - - - - - - - - - - - - - - - - - - - -

IMPORTANT NOTES:
 - Congratulations! Your certificate and chain have been saved at:
   /etc/letsencrypt/live/ghost.linuxbuz.com/fullchain.pem
   Your key file has been saved at:
   /etc/letsencrypt/live/ghost.linuxbuz.com/privkey.pem
   Your cert will expire on 2021-07-13. To obtain a new or tweaked
   version of this certificate in the future, simply run certbot again
   with the "certonly" option. To non-interactively renew *all* of
   your certificates, run "certbot renew"
 - Your account credentials have been saved in your Certbot
   configuration directory at /etc/letsencrypt. You should make a
   secure backup of this folder now. This configuration directory will
   also contain certificates and private keys obtained by Certbot so
   making regular backups of this folder is ideal.
 - If you like Certbot, please consider supporting our work by:

   Donating to ISRG / Let's Encrypt:   https://letsencrypt.org/donate
   Donating to EFF:                    https://eff.org/donate-le
Ahora, puede verificar el sitio web de Ghost con el siguiente comando;
ghost ls
Debería ver el siguiente resultado:
+ sudo systemctl is-active ghost_ghost-linuxbuz-com
??????????????????????????????????????????????????????????????????????????????????????????????????????????????????????????????
? Name               ? Location       ? Version ? Status               ? URL                        ? Port ? Process Manager ?
??????????????????????????????????????????????????????????????????????????????????????????????????????????????????????????????
? ghost-linuxbuz-com ? /var/www/ghost ? 4.2.1   ? running (production) ? https://ghost.linuxbuz.com ? 2368 ? systemd         ?
??????????????????????????????????????????????????????????????????????????????????????????????????????????????????????????????
También puede verificar el servicio Ghost con el siguiente comando:
sudo systemctl status ghost_ghost-linuxbuz-com
Debería ver el siguiente resultado:
? ghost_ghost-linuxbuz-com.service - Ghost systemd service for blog: ghost-linuxbuz-com
     Loaded: loaded (/lib/systemd/system/ghost_ghost-linuxbuz-com.service; enabled; vendor preset: enabled)
     Active: active (running) since Wed 2021-04-14 07:05:33 UTC; 9min ago
       Docs: https://ghost.org/docs/
   Main PID: 7546 (node)
      Tasks: 22 (limit: 2353)
     Memory: 134.3M
     CGroup: /system.slice/ghost_ghost-linuxbuz-com.service
             ??7546 ghost run
             ??7590 /usr/bin/node current/index.js

Apr 14 07:13:44 ubuntu node[7590]: [2021-04-14 07:13:44] INFO "GET /ghost/assets/img/dashboard/start-membership-baafa2c6558d118ae59cb1fddab045>
Apr 14 07:13:44 ubuntu node[7590]: [2021-04-14 07:13:44] INFO "GET /ghost/assets/img/dashboard/the-browser-f5e7e199fe82d8435913e84d022fa7e1.pn>
Apr 14 07:13:44 ubuntu node[7590]: [2021-04-14 07:13:44] INFO "GET /ghost/assets/img/dashboard/join-community-bb5478f7dca6c04a2d0baf2b02f880fb>
Apr 14 07:13:44 ubuntu node[7590]: [2021-04-14 07:13:44] INFO "GET /ghost/api/canary/admin/members/?filter=status%3Apaid&order=created_at%20as>
Apr 14 07:14:11 ubuntu node[7590]: [2021-04-14 07:14:11] INFO "GET /" 200 475ms
Apr 14 07:14:11 ubuntu node[7590]: [2021-04-14 07:14:11] INFO "GET /" 200 480ms
Apr 14 07:14:15 ubuntu node[7590]: [2021-04-14 07:14:15] INFO "GET /members/api/site/" 200 12ms
Apr 14 07:14:18 ubuntu node[7590]: [2021-04-14 07:14:18] INFO "GET /" 304 142ms
Apr 14 07:14:25 ubuntu node[7590]: [2021-04-14 07:14:25] INFO "GET /members/api/site/" 304 4ms
Apr 14 07:14:26 ubuntu node[7590]: [2021-04-14 07:14:26] INFO "GET /members/api/member/" 401 4ms
Acceder a la interfaz de administración de Ghost
Ahora, abra su navegador web y acceda a la interfaz de administración de Ghost usando la URL https://ghost.linuxbuz.com/ghost/ . Debería ver la siguiente página:
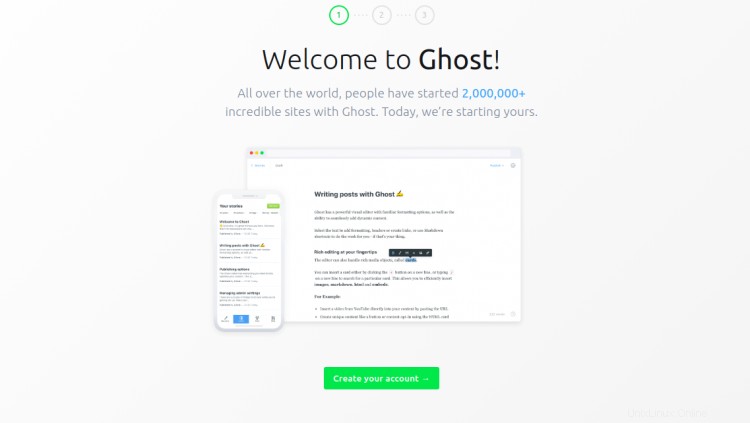
Haz clic en Crea tu cuenta botón para crear su primera cuenta:
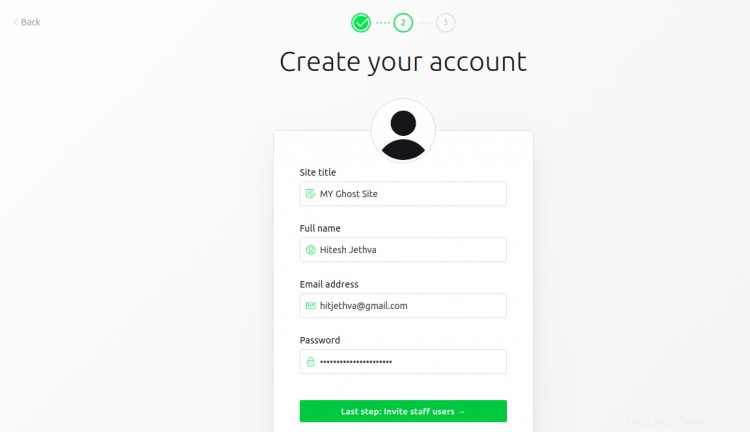
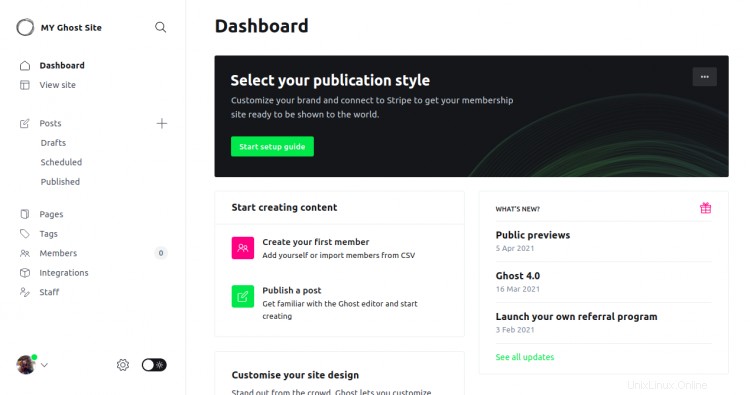
Proporcione los detalles de su cuenta y haga clic en Lo haré más tarde en la parte inferior de la pantalla. Debería ver la interfaz de administración de Ghost en la siguiente página:
También puede acceder a su sitio web de Ghost utilizando la URL https://ghost.linuxbuz.com/. Debería ver la siguiente página:

Conclusión
¡Felicidades! ha instalado con éxito la plataforma de blogs Ghost en Ubuntu 20.04. Ahora puede crear y publicar su propio contenido desde la interfaz de Ghost.