Kolab es un software colaborativo gratuito y de código abierto para sistemas operativos similares a Unix. Kolab Groupware proporciona una solución para el servidor de correo electrónico (SMTP ), calendario/eventos, libreta de direcciones (LDAP ) y más.
Se puede acceder a Kolab a través de varios clientes como Outlook en Windows, KDE (Kontact) en Linux y RoundCube Web Interface.
En este artículo voy a instalar kolab 16 Groupware en un único servidor (CentOS 7/RHEL 7) que incluirá servicios como SMTP , IMAP , LDAP ,
Abajo están los detalles de mi Servidor
- Nombre de host =kolab.linuxtechi.com
- Dirección IP =192.168.1.21
- SO =CentOS 7.x/RHEL 7.x
Paso:1 Deshabilitar SELinux y establecer nombre de host
De acuerdo con la documentación de Kolab, los componentes de trabajo en grupo de Kolab no son compatibles con SELinux, por lo que lo deshabilitaremos usando los siguientes comandos.
[[email protected] ~]# setenforce 0
[[email protected] ~]# getenforce
Permissive
[[email protected] ~]#
El comando anterior establecerá SELinux en modo permisivo de forma temporal, por lo que para desactivarlo de forma permanente, edite su archivo de configuración ' /etc/sysconfig/selinux ' cambiar el parámetro 'SELINUX=enforcing ‘ a ‘SELINUX=deshabilitado ‘ y reinicie el servidor.
Para establecer el nombre de host de forma permanente, use hostnamectl comando.
[[email protected] ~]# hostnamectl set-hostname "kollab.linuxtechi.com"
Actualice el archivo de host en caso de que no tenga un servidor DNS local.
[[email protected] ~]# vi /etc/hosts
192.168.1.21 kolab.linuxtechi.com
Paso:2 Permitir los puertos estándar de Kolab en el cortafuegos.
Use los siguientes comandos para permitir los puertos estándar de kolab en el firewall del sistema operativo.
[[email protected] ~]# firewall-cmd --permanent --add-service=ssh
success
[[email protected] ~]# firewall-cmd --permanent --add-service=http
success
[[email protected] ~]# firewall-cmd --permanent --add-service=https
success
[[email protected] ~]# firewall-cmd --permanent --add-service=pop3s
success
[[email protected] ~]# firewall-cmd --permanent --add-service=imaps
success
[[email protected] ~]# firewall-cmd --permanent --add-service=smtp
success
[[email protected] ~]# firewall-cmd --permanent --add-service=ldap
success
[[email protected] ~]# firewall-cmd --permanent --add-service=ldaps
success
[[email protected]b ~]# firewall-cmd --permanent --add-port=110/tcp
success
[[email protected] ~]# firewall-cmd --permanent --add-port=143/tcp
success
[[email protected] ~]# firewall-cmd --permanent --add-port=587/tcp
success
[[email protected] ~]# firewall-cmd --reload
success
[[email protected] ~]#
Paso:3 Habilitar EPEL y Repositorio de Kolab
Utilice los siguientes comandos para habilitar el repositorio de epel y kolab,
[[email protected] ~]# rpm -Uhv https://dl.fedoraproject.org/pub/epel/epel-release-latest-7.noarch.rpm
[[email protected] ~]# cd /etc/yum.repos.d/
[[email protected] yum.repos.d]# wget http://obs.kolabsys.com/repositories/Kolab:/16/CentOS_7/Kolab:16.repo
Utilice el siguiente comando para importar la clave que se utilizará para firmar los paquetes
[[email protected] ~]# rpm --import https://ssl.kolabsys.com/community.asc
[[email protected] ~]#
Instalar el paquete de prioridades de complementos de yum
[[email protected] ~]# yum install yum-plugin-priorities
Establezca la prioridad alta para el repositorio de Kolab usando el siguiente comando.
[[email protected] ~]# for f in /etc/yum.repos.d/Kolab*.repo; do echo "priority = 60" >> $f; done
[[email protected] ~]#
Paso:4 Instalar y configurar Kolab
Use el siguiente comando yum para instalar kolab
[[email protected] ~]# yum install kolab
Ahora es el momento de configurar Kolab ejecutando debajo de 'setup-kolab ‘ y especifique la contraseña de LDAP, la información de dominio y la contraseña de la base de datos.
[[email protected] ~]# setup-kolab

Created symlink from /etc/systemd/system/multi-user.target.wants/guam.service to /usr/lib/systemd/system/guam.service.

Please supply a password for the LDAP administrator user 'admin', used to login
to the graphical console of 389 Directory server.

Administrator password [jzucZOpwwwGQ0KO]:
Confirm Administrator password:

Please supply a password for the LDAP Directory Manager user, which is the
administrator user you will be using to at least initially log in to the Web
Admin, and that Kolab uses to perform administrative tasks.

Directory Manager password [e58Z-DlULxLcEeF]:
Confirm Directory Manager password:

Please choose the system user and group the service should use to run under.
These should be existing, unprivileged, local system POSIX accounts with no
shell.

User [nobody]:
Group [nobody]:

This setup procedure plans to set up Kolab Groupware for the following domain
name space. This domain name is obtained from the reverse DNS entry on your
network interface. Please confirm this is the appropriate domain name space.

linuxtechi.com [Y/n]: Y

The standard root dn we composed for you follows. Please confirm this is the root
dn you wish to use.

dc=linuxtechi,dc=com [Y/n]: Y

Setup is now going to set up the 389 Directory Server. This may take a little
while (during which period there is no output and no progress indication).

Created symlink from /etc/systemd/system/multi-user.target.wants/dirsrv.target to /usr/lib/systemd/system/dirsrv.target.

Please supply a Cyrus Administrator password. This password is used by Kolab to
execute administrative tasks in Cyrus IMAP. You may also need the password
yourself to troubleshoot Cyrus IMAP and/or perform other administrative tasks
against Cyrus IMAP directly.

Cyrus Administrator password [0Oc4nmyeTpnjTW2]:
Confirm Cyrus Administrator password:

Please supply a Kolab Service account password. This account is used by various
services such as Postfix, and Roundcube, as anonymous binds to the LDAP server
will not be allowed.

Kolab Service password [sGU25rl-5Q7Ewic]:
Confirm Kolab Service password:
Job for [email protected] failed because start of the service was attempted too often. See "systemctl status [email protected]" and "journalctl -xe" for details.
To force a start use "systemctl reset-failed [email protected]" followed by "systemctl start [email protected]" again.
Created symlink from /etc/systemd/system/multi-user.target.wants/amavisd.service to /usr/lib/systemd/system/amavisd.service.
Created symlink from /etc/systemd/system/multi-user.target.wants/[email protected] to /etc/systemd/system/[email protected]
Created symlink from /etc/systemd/system/multi-user.target.wants/wallace.service to /usr/lib/systemd/system/wallace.service.
Created symlink from /etc/systemd/system/multi-user.target.wants/mariadb.service to /usr/lib/systemd/system/mariadb.service.
What MySQL server are we setting up?
 - 1: Existing MySQL server (with root password already set).
 - 2: New MySQL server (needs to be initialized).
Choice: 2

Please supply a root password for MySQL. This password will be the administrative
user for this MySQL server, and it should be kept a secret. After this setup
process has completed, Kolab is going to discard and forget about this password,
but you will need it for administrative tasks in MySQL.

MySQL root password [-nwxIMrNyT_0cRB]:
Confirm MySQL root password:

Please supply a password for the MySQL user 'kolab'. This password will be used
by Kolab services, such as the Web Administration Panel.

MySQL kolab password [yO2zsl5PEyTmbti]:
Confirm MySQL kolab password:

Please supply the timezone PHP should be using. You have to use a Continent or
Country / City locality name like 'Europe/Berlin', but not just 'CEST'.

Timezone ID [UTC]: Asia/Kolkata

Please supply a password for the MySQL user 'roundcube'. This password will be
used by the Roundcube webmail interface.

MySQL roundcube password [rUf1emw_km1TLMB]:
Confirm MySQL roundcube password:
Created symlink from /etc/systemd/system/multi-user.target.wants/httpd.service to /usr/lib/systemd/system/httpd.service.
Created symlink from /etc/systemd/system/multi-user.target.wants/kolab-saslauthd.service to /usr/lib/systemd/system/kolab-saslauthd.service.
Created symlink from /etc/systemd/system/multi-user.target.wants/cyrus-imapd.service to /usr/lib/systemd/system/cyrus-imapd.service.
Created symlink from /etc/systemd/system/multi-user.target.wants/kolabd.service to /usr/lib/systemd/system/kolabd.service.
Created symlink from /etc/systemd/system/multi-user.target.wants/mongod.service to /usr/lib/systemd/system/mongod.service.
Created symlink from /etc/systemd/system/multi-user.target.wants/manticore.service to /usr/lib/systemd/system/manticore.service.
[[email protected] ~]#
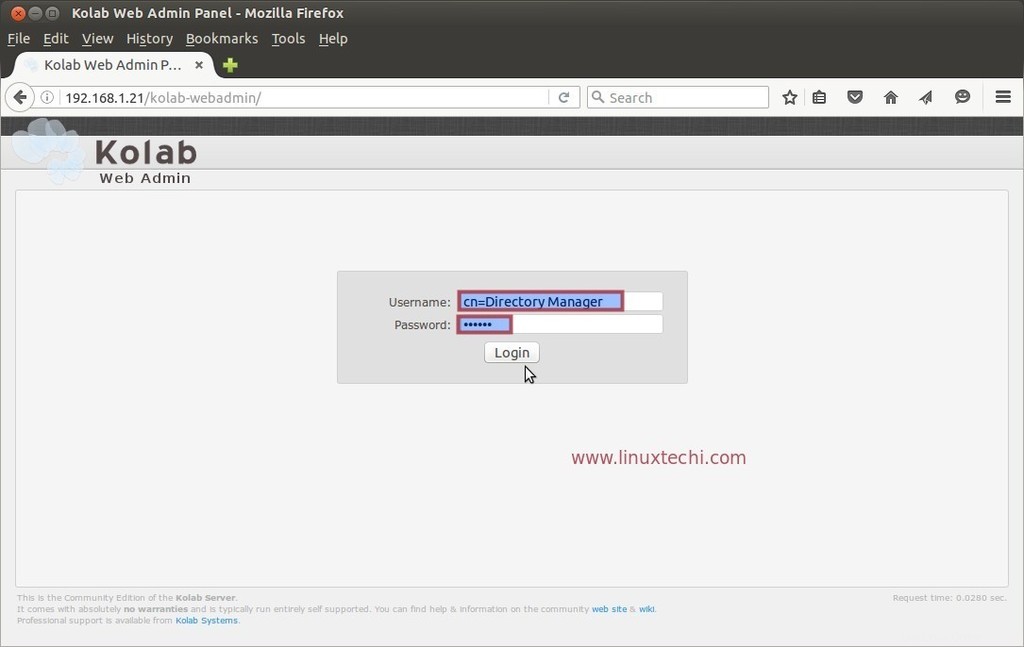
Paso:5 Acceda a la consola de administración web de Kolab
Acceda a la consola de administración web de kolab utilizando la siguiente URL:
http://192.168.1.21/kolab-webadmin/
O
http://
Reemplace la IP o el nombre de host según su configuración.
Utilice el nombre de usuario como 'cn=Directory Manager ‘ y la contraseña que configuramos en el paso anterior.
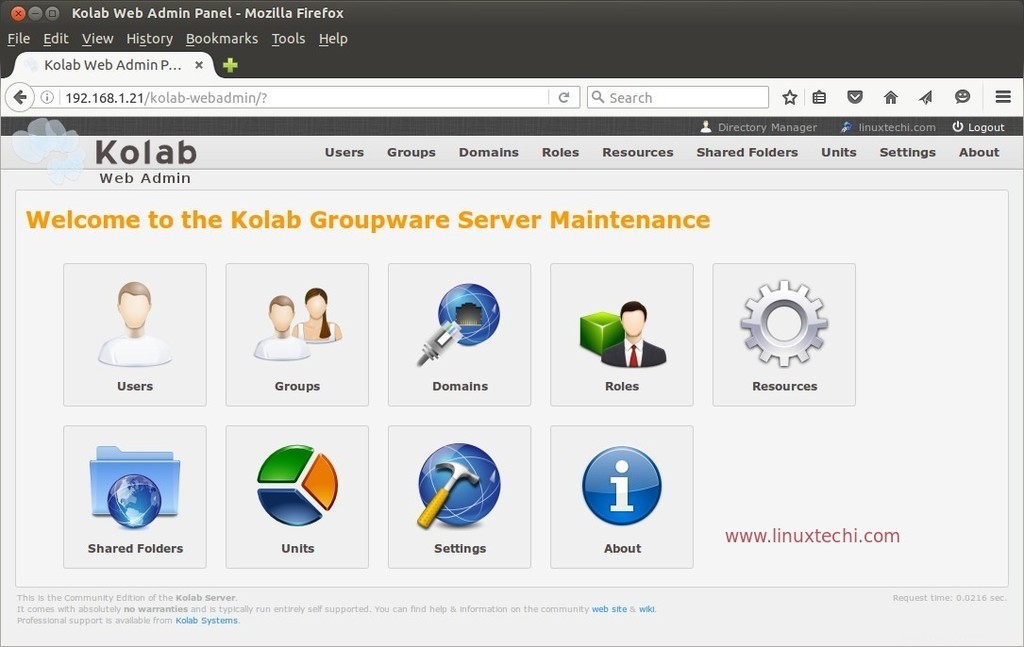
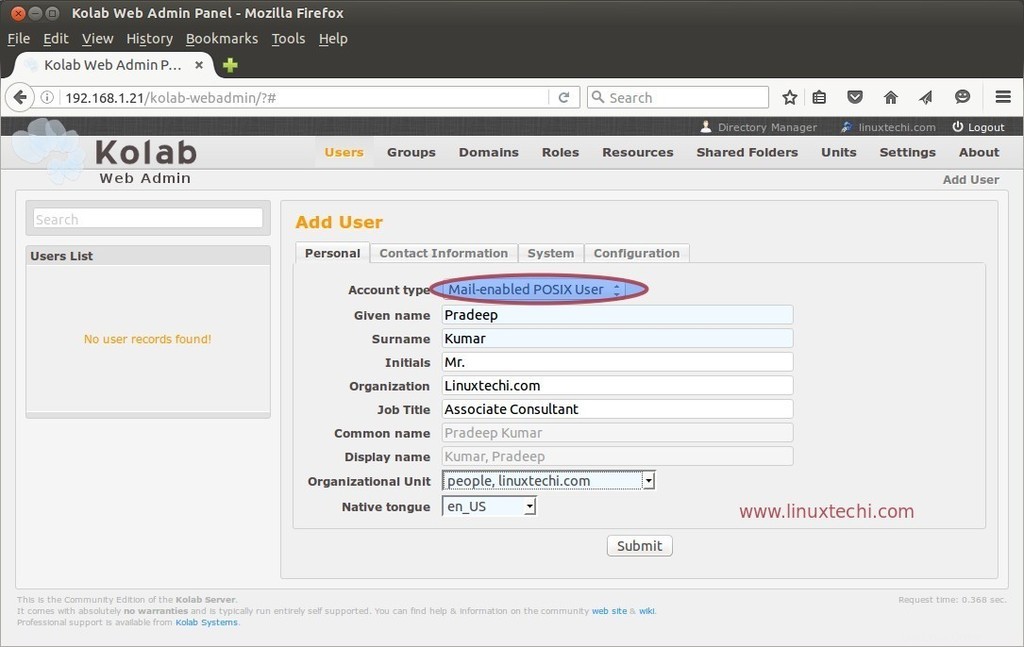
Ahora intentemos crear un usuario de correo desde el Panel de administración. Haga clic en el icono de usuarios en el panel de administración web.
Especifique el tipo de cuenta como 'Usuario POSIX habilitado para correo ‘
Desde la pestaña Contacto, verifique la dirección de correo electrónico del usuario.
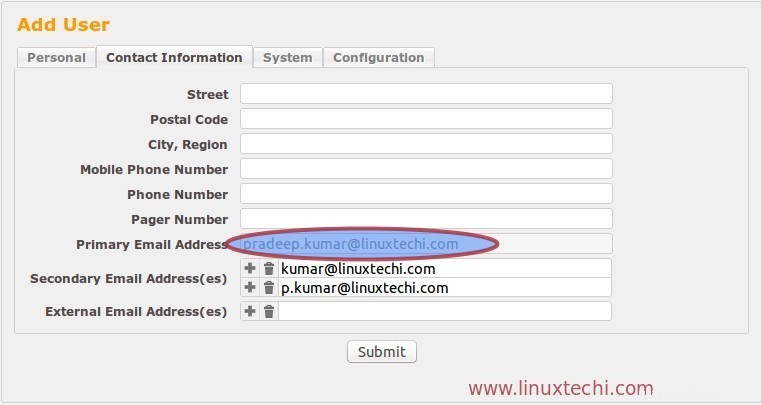
Desde la pestaña Sistema, podemos obtener la contraseña para el usuario y también podemos generar una nueva contraseña.
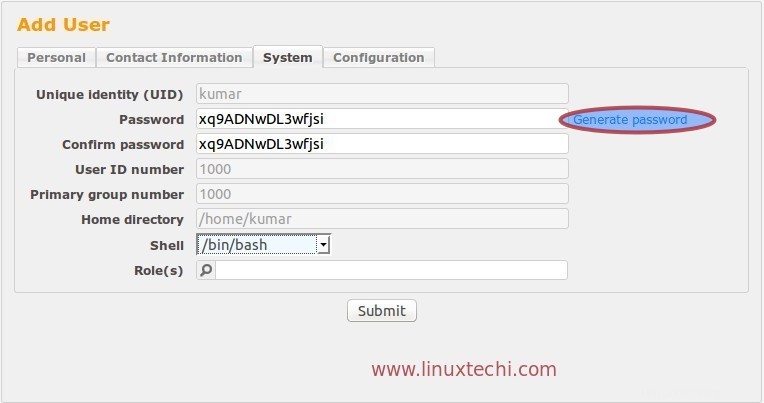
Desde la pestaña Configuración podemos establecer la Cuota de correo electrónico para el Usuario. Una vez que haya terminado con toda la configuración, haga clic en Enviar para crear un usuario.
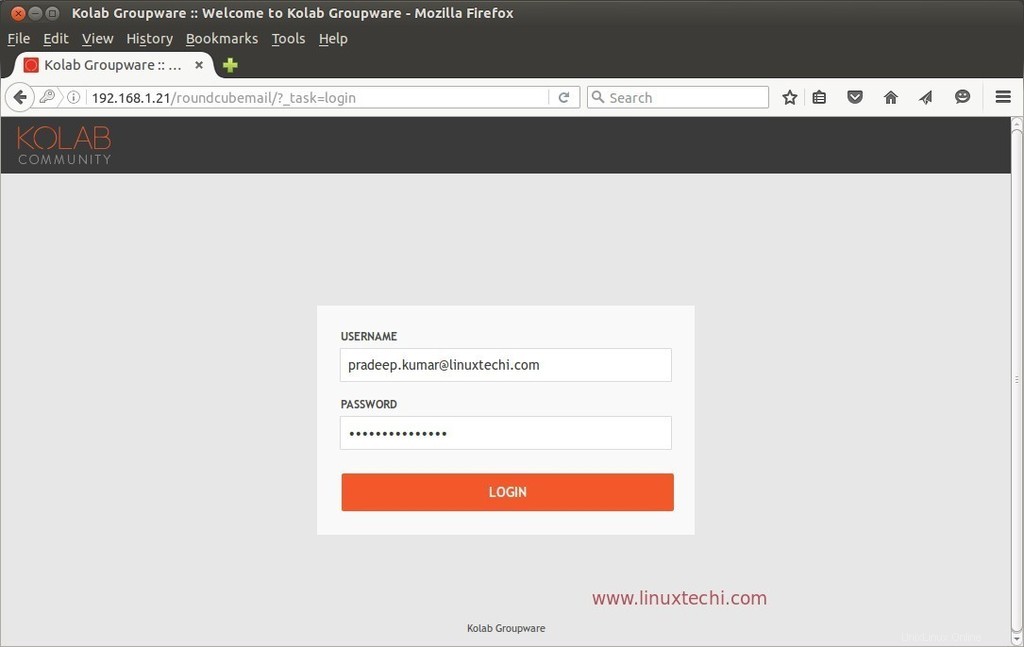
Paso:6 Inicie sesión en Kolab Roundcube Webmail
Use la siguiente URL para acceder al correo web de Kolab Roundcube.
http://192.168.1.21/correocuboredondo/
O
http://
Use el nombre de usuario como ID de correo electrónico principal, en mi caso, el nombre de usuario es '[email protected]' y la contraseña que configuramos al crear el usuario.
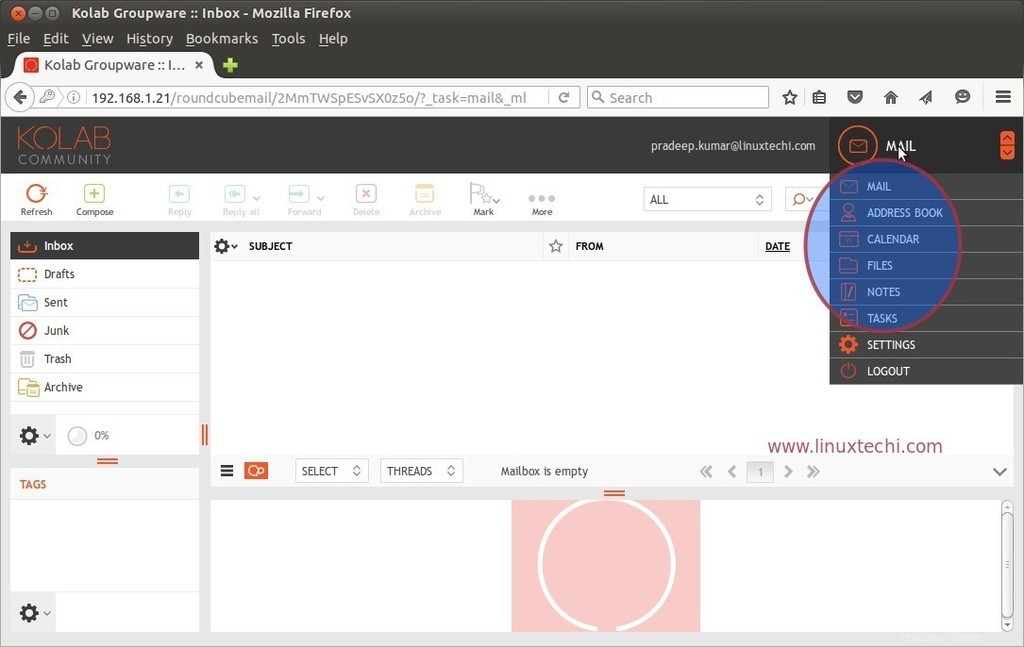
Como vemos que desde el webmail de Round cube podemos acceder al correo, libreta de direcciones, calendarios y tareas.
Eso es concluir este artículo e intentar explorar más a fondo Kolab Groupware y divertirse 🙂