En el tutorial anterior, le mostré cómo implementar Ansible AWX a través de Docker. Mientras tanto, encontré dos proyectos que compilan paquetes rpm para AWX. Entonces, en este tutorial, le mostraré cómo instalar Ansible AWX desde archivos RPM en CentOS 7. Ansible AWX es la versión OpenSource del software Ansible Tower.
Usaré 3 servidores con instalación mínima de CentOS 7 y SELinux en modo permisivo.
- 192.168.1.25 Servidor AWX
- 192.168.1.21 cliente1
- 192.168.1.22 cliente2
Requisitos mínimos del sistema para el servidor AWX
- Al menos 4 GB de memoria
- Al menos 2 núcleos de CPU
- Al menos 20 GB de espacio
- Ejecutar Docker, Openshift o Kubernetes
Comprueba la configuración de SELinux.
[[email protected] ~]# sestatus
SELinux status:                 enabled
SELinuxfs mount:                /sys/fs/selinux
SELinux root directory:         /etc/selinux
Loaded policy name:             targeted
Current mode:                   permissive
Mode from config file:          permissive
Policy MLS status:              enabled
Policy deny_unknown status:     allowed
Max kernel policy version:      28
[[email protected] ~]#
Agregue las entradas de host en
/etc/hosts
[[email protected] ~]# cat /etc/hosts
192.168.1.25    awx.sunil.cc awx
192.168.1.21    client1.sunil.cc client1
192.168.1.22    client2.sunil.cc client2
[[email protected] ~]#
Agregue las reglas de firewall
[[email protected] ~]# systemctl enable firewalld
Created symlink from /etc/systemd/system/dbus-org.fedoraproject.FirewallD1.service to /usr/lib/systemd/system/firewalld.service.
Created symlink from /etc/systemd/system/multi-user.target.wants/firewalld.service to /usr/lib/systemd/system/firewalld.service.
[[email protected] ~]# systemctl start firewalld
[[email protected] ~]# firewall-cmd --add-service=http --permanent;firewall-cmd --add-service=https --permanent
success
success
[[email protected] ~]# systemctl restart firewalld
[[email protected] ~]#
Habilite el repositorio EPEL de CentOS.
[[email protected] ~]# yum install -y epel-release
Necesitamos postgresql 9.6 para la instalación de AWX.
Habilite el repositorio de PostgreSQL.
[[email protected] ~]# yum install -y https://download.postgresql.org/pub/repos/yum/9.6/redhat/rhel-7-x86_64/pgdg-centos96-9.6-3.noarch.rpm
Instalando postgreSQL.
[[email protected] ~]# yum install postgresql96-server -y
Instalando los demás rpms necesarios.
[[email protected] ~]# yum install -y rabbitmq-server wget memcached nginx ansible
Instalando Ansible AWX
Agregando el repositorio AWX.
[[email protected] ~]# wget -O /etc/yum.repos.d/awx-rpm.repo https://copr.fedorainfracloud.org/coprs/mrmeee/awx/repo/epel-7/mrmeee-awx-epel-7.repo
Instalación de rpm
[[email protected] ~]# yum install -y awx
Inicializando la base de datos
[[email protected] ~]# /usr/pgsql-9.6/bin/postgresql96-setup initdb
Initializing database ... OK

[[email protected] ~]#
Inicio del servicio Rabbitmq
[[email protected] ~]# systemctl start rabbitmq-server
[[email protected] ~]# systemctl enable rabbitmq-server
Created symlink from /etc/systemd/system/multi-user.target.wants/rabbitmq-server.service to /usr/lib/systemd/system/rabbitmq-server.service.
[[email protected] ~]#
Iniciando el servicio PostgreSQL
[[email protected] ~]# systemctl enable postgresql-9.6
Created symlink from /etc/systemd/system/multi-user.target.wants/postgresql-9.6.service to /usr/lib/systemd/system/postgresql-9.6.service.
[[email protected] ~]# systemctl start postgresql-9.6
Inicio del servicio Memcached
[[email protected] ~]# systemctl enable memcached
Created symlink from /etc/systemd/system/multi-user.target.wants/memcached.service to /usr/lib/systemd/system/memcached.service.
[[email protected] ~]# systemctl start memcached
Creando un usuario de Postgres
[[email protected] ~]# sudo -u postgres createuser -S awx
could not change directory to "/root": Permission denied
[[email protected] ~]#
ignorar el error
Creando la base de datos
[[email protected] ~]# sudo -u postgres createdb -O awx awx
could not change directory to "/root": Permission denied
[[email protected] ~]#
ignorar el error
Importando los datos a la base de datos
[[email protected] ~]# sudo -u awx /opt/awx/bin/awx-manage migrate
Inicializando la configuración para AWX
[[email protected] ~]# echo "from django.contrib.auth.models import User; User.objects.create_superuser('admin', '[email protected]', 'password')" | sudo -u awx /opt/awx/bin/awx-manage shell
[[email protected] ~]# sudo -u awx /opt/awx/bin/awx-manage create_preload_data
Default organization added.
Demo Credential, Inventory, and Job Template added.
[[email protected] ~]# sudo -u awx /opt/awx/bin/awx-manage provision_instance --hostname=$(hostname)
Successfully registered instance awx.sunil.cc
(changed: True)
[[email protected] ~]# sudo -u awx /opt/awx/bin/awx-manage register_queue --queuename=tower --hostnames=$(hostname)
Creating instance group tower
Added instance awx.sunil.cc to tower
(changed: True)
[[email protected] ~]#
Configurar Nginx
Tome la copia de seguridad de nginx.conf
[[email protected] ~]# cd /etc/nginx/
[[email protected] nginx]# pwd
/etc/nginx
[[email protected] nginx]# cp nginx.conf nginx.conf.bkp
Reemplace el archivo conf de nginx
[[email protected] nginx]# wget -O /etc/nginx/nginx.conf https://raw.githubusercontent.com/sunilsankar/awx-build/master/nginx.conf
Habilitar e iniciar el servicio nginx
[[email protected] ~]# systemctl start nginx
[[email protected] ~]# systemctl enable nginx
Inicie los servicios awx
[[email protected] ~]# systemctl start awx-cbreceiver
[[email protected] ~]# systemctl start awx-celery-beat
[[email protected] ~]# systemctl start awx-celery-worker
[[email protected] ~]# systemctl start awx-channels-worker
[[email protected] ~]# systemctl start awx-daphne
[[email protected] ~]# systemctl start awx-web
Asegúrese de que el servicio se inicie durante el reinicio
[[email protected] ~]# systemctl enable awx-cbreceiver
Created symlink from /etc/systemd/system/multi-user.target.wants/awx-cbreceiver.service to /usr/lib/systemd/system/awx-cbreceiver.service.
[[email protected] ~]# systemctl enable awx-celery-beat
Created symlink from /etc/systemd/system/multi-user.target.wants/awx-celery-beat.service to /usr/lib/systemd/system/awx-celery-beat.service.
[[email protected] ~]# systemctl enable awx-celery-worker
Created symlink from /etc/systemd/system/multi-user.target.wants/awx-celery-worker.service to /usr/lib/systemd/system/awx-celery-worker.service.
[[email protected] ~]# systemctl enable awx-channels-worker
Created symlink from /etc/systemd/system/multi-user.target.wants/awx-channels-worker.service to /usr/lib/systemd/system/awx-channels-worker.service.
[[email protected] ~]# systemctl enable awx-daphne
Created symlink from /etc/systemd/system/multi-user.target.wants/awx-daphne.service to /usr/lib/systemd/system/awx-daphne.service.
[[email protected] ~]# systemctl enable awx-web
Created symlink from /etc/systemd/system/multi-user.target.wants/awx-web.service to /usr/lib/systemd/system/awx-web.service.
[[email protected] ~]#
Configure el inicio de sesión sin contraseña desde el servidor AWX
Cree un usuario en los 3 hosts.
Aquí en este tutorial, estoy creando un usuario ansible en los 3 servidores.
[[email protected] ~]# useradd ansible
[[email protected] ~]# useradd ansible
[[email protected] ~]# useradd ansible
Generando clave ssh en el servidor awx
[[email protected] nginx]# su - ansible
[[email protected] ~]$ ssh-keygen
Generating public/private rsa key pair.
Enter file in which to save the key (/home/ansible/.ssh/id_rsa):
Created directory '/home/ansible/.ssh'.
Enter passphrase (empty for no passphrase):
Enter same passphrase again:
Your identification has been saved in /home/ansible/.ssh/id_rsa.
Your public key has been saved in /home/ansible/.ssh/id_rsa.pub.
The key fingerprint is:
SHA256:RW/dhTsxcyGicleRI0LpLm+LyhAVinm0xktapodc8gY [email protected]
The key's randomart image is:
+---[RSA 2048]----+
|   . .  ..o. +ooo|
|  = o .  +.oo+*.o|
| E @ . ..oo.+ o*.|
|. # o   oo..  o  |
| = *    S      . |
|  o .  . .       |
|   .    o        |
|    o   .o       |
|     o.....      |
+----[SHA256]-----+
[[email protected] ~]$
Agregar la entrada sudoers en los 3 servidores como última entrada al archivo
[[email protected] nginx]# visudo
ansible ALL=(ALL) NOPASSWD: ALL
Copie el contenido de id_rsa.pub a authorized_keys en los 3 servidores
[[email protected] .ssh]$ cat id_rsa.pub
ssh-rsa AAAAB3NzaC1yc2EAAAADAQABAAABAQDStB8JGsVsSLppwYWdnEPLE4xwFqRDn7xE/d3hjBQ6A0JGm1t+GtHB3GPIEjANFTnxQwHpR+cRttbL3mlQvpIYqCZOMZds9XA7VI5qgs0aSGUU8cNYKjmmrMpJa9sB4WVtj3M4u2fEXt9FKKCtjMMpOfiQxIkEhYZ+2GoAX5sHXan7TPcgwb5r7WW6j43aaPc6g9XWN63nonQz6KeMSFZ/y0o2HJMh1FEkktZw6A1HVfn+JNWoQb1glyqGjO1ync+Sok8yXpqakEEWpXNQSQYs4eBEwfkKql5EuolQMIbF9VYhpEcR9LfbMvYdq/RPKWN3mmRMWfPZ2dTZl515XBdV [email protected]
[[email protected] .ssh]$
[[email protected] .ssh]$ cat authorized_keys
ssh-rsa AAAAB3NzaC1yc2EAAAADAQABAAABAQDStB8JGsVsSLppwYWdnEPLE4xwFqRDn7xE/d3hjBQ6A0JGm1t+GtHB3GPIEjANFTnxQwHpR+cRttbL3mlQvpIYqCZOMZds9XA7VI5qgs0aSGUU8cNYKjmmrMpJa9sB4WVtj3M4u2fEXt9FKKCtjMMpOfiQxIkEhYZ+2GoAX5sHXan7TPcgwb5r7WW6j43aaPc6g9XWN63nonQz6KeMSFZ/y0o2HJMh1FEkktZw6A1HVfn+JNWoQb1glyqGjO1ync+Sok8yXpqakEEWpXNQSQYs4eBEwfkKql5EuolQMIbF9VYhpEcR9LfbMvYdq/RPKWN3mmRMWfPZ2dTZl515XBdV [email protected]
[[email protected] .ssh]$ chmod 600 authorized_keys
Cliente1
[[email protected] ~]# su - ansible
[[email protected] ~]$ mkdir .ssh
[[email protected] ~]$ chmod 700 .ssh
[[email protected] ~]$ cat .ssh/authorized_keys
ssh-rsa AAAAB3NzaC1yc2EAAAADAQABAAABAQDStB8JGsVsSLppwYWdnEPLE4xwFqRDn7xE/d3hjBQ6A0JGm1t+GtHB3GPIEjANFTnxQwHpR+cRttbL3mlQvpIYqCZOMZds9XA7VI5qgs0aSGUU8cNYKjmmrMpJa9sB4WVtj3M4u2fEXt9FKKCtjMMpOfiQxIkEhYZ+2GoAX5sHXan7TPcgwb5r7WW6j43aaPc6g9XWN63nonQz6KeMSFZ/y0o2HJMh1FEkktZw6A1HVfn+JNWoQb1glyqGjO1ync+Sok8yXpqakEEWpXNQSQYs4eBEwfkKql5EuolQMIbF9VYhpEcR9LfbMvYdq/RPKWN3mmRMWfPZ2dTZl515XBdV [email protected]
[[email protected] ~]$ chmod 600 .ssh/authorized_keys
Cliente2
[[email protected] ~]# su - ansible
[[email protected] ~]$ mkdir .ssh
[[email protected] ~]$ chmod 700 .ssh
[[email protected] ~]$ cat .ssh/authorized_keys
ssh-rsa AAAAB3NzaC1yc2EAAAADAQABAAABAQDStB8JGsVsSLppwYWdnEPLE4xwFqRDn7xE/d3hjBQ6A0JGm1t+GtHB3GPIEjANFTnxQwHpR+cRttbL3mlQvpIYqCZOMZds9XA7VI5qgs0aSGUU8cNYKjmmrMpJa9sB4WVtj3M4u2fEXt9FKKCtjMMpOfiQxIkEhYZ+2GoAX5sHXan7TPcgwb5r7WW6j43aaPc6g9XWN63nonQz6KeMSFZ/y0o2HJMh1FEkktZw6A1HVfn+JNWoQb1glyqGjO1ync+Sok8yXpqakEEWpXNQSQYs4eBEwfkKql5EuolQMIbF9VYhpEcR9LfbMvYdq/RPKWN3mmRMWfPZ2dTZl515XBdV [email protected]
[[email protected] ~]$ chmod 600 .ssh/authorized_keys
Compruebe el inicio de sesión sin contraseña del servidor AWX.
[[email protected] ~]$ ssh client1
Last login: Sun Mar 11 13:14:06 2018 from 192.168.1.25
[[email protected] ~]$ exit
logout
Connection to client1 closed.
[[email protected] ~]$ ssh client2
Last login: Sun Mar 11 12:50:14 2018 from 192.168.1.25
[[email protected] ~]$
Valide el inicio de sesión:
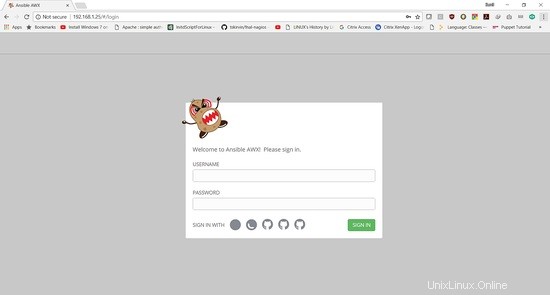
Los datos de inicio de sesión son:
Nombre de usuario:"administrador "
Contraseña:"contraseña "
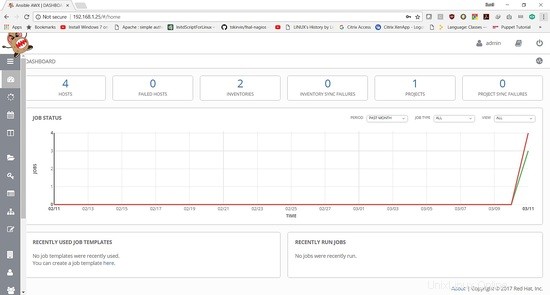
En el siguiente tutorial, se mostrará cómo agregar un libro de jugadas y ejecutar el trabajo.