
En este tutorial, le mostraremos cómo instalar Apache en Ubuntu 14.04. Para aquellos de ustedes que no lo sabían, Apache es un servidor web HTTP, el más popular en uso. sirve páginas web cuando son solicitadas por los navegadores web. Cuando escribe una URL en su servidor web y presiona Intro, es muy probable que las páginas que ve en la pantalla sean atendidas por el servidor web Apache.
Este artículo asume que tiene al menos conocimientos básicos de Linux, sabe cómo usar el shell y, lo que es más importante, aloja su sitio en su propio VPS. La instalación es bastante simple. mostrarle la instalación paso a paso de Apache en el servidor Ubuntu 14.04.
Instalar Apache en Ubuntu 14.04
Paso 1. En primer lugar, asegúrese de que todos los paquetes estén actualizados.
apt-get update
apt-get upgrade
Paso 2. Instalación del servidor web Apache en Ubuntu 14.04.
Instalaremos Apache con apt-get, que es el administrador de paquetes predeterminado para ubuntu:
apt-get install apache2 apache2-utils
Inicie Apache y agréguelo para que se inicie automáticamente en el inicio de su sistema usando:
service apache2 start
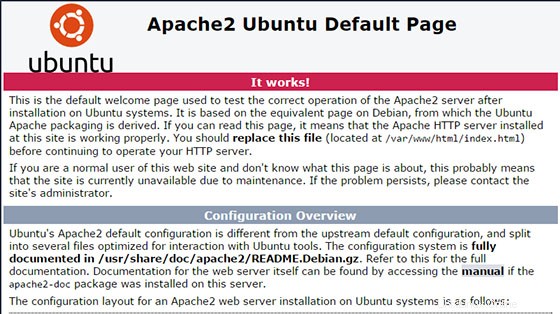
Puede verificar que Apache realmente se está ejecutando abriendo su navegador web favorito e ingresando la URL http://your-server's-address , si está instalado, verá esto:
Configurar Apache (host único)
Ahora configuraremos Apache abriendo el archivo de configuración principal y editando las líneas ServerName y ServerAdmin según corresponda:
nano /etc/apache2/sites-available/000-default.conf
<VirtualHost *:80>
        # The ServerName directive sets the request scheme, hostname and port that
        # the server uses to identify itself. This is used when creating
        # redirection URLs. In the context of virtual hosts, the ServerName
        # specifies what hostname must appear in the request's Host: header to
        # match this virtual host. For the default virtual host (this file) this
        # value is not decisive as it is used as a last resort host regardless.
        # However, you must set it for any further virtual host explicitly.
        #ServerName www.example.com
        ServerAdmin webmaster@localhost
        DocumentRoot /var/www/html
        # Available loglevels: trace8, ..., trace1, debug, info, notice, warn,
        # error, crit, alert, emerg.
        # It is also possible to configure the loglevel for particular
        # modules, e.g.
        #LogLevel info ssl:warn
        ErrorLog ${APACHE_LOG_DIR}/error.log
        CustomLog ${APACHE_LOG_DIR}/access.log combined
        # For most configuration files from conf-available/, which are
        # enabled or disabled at a global level, it is possible to
        # include a line for only one particular virtual host. For example the
        # following line enables the CGI configuration for this host only
        # after it has been globally disabled with "a2disconf".
        #Include conf-available/serve-cgi-bin.conf
</VirtualHost>
Ahora, podemos reiniciar Apache para que se produzcan los cambios:
service apache2 restart
Ahora puede crear/cargar su contenido web en el directorio HTML de Apache. (Recuerde reemplazar el archivo index.html existente con su index.html, que es su página de inicio).
Configurar Apache (múltiples hosts)
Si desea alojar varios sitios web, proceda abriendo el archivo de configuración principal, copie la entrada del Host virtual existente y péguela debajo. Luego edite ServerName, ServerAdmin y las líneas DocumentRoot en consecuencia.
nano /etc/apache2/sites-available/000-default.conf
Alternativamente, puede simplemente copiar las siguientes entradas y editarlas según corresponda:
    <VirtualHost *:80>
    ServerAdmin [email protected]
    DocumentRoot /var/www/site1
    ServerName site1.com
    ServerAlias www.site1.com
    ErrorLog ${APACHE_LOG_DIR}/error.log
    CustomLog ${APACHE_LOG_DIR}/access.log combined
    </VirtualHost>
    <VirtualHost *:80>
    ServerAdmin [email protected]
    DocumentRoot /var/www/site2
    ServerName site2.com
    ServerAlias www.site2.com
    ErrorLog ${APACHE_LOG_DIR}/error.log
    CustomLog ${APACHE_LOG_DIR}/access.log combined
    </VirtualHost>
Ahora debemos crear directorios para los sitios que acabamos de configurar, sitio1 y sitio2.
mkdir -p /var/www/site1
mkdir -p /var/www/site2
Ahora, podemos reiniciar Apache para que se produzcan los cambios:
service apache2 restart
¡Felicitaciones! Ha instalado Apache con éxito. Gracias por usar este tutorial para instalar el servidor web Apache en el sistema Ubuntu 14.04. Para obtener ayuda adicional o información útil, le recomendamos que consulte el sitio web oficial de Apache.