Vamos a cifrar es una autoridad de certificación (CA) sin fines de lucro que proporciona un certificado SSL/TLS gratuito. Let's Encrypt le permite instalar o solicitar un certificado SSL de forma gratuita. El certificado SSL/TLS de Let's Encrypt tiene una validez de 90 días y puede renovarlo en cualquier momento también de forma gratuita.
En este tutorial usaremos Certbot para solicitar u obtener un certificado SSL gratuito de Let's Encrypt.
Certbot es un cliente de Let's Encrypt que gestiona los certificados SSL de Let's Encrypt. Un cliente Let's Encrypt con todas las funciones que puede automatizar tareas, obtener y renovar certificados SSL.
Procedamos con los pasos sobre cómo proteger nuestro sitio web con Let's Encrypt.
1 Requisitos previos
El certificado Let's Encrypt SSL/TLS solo se puede instalar en un servidor con un nombre de dominio registrado. Debe asegurarse de que su registro de Dominio A apunte a su servidor porque Let's Encrypt necesita validar el dominio si apunta correctamente al servidor donde solicita obtener el certificado SSL.
2 Instalación de Certbot
En esta sección, lo guiaremos sobre cómo instalar Certbot con Apache y Nginx Webserver.
Para el servidor web Apache.
sudo apt install certbot python3-certbot-apachePara el servidor web Nginx.
sudo apt install certbot python3-certbot-nginx3 Generación del certificado SSL
Para el servidor web Apache.
sudo certbot --apacheDespués de iniciar el comando, siga las instrucciones a continuación.
Output:
Saving debug log to /var/log/letsencrypt/letsencrypt.log
Plugins selected: Authenticator apache, Installer apache
Enter email address (used for urgent renewal and security notices) (Enter 'c' to
cancel): [email protected]
- - - - - - - - - - - - - - - - - - - - - - - - - - - - - - - - - - - - - - - -
Please read the Terms of Service at
https://letsencrypt.org/documents/LE-SA-v1.2-November-15-2017.pdf. You must
agree in order to register with the ACME server at
https://acme-v02.api.letsencrypt.org/directory
- - - - - - - - - - - - - - - - - - - - - - - - - - - - - - - - - - - - - - - -
(A)gree/(C)ancel: A
- - - - - - - - - - - - - - - - - - - - - - - - - - - - - - - - - - - - - - - -
Would you be willing to share your email address with the Electronic Frontier
Foundation, a founding partner of the Let's Encrypt project and the non-profit
organization that develops Certbot? We'd like to send you email about our work
encrypting the web, EFF news, campaigns, and ways to support digital freedom.
- - - - - - - - - - - - - - - - - - - - - - - - - - - - - - - - - - - - - - - -
(Y)es/(N)o: Y
Which names would you like to activate HTTPS for?
- - - - - - - - - - - - - - - - - - - - - - - - - - - - - - - - - - - - - - - -
1: domain.com
2: www.domain.com
- - - - - - - - - - - - - - - - - - - - - - - - - - - - - - - - - - - - - - - -
Select the appropriate numbers separated by commas and/or spaces, or leave input
blank to select all options shown (Enter 'c' to cancel): 1,2
Seleccionamos 1 y 2 para que el subdominio www se incluya en los certificados SSL.
Nota :puede optar si no desea incluir el subdominio www, simplemente seleccione 1 y presiona enter.
Please choose whether or not to redirect HTTP traffic to HTTPS, removing HTTP access.
- - - - - - - - - - - - - - - - - - - - - - - - - - - - - - - - - - - - - - - -
1: No redirect - Make no further changes to the webserver configuration.
2: Redirect - Make all requests redirect to secure HTTPS access. Choose this for
new sites, or if you're confident your site works on HTTPS. You can undo this
change by editing your web server's configuration.
- - - - - - - - - - - - - - - - - - - - - - - - - - - - - - - - - - - - - - - -
Select the appropriate number [1-2] then [enter] (press 'c' to cancel):2
Redirecting vhost in /etc/apache2/sites-enabled/domain.com.conf to ssl vhost in /etc/apache2/sites-available/domain.com-le-ssl.conf

- - - - - - - - - - - - - - - - - - - - - - - - - - - - - - - - - - - - - - - -
Congratulations! You have successfully enabled https://domain.com
You should test your configuration at:
https://www.ssllabs.com/ssltest/analyze.html?d=domain.com
- - - - - - - - - - - - - - - - - - - - - - - - - - - - - - - - - - - - - - - -

IMPORTANT NOTES:
 - Congratulations! Your certificate and chain have been saved at:
   /etc/letsencrypt/live/domain.com/fullchain.pem
   Your key file has been saved at:
   /etc/letsencrypt/live/domain.com/privkey.pem
   Your cert will expire on 2022-03-05. To obtain a new or tweaked
   version of this certificate in the future, simply run certbot again
   with the "certonly" option. To non-interactively renew *all* of
   your certificates, run "certbot renew"
 - Your account credentials have been saved in your Certbot
   configuration directory at /etc/letsencrypt. You should make a
   secure backup of this folder now. This configuration directory will
   also contain certificates and private keys obtained by Certbot so
   making regular backups of this folder is ideal.
 - If you like Certbot, please consider supporting our work by:

   Donating to ISRG / Let's Encrypt:   https://letsencrypt.org/donate
   Donating to EFF:                    https://eff.org/donate-le
Para el servidor web Nginx.
sudo certbot --nginxOUTPUT:
Saving debug log to /var/log/letsencrypt/letsencrypt.log
Enter email address (used for urgent renewal and security notices)
(Enter 'c' to cancel): [email protected]
- - - - - - - - - - - - - - - - - - - - - - - - - - - - - - - - - - - - - - - -
Please read the Terms of Service at
https://letsencrypt.org/documents/LE-SA-v1.2-November-15-2017.pdf. You must
agree in order to register with the ACME server. Do you agree?
- - - - - - - - - - - - - - - - - - - - - - - - - - - - - - - - - - - - - - - -
(Y)es/(N)o: Y
- - - - - - - - - - - - - - - - - - - - - - - - - - - - - - - - - - - - - - - -
Would you be willing, once your first certificate is successfully issued, to
share your email address with the Electronic Frontier Foundation, a founding
partner of the Let's Encrypt project and the non-profit organization that
develops Certbot? We'd like to send you email about our work encrypting the web,
EFF news, campaigns, and ways to support digital freedom.
- - - - - - - - - - - - - - - - - - - - - - - - - - - - - - - - - - - - - - - -
(Y)es/(N)o: Y
Account registered.
Which names would you like to activate HTTPS for?
- - - - - - - - - - - - - - - - - - - - - - - - - - - - - - - - - - - - - - - -
1: domain.com
2: www.domain.com
- - - - - - - - - - - - - - - - - - - - - - - - - - - - - - - - - - - - - - - -
Select the appropriate numbers separated by commas and/or spaces, or leave input
blank to select all options shown (Enter 'c' to cancel): 1,2
Requesting a certificate for domain.com
Successfully received certificate.
Certificate is saved at: /etc/letsencrypt/live/domain.com/fullchain.pem
Key is saved at: /etc/letsencrypt/live/domain.com/privkey.pem
This certificate expires on 2022-07-28.
These files will be updated when the certificate renews.
Certbot has set up a scheduled task to automatically renew this certificate in the background.
Deploying certificate
Successfully deployed certificate for domain.com to /etc/nginx/sites-enabled/domain.com.conf
Congratulations! You have successfully enabled HTTPS on https://domain.com
- - - - - - - - - - - - - - - - - - - - - - - - - - - - - - - - - - - - - - - -
If you like Certbot, please consider supporting our work by:
* Donating to ISRG / Let's Encrypt: https://letsencrypt.org/donate
* Donating to EFF: https://eff.org/donate-le
- - - - - - - - - - - - - - - - - - - - - - - - - - - - - - - - - - - - - - - -¡Eso es todo, felicidades!
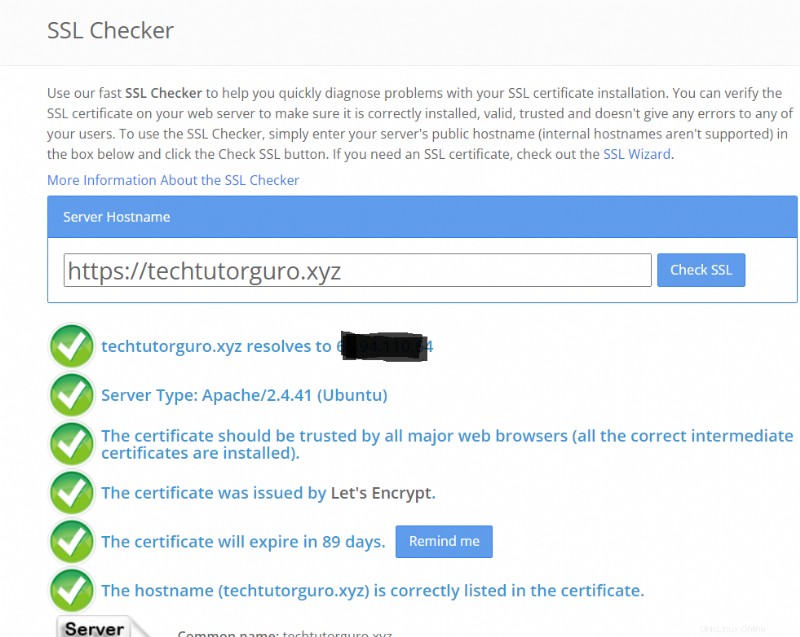
4 Probar el certificado SSL
Después de la instalación, puede verificar si el certificado SSL está instalado en su sitio web simplemente accediendo con https://domain.com. También puede verificarlo utilizando un sitio web SSL Checker como https://www.sslshopper.com/ssl-checker.html.
5 Renovación del certificado SSL
Cuando instala Certbot configurará automáticamente un script de renovación automática ya que Let's Encrypt solo es válido dentro de los 90 días o 3 meses. Para verificar si el script de renovación automática se está ejecutando, ejecute este comando.
systemctl status certbot.timer● certbot.timer - Run certbot twice daily
Loaded: loaded (/lib/systemd/system/certbot.timer; enabled; vendor preset: enabled)
Active: active (waiting) since Sun 2021-12-05 13:33:10 EST; 45min ago
Trigger: Mon 2021-12-06 00:10:45 EST; 9h left
Triggers: ● certbot.service
Dec 05 13:33:10 domain.com systemd[1]: Started Run certbot twice daily.El Certbot el temporizador se ejecutará dos veces al día para verificar si hay dominios que estén listos para la renovación.
Hay casos en los que el temporizador de Certbot no puede renovar los dominios a tiempo, lo que hace que caduquen los certificados. En este caso, puede renovar manualmente los dominios ejecutando este comando.
sudo certbot renewTambién puede hacer una prueba de renovación para probar si la renovación de SSL funciona como se esperaba. Para hacerlo, ejecute este comando.
sudo certbot renew --dry-run6 Conclusión
Hemos demostrado cómo asegurar nuestros sitios usando el certificado SSL de Let's Encrypt. En este tutorial, también podrá aprender a usar Certbot para renovar y obtener un certificado Let's Encrypt SSL gratuito.
Si desea obtener más información sobre cómo proteger su servidor, puede consultar el tutorial de fail2ban.