Matomo, anteriormente conocido como Piwik, es una aplicación de análisis web gratuita y de código abierto desarrollada por una comunidad de desarrolladores. Se utiliza para rastrear su sitio web y brindar información detallada sobre su sitio web y sus visitantes, incluidos los motores de búsqueda y las palabras clave que usaron, el idioma que hablan, las páginas que les gustan, los archivos que descargan y mucho más. Ofrece una gran cantidad de funciones que incluyen Google AdWords, Facebook Ads, Yahoo, Search Marketing, API de seguimiento e informes y costo por clic (CPC).
En este tutorial, le mostraré cómo instalar Matomo en Debian 11 con un servidor web Apache2 y un certificado Let's Encrypt SSL gratuito.
Requisitos
- Un servidor que ejecuta Debian 11.
- Un nombre de dominio válido apuntado con la IP de su servidor.
- Se configura una contraseña raíz en el servidor.
Instalar Apache, MariaDB y PHP
Primero, deberá instalar el servidor web Apache, el servidor de base de datos MariaDB, PHP y otras extensiones de PHP en su servidor. Puede instalarlos todos ejecutando el siguiente comando:
apt-get install apache2 mariadb-server php libapache2-mod-php php-cli php-fpm php-fpm php-json php-json php-common php-mysql php-zip php-gd php-mbstring php-curl php-xml php-pear php-bcmath curl unzip -y
Después de instalar todos los paquetes, inicie y habilite el servicio Apache y MariaDB usando el siguiente comando:
systemctl start apache2 mariadb
systemctl enable apache2 mariadb
Una vez que haya terminado, puede continuar con el siguiente paso.
Crear una base de datos MariaDB para Matomo
Matomo usa MariaDB como base de datos. Por lo tanto, deberá crear una base de datos y un usuario para Matomo.
Primero, inicie sesión en MariaDB con el siguiente comando:
mysql
Una vez que haya iniciado sesión, cree una base de datos y un usuario con el siguiente comando:
MariaDB [(none)]> CREATE DATABASE matomodb;
MariaDB [(none)]> CREATE USER 'matomo'@'localhost' IDENTIFIED BY 'password';
A continuación, otorgue todos los privilegios a la base de datos de Matomo con el siguiente comando:
MariaDB [(none)]> GRANT ALL ON matomodb.* TO 'matomo'@'localhost' WITH GRANT OPTION;
A continuación, elimine los privilegios y salga del shell de MariaDB con el siguiente comando:
MariaDB [(none)]> FLUSH PRIVILEGES;
MariaDB [(none)]> EXIT;
Después de configurar la base de datos MariaDB, puede continuar con el siguiente paso.
Descargar Matomo
A continuación, visite el sitio web oficial de Matomo y descargue la última versión de Matomo con el siguiente comando:
wget http://builds.matomo.org/matomo-latest.zip
Una vez completada la descarga, descomprima el archivo descargado con el siguiente comando:
unzip matomo-latest.zip
A continuación, mueva el directorio extraído al directorio raíz web de Apache:
mv matomo /var/www/html/matomo
A continuación, cambie la propiedad y el permiso del directorio Matomo:
chown -R www-data:www-data /var/www/html/matomo
chmod -R 755 /var/www/html/matomo
Una vez que haya terminado, puede continuar con el siguiente paso.
Configurar Apache para Matomo
A continuación, deberá crear un archivo de configuración de host virtual de Apache para alojar Matomo en Internet. Puedes crearlo con el siguiente comando:
nano /etc/apache2/sites-available/matomo.conf
Agregue las siguientes líneas:
<VirtualHost *:80>

ServerAdmin [email protected]
ServerName matomo.example.com
DocumentRoot /var/www/html/matomo/

<Directory /var/www/html/matomo>
DirectoryIndex index.php
Options FollowSymLinks
AllowOverride All
Require all granted
</Directory>

<Files "console">
Options None
Require all denied
</Files>

<Directory /var/www/html/matomo/misc/user>
Options None
Require all granted
</Directory>

<Directory /var/www/html/matomo/misc>
Options None
Require all denied
</Directory>

<Directory /var/www/html/matomo/vendor>
Options None
Require all denied
</Directory>

ErrorLog ${APACHE_LOG_DIR}/matomo_error.log
CustomLog ${APACHE_LOG_DIR}/matomo_access.log combined


</VirtualHost>
Guarde y cierre el archivo cuando haya terminado, luego active el host virtual de Matomo y el módulo de reescritura de Apache con el siguiente comando:
a2ensite matomo.conf
a2enmod rewrite
A continuación, reinicie el servicio Apache para aplicar los cambios:
systemctl restart apache2
También puede verificar el estado de Apache con el siguiente comando:
systemctl status apache2
Obtendrá el siguiente resultado:
? apache2.service - The Apache HTTP Server
     Loaded: loaded (/lib/systemd/system/apache2.service; enabled; vendor preset: enabled)
     Active: active (running) since Sun 2022-03-06 06:33:24 UTC; 5s ago
       Docs: https://httpd.apache.org/docs/2.4/
    Process: 55482 ExecStart=/usr/sbin/apachectl start (code=exited, status=0/SUCCESS)
   Main PID: 55486 (apache2)
      Tasks: 6 (limit: 4679)
     Memory: 12.4M
        CPU: 108ms
     CGroup: /system.slice/apache2.service
             ??55486 /usr/sbin/apache2 -k start
             ??55487 /usr/sbin/apache2 -k start
             ??55488 /usr/sbin/apache2 -k start
             ??55489 /usr/sbin/apache2 -k start
             ??55490 /usr/sbin/apache2 -k start
             ??55491 /usr/sbin/apache2 -k start

Mar 06 06:33:24 debian11 systemd[1]: Starting The Apache HTTP Server...
Mar 06 06:33:24 debian11 apachectl[55485]: AH00558: apache2: Could not reliably determine the server's fully qualified domain name, using 209>
Mar 06 06:33:24 debian11 systemd[1]: Started The Apache HTTP Server.
Acceder a la interfaz de usuario web de Matomo
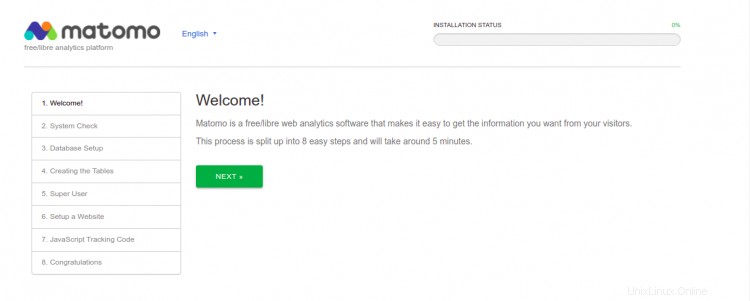
Ahora, abra su navegador web y acceda a la interfaz web de Matomo usando la URL http://matomo.example.com . Será redirigido a la siguiente página:
Haga clic en Siguiente botón. Debería ver la página de comprobación de configuración de PHP:

Asegúrese de que todas las configuraciones estén bien y luego haga clic en SIGUIENTE botón. Debería ver la página de configuración de la base de datos MariaDB:

Proporcione su servidor de base de datos, nombre de usuario, nombre de base de datos, contraseña y luego haga clic en SIGUIENTE botón. Debería ver la siguiente página:

Haga clic en SIGUIENTE botón. Debería ver la página de creación de superusuario:

Proporcione su nombre de usuario, contraseña y correo electrónico de administrador y haga clic en SIGUIENTE botón. Debería ver la página de configuración del sitio web:

Proporcione el nombre de su sitio web, URL, zona horaria y haga clic en SIGUIENTE botón. Debería ver la siguiente página:

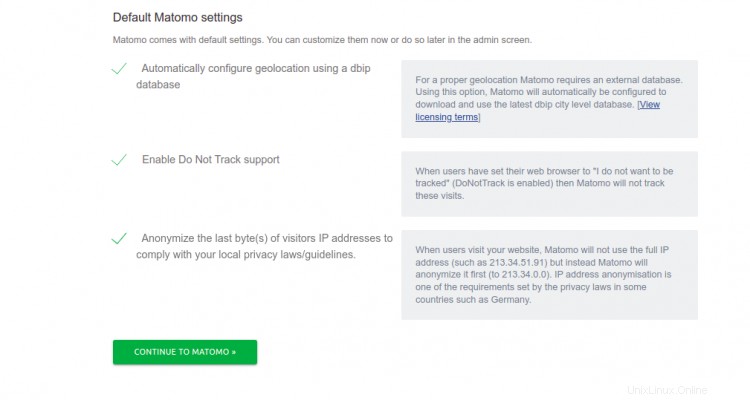
Haga clic en SIGUIENTE botón. Debería ver la página de verificación de la configuración:
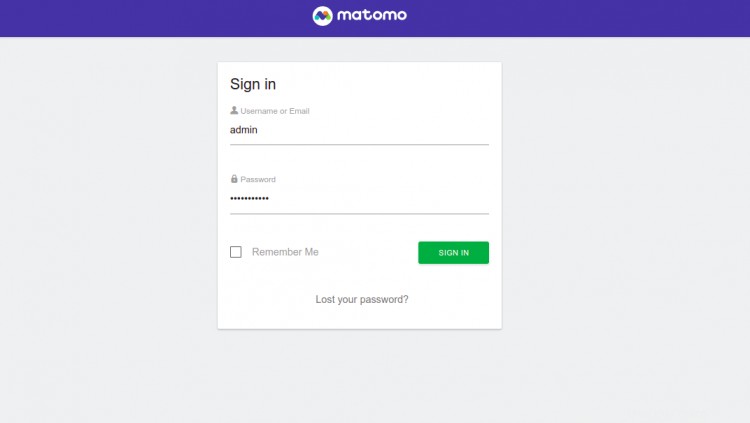
Haga clic en CONTINUAR A MATOMO . Debería ver la página de inicio de sesión de Matomo:
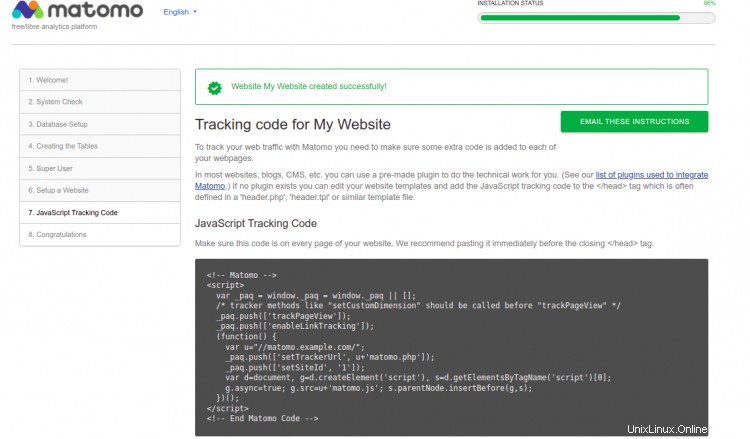
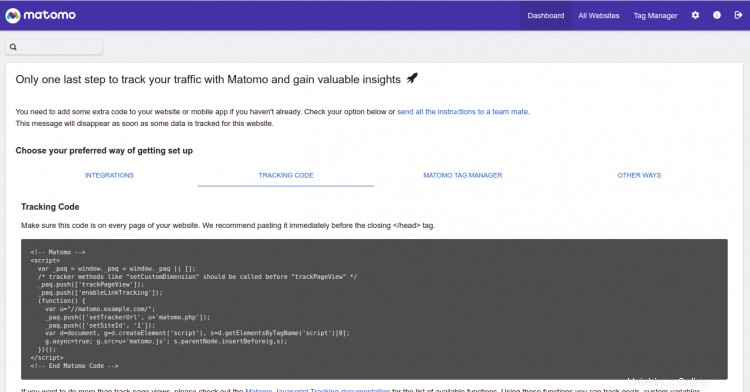
Proporcione su nombre de usuario y contraseña de administrador y haga clic en INICIAR SESIÓN botón. Debería ver el panel de control de Matomo en la siguiente página:ahora puede copiar el código de seguimiento que se muestra en la imagen de arriba y pegarlo en todas las páginas de su sitio web.
Asegure Matomo con Let's Encrypt SSL
A continuación, deberá instalar el cliente Certbot para instalar Let's Encrypt SSL para su sitio web. Puede instalarlo con el siguiente comando:
dnf install epel-release -y dnf install certbot python3-certbot-apache
A continuación, obtenga e instale un certificado SSL para su dominio de Lets con el siguiente comando:
certbot --apache -d matomo.example.com
Se le pedirá que proporcione su dirección de correo electrónico y acepte el término del servicio:
Saving debug log to /var/log/letsencrypt/letsencrypt.log
Plugins selected: Authenticator apache, Installer apache
Enter email address (used for urgent renewal and security notices)
 (Enter 'c' to cancel): [email protected]

- - - - - - - - - - - - - - - - - - - - - - - - - - - - - - - - - - - - - - - -
Please read the Terms of Service at
https://letsencrypt.org/documents/LE-SA-v1.2-November-15-2017.pdf. You must
agree in order to register with the ACME server. Do you agree?
- - - - - - - - - - - - - - - - - - - - - - - - - - - - - - - - - - - - - - - -
(Y)es/(N)o: Y

- - - - - - - - - - - - - - - - - - - - - - - - - - - - - - - - - - - - - - - -
Would you be willing, once your first certificate is successfully issued, to
share your email address with the Electronic Frontier Foundation, a founding
partner of the Let's Encrypt project and the non-profit organization that
develops Certbot? We'd like to send you email about our work encrypting the web,
EFF news, campaigns, and ways to support digital freedom.
- - - - - - - - - - - - - - - - - - - - - - - - - - - - - - - - - - - - - - - -
(Y)es/(N)o: Y
Account registered.
Requesting a certificate for matomo.example.com
Performing the following challenges:
http-01 challenge for matomo.example.com
Waiting for verification...
Cleaning up challenges
Deploying Certificate to VirtualHost /etc/httpd/conf.d/matomo.conf
Redirecting all traffic on port 80 to ssl in /etc/httpd/conf.d/matomo.conf

- - - - - - - - - - - - - - - - - - - - - - - - - - - - - - - - - - - - - - - -
Congratulations! You have successfully enabled https://matomo.example.com
- - - - - - - - - - - - - - - - - - - - - - - - - - - - - - - - - - - - - - - -
Subscribe to the EFF mailing list (email: [email protected]).


IMPORTANT NOTES:
 - Congratulations! Your certificate and chain have been saved at:
   /etc/letsencrypt/live/matomo.example.com/fullchain.pem
   Your key file has been saved at:
   /etc/letsencrypt/live/matomo.example.com/privkey.pem
   Your certificate will expire on 2022-05-09. To obtain a new or
   tweaked version of this certificate in the future, simply run
   certbot again with the "certonly" option. To non-interactively
   renew *all* of your certificates, run "certbot renew"
 - If you like Certbot, please consider supporting our work by:

   Donating to ISRG / Let's Encrypt:   https://letsencrypt.org/donate
   Donating to EFF:                    https://eff.org/donate-le
Conclusión
¡Felicidades! Ha instalado correctamente Matomo en Debian 11. Ahora puede agregar un código de seguimiento a su sitio web y comenzar a monitorearlo desde el panel de control de Matomo. Siéntase libre de preguntarme si tiene alguna pregunta.