Este es un "copiar y pegar" Cómo! La forma más sencilla de seguir este tutorial es utilizar un cliente de línea de comandos/cliente SSH (como PuTTY para Windows) y simplemente copiar y pegar los comandos (excepto cuando tenga que proporcionar información propia como direcciones IP, nombres de host, contraseñas,... ). Esto ayuda a evitar errores tipográficos.
La configuración perfecta - Debian Sarge (3.1)
Versión 1.9
Autor:Falko Timme
Esta es una descripción detallada sobre los pasos a seguir para configurar un Debian servidor basado en (Debian Sarge alias Debian 3.1) que ofrece todos los servicios que necesitan los ISP y hosters (servidor web (compatible con SSL), servidor de correo (¡con SMTP-AUTH y TLS!), servidor DNS, servidor FTP, servidor MySQL, POP3/POP3s/ IMAP/IMAP, cuota, cortafuegos, etc.).
Usaré el siguiente software:
- Servidor web:Apache 2.0.x
- Servidor de correo:Postfix (más fácil de configurar que sendmail; tiene un historial más corto de agujeros de seguridad que sendmail)
- Servidor DNS:BIND9
- Servidor FTP:proftpd
- POP3/POP3s/IMAP/IMAPs:en este ejemplo, puede elegir entre el formato de buzón UNIX tradicional (luego usamos ipopd/ uw-imapd) o el formato Maildir (en este caso usaremos Courier-POP3/Courier-IMAP).
- Webalizer para estadísticas de sitios web
Al final, debe tener un sistema que funcione de manera confiable y esté listo para el panel de control de alojamiento web gratuito ISPConfig (es decir, ISPConfig se ejecuta en él fuera del caja).
Quiero decir primero que esta no es la única forma de configurar dicho sistema. Hay muchas maneras de lograr este objetivo, pero este es el camino que tomo. ¡No emito ninguna garantía de que esto funcione para usted!
Requisitos
Para instalar dicho sistema necesitará lo siguiente:
- Un CD de instalación de Debian SargeNet (disponible aquí:http://ftp.de.debian.org/debian-cd/3.1_r0a) /i386/iso-cd/debian-31r0a-i386-netinst.iso)
- una conexión a Internet ya que describiré una instalación de red en este documento
1 Sistema TheBase
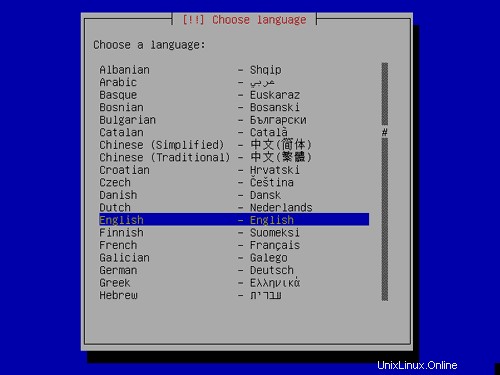
Inserte su CD de instalación de SargeNet en su sistema y arranque desde él (ingrese linux26 en el indicador de arranque para instalar un kernel 2.6). Comienza la instalación, y primero tienes que elegir tu idioma:
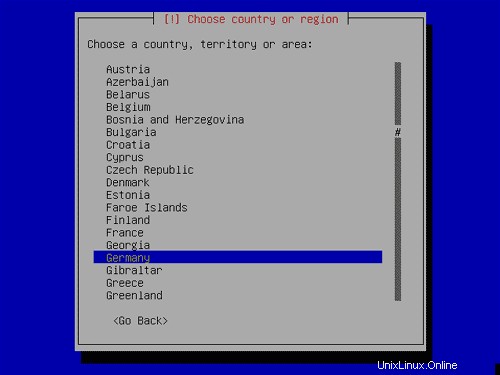
Seleccione su país:
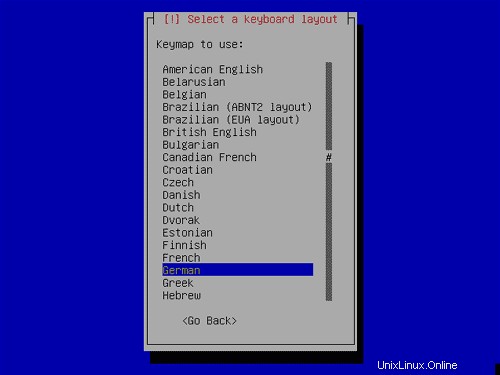
Elija un diseño de teclado:
La detección de hardware comienza:
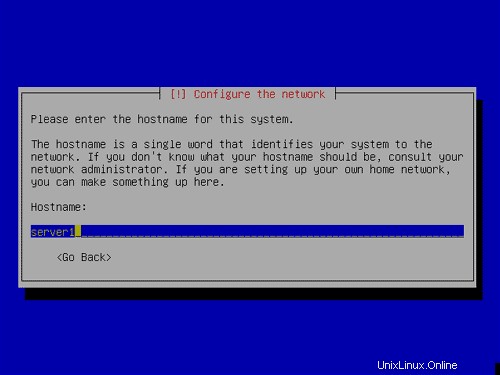
Ingrese el nombre de host. En este ejemplo, mi sistema se llama servidor1 .ejemplo.com ,entonces ingreso servidor1 :
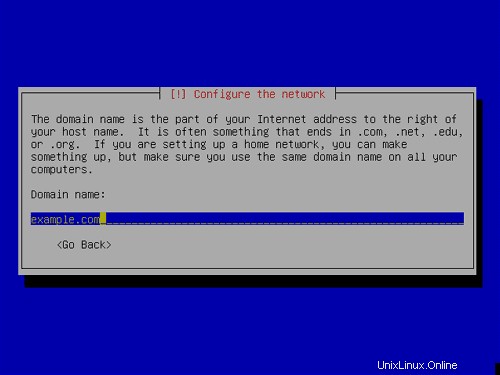
Ingrese su nombre de dominio. En este ejemplo, esto es example.com :
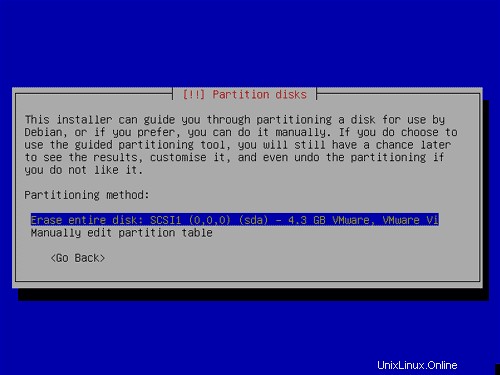
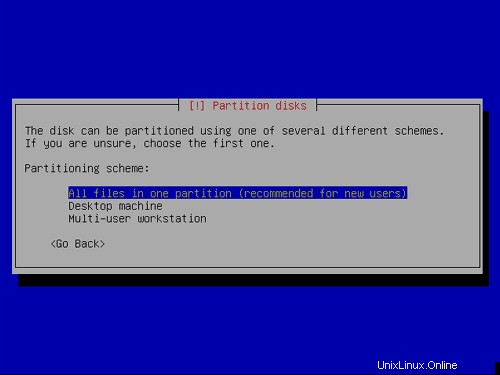
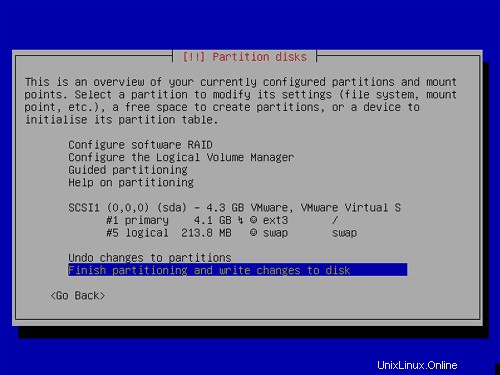
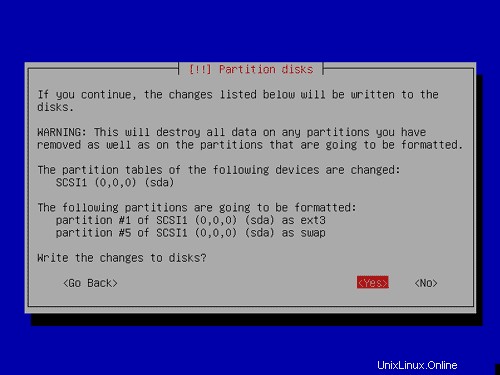
Ahora tiene que particionar su disco duro. Crearé una partición grande (con el punto de montaje / ) y una pequeña partición de intercambio:
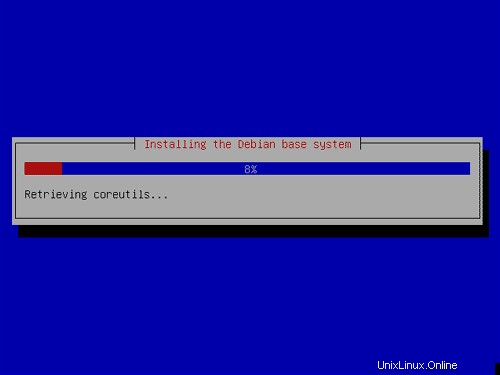
Ahora se está instalando el sistema base:
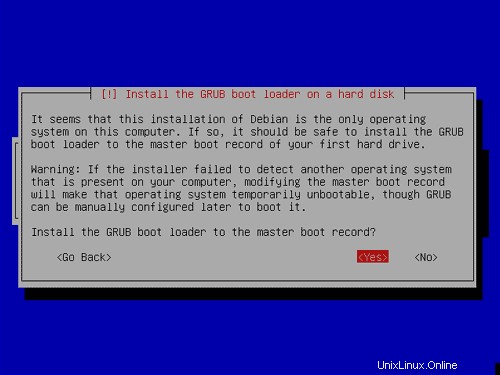
Instale el cargador de arranque GRUB al registro de arranque maestro:
Después, extraiga el CD Sarge Netinstall de su sistema y reinícielo:
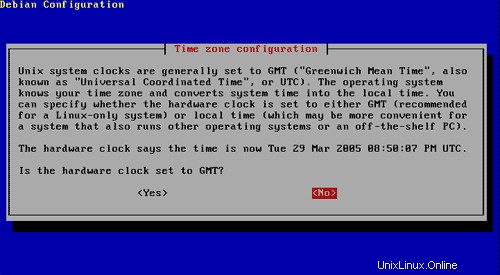
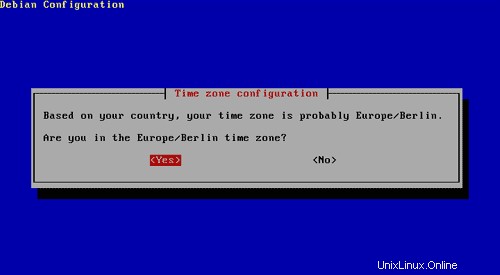
Configura tu zona horaria:
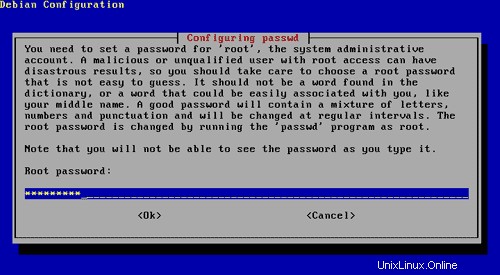
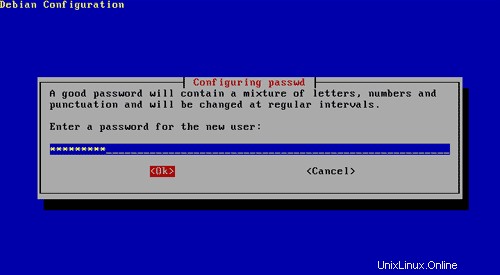
Ingrese una contraseña para raíz :
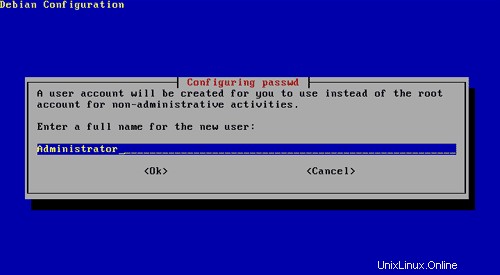
Crear un segundo usuario administrador :

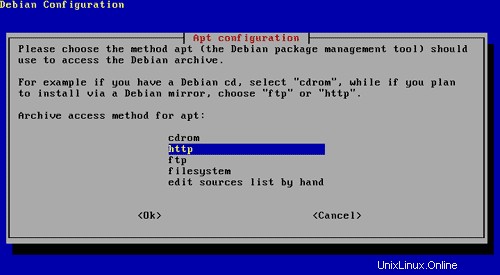
Elija su método de instalación. Como quiero hacer una instalación a través de la red, selecciono http o ftp .
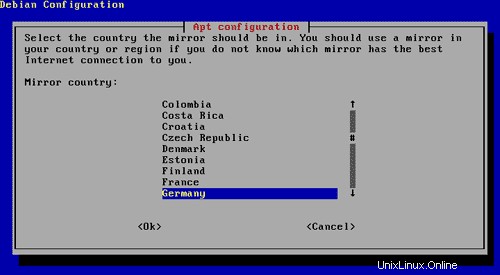
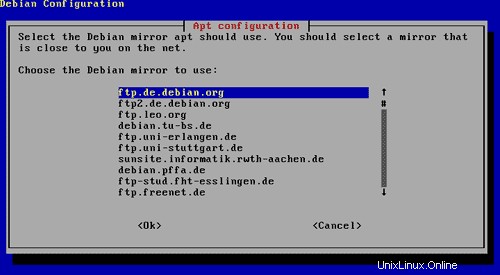
Seleccione un espejo para su instalación:
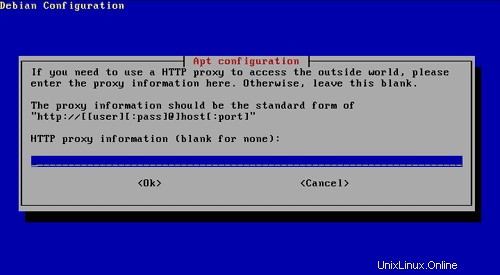
Ingrese un proxy para la instalación (si es necesario) . Normalmente puede dejar este campo vacío.
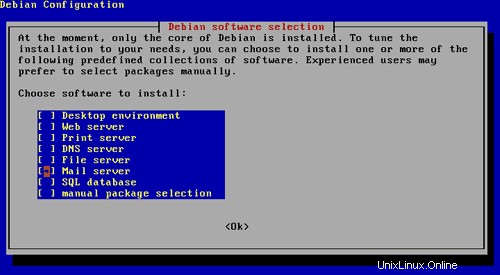
En Selección de software Debian Solo elijo Servidor de correo . Instalaré todos los demás servicios manualmente más adelante.
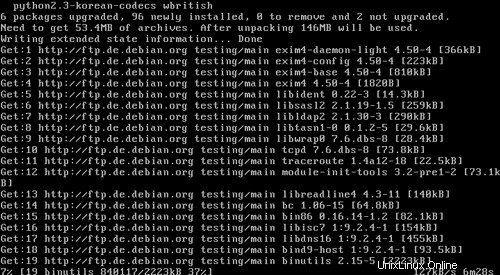
La instalación de la red comienza:
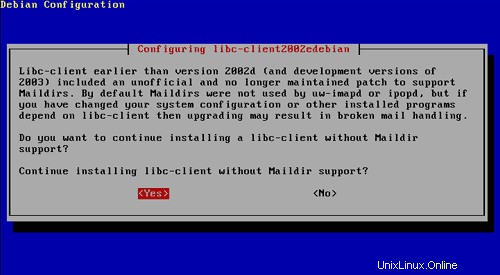
Continúe instalando libc-client sin compatibilidad con Maildir. Si desea utilizar Maildir, puede instalar Courier-POP3 /Courier-IMAP (explicado más adelante):
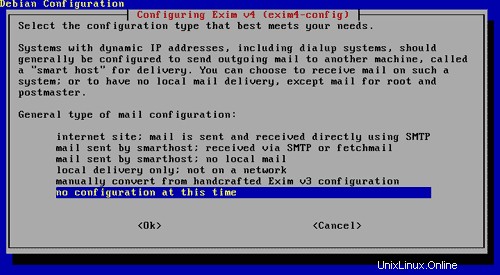
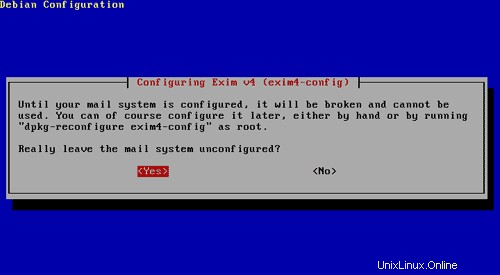
No configurar Exim ya que lo reemplazaremos con Postfix más tarde:
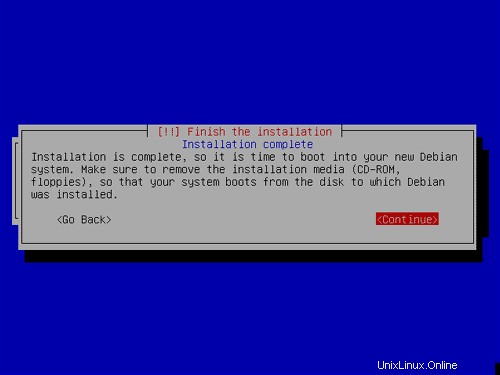
¡Felicitaciones! Su sistema base ya está terminado:
Al siguiente paso...
2 Instalación y configuración del resto del sistema
Configurar la red
Debido a que el instalador de DebianSarge configuró nuestro sistema para obtener su configuración de red a través de DHCP, debemos cambiar eso ahora porque un servidor debe tener una Dirección IP.Editar /etc/network/interfaces y ajústelo a sus necesidades (en este ejemplo de configuración usaré la dirección IP 192.168.0.100 ):
# /etc/network/interfaces -- configuration file for ifup(8), ifdown(8)

# The loopback interface
auto lo
iface lo inet loopback

# The first network card - this entry was created during the Debian installation
# (network, broadcast and gateway are optional)
auto eth0
iface eth0 inet static
        address 192.168.0.100
        netmask 255.255.255.0
        network 192.168.0.0
        broadcast 192.168.0.255
gateway 192.168.0.1 |
Si desea agregar la dirección IP 192.168.0.101 a la interfaz eth0 debe cambiar el archivo para que se vea así:
# /etc/network/interfaces -- configuration file for ifup(8), ifdown(8)

# The loopback interface
auto lo
iface lo inet loopback

# The first network card - this entry was created during the Debian installation
# (network, broadcast and gateway are optional)
auto eth0
iface eth0 inet static
        address 192.168.0.100
        netmask 255.255.255.0
        network 192.168.0.0
        broadcast 192.168.0.255
        gateway 192.168.0.1

auto eth0:0
iface eth0:0 inet static
        address 192.168.0.101
        netmask 255.255.255.0
        network 192.168.0.0
        broadcast 192.168.0.255
gateway 192.168.0.1 |
Luego reinicie su red:
/etc/init.d/networkingrestart
Editar /etc/resolv.conf y agregue algunos servidores de nombres:
search server
nameserver 145.253.2.75
nameserver 193.174.32.18
nameserver 194.25.0.60 |
Editar /etc/hosts y agregue sus nuevas direcciones IP:
127.0.0.1       localhost.localdomain   localhost       server1
192.168.0.100   server1.example.com     server1
192.168.0.101   virtual-ip1.example.com     virtual-ip1


# The following lines are desirable for IPv6 capable hosts
::1     ip6-localhost ip6-loopback
fe00::0 ip6-localnet
ff00::0 ip6-mcastprefix
ff02::1 ip6-allnodes
ff02::2 ip6-allrouters
ff02::3 ip6-allhosts |
Configuración del nombre de host
echo server1.example.com> /etc/hostname
/bin/nombre de host -F /etc/nombre de host
Instalar/eliminar algún software
Ahora instalemos algún software que necesitemos más adelante y eliminemos algunos paquetes que no necesitamos:
apt-get install wget bzip2rdate fetchmail libdb3++-dev unzip zip ncftp xlispstat libarchive-zip-perl zlib1g-devlibpopt-dev nmap openssl lynx fileutils g++
apt-get remove lpr nfs-commonportmap pidentd pcmcia-cs pppoe pppoeconf ppp pppconfig
update-rc.d -f exim remove
update-inetd --removedaytime
update-inetd --remove telnet
update-inetd - -remove time
update-inetd --remove finger
update-inetd --remove talk
update-inetd --remove ntalk
update-inetd --remove ftp
actualizar-inetd --eliminar descartar
<- Sí
/etc/init.d/openbsd-inetd reload
Cuota
apt-get install quota quotatool
<- No
Editar /etc/fstab para verse así (agregué ,usrquota,grpquota a la partición con el punto de montaje / ):
# /etc/fstab: static file system information.
#
# <file system> <mount point>   <type>  <options>       <dump>  <pass>
proc            /proc           proc    defaults        0       0
/dev/sda1       /               ext3    defaults,errors=remount-ro,usrquota,grpquota 0       1
/dev/sda5       none            swap    sw              0       0
/dev/hdc        /media/cdrom0   iso9660 ro,user,noauto  0       0
/dev/fd0 /media/floppy0 auto rw,user,noauto 0 0 |
Luego ejecuta:
touch /quota.user /quota.group
chmod 600 /quota.*
mount -o remount /
control de cuota -avugm
cotización -avug
Servidor DNS
apt-getinstall bind9
Por razones de seguridad, queremos ejecutar BIND en chroot, por lo que debemos realizar los siguientes pasos:
/etc/init.d/bind9 parada
Edite el archivo /etc/default/bind9 para que el demonio se ejecute como el usuario sin privilegios 'bind ', enrutado a /var/lib/named .Modifique la línea:OPTS=" -ubind " para que lea OPTS="-u bind-t /var/lib/named" :
OPTIONS="-u bind -t /var/lib/named" |
Cree los directorios necesarios en /var/lib :
mkdir -p /var/lib/named/etc
mkdir /var/lib/named/dev
mkdir -p /var/lib/named/var/cache/bind
mkdir -p /var/lib/named/var/run/bind/run
Luego mueva el directorio de configuración de /etc a /var/lib/named/etc :
mv /etc/bind /var/lib/named/etc
Cree un enlace simbólico al nuevo directorio de configuración desde la ubicación anterior (para evitar problemas cuando se actualice bindis en el futuro):
ln -s /var/lib/named/etc/bind/etc/bind
Hacer dispositivos nulos y aleatorios, y arreglar los permisos de los directorios:
mknod /var/lib/named/dev/nullc 1 3
mknod /var/lib/named/dev /random c 1 8
chmod 666 /var/lib/named/dev/null /var/lib/named/dev/random
chown -R bind:bind /var/lib/named/var/ *
chown -R enlazar:enlazar /var/lib/named/etc/bind
Necesitamos modificar el script de inicio /etc/init.d/ registro del sistema de sysklogd para que aún podamos obtener mensajes importantes registrados en los registros del sistema. Modifique la línea: SYSLOGD="" para que diga:SYSLOGD="-a/var/lib/named/dev/log" :
#! /bin/sh
# /etc/init.d/sysklogd: start the system log daemon.

PATH=/bin:/usr/bin:/sbin:/usr/sbin

pidfile=/var/run/syslogd.pid
binpath=/sbin/syslogd

test -x $binpath || exit 0

# Options for start/restart the daemons
#   For remote UDP logging use SYSLOGD="-r"
#
SYSLOGD="-a /var/lib/named/dev/log"

create_xconsole()
{
    if [ ! -e /dev/xconsole ]; then
        mknod -m 640 /dev/xconsole p
    else
        chmod 0640 /dev/xconsole
    fi
    chown root:adm /dev/xconsole
}

running()
{
    # No pidfile, probably no daemon present
    #
    if [ ! -f $pidfile ]
    then
        return 1
    fi

    pid=`cat $pidfile`

    # No pid, probably no daemon present
    #
    if [ -z "$pid" ]
    then
        return 1
    fi

    if [ ! -d /proc/$pid ]
    then
        return 1
    fi

    cmd=`cat /proc/$pid/cmdline | tr "\000" "\n"|head -n 1`

    # No syslogd?
    #
    if [ "$cmd" != "$binpath" ]
    then
        return 1
    fi

    return 0
}

case "$1" in
  start)
    echo -n "Starting system log daemon: syslogd"
    create_xconsole
    start-stop-daemon --start --quiet --exec $binpath -- $SYSLOGD
    echo "."
    ;;
  stop)
    echo -n "Stopping system log daemon: syslogd"
    start-stop-daemon --stop --quiet --exec $binpath --pidfile $pidfile
    echo "."
    ;;
  reload|force-reload)
    echo -n "Reloading system log daemon: syslogd"
    start-stop-daemon --stop --quiet --signal 1 --exec $binpath --pidfile $pidfile
    echo "."
    ;;
  restart)
    echo -n "Restarting system log daemon: syslogd"
    start-stop-daemon --stop --quiet --exec $binpath --pidfile $pidfile
    sleep 1
    start-stop-daemon --start --quiet --exec $binpath -- $SYSLOGD
    echo "."
    ;;
  reload-or-restart)
    if running
    then
        echo -n "Reloading system log daemon: syslogd"
        start-stop-daemon --stop --quiet --signal 1 --exec $binpath --pidfile $pidfile
    else
        echo -n "Restarting system log daemon: syslogd"
        start-stop-daemon --start --quiet --exec $binpath -- $SYSLOGD
    fi
    echo "."
    ;;
  *)
    echo "Usage: /etc/init.d/sysklogd {start|stop|reload|restart|force-reload|reload-or-restart}"
    exit 1
esac

exit 0 |
Reiniciar el loggingdaemon:
/etc/init.d/sysklogd restart
Inicie BIND y verifique /var/log/syslog por cualquier error:
/etc/init.d/bind9 start
MySQL
apt-getinstall mysql-server mysql-client libmysqlclient12-dev
mysqladmin -u root passwordyourrootsqlpassword
Cuando ejecuta netstat-tap ahora debería ver una línea como esta:
tcp 0 0 localhost.localdo:mysql *:* LISTEN 2449/mysqld
|
lo que significa que se puede acceder a MySQL en 127.0.0.1 en el puerto 3306. Puede ir a la siguiente sección (Postfix). Si no ve esta línea, edite /etc/mysql/my.cnf y comenta skip-networking :
# skip-networking
|
Si desea que MySQL escuche en todas las direcciones IP disponibles, edite /etc/mysql/my.cnf y comenta bind-address =127.0.0.1 :
#bind-address = 127.0.0.1
|
Si tuviera que editar /etc/mysql/my.cnf tienes que reiniciar MySQL:
/etc/init.d/mysql restart
Si MySQL está escuchando en todas las interfaces, ahora también debe establecer una contraseña de MySQL para servidor1.ejemplo.com porque de lo contrario cualquiera podría acceder a su base de datos:
mysqladmin -h server1.example.com -u root password yourrootsqlpassword
Postfix/POP3/IMAP
Para instalar Postfix con SMTP-AUTH y TLS así como un servidor POP3 que también hace POP3s (puerto 995) y un servidor IMAP que también es compatible con IMAP (puerto 993) siga los siguientes pasos:
apt-get install postfixpostfix-tls libsasl2 sasl2-bin libsasl2-modules ipopd-ssl uw-imapd-ssl (¡1 línea!)
<- pop3 y pop3s
<- No
<- Sitio de Internet
<- NINGUNO
<- servidor1.ejemplo.com
<- servidor1.ejemplo.com, localhost.ejemplo.com, localhost
<- No
postconf -e 'smtpd_sasl_local_domain='
postconf -e 'smtpd_sasl_auth_enable =yes'
postconf -e 'smtpd_sasl_security_options =noanonymous'
postconf -e 'broken_sasl_auth_clients =yes'
postconf -e 'smtpd_recipient_restrictions =permit_sasl_authenticated,permit_mynetworks,reject_unauth_destination'
postconf -e 'inet_interfaces =all'
echo 'pwcheck_method:saslauthd'>> /etc/postfix/sasl/smtpd.conf
echo 'mech_list:inicio de sesión simple'>> /etc/postfix/sasl/smtpd.conf
mkdir /etc/postfix/ssl
cd /etc/postfix/ssl/
openssl genrsa - des3 -rand /etc/hosts -out smtpd.key 1024
chmod 600 smtpd.key
openssl req -new -key smtpd.key -out smtpd.csr
openssl x509 -req -days 3650 -in smtpd.csr -signkey smtpd.key -out smtpd.crt
openssl rsa -in smtpd.key -out smtpd.key.unencrypted
mv -f smtpd.key.unencrypted smtpd.key
openssl req -nuevo -x509 -extensiones v3_ca -keyout cakey.pem -out cacert.pem -days3650
postconf -e 'smtpd_tls_auth_only=no'
postconf -e 'smtp_use_tls =yes'
postconf - e 'smtpd_use_tls =yes'
postconf -e 'smtp_tls_note_starttls_offer =yes'
postconf -e 'smtpd_tls_key_file =/etc/postfix/ssl/smtpd.key'
postconf -e 'smtpd_tls_cert_file =/ etc/postfix/ssl/smtpd.crt'
postconf -e 'smtpd_tls_CAfile =/etc/postfix/ssl/cacert.pem'
postconf -e 'smtpd_tls_loglevel =1'
postconf -e 'smtpd_tls_received_header =yes'
postconf -e 'smtpd_tls_session_cache_timeout =3600s'
postconf -e 'tls_random_source =dev:/dev/urandom'
El archivo /etc/postfix/main.cf ahora debería verse así:
# See /usr/share/postfix/main.cf.dist for a commented, more complete version

smtpd_banner = $myhostname ESMTP $mail_name (Debian/GNU)
biff = no

# appending .domain is the MUA's job.
append_dot_mydomain = no

# Uncomment the next line to generate "delayed mail" warnings
#delay_warning_time = 4h

myhostname = server1.example.com
alias_maps = hash:/etc/aliases
alias_database = hash:/etc/aliases
myorigin = /etc/mailname
mydestination = server1.example.com, localhost.example.com, localhost
relayhost =
mynetworks = 127.0.0.0/8
mailbox_command = procmail -a "$EXTENSION"
mailbox_size_limit = 0
recipient_delimiter = +
inet_interfaces = all
smtpd_sasl_local_domain =
smtpd_sasl_auth_enable = yes
smtpd_sasl_security_options = noanonymous
broken_sasl_auth_clients = yes
smtpd_recipient_restrictions = permit_sasl_authenticated,permit_mynetworks,reject_unauth_destination
smtpd_tls_auth_only = no
smtp_use_tls = yes
smtpd_use_tls = yes
smtp_tls_note_starttls_offer = yes
smtpd_tls_key_file = /etc/postfix/ssl/smtpd.key
smtpd_tls_cert_file = /etc/postfix/ssl/smtpd.crt
smtpd_tls_CAfile = /etc/postfix/ssl/cacert.pem
smtpd_tls_loglevel = 1
smtpd_tls_received_header = yes
smtpd_tls_session_cache_timeout = 3600s
tls_random_source = dev:/dev/urandom |
/etc/init.d/postfixrestart
Authenticationwill be done by saslauthd .We have to change a few things to make it work properly. Because Postfix runschrooted in /var/spool/postfix we have to do the following:
mkdir -p /var/spool/postfix/var/run/saslauthd
Now we have toedit /etc/default/saslauthd in order to activate saslauthd .Remove # in front of START=yes and add the line PARAMS="-m /var/spool/postfix/var/run/saslauthd -r" :
# This needs to be uncommented before saslauthd will be run automatically
START=yes

PARAMS="-m /var/spool/postfix/var/run/saslauthd -r"

# You must specify the authentication mechanisms you wish to use.
# This defaults to "pam" for PAM support, but may also include
# "shadow" or "sasldb", like this:
# MECHANISMS="pam shadow"

MECHANISMS="pam"
|
We must also edit /etc/init.d/saslauthd and change the location of saslauthd's PID file. Change the value of PIDFILE to /var/spool/postfix/var/run/${NAME}/saslauthd.pid :
PIDFILE="/var/spool/postfix/var/run/${NAME}/saslauthd.pid" |
Now start saslauthd :
/etc/init.d/saslauthd start
Next we create the file /etc/c-client.cf with the following contents:
I accept the risk
set disable-plaintext 0
|
and restart inetd :
/etc/init.d/openbsd-inetd restart
If we don't do this, then our POP3/IMAP logins will fail.
To see if SMTP-AUTHand TLS work properly now run the following command:
telnetlocalhost 25
After you haveestablished the connection to your postfix mail server type
ehlolocalhost
If you see thelines
250-STARTTLS
and
250-AUTH
everything is fine.
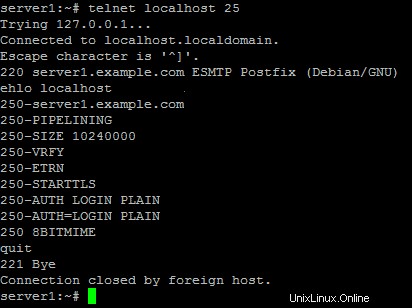
Type
quit
to return to thesystem's shell.
Courier-IMAP/Courier-POP3
If you want touse a POP3/IMAP daemon that has Maildir support (if you do not want to use thetraditional Unix mailbox format) you can install Courier-IMAP/Courier-IMAP-SSL(for IMAPs on port 993) and Courier-POP3/Courier-POP3-SSL (for POP3s on port995). Otherwise you can proceed with the Apache configuration.
apt-get install courier-imapcourier-imap-ssl courier-pop courier-pop-ssl
<- No
ipopd and UW-IMAPwill then be replaced.
Then configurePostfix to deliver emails to a user's Maildir*:
postconf -e 'home_mailbox=Maildir/'
postconf -e 'mailbox_command ='
/etc/init.d/postfix restart
*Please note:Youdo not have to do this if you intend to use ISPConfigon your system as ISPConfig does the necessary configuration using procmailrecipes. But please go sure to enable Maildir under Management -> Settings ->EMail in the ISPConfig web interface.