Este tutorial muestra cómo preparar un servidor Debian Jessie (con Apache2, BIND, Dovecot) para la instalación de ISPConfig 3 y cómo instalar ISPConfig 3. El panel de control de alojamiento web ISPConfig 3 le permite configurar los siguientes servicios a través de un navegador web:Servidor web Apache o nginx, servidor de correo Postfix, servidor Courier o Dovecot IMAP/POP3, servidor de nombres MySQL, BIND o MyDNS, PureFTPd, SpamAssassin, ClamAV y muchos más. Esta configuración cubre Apache (en lugar de nginx), BIND (en lugar de MyDNS) y Dovecot (en lugar de Courier).
1 Nota Preliminar
En este tutorial usaré el nombre de host server1.example.com con la dirección IP 192.168.1.100 y la puerta de enlace 192.168.1.1. Estas configuraciones pueden diferir para usted, por lo que debe reemplazarlas cuando corresponda. Antes de continuar, debe tener una instalación mínima de Debian 8. Esta puede ser una imagen mínima de Debian de su proveedor de alojamiento o puede usar el tutorial del servidor de Debian mínimo para configurar el sistema base.
2 Instalar el servidor SSH (Opcional)
Si no instaló el servidor OpenSSH durante la instalación del sistema, puede hacerlo ahora:
apt-get install ssh openssh-server
A partir de ahora, puede usar un cliente SSH como PuTTY y conectarse desde su estación de trabajo a su servidor Debian Jessie y seguir los pasos restantes de este tutorial.
3 Instalar un editor de texto de shell (Opcional)
Usaremos nano editor de texto en este tutorial. Algunos usuarios prefieren el editor vi clásico, por lo que instalaremos ambos editores aquí. El programa vi predeterminado tiene un comportamiento extraño en Debian y Ubuntu; para arreglar esto, instalamos vim-nox:
apt-get install nano vim-nox
Si vi es su editor favorito, reemplace nano con vi en los siguientes comandos para editar archivos.
4 Configure el nombre de host
El nombre de host de su servidor debe ser un subdominio como "server1.example.com". No use un nombre de dominio sin parte de subdominio como "example.com" como nombre de host, ya que esto causará problemas más adelante con la configuración de su correo. Primero debe verificar el nombre de host en /etc/hosts y cambiarlo cuando sea necesario. La línea debe ser:"Dirección IP - espacio - nombre de host completo, incluido el dominio - espacio - parte del subdominio". Para nuestro nombre de host server1.example.com, el archivo se verá así:
nano /etc/hosts
127.0.0.1       localhost.localdomain   localhost
192.168.1.100   server1.example.com     server1

# The following lines are desirable for IPv6 capable hosts
::1     localhost ip6-localhost ip6-loopback
ff02::1 ip6-allnodes
ff02::2 ip6-allrouters
Luego edite el archivo /etc/hostname:
nano /etc/hostname
Contendrá solo la parte del subdominio, en nuestro caso:
server1
Finalmente reinicie el servidor para aplicar el cambio:
reboot
Inicie sesión nuevamente y verifique si el nombre de host es correcto ahora con estos comandos:
hostname
hostname -f
La salida será así:
[email protected]:/tmp# hostname
server1
[email protected]:/tmp# hostname -f
server1.example.com
5 Actualice su instalación de Debian
Primero, asegúrese de que su /etc/apt/sources.list contenga el repositorio jessie/updates (esto asegura que siempre obtenga las actualizaciones de seguridad más recientes) y que los repositorios contrib y non-free estén habilitados (algunos paquetes como libapache2- mod-fastcgi no están en el repositorio principal).
nano /etc/apt/sources.list
#deb cdrom:[Debian GNU/Linux 8.0.0 _Jessie_ - Official amd64 NETINST Binary-1 20150425-12:50]/ jessie main

deb http://ftp.us.debian.org/debian/ jessie main contrib non-free
deb-src http://ftp.us.debian.org/debian/ jessie main contrib non-free

deb http://security.debian.org/ jessie/updates main contrib non-free
deb-src http://security.debian.org/ jessie/updates main contrib non-free
Ejecutar:
apt-get update
Para actualizar la base de datos de paquetes apt
apt-get upgrade
y para instalar las últimas actualizaciones (si las hay).
6 Cambiar el shell predeterminado
/bin/sh es un enlace simbólico a /bin/dash, sin embargo, necesitamos /bin/bash, no /bin/dash. Por lo tanto hacemos esto:
dpkg-reconfigure dash
¿Usar guión como shell del sistema predeterminado (/bin/sh)? <- no
Si no hace esto, la instalación de ISPConfig fallará.
7 Sincronizar el reloj del sistema
Es una buena idea sincronizar el reloj del sistema con un NTP (n red t tiempo p rotocol) servidor a través de Internet. Simplemente ejecuta
apt-get install ntp ntpdate
y la hora de su sistema siempre estará sincronizada.
8 Instalar Postfix, Dovecot, MySQL, phpMyAdmin, rkhunter, binutils
Podemos instalar Postfix, Dovecot, MySQL, rkhunter y binutils con un solo comando:
apt-get install postfix postfix-mysql postfix-doc mariadb-client mariadb-server openssl getmail4 rkhunter binutils dovecot-imapd dovecot-pop3d dovecot-mysql dovecot-sieve dovecot-lmtpd sudo
Cuando prefiera MySQL sobre MariaDB, reemplace los paquetes "mariadb-client mariadb-server" en el comando anterior con "mysql-client mysql-server".
Se le harán las siguientes preguntas:
Tipo general de configuración de correo:<-- Sitio de Internet
Nombre de correo del sistema:<-- server1.example.com
Nueva contraseña para el usuario "root" de MariaDB:<-- yourrootsqlpassword
Repetir contraseña para el usuario "root" de MariaDB: <-- yourrootsqlpassword
A continuación, abra TLS/SSL y los puertos de envío en Postfix:
nano /etc/postfix/master.cf
Descomente las secciones de envío y smtps de la siguiente manera y agregue líneas donde sea necesario para que esta sección del archivo master.cf se vea exactamente como la siguiente.
[...]
submission inet n - - - - smtpd
 -o syslog_name=postfix/submission
 -o smtpd_tls_security_level=encrypt
 -o smtpd_sasl_auth_enable=yes
 -o smtpd_client_restrictions=permit_sasl_authenticated,reject
# -o smtpd_reject_unlisted_recipient=no
# -o smtpd_client_restrictions=$mua_client_restrictions
# -o smtpd_helo_restrictions=$mua_helo_restrictions
# -o smtpd_sender_restrictions=$mua_sender_restrictions
# -o smtpd_recipient_restrictions=
# -o smtpd_relay_restrictions=permit_sasl_authenticated,reject
# -o milter_macro_daemon_name=ORIGINATING
smtps inet n - - - - smtpd
 -o syslog_name=postfix/smtps
 -o smtpd_tls_wrappermode=yes
 -o smtpd_sasl_auth_enable=yes
 -o smtpd_client_restrictions=permit_sasl_authenticated,reject
# -o smtpd_reject_unlisted_recipient=no
# -o smtpd_client_restrictions=$mua_client_restrictions
# -o smtpd_helo_restrictions=$mua_helo_restrictions
# -o smtpd_sender_restrictions=$mua_sender_restrictions
# -o smtpd_recipient_restrictions=
# -o smtpd_relay_restrictions=permit_sasl_authenticated,reject
# -o milter_macro_daemon_name=ORIGINATING
[...]
Reinicie Postfix después:
service postfix restart
Queremos que MariaDB escuche en todas las interfaces, no solo en localhost, por lo que editamos /etc/mysql/my.cnf y comentamos la línea bind-address =127.0.0.1:
nano /etc/mysql/my.cnf
[...]
# Instead of skip-networking the default is now to listen only on
# localhost which is more compatible and is not less secure.
#bind-address           = 127.0.0.1
[...]
Luego reiniciamos MySQL:
service mysql restart
Ahora verifique que la red esté habilitada. Ejecutar
netstat -tap | grep mysql
La salida debería verse así:
[email protected]:/tmp# netstat -tap | grep mysql
tcp6 0 0 [::]:mysql [::]:* LISTEN 27371/mysqld
9 Instalar Amavisd-new, SpamAssassin y Clamav
Para instalar amavisd-new, SpamAssassin y ClamAV, ejecutamos
apt-get install amavisd-new spamassassin clamav clamav-daemon zoo unzip bzip2 arj nomarch lzop cabextract apt-listchanges libnet-ldap-perl libauthen-sasl-perl clamav-docs daemon libio-string-perl libio-socket-ssl-perl libnet-ident-perl zip libnet-dns-perl
La configuración de ISPConfig 3 usa amavisd que carga la biblioteca de filtros SpamAssassin internamente, por lo que podemos detener SpamAssassin para liberar RAM:
service spamassassin stop
systemctl disable spamassassin
10 Instale Apache2, PHP5, phpMyAdmin, FCGI, suExec, Pear y mcrypt
Apache2, PHP5, phpMyAdmin, FCGI, suExec, Pear y mcrypt se pueden instalar de la siguiente manera:
apt-get install apache2 apache2.2-common apache2-doc apache2-mpm-prefork apache2-utils libexpat1 ssl-cert libapache2-mod-php5 php5 php5-common php5-gd php5-mysql php5-imap phpmyadmin php5-cli php5-cgi libapache2-mod-fcgid apache2-suexec php-pear php-auth php5-mcrypt mcrypt php5-imagick imagemagick libruby libapache2-mod-python php5-curl php5-intl php5-memcache php5-memcached php5-pspell php5-recode php5-sqlite php5-tidy php5-xmlrpc php5-xsl memcached libapache2-mod-passenger
Verá las siguientes preguntas:
Web server to reconfigure automatically: <- apache2
 Configure database for phpmyadmin with dbconfig-common? <- yes
Enter the password of the administrative user? <- yourrootmysqlpassword
Enter the phpmyadmin application password? <-  Just press enter
Luego ejecute el siguiente comando para habilitar los módulos de Apache suexec, rewrite, ssl, actions e include (además de dav, dav_fs y auth_digest si desea usar WebDAV):
a2enmod suexec rewrite ssl actions include dav_fs dav auth_digest cgi
y habilite el módulo ejecutando:
service apache2 restart
11 Instalar SuPHP (opcional, no recomendado)
NOTA ACTUALIZADA:SuPHP ya no debe instalarse, continúe con el paso 11
SuPHP ya no está disponible para Debian Jessie. El modo suphp ya no debe usarse en ISPConfig ya que hay mejores modos PHP como php-fpm y php-fcgi disponibles. Si realmente necesita suphp por motivos heredados, siga los pasos de este capítulo para compilarlo manualmente:
apt-get install apache2-dev build-essential autoconf automake libtool flex bison debhelper binutils
cd /usr/local/src
wget http://suphp.org/download/suphp-0.7.2.tar.gz
tar zxvf suphp-0.7.2.tar.gz
wget -O suphp.patch https://lists.marsching.com/pipermail/suphp/attachments/20130520/74f3ac02/attachment.patch
patch -Np1 -d suphp-0.7.2 < suphp.patch
cd suphp-0.7.2
autoreconf -if
./configure --prefix=/usr/ --sysconfdir=/etc/suphp/ --with-apr=/usr/bin/apr-1-config --with-apache-user=www-data --with-setid-mode=owner --with-logfile=/var/log/suphp/suphp.log
make
make install
Cree el directorio de configuración de suphp y el archivo suphp.conf:
mkdir /var/log/suphp
mkdir /etc/suphp
nano /etc/suphp/suphp.conf
[global]
;Path to logfile
logfile=/var/log/suphp/suphp.log

;Loglevel
loglevel=info

;User Apache is running as
webserver_user=www-data

;Path all scripts have to be in
docroot=/var/www

;Path to chroot() to before executing script
;chroot=/mychroot

; Security options
allow_file_group_writeable=false
allow_file_others_writeable=false
allow_directory_group_writeable=false
allow_directory_others_writeable=false

;Check wheter script is within DOCUMENT_ROOT
check_vhost_docroot=true

;Send minor error messages to browser
errors_to_browser=false

;PATH environment variable
env_path=/bin:/usr/bin

;Umask to set, specify in octal notation
umask=0022

; Minimum UID
min_uid=100

; Minimum GID
min_gid=100


[handlers]
;Handler for php-scripts
x-httpd-suphp="php:/usr/bin/php-cgi"

;Handler for CGI-scripts
x-suphp-cgi=execute:!self
umask=0022
A continuación, agregaremos un archivo de configuración para cargar el módulo suphp en apache:
echo "LoadModule suphp_module /usr/lib/apache2/modules/mod_suphp.so" > /etc/apache2/mods-available/suphp.load
Y luego abra /etc/apache2/mods-disponible/suphp.conf...
nano /etc/apache2/mods-available/suphp.conf
... y agregue el siguiente contenido:
<IfModule mod_suphp.c>
        AddType application/x-httpd-suphp .php .php3 .php4 .php5 .phtml
        suPHP_AddHandler application/x-httpd-suphp

    <Directory />
        suPHP_Engine on
    </Directory>

    # By default, disable suPHP for debian packaged web applications as files
    # are owned by root and cannot be executed by suPHP because of min_uid.
    <Directory /usr/share>
        suPHP_Engine off
    </Directory>

# # Use a specific php config file (a dir which contains a php.ini file)
#       suPHP_ConfigPath /etc/php5/cgi/suphp/
# # Tells mod_suphp NOT to handle requests with the type <mime-type>.
#       suPHP_RemoveHandler <mime-type>
</IfModule>
Habilite el módulo suphp en apache:
a2enmod suphp
Reinicie Apache después:
service apache2 restart
12 XCache y PHP-FPM
XCache es un caché de código de operación de PHP gratuito y abierto para almacenar en caché y optimizar el código intermedio de PHP. Es similar a otros cachés de código de operación de PHP, como eAccelerator y APC. Se recomienda encarecidamente tener uno de estos instalados para acelerar su página PHP.
XCache se puede instalar de la siguiente manera:
apt-get install php5-xcache
Ahora reinicie Apache:
service apache2 restart
12.2 PHP-FPM
A partir de ISPConfig 3.0.5, hay un modo PHP adicional que puede seleccionar para usar con Apache:PHP-FPM.
Para usar PHP-FPM con Apache, necesitamos el módulo de Apache mod_fastcgi (no mezcle esto con mod_fcgid; son muy similares, pero no puede usar PHP-FPM con mod_fcgid). Podemos instalar PHP-FPM y mod_fastcgi de la siguiente manera:
apt-get install libapache2-mod-fastcgi php5-fpm
Asegúrese de habilitar el módulo y reiniciar Apache:
a2enmod actions fastcgi alias
service apache2 restart
13 Instalar Mailman
ISPConfig le permite administrar (crear/modificar/eliminar) listas de correo de Mailman. Si desea utilizar esta función, instale Mailman de la siguiente manera:
apt-get install mailman
Seleccione al menos un idioma, por ejemplo:
Languages to support: <-- en (English)
 Missing site list <-- Ok
Antes de que podamos iniciar Mailman, se debe crear una primera lista de correo llamada mailman:
newlist mailman
[email protected]:~# newlist mailman
Enter the email of the person running the list: <-- admin email address, e.g. [email protected]
Initial mailman password: <-- admin password for the mailman list
To finish creating your mailing list, you must edit your /etc/aliases (or
equivalent) file by adding the following lines, and possibly running the
`newaliases' program:

## mailman mailing list
mailman:              "|/var/lib/mailman/mail/mailman post mailman"
mailman-admin:        "|/var/lib/mailman/mail/mailman admin mailman"
mailman-bounces:      "|/var/lib/mailman/mail/mailman bounces mailman"
mailman-confirm:      "|/var/lib/mailman/mail/mailman confirm mailman"
mailman-join:         "|/var/lib/mailman/mail/mailman join mailman"
mailman-leave:        "|/var/lib/mailman/mail/mailman leave mailman"
mailman-owner:        "|/var/lib/mailman/mail/mailman owner mailman"
mailman-request:      "|/var/lib/mailman/mail/mailman request mailman"
mailman-subscribe:    "|/var/lib/mailman/mail/mailman subscribe mailman"
mailman-unsubscribe:  "|/var/lib/mailman/mail/mailman unsubscribe mailman"

Hit enter to notify mailman owner... <-- ENTER

[email protected]:~#
Abra /etc/aliases luego...
vi /etc/aliases
... y agregue las siguientes líneas:
[...]
## mailman mailing list
mailman:              "|/var/lib/mailman/mail/mailman post mailman"
mailman-admin:        "|/var/lib/mailman/mail/mailman admin mailman"
mailman-bounces:      "|/var/lib/mailman/mail/mailman bounces mailman"
mailman-confirm:      "|/var/lib/mailman/mail/mailman confirm mailman"
mailman-join:         "|/var/lib/mailman/mail/mailman join mailman"
mailman-leave:        "|/var/lib/mailman/mail/mailman leave mailman"
mailman-owner:        "|/var/lib/mailman/mail/mailman owner mailman"
mailman-request:      "|/var/lib/mailman/mail/mailman request mailman"
mailman-subscribe:    "|/var/lib/mailman/mail/mailman subscribe mailman"
mailman-unsubscribe:  "|/var/lib/mailman/mail/mailman unsubscribe mailman"
Ejecutar
newaliases
después y reinicie Postfix:
service postfix restart
Finalmente debemos habilitar la configuración de Mailman Apache:
ln -s /etc/mailman/apache.conf /etc/apache2/conf-enabled/mailman.conf
Esto define el alias /cgi-bin/mailman/ para todos los vhosts de Apache, lo que significa que puede acceder a la interfaz de administración de Mailman para obtener una lista en http://server1.example.com/cgi-bin/mailman/admin/, y el La página web para usuarios de una lista de correo se puede encontrar en http://server1.example.com/cgi-bin/mailman/listinfo/.
En http://server1.example.com/pipermail puede encontrar los archivos de la lista de correo.
Reinicie Apache después:
service apache2 restart
Luego inicie el demonio Mailman:
service mailman start
14 Instalar PureFTPd y cuota
PureFTPd y la cuota se pueden instalar con el siguiente comando:
apt-get install pure-ftpd-common pure-ftpd-mysql quota quotatool
Edite el archivo /etc/default/pure-ftpd-common...
nano /etc/default/pure-ftpd-common
... y asegúrese de que el modo de inicio esté configurado como autónomo y establezca VIRTUALCHROOT=true:
[...]
STANDALONE_OR_INETD=standalone
[...]
VIRTUALCHROOT=true
[...]
Ahora configuramos PureFTPd para permitir sesiones FTP y TLS. FTP es un protocolo muy inseguro porque todas las contraseñas y todos los datos se transfieren en texto claro. Mediante el uso de TLS, toda la comunicación se puede cifrar, lo que hace que el FTP sea mucho más seguro.
Si desea permitir sesiones FTP y TLS, ejecute
echo 1 > /etc/pure-ftpd/conf/TLS
Para usar TLS, debemos crear un certificado SSL. Lo creo en /etc/ssl/private/, por lo tanto, primero creo ese directorio:
mkdir -p /etc/ssl/private/
Posteriormente, podemos generar el certificado SSL de la siguiente manera:
openssl req -x509 -nodes -days 7300 -newkey rsa:2048 -keyout /etc/ssl/private/pure-ftpd.pem -out /etc/ssl/private/pure-ftpd.pem
Country Name (2 letter code) [AU]: <-- Enter your Country Name (e.g., "DE").
State or Province Name (full name) [Some-State]: <-- Enter your State or Province Name.
Locality Name (eg, city) []: <-- Enter your City.
Organization Name (eg, company) [Internet Widgits Pty Ltd]: <-- Enter your Organization Name (e.g., the name of your company).
Organizational Unit Name (eg, section) []: <-- Enter your Organizational Unit Name (e.g. "IT Department").
Common Name (eg, YOUR name) []: <-- Enter the Fully Qualified Domain Name of the system (e.g. "server1.example.com").
Email Address []: <-- Enter your Email Address.
Cambiar los permisos del certificado SSL:
chmod 600 /etc/ssl/private/pure-ftpd.pem
Luego reinicie PureFTPd:
service pure-ftpd-mysql restart
Edite /etc/fstab. El mío se ve así (agregué, usrjquota=quota.user,grpjquota=quota.group,jqfmt=vfsv0 a la partición con el punto de montaje /):
nano /etc/fstab
# /etc/fstab: static file system information.
#
# Use 'blkid' to print the universally unique identifier for a
# device; this may be used with UUID= as a more robust way to name devices
# that works even if disks are added and removed. See fstab(5).
#
# <file system> <mount point> <type> <options> <dump> <pass>
# / was on /dev/sda1 during installation
UUID=3dc3b58d-97e5-497b-8254-a913fdfc5408 / ext4 errors=remount-ro,usrjquota=quota.user,grpjquota=quota.group,jqfmt=vfsv0 0 1
# swap was on /dev/sda5 during installation
UUID=36bf486e-8f76-492d-89af-5a8eb3ce8a02 none swap sw 0 0
/dev/sr0 /media/cdrom0 udf,iso9660 user,noauto 0 0
Para habilitar la cuota, ejecute estos comandos:
mount -o remount /
quotacheck -avugm
quotaon -avug
15 Instalar servidor BIND DNS
BIND se puede instalar de la siguiente manera:
apt-get install bind9 dnsutils
16 Instalar Vlogger, Webalizer y AWStats
Vlogger, Webalizer y AWStats se pueden instalar de la siguiente manera:
apt-get install vlogger webalizer awstats geoip-database libclass-dbi-mysql-perl
Abra /etc/cron.d/awstats luego...
nano /etc/cron.d/awstats
... y comentar todo en ese archivo:
#MAILTO=root

#*/10 * * * * www-data [ -x /usr/share/awstats/tools/update.sh ] && /usr/share/awstats/tools/update.sh

# Generate static reports:
#10 03 * * * www-data [ -x /usr/share/awstats/tools/buildstatic.sh ] && /usr/share/awstats/tools/buildstatic.sh
17 Instalar Jailkit
Solo se necesita Jailkit si desea chrootear a los usuarios de SSH. Se puede instalar de la siguiente manera (importante:Jailkit se debe instalar antes de ISPConfig - ¡no se puede instalar después!):
apt-get install build-essential autoconf automake libtool flex bison debhelper binutils
cd /tmp
wget http://olivier.sessink.nl/jailkit/jailkit-2.17.tar.gz
tar xvfz jailkit-2.17.tar.gz
cd jailkit-2.17
./debian/rules binary
Ahora puede instalar el paquete Jailkit .deb de la siguiente manera:
cd ..
dpkg -i jailkit_2.17-1_*.deb
rm -rf jailkit-2.17*
18 Instalar fail2ban
Esto es opcional pero recomendado, porque el monitor ISPConfig intenta mostrar el registro:
apt-get install fail2ban
Para hacer que fail2ban monitoree PureFTPd y Dovecot, cree el archivo /etc/fail2ban/jail.local:
nano /etc/fail2ban/jail.local
[pureftpd]
enabled  = true
port     = ftp
filter   = pureftpd
logpath  = /var/log/syslog
maxretry = 3

[dovecot-pop3imap]
enabled = true
filter = dovecot-pop3imap
action = iptables-multiport[name=dovecot-pop3imap, port="pop3,pop3s,imap,imaps", protocol=tcp]
logpath = /var/log/mail.log
maxretry = 5

[postfix-sasl]
enabled  = true
port     = smtp
filter   = postfix-sasl
logpath  = /var/log/mail.log
maxretry = 3
Luego cree los siguientes dos archivos de filtro:
nano /etc/fail2ban/filter.d/pureftpd.conf
[Definition]
failregex = .*pure-ftpd: \(.*@<HOST>\) \[WARNING\] Authentication failed for user.*
ignoreregex =
nano /etc/fail2ban/filter.d/dovecot-pop3imap.conf
[Definition]
failregex = (?: pop3-login|imap-login): .*(?:Authentication failure|Aborted login \(auth failed|Aborted login \(tried to use disabled|Disconnected \(auth failed|Aborted login \(\d+ authentication attempts).*rip=(?P<host>\S*),.*
ignoreregex =
Luego, para agregar la línea ignoreregex en el archivo de filtro postfix-sasl, ejecute:
echo "ignoreregex =" >> /etc/fail2ban/filter.d/postfix-sasl.conf
Reinicie fail2ban después:
service fail2ban restart
19 Instalar squirrelmail
Para instalar el cliente de correo web SquirrelMail, ejecute
apt-get install squirrelmail
Luego configure SquirrelMail:
squirrelmail-configure
Debemos decirle a SquirrelMail que estamos usando Dovecot-IMAP/-POP3:
SquirrelMail Configuration : Read: config.php (1.4.0)
---------------------------------------------------------
Main Menu --
1.  Organization Preferences
2.  Server Settings
3.  Folder Defaults
4.  General Options
5.  Themes
6.  Address Books
7.  Message of the Day (MOTD)
8.  Plugins
9.  Database
10. Languages

D.  Set pre-defined settings for specific IMAP servers

C   Turn color on
S   Save data
Q   Quit

Command >> <-- D


SquirrelMail Configuration : Read: config.php
---------------------------------------------------------
While we have been building SquirrelMail, we have discovered some
preferences that work better with some servers that don't work so
well with others.  If you select your IMAP server, this option will
set some pre-defined settings for that server.

Please note that you will still need to go through and make sure
everything is correct.  This does not change everything.  There are
only a few settings that this will change.

Please select your IMAP server:
    bincimap    = Binc IMAP server
    courier     = Courier IMAP server
    cyrus       = Cyrus IMAP server
    dovecot     = Dovecot Secure IMAP server
    exchange    = Microsoft Exchange IMAP server
    hmailserver = hMailServer
    macosx      = Mac OS X Mailserver
    mercury32   = Mercury/32
    uw          = University of Washington's IMAP server
    gmail       = IMAP access to Google mail (Gmail) accounts

    quit        = Do not change anything
Command >> <-- dovecot


SquirrelMail Configuration : Read: config.php
---------------------------------------------------------
While we have been building SquirrelMail, we have discovered some
preferences that work better with some servers that don't work so
well with others.  If you select your IMAP server, this option will
set some pre-defined settings for that server.

Please note that you will still need to go through and make sure
everything is correct.  This does not change everything.  There are
only a few settings that this will change.

Please select your IMAP server:
    bincimap    = Binc IMAP server
    courier     = Courier IMAP server
    cyrus       = Cyrus IMAP server
    dovecot     = Dovecot Secure IMAP server
    exchange    = Microsoft Exchange IMAP server
    hmailserver = hMailServer
    macosx      = Mac OS X Mailserver
    mercury32   = Mercury/32
    uw          = University of Washington's IMAP server
    gmail       = IMAP access to Google mail (Gmail) accounts

    quit        = Do not change anything
Command >> dovecot

              imap_server_type = dovecot
         default_folder_prefix =
                  trash_folder = Trash
                   sent_folder = Sent
                  draft_folder = Drafts
            show_prefix_option = false
          default_sub_of_inbox = false
show_contain_subfolders_option = false
            optional_delimiter = detect
                 delete_folder = false

Press any key to continue... <-- press a key

SquirrelMail Configuration : Read: config.php (1.4.0)
---------------------------------------------------------
Main Menu --
1.  Organization Preferences
2.  Server Settings
3.  Folder Defaults
4.  General Options
5.  Themes
6.  Address Books
7.  Message of the Day (MOTD)
8.  Plugins
9.  Database
10. Languages

D.  Set pre-defined settings for specific IMAP servers

C   Turn color on
S   Save data
Q   Quit

Command >> <-- S


SquirrelMail Configuration : Read: config.php (1.4.0)
---------------------------------------------------------
Main Menu --
1.  Organization Preferences
2.  Server Settings
3.  Folder Defaults
4.  General Options
5.  Themes
6.  Address Books
7.  Message of the Day (MOTD)
8.  Plugins
9.  Database
10. Languages

D.  Set pre-defined settings for specific IMAP servers

C   Turn color on
S   Save data
Q   Quit

Command >> <-- Q
Ahora configuraremos SquirrelMail para que pueda usarlo desde sus sitios web (creados a través de ISPConfig) usando los alias /squirrelmail o /webmail. Entonces, si su sitio web es www.example.com, podrá acceder a SquirrelMail usando www.example.com/squirrelmail o www.example.com/webmail.
La configuración de Apache de SquirrelMail está en el archivo /etc/squirrelmail/apache.conf, pero Apache no carga este archivo porque no está en el directorio /etc/apache2/conf.d/. Por lo tanto, creamos un enlace simbólico llamado squirrelmail.conf en el directorio /etc/apache2/conf.d/ que apunta a /etc/squirrelmail/apache.conf y recargamos Apache después:
cd /etc/apache2/conf-enabled/
ln -s ../../squirrelmail/apache.conf squirrelmail.conf
service apache2 reload
Ahora abra /etc/apache2/conf-enabled/squirrelmail.conf...
nano /etc/apache2/conf-enabled/squirrelmail.conf
... y agregue las siguientes líneas al contenedor para asegurarse de que se use mod_php para acceder a SquirrelMail, independientemente del modo PHP que seleccione para su sitio web en ISPConfig:
[...]
<Directory /usr/share/squirrelmail>
  Options FollowSymLinks
  <IfModule mod_php5.c>
    AddType application/x-httpd-php .php
    php_flag magic_quotes_gpc Off
    php_flag track_vars On
    php_admin_flag allow_url_fopen Off
    php_value include_path .
    php_admin_value upload_tmp_dir /var/lib/squirrelmail/tmp
    php_admin_value open_basedir /usr/share/squirrelmail:/etc/squirrelmail:/var/lib/squirrelmail:/etc/hostname:/etc/mailname
    php_flag register_globals off
  </IfModule>
  <IfModule mod_dir.c>
    DirectoryIndex index.php
  </IfModule>

  # access to configtest is limited by default to prevent information leak
  <Files configtest.php>
    order deny,allow
    deny from all
    allow from 127.0.0.1
  </Files>
</Directory>
[...]
Cree el directorio /var/lib/squirrelmail/tmp...
mkdir /var/lib/squirrelmail/tmp
... y hacerlo propiedad del usuario www-data:
chown www-data /var/lib/squirrelmail/tmp
Vuelva a cargar Apache:
service apache2 reload
Eso es todo:/etc/apache2/conf-enabled/squirrelmail.conf define un alias llamado /squirrelmail que apunta al directorio de instalación de SquirrelMail /usr/share/squirrelmail.
Ahora puede acceder a SquirrelMail desde su sitio web de la siguiente manera:
http://192.168.0.100/squirrelmail
http://www.example.com/squirrelmail
También puede acceder desde el panel de control de ISPConfig vhost (después de haber instalado ISPConfig, consulte el siguiente capítulo) de la siguiente manera (esto no necesita ninguna configuración en ISPConfig):
http://server1.example.com:8080/squirrelmail
Si desea utilizar el alias /webmail en lugar de /squirrelmail, simplemente abra /etc/apache2/conf-enabled/squirrelmail.conf
nano /etc/apache2/conf-enabled/squirrelmail.conf
... y agregue la línea Alias /webmail /usr/share/squirrelmail:
Alias /squirrelmail /usr/share/squirrelmail
Alias /webmail /usr/share/squirrelmail
[...]
Luego recargar Apache:
service apache2 reload
Ahora puede acceder a Squirrelmail de la siguiente manera:
http://192.168.1.100/webmail
http://www.example.com/webmail
http://server1.example.com:8080/webmail (después de haber instalado ISPConfig, consulte la próximo capítulo)
If you'd like to define a vhost like webmail.example.com where your users can access SquirrelMail, you'd have to add the following vhost configuration to /etc/apache2/conf-enabled/squirrelmail.conf:
vi /etc/apache2/conf-enabled/squirrelmail.conf
[...]
<VirtualHost *:80>
  DocumentRoot /usr/share/squirrelmail
  ServerName webmail.example.com
</VirtualHost>
Of course, there must be a DNS record for webmail.example.com that points to the IP address that you use in the vhost configuration. Also make sure that the vhost webmail.example.com does not exist in ISPConfig (otherwise both vhosts will interfere with each other!).
Now reload Apache...
/etc/init.d/apache2 reload
... and you can access SquirrelMail under http://webmail.example.com!
20 Install ISPConfig 3
To install ISPConfig 3 from the latest released version, do this:
cd /tmp
wget http://www.ispconfig.org/downloads/ISPConfig-3-stable.tar.gz
tar xfz ISPConfig-3-stable.tar.gz
cd ispconfig3_install/install/
The next step is to run
php -q install.php
This will start the ISPConfig 3 installer. The installer will configure all services like Postfix, Dovecot, etc. for you. A manual setup as required for ISPConfig 2 (perfect setup guides) is not necessary.
NOTE:Do not be alarmed that the ISPConfig 3 installer identifies Debian Jessie as unknown version. This does not interfere with any functionality and will be fixed with the next ISPConfig update.
[email protected]:/tmp/ispconfig3_install/install# php -q install.php
PHP Deprecated:  Comments starting with '#' are deprecated in /etc/php5/cli/conf.d/ming.ini on line 1 in Unknown on line 0


--------------------------------------------------------------------------------
 _____ ___________   _____              __ _         ____
|_   _/  ___| ___ \ /  __ \            / _(_)       /__  \
  | | \ `--.| |_/ / | /  \/ ___  _ __ | |_ _  __ _    _/ /
  | |  `--. \  __/  | |    / _ \| '_ \|  _| |/ _` |  |_ |
 _| |_/\__/ / |     | \__/\ (_) | | | | | | | (_| | ___\ \
 \___/\____/\_|      \____/\___/|_| |_|_| |_|\__, | \____/
                                              __/ |
                                             |___/
--------------------------------------------------------------------------------


>> Initial configuration

Operating System: Debian or compatible, unknown version.

    Following will be a few questions for primary configuration so be careful.
    Default values are in [brackets] and can be accepted with .
    Tap in "quit" (without the quotes) to stop the installer.


Select language (en,de) [en]: <-- ENTER

 Installation mode (standard,expert) [standard]: <-- ENTER

Full qualified hostname (FQDN) of the server, eg server1.domain.tld  [server1.example.com]: <-- ENTER

MySQL server hostname [localhost]: <-- ENTER

MySQL root username [root]: <-- ENTER

MySQL root password []: <-- yourrootsqlpassword

MySQL database to create [dbispconfig]: <-- ENTER

MySQL charset [utf8]: <-- ENTER

Generating a 4096 bit RSA private key
.............................................................++
.........................................................................................................................++
writing new private key to 'smtpd.key'
-----
You are about to be asked to enter information that will be incorporated
into your certificate request.
What you are about to enter is what is called a Distinguished Name or a DN.
There are quite a few fields but you can leave some blank
For some fields there will be a default value,
If you enter '.', the field will be left blank.
-----
Country Name (2 letter code) [AU]: <-- ENTER
State or Province Name (full name) [Some-State]: <-- ENTER
Locality Name (eg, city) []: <-- ENTER
Organization Name (eg, company) [Internet Widgits Pty Ltd]: <-- ENTER
Organizational Unit Name (eg, section) []: <-- ENTER
Common Name (e.g. server FQDN or YOUR name) []: <-- ENTER
Email Address []: <-- ENTER
Configuring Jailkit
Configuring Dovecot
Configuring Spamassassin
Configuring Amavisd
Configuring Getmail
Configuring Pureftpd
Configuring BIND
Configuring Apache
Configuring Vlogger
Configuring Apps vhost
Configuring Bastille Firewall
Configuring Fail2ban
Installing ISPConfig
ISPConfig Port [8080]: <-- ENTER

Do you want a secure (SSL) connection to the ISPConfig web interface (y,n) [y]: <-- ENTER

Generating RSA private key, 4096 bit long modulus
.................................................................................................++
........++
e is 65537 (0x10001)
You are about to be asked to enter information that will be incorporated
into your certificate request.
What you are about to enter is what is called a Distinguished Name or a DN.
There are quite a few fields but you can leave some blank
For some fields there will be a default value,
If you enter '.', the field will be left blank.
-----
Country Name (2 letter code) [AU]: <-- ENTER
State or Province Name (full name) [Some-State]: <-- ENTER
Locality Name (eg, city) []: <-- ENTER
Organization Name (eg, company) [Internet Widgits Pty Ltd]: <-- ENTER
Organizational Unit Name (eg, section) []: <-- ENTER
Common Name (e.g. server FQDN or YOUR name) []: <-- ENTER
Email Address []: <-- ENTER

Please enter the following 'extra' attributes
to be sent with your certificate request
A challenge password []: <-- ENTER
An optional company name []: <-- ENTER
writing RSA key
Configuring DBServer
Installing ISPConfig crontab
no crontab for root
no crontab for getmail
Restarting services ...
Stopping MySQL database server: mysqld.
Starting MySQL database server: mysqld ..
Checking for tables which need an upgrade, are corrupt or were
not closed cleanly..
Stopping Postfix Mail Transport Agent: postfix.
Starting Postfix Mail Transport Agent: postfix.
Stopping amavisd: amavisd-new.
Starting amavisd: amavisd-new.
Stopping ClamAV daemon: clamd.
Starting ClamAV daemon: clamd .
Restarting IMAP/POP3 mail server: dovecot.
[Tue May 07 02:36:22 2013] [warn] NameVirtualHost *:443 has no VirtualHosts
[Tue May 07 02:36:22 2013] [warn] NameVirtualHost *:80 has no VirtualHosts
[Tue May 07 02:36:23 2013] [warn] NameVirtualHost *:443 has no VirtualHosts
[Tue May 07 02:36:23 2013] [warn] NameVirtualHost *:80 has no VirtualHosts
Restarting web server: apache2 ... waiting .
Restarting ftp server: Running: /usr/sbin/pure-ftpd-mysql-virtualchroot -l mysql:/etc/pure-ftpd/db/mysql.conf -l pam -H -O clf:/var/log/pure-ftpd/transfer.log -Y 1 -D -u 1000 -A -E -b -8 UTF-8 -B
Installation completed.
[email protected]:/tmp/ispconfig3_install/install#
The installer automatically configures all underlying services, so no manual configuration is needed.
You now also have the possibility to let the installer create an SSL vhost for the ISPConfig control panel, so that ISPConfig can be accessed using https:// instead of http://. To achieve this, just press ENTER when you see this question:Do you want a secure (SSL) connection to the ISPConfig web interface (y,n) [y]:.
Afterwards you can access ISPConfig 3 under http(s)://server1.example.com:8080/ or http(s)://192.168.0.100:8080/ ( http or https depends on what you chose during installation). Log in with the username admin and the password admin (you should change the default password after your first login):

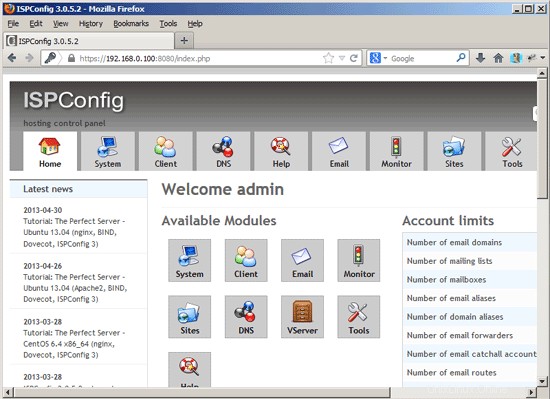
The system is now ready to be used.
20.1 ISPConfig 3 Manual
Para aprender a usar ISPConfig 3, recomiendo descargar el Manual de ISPConfig 3.
En más de 300 páginas, cubre el concepto detrás de ISPConfig (administrador, revendedores, clientes), explica cómo instalar y actualizar ISPConfig 3, incluye una referencia para todos los formularios y campos de formulario en ISPConfig junto con ejemplos de entradas válidas y proporciona tutoriales para las tareas más comunes en ISPConfig 3. También explica cómo hacer que su servidor sea más seguro y viene con una sección de resolución de problemas al final.
20.2 ISPConfig Monitor App For Android
Con la aplicación ISPConfig Monitor, puede verificar el estado de su servidor y averiguar si todos los servicios funcionan como se esperaba. Puede verificar los puertos TCP y UDP y hacer ping a sus servidores. Además de eso, puede usar esta aplicación para solicitar detalles de los servidores que tienen instalado ISPConfig (tenga en cuenta que la versión mínima instalada de ISPConfig 3 compatible con la aplicación ISPConfig Monitor es 3.0.3.3! ); estos detalles incluyen todo lo que sabe del módulo Monitor en el Panel de control de ISPConfig (por ejemplo, servicios, registros de correo y del sistema, cola de correo, información de CPU y memoria, uso del disco, cuota, detalles del sistema operativo, registro de RKHunter, etc.), y por supuesto , como ISPConfig tiene capacidad para varios servidores, puede verificar todos los servidores que están controlados desde su servidor maestro ISPConfig.
Para obtener instrucciones de uso y descarga, visite http://www.ispconfig.org/ispconfig-3/ispconfig-monitor-app-for-android/.
21 Additional Notes
21.1 OpenVZ
If the Debian server that you've just set up in this tutorial is an OpenVZ container (virtual machine), you should do this on the host system (I'm assuming that the ID of the OpenVZ container is 101 - replace it with the correct VPSID on your system):
VPSID=101
for CAP in CHOWN DAC_READ_SEARCH SETGID SETUID NET_BIND_SERVICE NET_ADMIN SYS_CHROOT SYS_NICE CHOWN DAC_READ_SEARCH SETGID SETUID NET_BIND_SERVICE NET_ADMIN SYS_CHROOT SYS_NICE
do
  vzctl set $VPSID --capability ${CAP}:on --save
done
22 Links
- Debian:http://www.debian.org/
- ISPConfig:http://www.ispconfig.org/