OpenLiteSpeed es una versión ligera y de código abierto del servidor LiteSpeed desarrollado por LiteSpeed Technologies. Viene con un panel de administración basado en WebGUI que lo hace diferente de otros servidores y más fácil de administrar.
En este tutorial, aprenderemos a instalar OpenLiteSpeed Server en Ubuntu 20.04 junto con PHP 7.4 y el servidor MariaDB.
Requisitos
-
Servidor web basado en Ubuntu 20.04.
-
Una cuenta de usuario no root con privilegios sudo.
Actualiza tu sistema.
$ sudo apt update
$ sudo apt upgrade
Paso 1:configurar el cortafuegos
Antes de comenzar con el tutorial, debemos configurar el Cortafuegos sin complicaciones (UFW) que suele estar habilitado de forma predeterminada. Primero verifiquemos el estado del firewall.
Necesitamos habilitar SSH, HTTP, HTTPS y los puertos 7080, 8088 para el firewall.
$ sudo ufw allow OpenSSH
$ sudo ufw allow http
$ sudo ufw allow https
$ sudo ufw allow 7080/tcp
$ sudo ufw allow 8088/tcp
Compruebe el estado del cortafuegos.
$ sudo ufw status
Status: active

To                         Action      From
--                         ------      ----
OpenSSH                    ALLOW       Anywhere
80/tcp                     ALLOW       Anywhere
443/tcp                    ALLOW       Anywhere
7080/tcp                   ALLOW       Anywhere
8088/tcp                   ALLOW       Anywhere
OpenSSH (v6)               ALLOW       Anywhere (v6)
80/tcp (v6)                ALLOW       Anywhere (v6)
443/tcp (v6)               ALLOW       Anywhere (v6)
7080/tcp (v6)              ALLOW       Anywhere (v6)
8088/tcp (v6)              ALLOW       Anywhere (v6)
Si no funciona, inicie el cortafuegos.
$ sudo ufw enable
Paso 2:instalar OpenLiteSpeed
Hay varias versiones de OpenLiteSpeed que puede instalar. Las versiones recomendadas son de la serie 1.6.x o 1.7.x al momento de escribir este tutorial.
Usaremos el Repositorio oficial de OpenLiteSpeed para nuestro tutorial, que solo mantiene la versión 1.6.x.
Agregue la clave de depósito de OpenLiteSpeed.
$ wget -qO - https://rpms.litespeedtech.com/debian/lst_repo.gpg | sudo apt-key add -
Agrega el Repositorio.
$ echo "deb http://rpms.litespeedtech.com/debian/ focal main" | sudo tee /etc/apt/sources.list.d/openlitespeed.list
Actualice el Repositorio.
$ sudo apt update
Instalar OpenLiteSpeed
$ sudo apt install openlitespeed
Comprueba el estado del servidor.
$ sudo /usr/local/lsws/bin/lswsctrl status
litespeed is running with PID 21825.
Si no se está ejecutando, puede comenzar con el siguiente comando.
$ sudo /usr/local/lsws/bin/lswsctrl start
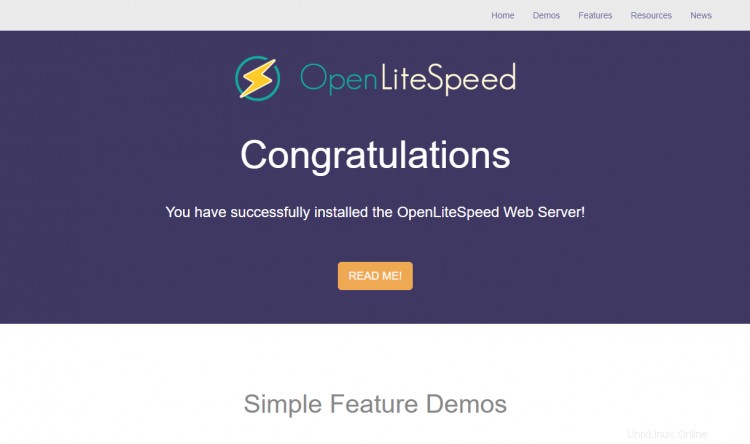
Abra http://<YOURSERVERIP>:8088 para acceder a su servidor web. Deberías ver la siguiente página.
Paso 3 - Instalar PHP
El servidor OpenLiteSpeed se envía con PHP 7.3 que está prehabilitado. Pero queremos usar PHP 7.4, así que instalaremos nuestra propia copia.
Instale PHP 7.4 junto con algunos paquetes adicionales.
$ sudo apt install lsphp74 lsphp74-common lsphp74-mysql lsphp74-curl
Verifique su instalación de PHP.
$ /usr/local/lsws/lsphp74/bin/php7.4 -v
PHP 7.4.5 (cli) (built: May  7 2020 23:08:38) ( NTS )
Copyright (c) The PHP Group
Zend Engine v3.4.0, Copyright (c) Zend Technologies
    with Zend OPcache v7.4.5, Copyright (c), by Zend Technologies
Puede verificar los módulos PHP habilitados.
$ /usr/local/lsws/lsphp74/bin/php7.4 --modules
Configuraremos PHP para que funcione con OpenLiteSpeed más adelante.
Paso 4:instalar MariaDB
Instale el servidor MariaDB.
$ sudo apt install mariadb-server
Inicie y habilite el servicio MariaDB.
$ sudo systemctl start mariadb
$ sudo systemctl enable mariadb
Asegure su instalación de MariaDB. Este script establecerá su contraseña de root, eliminará a los usuarios anónimos, no permitirá el inicio de sesión de root remoto y eliminará las tablas de prueba. Elija una contraseña segura y responda las preguntas como se describe a continuación.
$ sudo mysql_secure_installation
[sudo] password for username:

NOTE: RUNNING ALL PARTS OF THIS SCRIPT IS RECOMMENDED FOR ALL MariaDB
SERVERS IN PRODUCTION USE!  PLEASE READ EACH STEP CAREFULLY!

In order to log into MariaDB to secure it, we'll need the current
password for the root user.  If you've just installed MariaDB, and
you haven't set the root password yet, the password will be blank,
so you should just press enter here.

Enter current password for root (enter for none):
OK, successfully used password, moving on...

Setting the root password ensures that nobody can log into the MariaDB
root user without the proper authorisation.

Set root password? [Y/n] y
New password:
Re-enter new password:
Password updated successfully!
Reloading privilege tables..
 ... Success!

By default, a MariaDB installation has an anonymous user, allowing anyone
to log into MariaDB without having to have a user account created for
them.  This is intended only for testing, and to make the installation
go a bit smoother.  You should remove them before moving into a
production environment.

Remove anonymous users? [Y/n] y
 ... Success!

Normally, root should only be allowed to connect from 'localhost'.  This
ensures that someone cannot guess at the root password from the network.

Disallow root login remotely? [Y/n] y
 ... Success!

By default, MariaDB comes with a database named 'test' that anyone can
access.  This is also intended only for testing, and should be removed
before moving into a production environment.

Remove test database and access to it? [Y/n] y
 - Dropping test database...
 ... Success!
 - Removing privileges on test database...
 ... Success!

Reloading the privilege tables will ensure that all changes made so far
will take effect immediately.

Reload privilege tables now? [Y/n] y
 ... Success!

Cleaning up...

All done!  If you've completed all of the above steps, your MariaDB
installation should now be secure.

Thanks for using MariaDB!
Una vez hecho esto, puede iniciar sesión en el shell de MySQL usando el siguiente comando.
$ sudo mysql -u root -p
Cree una base de datos de prueba y un usuario con permiso de acceso. Reemplazar testdb y testuser con los nombres apropiados para su configuración. Reemplazar password con una contraseña segura.
CREATE DATABASE testdb;
CREATE USER 'testuser' IDENTIFIED BY 'password';
GRANT ALL PRIVILEGES ON testdb.* TO 'testuser';
FLUSH PRIVILEGES;
Salga del shell de MySQL.
exit
Paso 5:configurar OpenLiteSpeed
Configurar panel de administración
Configure las credenciales del panel de Administrador.
$ sudo /usr/local/lsws/admin/misc/admpass.sh
Please specify the user name of administrator.
This is the user name required to login the administration Web interface.

User name [admin]: <username>

Please specify the administrator's password.
This is the password required to login the administration Web interface.

Password:
Retype password:
Administrator's username/password is updated successfully!
También puede usar este comando en caso de que olvide sus datos de inicio de sesión.
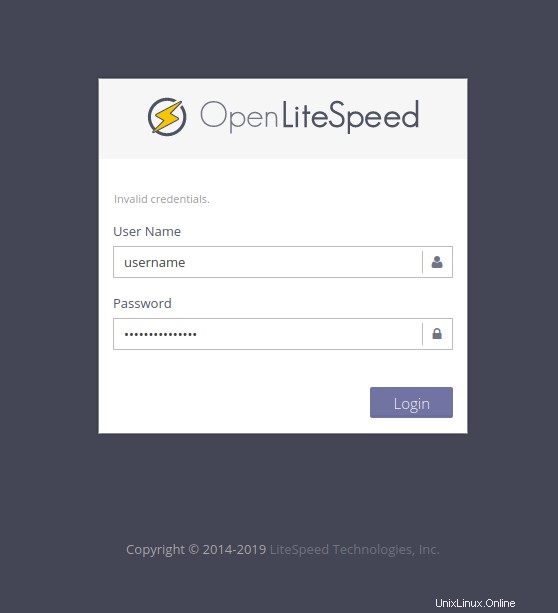
Para acceder al panel de administración, abra http://<YOURSERVERIP>:7080 .
En su primer inicio de sesión, su navegador le dará advertencias diciendo que su conexión no es privada. Haga clic en Avanzado y haga clic en "Aceptar el riesgo y continuar" (en el caso de Firefox) o "Proceder a <YOURSERVERIP>(unsafe) " (en el caso de un navegador basado en Chromium). No volverá a ver la advertencia.
Será recibido por la siguiente pantalla.
Cambiar el puerto HTTP de nuevo a 80
Cambiemos el puerto HTTP predeterminado a 80. Inicie sesión en su panel de administración en http://<YOURSERVERIP>:7080 con las credenciales que acaba de crear.
Será recibido por la siguiente pantalla.
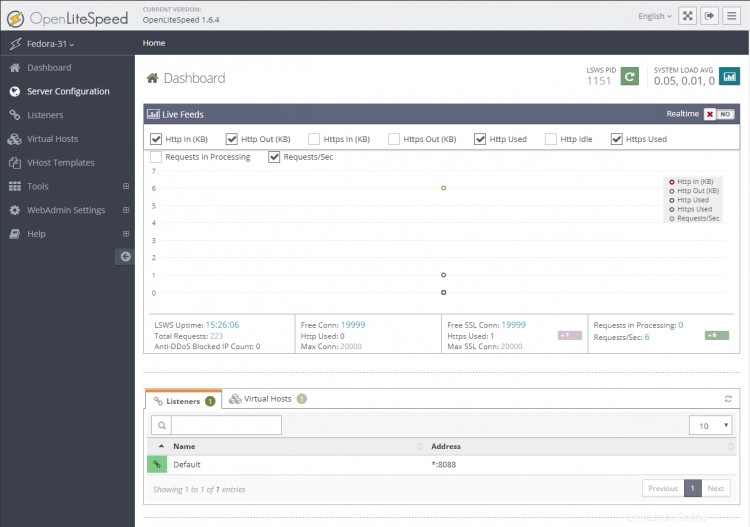
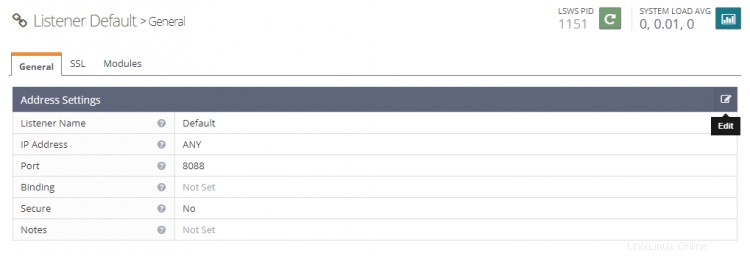
Visita Oyentes sección desde la izquierda. Verá los oyentes predeterminados con el puerto 8080.
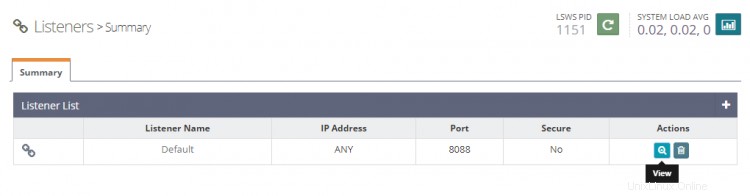
Haga clic en el botón Ver para ver la configuración detallada. En la página siguiente, en Predeterminado del oyente> General Página, haga clic en el icono Editar y cambie el puerto de 8080 a 80.
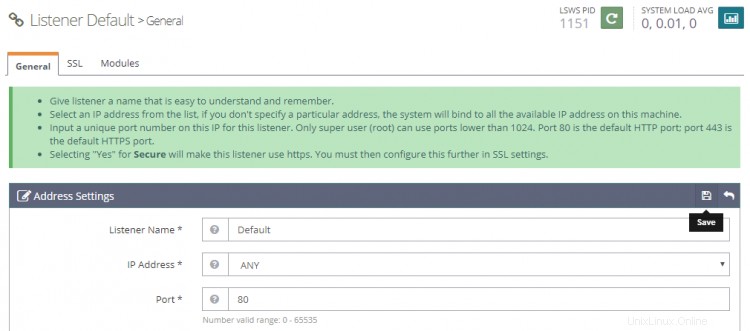
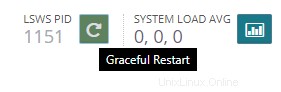
Haga clic en Guardar y luego reinicie el servidor haciendo clic en el botón Reinicio correcto.
Paso 6 - Configurar PHP
En este paso, debemos asociar nuestra copia de PHP 7.4 con el servidor.
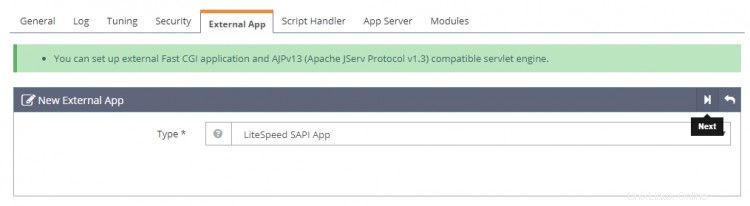
Haga clic en Configuración del servidor a la izquierda y luego en la pestaña Aplicación externa . Verá una aplicación LiteSpeed existente para PHP 7.3. Crearemos nuestra propia aplicación LiteSpeed para PHP 7.4. Puede cambiar fácilmente entre ellos más adelante si lo desea.
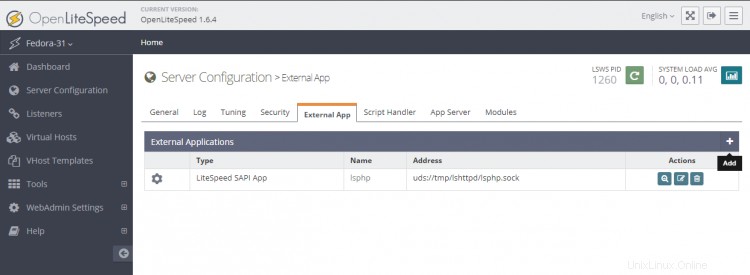
Haga clic en el botón Agregar para crear una nueva aplicación. Para el tipo, seleccione Aplicación LiteSpeed SAPI y haga clic en Siguiente.
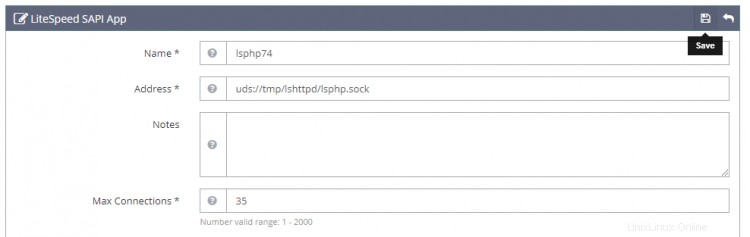
A continuación, agregue la configuración a continuación. Deje todos los demás campos en blanco.
Name: lsphp74
Address: uds://tmp/lshttpd/lsphp.sock
Max Connections: 35
Environment: PHP_LSAPI_MAX_REQUESTS=500
             PHP_LSAPI_CHILDREN=35
             LSAPI_AVOID_FORK=200M
Initial Request Timeout (secs): 60
Retry Timeout : 0
Persistent Connection: Yes
Response Buffering: no
Start By Server: Yes(Through CGI Daemon)
Command: lsphp74/bin/lsphp
Back Log: 100
Instances: 1
Priority: 0
Memory Soft Limit (bytes): 2047M
Memory Hard Limit (bytes): 2047M
Process Soft Limit: 1400
Process Hard Limit: 1500
Haga clic en Guardar cuando termine.
Ahora que hemos creado nuestra propia aplicación basada en PHP 7.4, debemos decirle al servidor que comience a usarla.
Vaya al Manejador de secuencias de comandos tab y edite el controlador lsphp. Cambie el nombre del identificador a lsphp74 del menú desplegable.
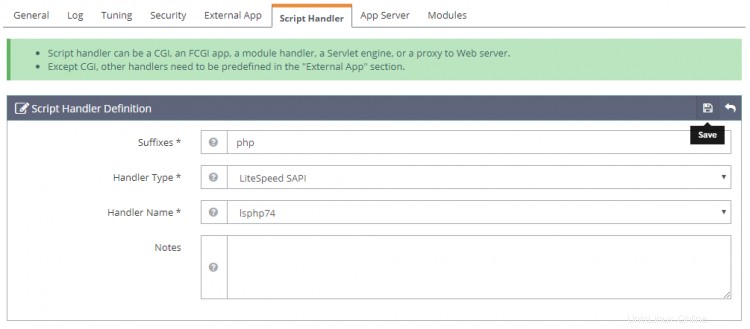
Haga clic en Guardar y luego reinicie el servidor haciendo clic en Reinicio elegante botón.
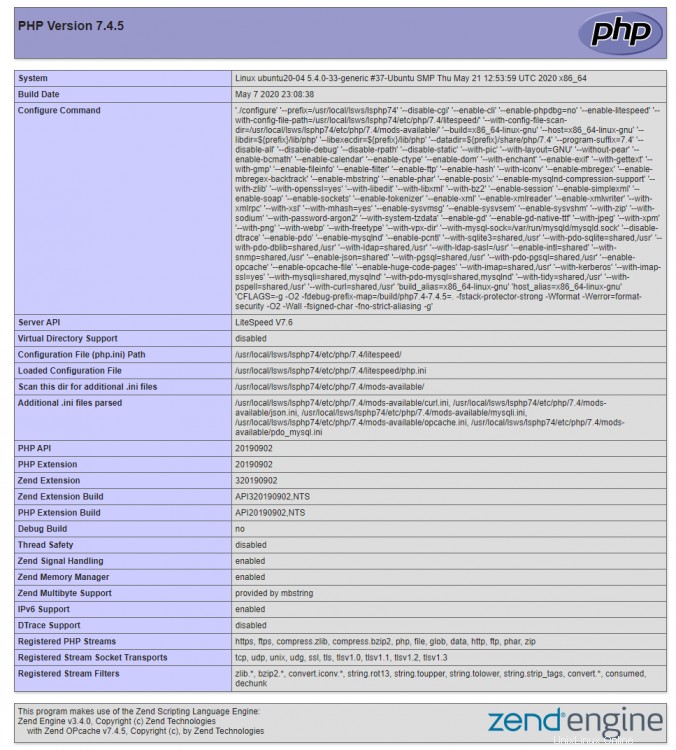
Para comprobar si su PHP se ha cambiado correctamente, visite http://<YOURSERVERIP>/phpinfo.php en su navegador.
Paso 7:configurar el host virtual
Primero, necesitamos crear directorios para nuestro host virtual.
$ sudo mkdir /usr/local/lsws/example.com/{html,logs} -p
El html El directorio contendrá los archivos públicos y los logs El directorio contendrá los registros del servidor.
A continuación, abra la consola de administración y acceda a los hosts virtuales. desde la izquierda y haga clic en el botón Agregar.
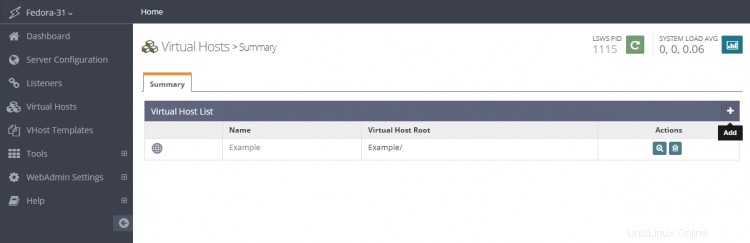
Complete los valores como se especifica
Virtual Host Name: example.com
Virtual Host Root: $SERVER_ROOT/example.com/
Config File: $SERVER_ROOT/conf/vhosts/$VH_NAME/vhconf.conf
Follow Symbolic Link: Yes
Enable Scripts/ExtApps: Yes
Restrained: Yes
External App Set UID Mode: Server UID

Haga clic en el botón Guardar cuando haya terminado. Obtendrá el siguiente error porque el archivo de configuración no existe a partir de ahora. Haga clic en el enlace para crear el archivo de configuración.
Haga clic en el botón Guardar nuevamente para terminar de crear el host virtual.
Una vez que se crea el host virtual, vaya a Hosts virtuales -> Elija Host virtual (ejemplo.com) -> General y modifique la configuración como se indica.
Document Root: $VH_ROOT/html/
Domain Name: example.com
Enable Compression: Yes
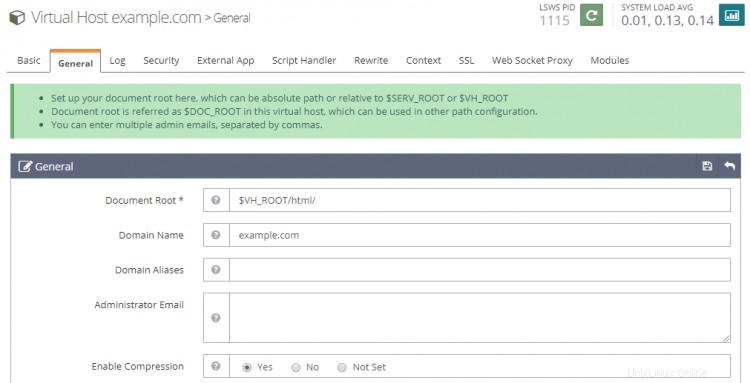
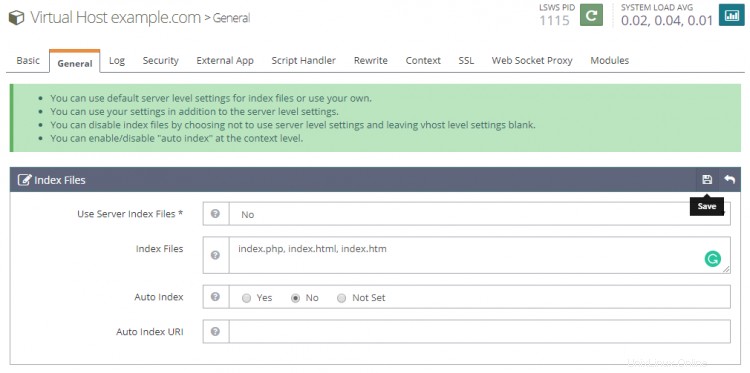
Haga clic en el botón Guardar cuando haya terminado. A continuación, necesitamos configurar los archivos de índice. Haga clic en el botón de edición junto a los archivos de índice debajo de General. Sección. Configure las siguientes opciones.
Use Server Index Files: No
Index files: index.php, index.html, index.htm
Auto Index: No
Haga clic en Guardar cuando haya terminado. A continuación, debemos elegir Archivos de registro. Ir al Registro y haga clic en Editar contra Registro de host virtual y complete los siguientes valores.
Use Server’s Log: Yes
File Name: $VH_ROOT/logs/error.log
Log Level: ERROR
Rolling Size (bytes): 10M
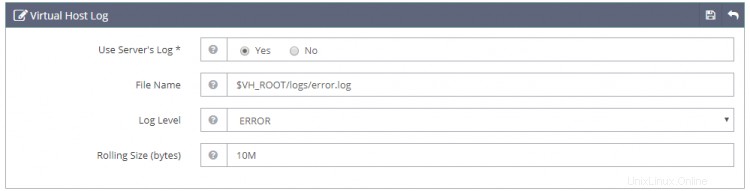
Puede elegir el nivel de registro como DEBUG si está en una máquina de producción/desarrollo.
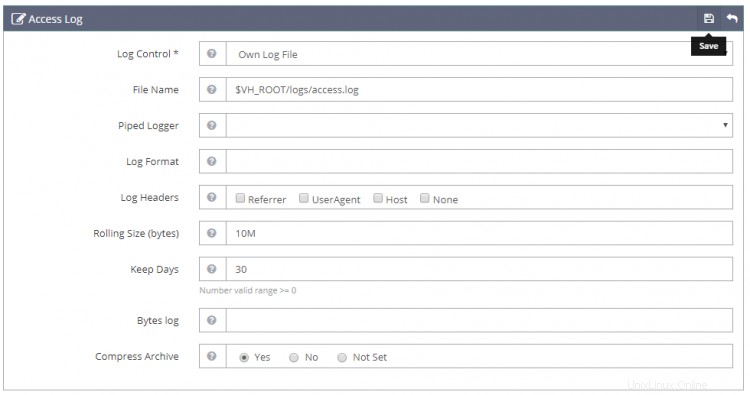
Haga clic en Guardar y luego haga clic en el signo más en el Registro de acceso. sección para agregar una nueva entrada. Complete los siguientes valores.
Log Control: Own Log File
File Name: $VH_ROOT/logs/access.log
Piped Logger: Not Set
Log Format: Not Set
Log Headers: Not Set
Rolling Size (bytes): 10M
Keep Days: 30
Bytes log: Not Set
Compress Archive: Yes
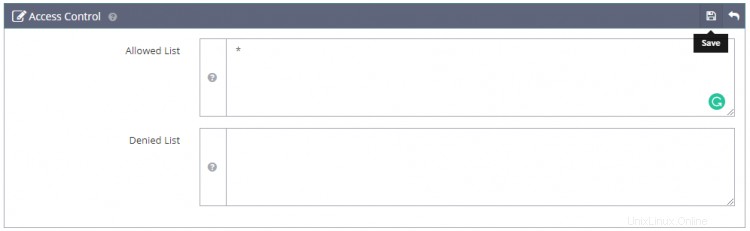
Haga clic en Guardar cuando haya terminado. A continuación, debemos configurar Control de acceso en Seguridad sección. Establezca los siguientes valores.
Allowed List: *
Denied List: Not set
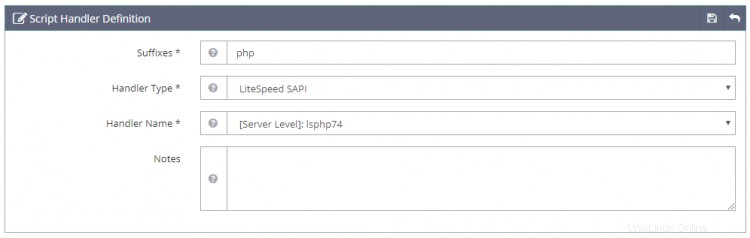
Haga clic en Guardar cuando haya terminado. A continuación, debemos establecer la Definición del controlador de secuencias de comandos . Establezca los siguientes valores.
Suffixes: php
Handler Type: LiteSpeed SAPI
Handler Name: [Server Level]: lsphp74
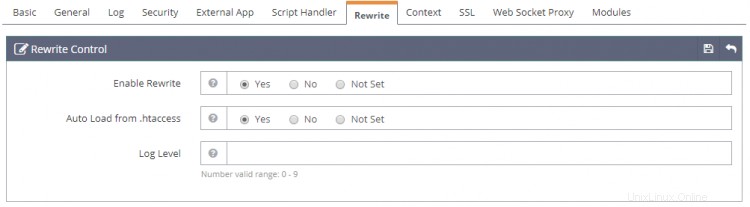
A continuación, debemos establecer Control de reescritura en Reescribir sección. Establezca los siguientes valores.
Y por último, necesitamos configurar los Oyentes. Ir a los Oyentes sección y haga clic en el botón Ver contra Oyente predeterminado . Luego, haga clic en el botón Agregar contra Asignaciones de host virtual para agregar una nueva asignación y establecer los siguientes valores.

Haga clic en Guardar cuando haya terminado. Ahora, haga clic en Reinicio elegante para aplicar todos los cambios anteriores y reiniciar el servidor.
Paso 8:configurar SSL
Configurar SSL en OpenLiteSpeed requiere que configuremos dos certificados. Un certificado autofirmado para el servidor general y un servidor específico del sitio de Let's Encrypt.
Primero creemos el certificado autofirmado.
$ openssl req -x509 -days 365 -newkey rsa:4096 -keyout key.pem -out cert.pem -nodes
Generating a RSA private key
..++++
......................++++
writing new private key to 'key.pem'
-----
You are about to be asked to enter information that will be incorporated
into your certificate request.
What you are about to enter is what is called a Distinguished Name or a DN.
There are quite a few fields but you can leave some blank
For some fields there will be a default value,
If you enter '.', the field will be left blank.
-----
Country Name (2 letter code) [AU]:
State or Province Name (full name) [Some-State]:
Locality Name (eg, city) []:
Organization Name (eg, company) [Internet Widgits Pty Ltd]:
Organizational Unit Name (eg, section) []:
Common Name (e.g. server FQDN or YOUR name) []:
Email Address []:
Puede pulsar Intro en todos los campos y dejarlos vacíos.
Los certificados ahora se almacenan en /home/user directorio. Necesitaremos esta información más tarde.
Para usar Let's Encrypt, necesitamos instalar la herramienta Certbot.
$ sudo apt install certbot
Obtenga el certificado SSL.
$ sudo certbot certonly --webroot -w /usr/local/lsws/example.com/html/ -d example.com
Siga la indicación interactiva.
Saving debug log to /var/log/letsencrypt/letsencrypt.log
Plugins selected: Authenticator webroot, Installer None
Enter email address (used for urgent renewal and security notices) (Enter 'c' to
cancel): [email protected]
Starting new HTTPS connection (1): acme-v01.api.letsencrypt.org

-------------------------------------------------------------------------------
Please read the Terms of Service at
https://letsencrypt.org/documents/LE-SA-v1.2-November-15-2017.pdf. You must agree
in order to register with the ACME server at
https://acme-v02.api.letsencrypt.org/directory
-------------------------------------------------------------------------------
(A)gree/(C)ancel: A

-------------------------------------------------------------------------------
Would you be willing to share your email address with the Electronic Frontier
Foundation, a founding partner of the Let's Encrypt project and the non-profit
organization that develops Certbot? We'd like to send you email about our work
encrypting the web, EFF news, campaigns, and ways to support digital freedom.
-------------------------------------------------------------------------------
(Y)es/(N)o: N
Obtaining a new certificate
Performing the following challenges:
http-01 challenge for example.com
Using the webroot path /usr/local/lsws/example.com/html for all unmatched domains.
Waiting for verification...
Cleaning up challenges

IMPORTANT NOTES:
 - Congratulations! Your certificate and chain have been saved at:
   /etc/letsencrypt/live/example/fullchain.pem. Your key file has
   been saved at:
   /etc/letsencrypt/live/linode.nspeaks.com/privkey.pem Your cert will
   expire on 2020-09-04. To obtain a new or tweaked version of this
   certificate in the future, simply run certbot again. To
   non-interactively renew *all* of your certificates, run "certbot
   renew"
 - Your account credentials have been saved in your Certbot
   configuration directory at /etc/letsencrypt. You should make a
   secure backup of this folder now. This configuration directory will
   also contain certificates and private keys obtained by Certbot so
   making regular backups of this folder is ideal.
 - If you like Certbot, please consider supporting our work by:

   Donating to ISRG / Let's Encrypt:   https://letsencrypt.org/donate
   Donating to EFF:                    https://eff.org/donate-le
Ahora abra la consola de administración y vaya a Oyentes>> Agregar nuevo oyente y agregue los siguientes valores.
Listener Name: SSL
IP Address: ANY
Port: 443
Secure: Yes
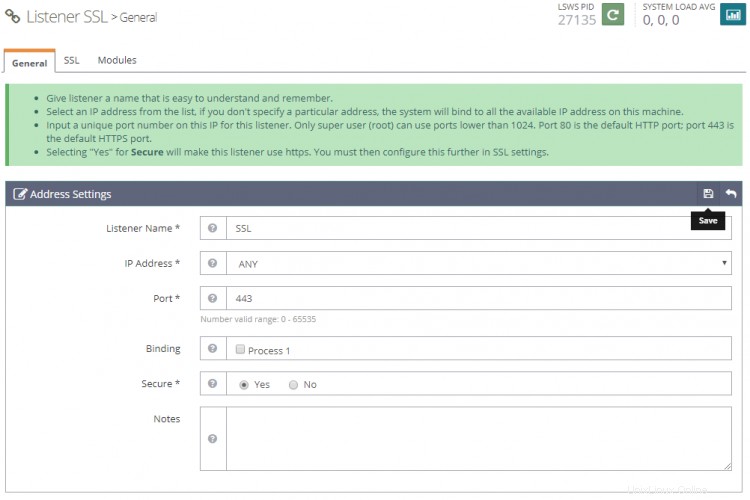
Haga clic en Guardar cuando haya terminado. A continuación, vaya a Asignaciones de host virtual debajo de SSL Listener haciendo clic en SSL, haga clic en el botón Agregar y complete los siguientes valores.
Virtual Host: example.com
Domains: example.com

Haz clic en Guardar cuando termines.
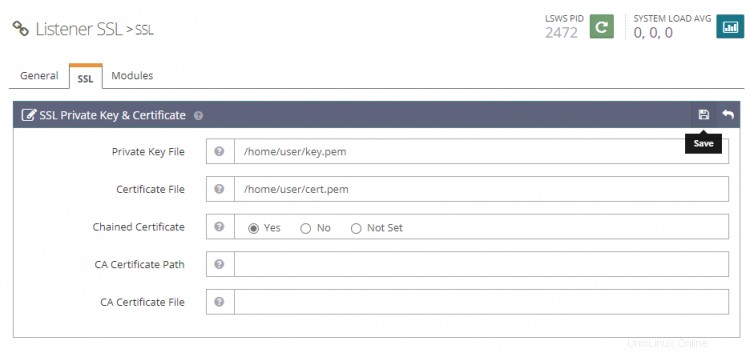
A continuación, vaya a Oyentes>> Oyente SSL>> Pestaña SSL>>Clave privada y certificado SSL (botón Editar) y complete los siguientes valores para el certificado autofirmado que creamos antes.
Private Key File: /home/user/key.pem
Certificate File: /home/user/cert.pem
Chained Certificate: Yes
A continuación, vaya a Hosts virtuales>> ejemplo.com>> Pestaña SSL>> Certificado y clave privada SSL (botón Editar) y complete los siguientes valores con el Certificado Let's Encrypt.
Private Key File: /etc/letsencrypt/live/example.com/privkey.pem
Certificate File: /etc/letsencrypt/live/example.com/fullchain.pem
Chained Certificate: Yes
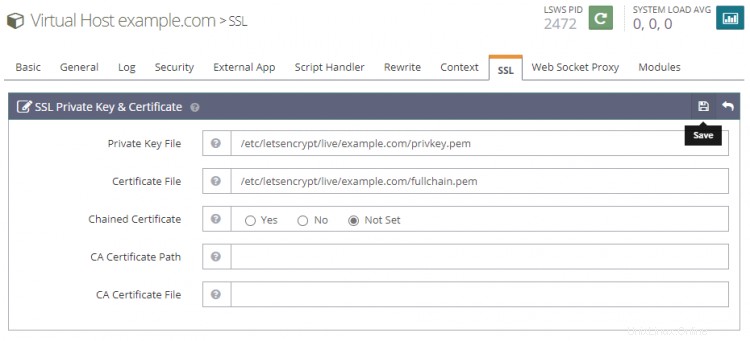
Haga clic en Guardar cuando termine.
Reinicie el servidor haciendo clic en el botón Reinicio elegante.
Paso 9 - Sitio de prueba
Cree un archivo de prueba en su html directorio.
$ sudo nano /usr/local/lsws/example.com/html/index.php
Pegue el siguiente código en el editor Nano.
<html>
<head>
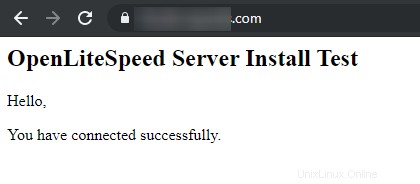
<h2>OpenLiteSpeed Server Install Test</h2>
</head>
<body>
<?php echo '<p>Hello,</p>';
// Define PHP variables for the MySQL connection.
$servername = "localhost";
$username = "testuser";
$password = "password";
// Create a MySQL connection.
$conn = mysqli_connect($servername, $username, $password);
// Report if the connection fails or is successful.
if (!$conn) {
exit('<p>Your connection has failed.<p>' . mysqli_connect_error());
}
echo '<p>You have connected successfully.</p>';
?>
</body>
</html>
Visite su sitio en https://example.com en un navegador y debería ver la siguiente página.
Eso es todo por este tutorial. Si tiene alguna pregunta, dispárela en los comentarios a continuación.