I-doit es una herramienta de gestión de activos de código abierto que se puede utilizar para gestionar todo el sistema de TI. Se basa en una base de datos y gestión de configuración de código abierto completa que le permite realizar un seguimiento de los activos de software y hardware y sus relaciones. Con i-doit, puede documentar sistemas de TI completos y sus cambios, mostrar información vital y garantizar un funcionamiento estable y eficiente de las redes de TI.
Ofrece una amplia gama de características que incluyen gestión de activos, planificación de infraestructura, sistema de tickets, gestión de cables, inventario, SAN, gestión de direcciones IP, clúster, gestión de parches y muchas más.
En este tutorial, explicaremos cómo instalar el sistema de gestión de activos I-doit en Ubuntu 20.04.
Requisitos
- Un servidor con Ubuntu 20.04 con un mínimo de 2 GB de RAM.
- Un nombre de dominio válido apuntado con la IP de su servidor.
- Se configura una contraseña raíz en el servidor.
Instalar servidor LAMP
Primero, deberá instalar el servidor web Apache, el servidor de base de datos MariaDB, PHP y otras extensiones de PHP requeridas en su sistema. Puede instalarlos todos con el siguiente comando:
apt-get install apache2 mariadb-server libapache2-mod-php7.4 php7.4-bcmath php7.4-cli php7.4-common php7.4-curl php7.4-gd php7.4-json php7.4-ldap php7.4-mbstring php7.4-mysql php7.4-opcache php7.4-pgsql php7.4-soap php7.4-xml php7.4-zip php7.4-imagick php7.4-memcached unzip wget curl memcached moreutils -y
Una vez que todos los paquetes estén instalados, cree un nuevo archivo php.ini para I-doit con los valores deseados:
nano /etc/php/7.4/mods-available/i-doit.ini
Agregue las siguientes líneas:
allow_url_fopen = Yes
file_uploads = On
magic_quotes_gpc = Off
max_execution_time = 300
max_file_uploads = 42
max_input_time = 60
max_input_vars = 10000
memory_limit = 256M
post_max_size = 128M
register_argc_argv = On
register_globals = Off
short_open_tag = On
upload_max_filesize = 128M
display_errors = Off
display_startup_errors = Off
error_reporting = E_ALL & ~E_DEPRECATED & ~E_STRICT
log_errors = On
default_charset = "UTF-8"
default_socket_timeout = 60
date.timezone = Asia/Kolkata
session.gc_maxlifetime = 604800
session.cookie_lifetime = 0
mysqli.default_socket = /var/run/mysqld/mysqld.sock
Guarde y cierre el archivo cuando haya terminado. Luego, aplique la configuración y habilite el módulo memcached con el siguiente comando:
phpenmod i-doit
phpenmod memcached
A continuación, reinicie el servicio Apache para aplicar los cambios:
systemctl restart apache2
Configure MariaDB para un mejor rendimiento
A continuación, deberá configurar el servidor MariaDB para un mejor rendimiento. Puede hacerlo creando un nuevo archivo de configuración:
nano /etc/mysql/mariadb.conf.d/99-i-doit.cnf
Agregue las siguientes líneas:
[mysqld]
innodb_buffer_pool_size = 1G
innodb_buffer_pool_instances = 1
innodb_log_file_size = 512M
innodb_sort_buffer_size = 64M
sort_buffer_size = 262144 # default
join_buffer_size = 262144 # default
max_allowed_packet = 128M
max_heap_table_size = 32M
query_cache_min_res_unit = 4096
query_cache_type = 1
query_cache_limit = 5M
query_cache_size = 80M
tmp_table_size = 32M
max_connections = 200
innodb_file_per_table = 1
innodb_thread_concurrency = 0
innodb_flush_log_at_trx_commit = 1
innodb_flush_method = O_DIRECT
innodb_lru_scan_depth = 2048
table_definition_cache = 1024
table_open_cache = 2048
innodb_stats_on_metadata = 0
sql-mode = ""
Guarde y cierre el archivo cuando haya terminado. Luego, inicie sesión en el shell de MariaDB con el siguiente comando:
mysql
Una vez que inicie sesión, cambie el complemento de autenticación de MariaDB a mysql_native_password con el siguiente comando:
MariaDB [(none)]> SET GLOBAL innodb_fast_shutdown = 0;
MariaDB [(none)]> UPDATE mysql.user SET plugin = 'mysql_native_password' WHERE User = 'root';
A continuación, elimine los privilegios y salga del shell de MariaDB con el siguiente comando:
MariaDB [(none)]> FLUSH PRIVILEGES;
MariaDB [(none)]> EXIT;
Finalmente, reinicie el servicio MariaDB para aplicar los cambios:
systemctl restart mariadb
Descargar I-doit
Primero, deberá descargar la última versión de I-doit del sitio web de Sourceforge. Puede usar el comando wget para descargarlo:
wget https://excellmedia.dl.sourceforge.net/project/i-doit/i-doit/1.14/idoit-open-1.14.zip
Una vez descargado, descomprima el archivo descargado en el directorio raíz web de Apache con el siguiente comando:
unzip idoit-open-1.14.2.zip -d /var/www/html/idoit
A continuación, cambie la propiedad al usuario www-data y establezca los permisos adecuados con el siguiente comando:
chown -R www-data:www-data /var/www/html/idoit/
chmod -R 775 /var/www/html/idoit/
Una vez que haya terminado, puede continuar con el siguiente paso.
Configurar servidor web Apache
A continuación, cree el archivo de configuración de host virtual de Apache para I-doit.
nano /etc/apache2/sites-available/idoit.conf
Agregue las siguientes líneas:
<VirtualHost *:80>
        ServerAdmin [email protected]
        ServerName  idoit.linuxbuz.com
        DirectoryIndex index.php
        DocumentRoot /var/www/html/idoit
        <Directory /var/www/html/idoit>
                AllowOverride All
                Require all granted
        </Directory>
        LogLevel warn
        ErrorLog ${APACHE_LOG_DIR}/error.log
        CustomLog ${APACHE_LOG_DIR}/access.log combined
</VirtualHost>
Guarde y cierre el archivo cuando haya terminado. Luego, habilite el host virtual y el módulo de reescritura de Apache con el siguiente comando:
a2ensite idoit
a2enmod rewrite
A continuación, reinicie el servicio Apache para aplicar los cambios:
systemctl restart apache2
I-doit seguro con Let's Encrypt SSL
Para proteger su sitio web I-doit con Let's Encrypt SSL, deberá instalar el paquete de cliente Certbot en su servidor. Puede instalarlo con el siguiente comando:
apt-get install python3-certbot-apache -y
Una vez instalado, ejecute el siguiente comando para proteger su sitio web con Let's Encrypt SSL:
certbot --apache -d idoit.linuxbuz.com
Deberá proporcionar su dirección de correo electrónico válida y aceptar el término de servicio como se muestra a continuación:
Saving debug log to /var/log/letsencrypt/letsencrypt.log
Plugins selected: Authenticator apache, Installer apache
Enter email address (used for urgent renewal and security notices) (Enter 'c' to
cancel): [email protected]

- - - - - - - - - - - - - - - - - - - - - - - - - - - - - - - - - - - - - - - -
Please read the Terms of Service at
https://letsencrypt.org/documents/LE-SA-v1.2-November-15-2017.pdf. You must
agree in order to register with the ACME server at
https://acme-v02.api.letsencrypt.org/directory
- - - - - - - - - - - - - - - - - - - - - - - - - - - - - - - - - - - - - - - -
(A)gree/(C)ancel: A

- - - - - - - - - - - - - - - - - - - - - - - - - - - - - - - - - - - - - - - -
Would you be willing to share your email address with the Electronic Frontier
Foundation, a founding partner of the Let's Encrypt project and the non-profit
organization that develops Certbot? We'd like to send you email about our work
encrypting the web, EFF news, campaigns, and ways to support digital freedom.
- - - - - - - - - - - - - - - - - - - - - - - - - - - - - - - - - - - - - - - -
(Y)es/(N)o: Y
Obtaining a new certificate
Performing the following challenges:
http-01 challenge for idoit.linuxbuz.com
Enabled Apache rewrite module
Waiting for verification...
Cleaning up challenges
Created an SSL vhost at /etc/apache2/sites-available/idoit-le-ssl.conf
Enabled Apache socache_shmcb module
Enabled Apache ssl module
Deploying Certificate to VirtualHost /etc/apache2/sites-available/idoit-le-ssl.conf
Enabling available site: /etc/apache2/sites-available/idoit-le-ssl.conf
A continuación, seleccione si desea redirigir o no el tráfico HTTP a HTTPS como se muestra a continuación:
Please choose whether or not to redirect HTTP traffic to HTTPS, removing HTTP access.
- - - - - - - - - - - - - - - - - - - - - - - - - - - - - - - - - - - - - - - -
1: No redirect - Make no further changes to the webserver configuration.
2: Redirect - Make all requests redirect to secure HTTPS access. Choose this for
new sites, or if you're confident your site works on HTTPS. You can undo this
change by editing your web server's configuration.
- - - - - - - - - - - - - - - - - - - - - - - - - - - - - - - - - - - - - - - -
Select the appropriate number [1-2] then [enter] (press 'c' to cancel): 2
Tipo 2 y pulsa Intro para instalar Let's Encrypt SSL para su sitio web:
Enabled Apache rewrite module
Redirecting vhost in /etc/apache2/sites-enabled/idoit.conf to ssl vhost in /etc/apache2/sites-available/idoit-le-ssl.conf

- - - - - - - - - - - - - - - - - - - - - - - - - - - - - - - - - - - - - - - -
Congratulations! You have successfully enabled https://idoit.linuxbuz.com

You should test your configuration at:
https://www.ssllabs.com/ssltest/analyze.html?d=idoit.linuxbuz.com
- - - - - - - - - - - - - - - - - - - - - - - - - - - - - - - - - - - - - - - -

IMPORTANT NOTES:
 - Congratulations! Your certificate and chain have been saved at:
   /etc/letsencrypt/live/idoit.linuxbuz.com/fullchain.pem
   Your key file has been saved at:
   /etc/letsencrypt/live/idoit.linuxbuz.com/privkey.pem
   Your cert will expire on 2020-10-17. To obtain a new or tweaked
   version of this certificate in the future, simply run certbot again
   with the "certonly" option. To non-interactively renew *all* of
   your certificates, run "certbot renew"
 - Your account credentials have been saved in your Certbot
   configuration directory at /etc/letsencrypt. You should make a
   secure backup of this folder now. This configuration directory will
   also contain certificates and private keys obtained by Certbot so
   making regular backups of this folder is ideal.
 - If you like Certbot, please consider supporting our work by:

   Donating to ISRG / Let's Encrypt:   https://letsencrypt.org/donate
   Donating to EFF:                    https://eff.org/donate-le
Una vez que haya terminado, puede continuar con el siguiente paso.
Acceder a la interfaz web de I-doit
Ahora, abra su navegador web y acceda a I-doit usando la URL https://idoit.linuxbuz.com. Debería ver la pantalla de comprobación del sistema:
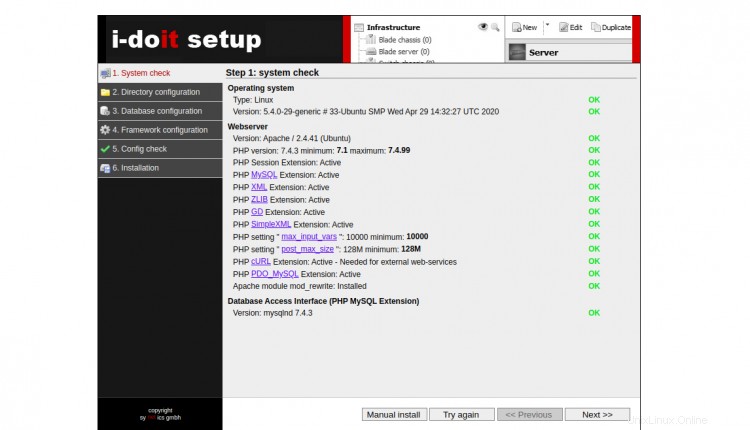
Asegúrese de que todos los paquetes necesarios estén instalados. Luego, haga clic en Siguiente botón. Debería ver la pantalla de configuración del directorio:
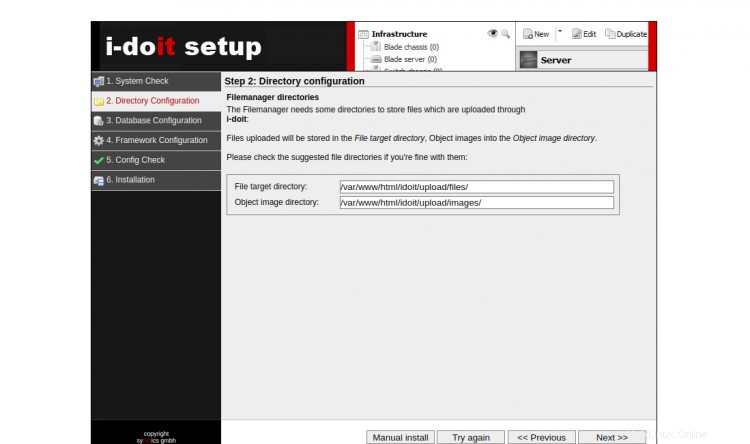
Proporcione la ruta del directorio del administrador de archivos que desee y haga clic en Siguiente botón. Debería ver la pantalla de configuración de la base de datos:
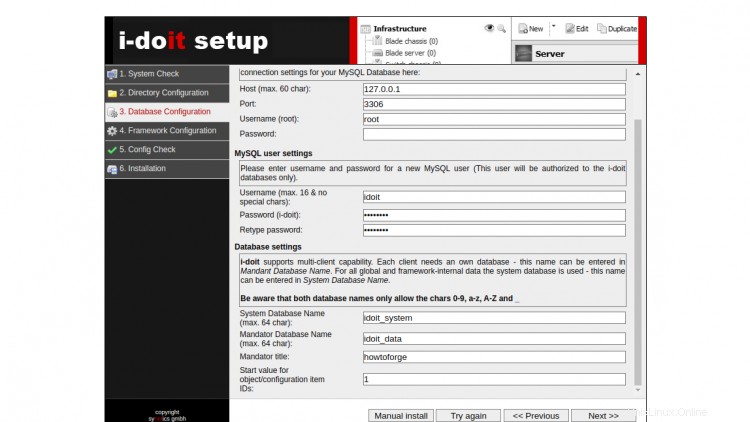
Proporcione la información de su base de datos deseada y haga clic en Siguiente botón. Debería ver la pantalla de configuración del usuario administrador:
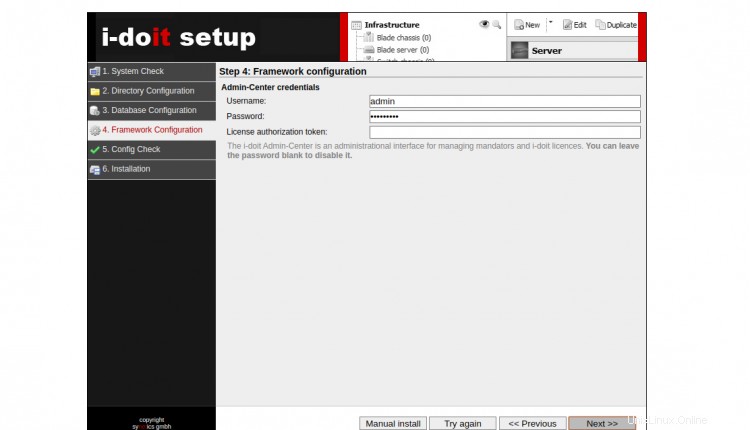
Proporcione su nombre de usuario y contraseña de administrador y haga clic en Siguiente botón. Debería ver la pantalla de vista previa de la configuración:
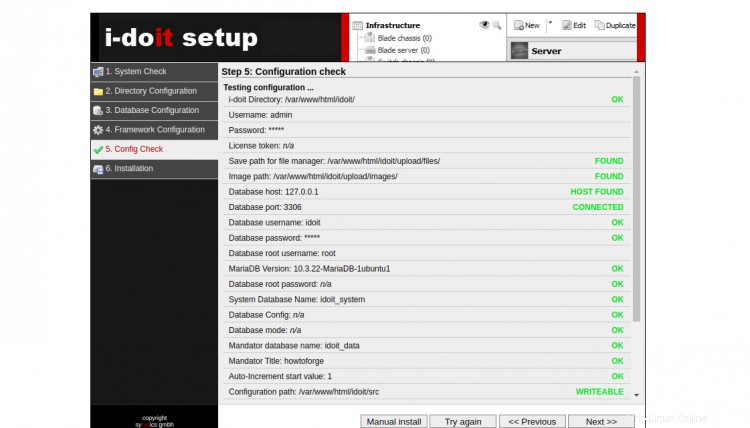
Haga clic en Siguiente botón para iniciar la instalación. Una vez finalizada la instalación, debería ver la siguiente pantalla:
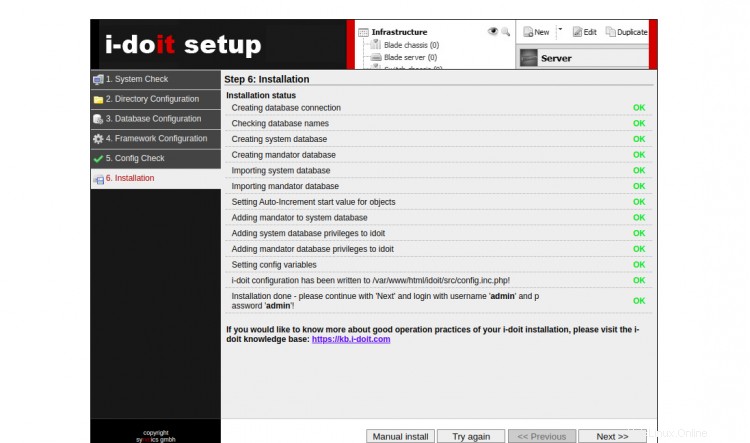
Haga clic en Siguiente botón. Debería ver la pantalla de inicio de sesión de I-doit:
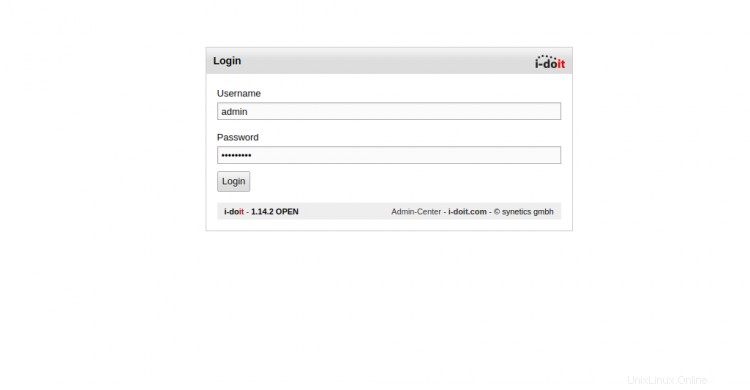
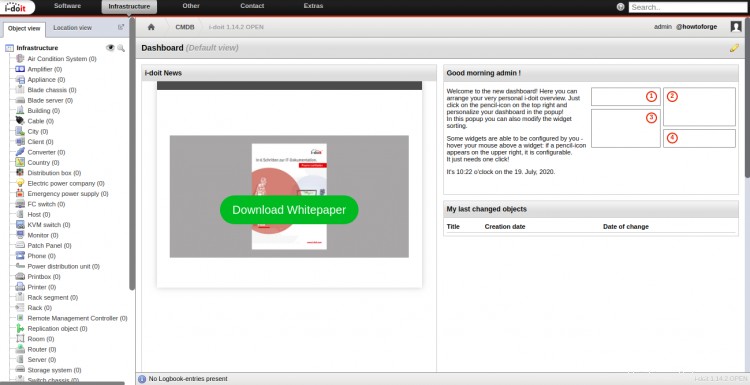
Proporcione su nombre de usuario y contraseña de administrador y haga clic en Iniciar sesión botón. Debería ver el panel de I-doit en la siguiente pantalla:
Conclusión
¡Felicidades! Ha instalado correctamente el sistema de gestión de activos I-doit en Ubuntu 20.04 con Let's Encrypt SSL. Ahora puede administrar sus activos de hardware y software a través de un navegador web. Siéntase libre de preguntarme si tiene alguna pregunta.