Este tutorial es Copyright (c) 2012 por Falko Timme. Se deriva de un tutorial de Christoph Haas que puede encontrar en http://workaround.org. Puede utilizar este tutorial bajo la licencia Creative Commons 2.5 o cualquier versión posterior.
Este documento describe cómo instalar un servidor de correo Postfix basado en usuarios y dominios virtuales, es decir, usuarios y dominios que se encuentran en una base de datos MySQL. También demostraré la instalación y configuración de Courier (Courier-POP3, Courier-IMAP), para que Courier pueda autenticarse contra la misma base de datos MySQL que usa Postfix.
El servidor Postfix resultante es capaz de SMTP-AUTH y TLS y cuota (La cuota no está integrada en Postfix de forma predeterminada, le mostraré cómo parchear su Postfix de manera adecuada). Las contraseñas se almacenan en encriptadas formulario en la base de datos (la mayoría de los documentos que encontré trataban con contraseñas de texto sin formato, lo que es un riesgo de seguridad). Además de eso, este tutorial cubre la instalación de Amavisd , Asesino de spam y ClamAV para que los correos electrónicos sean escaneados en busca de spam y virus. También mostraré cómo instalar SquirrelMail como una interfaz de correo web para que los usuarios puedan leer y enviar correos electrónicos y cambiar sus contraseñas.
La ventaja de una configuración "virtual" de este tipo (usuarios y dominios virtuales en una base de datos MySQL) es que tiene mucho más rendimiento que una configuración basada en usuarios "reales" del sistema. Con esta configuración virtual, su servidor de correo puede manejar miles de dominios y usuarios. Además, es más fácil de administrar porque solo tiene que lidiar con la base de datos MySQL cuando agrega nuevos usuarios/dominios o edita los existentes. No más comandos postmap para crear archivos db, no más recargas de Postfix, etc. Para la administración de la base de datos MySQL, puede usar herramientas basadas en web como phpMyAdmin, que también se instalará en este tutorial. La tercera ventaja es que los usuarios tienen una dirección de correo electrónico como nombre de usuario (en lugar de un nombre de usuario + una dirección de correo electrónico) que es más fácil de entender y tener en cuenta.
Este howto pretende ser una guía práctica; no cubre los antecedentes teóricos. Se tratan en muchos otros documentos en la web.
¡Este documento viene sin garantía de ningún tipo! Quiero decir que esta no es la única forma de establecer un sistema de este tipo. Hay muchas maneras de lograr este objetivo, pero este es el camino que tomo. ¡No emito ninguna garantía de que esto funcione para usted!
1 nota preliminar
Este tutorial se basa en el servidor Ubuntu 12.10 (Quantal Quetzal), por lo que debe configurar una instalación básica del servidor Ubuntu 12.10 antes de continuar con este tutorial. El sistema debe tener una dirección IP estática. Uso 192.168.0.100 como mi dirección IP en este tutorial y server1.example.com como nombre de host.
Asegúrese de haber iniciado sesión como raíz (escriba
sudo su
para convertirse en root), porque debemos ejecutar todos los pasos de este tutorial como usuario root.
Es muy importante que haga de /bin/sh un enlace simbólico a /bin/bash...
dpkg-reconfigure dash
¿Usar guión como shell del sistema predeterminado (/bin/sh)? <-- No
... y que deshabilites AppArmor:
/etc/init.d/apparmor stop
update-rc.d -f apparmor remove
apt-get remove apparmor apparmor-utils
2 Instale Postfix, Courier, Saslauthd, MySQL, phpMyAdmin
Para instalar Postfix, Courier, Saslauthd, MySQL y phpMyAdmin, simplemente ejecutamos
apt-get install postfix postfix-mysql postfix-doc mysql-client mysql-server courier-authdaemon courier-authlib-mysql courier-pop courier-pop-ssl courier-imap courier-imap-ssl libsasl2-2 libsasl2-modules libsasl2-modules-sql sasl2-bin libpam-mysql openssl phpmyadmin apache2 libapache2-mod-php5 php5 php5-mysql libpam-smbpass
Se le harán algunas preguntas:
Nueva contraseña para el usuario "root" de MySQL:<-- yourrootsqlpassword
Repetir la contraseña para el usuario "root" de MySQL:<-- yourrootsqlpassword
¿Crear directorios para administración basada en web? <-- No
Tipo general de configuración de correo:<-- Sitio de Internet
Nombre de correo del sistema:<-- server1.example.com
Certificado SSL requerido <-- Ok
Servidor web para reconfigurar automáticamente:<-- apache2
¿Configurar base de datos para phpmyadmin con dbconfig-common? <-- No
3 Aplicar el parche de cuota a Postfix
Tenemos que obtener las fuentes de Postfix, parchearlo con el parche de cuota, crear nuevos paquetes .deb de Postfix e instalar esos paquetes .deb:
apt-get build-dep postfix
cd /usr/src
apt-get source postfix
(Asegúrese de usar la versión correcta de Postfix en los siguientes comandos. Tengo instalado Postfix 2.9.3. Puede encontrar su versión de Postfix ejecutando
postconf -d | grep mail_version
La salida debería verse así:
[correo electrónico protegido]:/usr/src# postconf -d | grep mail_version
mail_version =2.9.3
milter_macro_v =$mail_name $mail_version
[email protected]:/usr/src#
)
wget http://vda.sourceforge.net/VDA/postfix-vda-v11-2.9.1.patch
cd postfix-2.9.3
parche -p1 <../postfix-vda-v11 -2.9.1.parche
A continuación, abra debian/rules y cambie DEB_BUILD_HARDENING de 1 a 0:
vi debian/rules
[...]
export DEB_BUILD_HARDENING=0
[...] |
Si no hace esto, su compilación fallará con los siguientes mensajes de error:
maildir.c:en la función âdeliver_maildirâ:
maildir.c:974:17:error:el formato no es una cadena literal ni argumentos de formato [-Werror=format-security]
maildir.c:977:17 :error:el formato no es una cadena literal ni argumentos de formato [-Werror=formato-seguridad]
maildir.c:983:17:error:el formato no es una cadena literal ni argumentos de formato [-Werror=formato-seguridad] ]
maildir.c:986:17:error:el formato no es una cadena literal ni argumentos de formato [-Werror=format-security]
maildir.c:en la función âsql2fileâ:
maildir. c:404:25:advertencia:ignorando el valor de retorno de âreadâ, declarado con el atributo warn_unused_result [-Wunused-result]
maildir.c:417:26:advertencia:ignorando el valor de retorno de âwriteâ, declarado con el atributo warn_unused_result [- Wunused-result]
cc1:algunas advertencias se tratan como errores
make:*** [maildir.o] Error 1
make:Dejando el directorio `/usr/src/postfix-2.9. 3/src/virtual'
make[1]:*** [actualización] Error 1
make[1]:Dejando el directorio `/usr/src/postfix -2.9.3'
make:*** [compilación] Error 2
dpkg-buildpackage:error:la compilación de debian/rules dio el estado de salida de error 2
[email protected]:/usr/ src/postfix-2.9.3#
Ahora podemos construir los nuevos paquetes Postfix .deb:
dpkg-buildpackage
Ahora subimos un directorio, ahí es donde se han creado los nuevos paquetes .deb:
cd ..
El comando
ls -l
te muestra los paquetes disponibles:
[email protected]:/usr/src# ls -l
total 6928
drwxr-xr-x 24 root root 4096 19 de octubre 12:56 linux-headers-3.5.0-17
drwxr-xr-x 7 root root 4096 19 de octubre 12:56 linux-headers-3.5.0-17-generic
drwxr-xr-x 18 root root 4096 4 de noviembre 14:11 postfix-2.9.3
-rw-r--r-- 1 root root 3809 4 de noviembre 14:11 postfix_2.9.3-2ubuntu2_amd64.changes
-rw-r--r-- 1 root root 1510254 4 de noviembre 14:11 postfix_2 .9.3-2ubuntu2_amd64.deb
-rw-r--r-- 1 root root 249645 4 de noviembre 14:10 postfix_2.9.3-2ubuntu2.diff.gz
-rw-r--r-- 1 raíz raíz 1599 4 de noviembre 14:10 postfix_2.9.3-2ubuntu2.dsc
-rw-r--r-- 1 raíz root 3760555 30 de mayo 18:04 postfix_2.9.3.orig.tar.gz
-rw-r--r-- 1 root root 47064 4 de noviembre 14:11 postfix-cdb_2.9.3-2ubuntu2_amd64.deb
-rw-r--r-- 1 root root 159634 4 de noviembre 14:11 postfix-dev_2.9.3-2ubuntu2_all.deb
-rw-r--r-- 1 root root 1077006 4 de noviembre 14:11 postfix-doc_2.9.3-2ubuntu2_all.deb
-rw-r-- r-- 1 raíz raíz 55430 4 de noviembre 14:11 postfix-ldap_2.9.3-2u buntu2_amd64.deb
-rw-r--r-- 1 raíz raíz 48796 4 de noviembre 14:11 postfix-mysql_2.9.3-2ubuntu2_amd64.deb
-rw-r--r-- 1 raíz raíz 48964 4 de noviembre 14:11 postfix-pcre_2.9.3-2ubuntu2_amd64.deb
-rw-r--r-- 1 root root 48978 4 de noviembre 14:11 postfix-pgsql_2.9.3-2ubuntu2_amd64.deb
-rw-r--r-- 1 root root 55009 11 de abril 2012 postfix-vda-v11-2.9.1.patch
[email protected]:/usr/src#
Elija los paquetes postfix y postfix-mysql e instálelos así:
dpkg -i postfix_2.9.3-2ubuntu2_amd64.deb postfix-mysql_2.9.3-2ubuntu2_amd64.deb
4 Crea la base de datos MySQL para Postfix/Courier
Ahora creamos una base de datos llamada correo:
mysqladmin -u root -p create mail
A continuación, vamos al shell de MySQL:
mysql -u root -p
En el shell de MySQL, creamos el usuario mail_admin con la contraseña mail_admin_password (reemplácela con su propia contraseña) que tiene privilegios SELECCIONAR, INSERTAR, ACTUALIZAR, ELIMINAR en la base de datos de correo. Este usuario será utilizado por Postfix y Courier para conectarse a la base de datos de correo:
CONCEDER SELECCIONAR, INSERTAR, ACTUALIZAR, ELIMINAR EN EL CORREO.* A 'mail_admin'@'localhost' IDENTIFICADO POR 'mail_admin_password';
CONCEDER SELECCIONAR, INSERTAR, ACTUALIZAR, ELIMINAR EN EL CORREO.* A 'mail_admin'@'localhost. localdomain' IDENTIFICADO POR 'mail_admin_password';
PRIVILEGIOS DE DESCARGA;
Todavía en el shell de MySQL, creamos las tablas que necesitan Postfix y Courier:
USE mail;
CREATE TABLE dominios (
domain varchar(50) NOT NULL,
PRIMARY KEY (domain) )
ENGINE=MyISAM;
Reenvíos CREATE TABLE (
origen varchar(80) NOT NULL,
destino TEXT NOT NULL,
PRIMARY KEY (origen) )
ENGINE=MyISAM;
CREATE TABLE usuarios (
email varchar(80) NOT NULL,
password varchar(20) NOT NULL,
quota INT(10) DEFAULT '10485760',
CLAVE PRIMARIA (email )
) MOTOR=MiISAM;
CREATE TABLE transport (
dominio varchar(128) NOT NULL predeterminado '',
transport varchar(128) NOT NULL predeterminado '',
CLAVE ÚNICA dominio (dominio)
) MOTOR =MiISAM;
quit;
Como habrás notado, con la renuncia; hemos dejado el shell de MySQL y estamos de vuelta en el shell de Linux.
Los dominios la tabla almacenará cada dominio virtual para el que Postfix debería recibir correos electrónicos (por ejemplo, example.com ).
| dominio |
| ejemplo.com |
Los reenvíos la tabla es para crear un alias de una dirección de correo electrónico a otra, p. reenviar correos electrónicos para [email protected] a [email protected] .
| fuente | destino |
| [correo electrónico protegido] | [correo electrónico protegido] |
Los usuarios La tabla almacena todos los usuarios virtuales (es decir, las direcciones de correo electrónico, porque la dirección de correo electrónico y el nombre de usuario son los mismos) y las contraseñas (en formato cifrado). form!) y un valor de cuota para cada casilla de correo (en este ejemplo, el valor predeterminado es 10485760 bytes, lo que significa 10 MB).
| correo electrónico | contraseña | cuota |
| [correo electrónico protegido] | No9.E4skNvGa. ("secreto" en forma encriptada) | 10485760 |
El transporte La tabla es opcional, es para usuarios avanzados. Permite reenviar correos para usuarios individuales, dominios completos o todos los correos a otro servidor. Por ejemplo,
| dominio | transporte |
| ejemplo.com | smtp:[1.2.3.4] |
reenviaría todos los correos electrónicos para example.com a través del protocolo smtp al servidor con la dirección IP 1.2.3.4 (los corchetes [] significa "no realizar una búsqueda del registro MX DNS" (lo que tiene sentido para las direcciones IP...). Si usa un nombre de dominio completo (FQDN) en su lugar, no usaría los corchetes).
Por cierto, (supongo que la dirección IP de su sistema de servidor de correo es 192.168.0.100) puede acceder a phpMyAdmin en http://192.168.0.100/phpmyadmin/ en un navegador e iniciar sesión como mail_admin. A continuación, puede echar un vistazo a la base de datos. Más tarde puede usar phpMyAdmin para administrar su servidor de correo.
5 Configurar postfijo
Ahora tenemos que decirle a Postfix dónde puede encontrar toda la información en la base de datos. Por lo tanto, tenemos que crear seis archivos de texto. Notará que le digo a Postfix que se conecte a MySQL en la dirección IP 127.0.0.1 en lugar de localhost. Esto se debe a que Postfix se está ejecutando en una cárcel chroot y no tiene acceso al socket MySQL, que intentaría conectar si le dijera a Postfix que use localhost. Si uso 127.0.0.1, Postfix usa la red TCP para conectarse a MySQL, lo cual no es un problema incluso en un chroot jail (la alternativa sería mover el socket de MySQL al chroot jail, lo que causa otros problemas).
Asegúrese de que /etc/mysql/my.cnf contenga la siguiente línea:
vi /etc/mysql/my.cnf
[...]
# Instead of skip-networking the default is now to listen only on
# localhost which is more compatible and is not less secure.
bind-address           = 127.0.0.1
[...] |
Si tuvo que modificar /etc/mysql/my.cnf, reinicie MySQL ahora:
/etc/init.d/mysql restart
Ejecutar
netstat -tap | grep mysql
para asegurarse de que MySQL esté escuchando en 127.0.0.1 (localhost.localdomain):
[correo electrónico protegido]:/usr/src# netstat -tap | grep mysql
tcp 0 0 localhost.localdo:mysql *:* ESCUCHAR 3895/mysqld
[email protected]:/usr/src#
Ahora vamos a crear nuestros seis archivos de texto.
vi /etc/postfix/mysql-virtual_domains.cf
user = mail_admin
password = mail_admin_password
dbname = mail
query = SELECT domain AS virtual FROM domains WHERE domain='%s'
hosts = 127.0.0.1 |
vi /etc/postfix/mysql-virtual_forwardings.cf
user = mail_admin
password = mail_admin_password
dbname = mail
query = SELECT destination FROM forwardings WHERE source='%s'
hosts = 127.0.0.1 |
vi /etc/postfix/mysql-virtual_mailboxes.cf
user = mail_admin
password = mail_admin_password
dbname = mail
query = SELECT CONCAT(SUBSTRING_INDEX(email,'@',-1),'/',SUBSTRING_INDEX(email,'@',1),'/') FROM users WHERE email='%s'
hosts = 127.0.0.1 |
vi /etc/postfix/mysql-virtual_email2email.cf
user = mail_admin
password = mail_admin_password
dbname = mail
query = SELECT email FROM users WHERE email='%s'
hosts = 127.0.0.1 |
vi /etc/postfix/mysql-virtual_transports.cf
user = mail_admin
password = mail_admin_password
dbname = mail
query = SELECT transport FROM transport WHERE domain='%s'
hosts = 127.0.0.1 |
vi /etc/postfix/mysql-virtual_mailbox_limit_maps.cf
user = mail_admin
password = mail_admin_password
dbname = mail
query = SELECT quota FROM users WHERE email='%s'
hosts = 127.0.0.1 |
Luego cambie los permisos y el grupo de estos archivos:
chmod o=/etc/postfix/mysql-virtual_*.cf
chgrp postfix /etc/postfix/mysql-virtual_*.cf
Ahora creamos un usuario y un grupo llamados vmail con el directorio de inicio /home/vmail. Aquí es donde se almacenarán todos los buzones de correo.
groupadd -g 5000 vmail
useradd -g vmail -u 5000 vmail -d /home/vmail -m
A continuación hacemos algo de configuración de Postfix. ¡Asegúrese de reemplazar server1.example.com con un FQDN válido, de lo contrario, su Postfix podría no funcionar correctamente!
postconf -e 'minombre de host =servidor1.ejemplo.com'
postconf -e 'midestino =servidor1.ejemplo.com, localhost, localhost.dominiolocal'
postconf -e 'misredes =127.0.0.0/8'
postconf -e 'virtual_alias_domains ='
postconf -e 'virtual_alias_maps =proxy:mysql:/etc/postfix/mysql-virtual_forwardings.cf, mysql:/etc/postfix/mysql-virtual_email2email.cf'
postconf -e 'virtual_mailbox_domains =proxy:mysql:/etc/postfix/mysql-virtual_domains.cf'
postconf -e 'virtual_mailbox_maps =proxy:mysql:/etc/postfix/mysql-virtual_mailboxes.cf'
postconf -e 'virtual_mailbox_base =/home/vmail'
postconf -e 'virtual_uid_maps =static:5000'
postconf -e 'virtual_gid_maps =static:5000'
postconf -e ' smtpd_sasl_auth_enable =yes'
postconf -e 'broken_sasl_auth_clients =yes'
postconf -e 'smtpd_sasl_authenticated_header =yes'
postconf -e 'smtpd_recipient_restrictions =permit_mynetworks, permit_sasl_authenticated, rechazó_unauth_destination'
-e 'smtpd_use_tls =yes'
postconf -e 'smtpd_tls_cert_file =/etc/postfix/smtpd.cert'
postconf -e 'smtpd_tls_key_file =/etc/postfix/smtpd.key'
postconf -e 'transport_maps =proxy:mysql:/etc/postfix/mysql-virtual_transports.cf'
postconf -e 'virtual_maildir_extended =yes'
postconf -e 'virtual_mailbox_limit_maps =proxy:mysql:/etc/postfix /mysql-virtual_mailbox_limit_maps.cf'
postconf -e 'virtual_mailbox_limit_override =yes'
postconf -e 'virtual_maildir_limit_message ="El usuario al que intenta comunicarse supera la cuota".'
postconf -e 'virtual_overquota_bounce =yes'
postconf -e 'proxy_read_maps =$ $ local_recipient_maps mydestination $ virtual_alias_maps $ virtual_alias_domains $ virtual_mailbox_maps $ virtual_mailbox_domains $ relay_recipient_maps $ relay_domains $ canonical_maps $ sender_canonical_maps $ recipient_canonical_maps $ relocated_maps $ transport_maps $ mynetworks $ virtual_mailbox_limit_maps'
Luego creamos el certificado SSL que se necesita para TLS:
cd /etc/postfix
openssl req -new -outform PEM -out smtpd.cert -newkey rsa:2048 -nodes -keyout smtpd.key -keyform PEM -days 365 -x509
Nombre del país (código de 2 letras) [AU]:<-- Ingrese el nombre de su país (por ejemplo, "DE").
Nombre del estado o provincia (nombre completo) [Algún estado]:<-- Ingrese su estado o Nombre de la provincia.
Nombre de la localidad (p. ej., ciudad) []:<-- Ingrese su ciudad.
Nombre de la organización (p. ej., empresa) [Internet Widgits Pty Ltd]:<-- Ingrese el nombre de su organización (p. ej., el nombre de su empresa).
Nombre de la unidad organizativa (p. ej., sección) []:<-- Ingrese el nombre de su unidad organizativa (p. ej., "Departamento de TI").
Nombre común (p. ej., SU nombre) []:<-- Ingrese el nombre de dominio completo del sistema (por ejemplo, "servidor1.ejemplo.com").
Dirección de correo electrónico []:<-- Ingrese su dirección de correo electrónico.
Luego cambie los permisos de smtpd.key:
chmod o= /etc/postfix/smtpd.key
Primera ejecución
mkdir -p /var/spool/postfix/var/run/saslauthd
Luego edite /etc/default/saslauthd. Establezca START en sí y cambie la línea OPTIONS="-c -m /var/run/saslauthd" a OPTIONS="-c -m /var/spool/postfix/var/run/saslauthd -r":
vi /etc/default/saslauthd
#
# Settings for saslauthd daemon
# Please read /usr/share/doc/sasl2-bin/README.Debian for details.
#

# Should saslauthd run automatically on startup? (default: no)
START=yes

# Description of this saslauthd instance. Recommended.
# (suggestion: SASL Authentication Daemon)
DESC="SASL Authentication Daemon"

# Short name of this saslauthd instance. Strongly recommended.
# (suggestion: saslauthd)
NAME="saslauthd"

# Which authentication mechanisms should saslauthd use? (default: pam)
#
# Available options in this Debian package:
# getpwent  -- use the getpwent() library function
# kerberos5 -- use Kerberos 5
# pam       -- use PAM
# rimap     -- use a remote IMAP server
# shadow    -- use the local shadow password file
# sasldb    -- use the local sasldb database file
# ldap      -- use LDAP (configuration is in /etc/saslauthd.conf)
#
# Only one option may be used at a time. See the saslauthd man page
# for more information.
#
# Example: MECHANISMS="pam"
MECHANISMS="pam"

# Additional options for this mechanism. (default: none)
# See the saslauthd man page for information about mech-specific options.
MECH_OPTIONS=""

# How many saslauthd processes should we run? (default: 5)
# A value of 0 will fork a new process for each connection.
THREADS=5

# Other options (default: -c -m /var/run/saslauthd)
# Note: You MUST specify the -m option or saslauthd won't run!
#
# WARNING: DO NOT SPECIFY THE -d OPTION.
# The -d option will cause saslauthd to run in the foreground instead of as
# a daemon. This will PREVENT YOUR SYSTEM FROM BOOTING PROPERLY. If you wish
# to run saslauthd in debug mode, please run it by hand to be safe.
#
# See /usr/share/doc/sasl2-bin/README.Debian for Debian-specific information.
# See the saslauthd man page and the output of 'saslauthd -h' for general
# information about these options.
#
# Example for chroot Postfix users: "-c -m /var/spool/postfix/var/run/saslauthd"
# Example for non-chroot Postfix users: "-c -m /var/run/saslauthd"
#
# To know if your Postfix is running chroot, check /etc/postfix/master.cf.
# If it has the line "smtp inet n - y - - smtpd" or "smtp inet n - - - - smtpd"
# then your Postfix is running in a chroot.
# If it has the line "smtp inet n - n - - smtpd" then your Postfix is NOT
# running in a chroot.
#OPTIONS="-c -m /var/run/saslauthd"
OPTIONS="-c -m /var/spool/postfix/var/run/saslauthd -r" |
Luego cree el archivo /etc/pam.d/smtp. Debe contener solo las siguientes dos líneas (asegúrese de completar los detalles correctos de su base de datos):
vi /etc/pam.d/smtp
auth    required   pam_mysql.so user=mail_admin passwd=mail_admin_password host=127.0.0.1 db=mail table=users usercolumn=email passwdcolumn=password crypt=1
account sufficient pam_mysql.so user=mail_admin passwd=mail_admin_password host=127.0.0.1 db=mail table=users usercolumn=email passwdcolumn=password crypt=1 |
A continuación, cree el archivo /etc/postfix/sasl/smtpd.conf. Debería verse así:
vi /etc/postfix/sasl/smtpd.conf
pwcheck_method: saslauthd
mech_list: plain login
allow_plaintext: true
auxprop_plugin: sql
sql_engine: mysql
sql_hostnames: 127.0.0.1
sql_user: mail_admin
sql_passwd: mail_admin_password
sql_database: mail
sql_select: select password from users where email = '%[email protected]%r' |
A continuación, agregue el usuario de Postfix al grupo sasl (esto garantiza que Postfix tenga permiso para acceder a saslauthd):
adduser postfix sasl
Luego reinicie Postfix y Saslauthd:
/etc/init.d/postfix reiniciar
/etc/init.d/saslauthd reiniciar
Ahora tenemos que decirle a Courier que debe autenticarse en nuestra base de datos MySQL. Primero, edite /etc/courier/authdaemonrc y cambie el valor de authmodulelist para que diga:
vi /etc/courier/authdaemonrc
[...]
authmodulelist="authmysql"
[...] |
Luego haga una copia de seguridad de /etc/courier/authmysqlrc y vacíe el archivo antiguo:
cp /etc/courier/authmysqlrc /etc/courier/authmysqlrc_orig
cat /dev/null> /etc/courier/authmysqlrc
Luego abra /etc/courier/authmysqlrc y coloque las siguientes líneas:
vi /etc/courier/authmysqlrc
MYSQL_SERVER localhost
MYSQL_USERNAME mail_admin
MYSQL_PASSWORD mail_admin_password
MYSQL_PORT 0
MYSQL_DATABASE mail
MYSQL_USER_TABLE users
MYSQL_CRYPT_PWFIELD password
#MYSQL_CLEAR_PWFIELD password
MYSQL_UID_FIELD 5000
MYSQL_GID_FIELD 5000
MYSQL_LOGIN_FIELD email
MYSQL_HOME_FIELD "/home/vmail"
MYSQL_MAILDIR_FIELD CONCAT(SUBSTRING_INDEX(email,'@',-1),'/',SUBSTRING_INDEX(email,'@',1),'/')
#MYSQL_NAME_FIELD
MYSQL_QUOTA_FIELD quota |
Durante la instalación, los certificados SSL para IMAP-SSL y POP3-SSL se crean con el nombre de host localhost. Para cambiar esto al nombre de host correcto (server1.example.com en este tutorial), elimine los certificados...
cd /etc/courier
rm -f /etc/courier/imapd.pem
rm -f /etc/courier/pop3d.pem
... y modifique los siguientes dos archivos; reemplace CN=localhost con CN=server1.example.com (también puede modificar los otros valores, si es necesario):
vi /etc/courier/imapd.cnf
[...]
CN=server1.example.com
[...] |
vi /etc/courier/pop3d.cnf
[...]
CN=server1.example.com
[...] |
Luego vuelva a crear los certificados...
mkimapdcert
mkpop3dcert
... y reinicie Courier:
/etc/init.d/courier-authdaemon restart
/etc/init.d/courier-imap restart
/etc/init.d/courier-imap-ssl restart
/etc/ reinicio de init.d/courier-pop
/etc/init.d/reinicio de courier-pop-ssl
Al correr
telnet localhost pop3
puede ver si su servidor POP3 está funcionando correctamente. Debería devolver +OK Hola. (Escriba quit para volver al shell de Linux).
[email protected]:/etc/courier# telnet localhost pop3
Probando 127.0.0.1...
Conectado a localhost.localdomain.
El carácter de escape es '^]'.
+OK Hola.
<-- salir
+OK Mejor suerte la próxima vez.
Conexión cerrada por host externo.
[email protected]:/etc/courier#
8 Modificar /etc/aliases
Ahora deberíamos abrir /etc/aliases. Asegúrese de que postmaster apunte a root y root a su propio nombre de usuario o su dirección de correo electrónico, p. así:
vi /etc/aliases
[...]
postmaster: root
root: [email protected]
[...] |
o así (si el administrador es su propio nombre de usuario):
[...]
postmaster: root
root:   administrator
[...] |
Siempre que modifique /etc/aliases, debe ejecutar
newaliases
después y reinicie Postfix:
/etc/init.d/postfix restart
9 Instale amavisd-new, SpamAssassin y ClamAV
Para instalar amavisd-new, spamassassin y clamav, ejecute el siguiente comando:
apt-get install amavisd-new spamassassin clamav clamav-daemon zoo unzip bzip2 libnet-ph-perl libnet-snpp-perl libnet-telnet-perl nomarch lzop pax
Posteriormente debemos configurar amavisd-new. La configuración se divide en varios archivos que residen en el directorio /etc/amavis/conf.d. Eche un vistazo a cada uno de ellos para familiarizarse con la configuración. La mayoría de las configuraciones están bien, sin embargo, debemos modificar tres archivos:
Primero debemos habilitar ClamAV y SpamAssassin en /etc/amavis/conf.d/15-content_filter_mode descomentando las líneas @bypass_virus_checks_maps y @bypass_spam_checks_maps:
vi /etc/amavis/conf.d/15-content_filter_mode
El archivo debería verse así:
use strict;

# You can modify this file to re-enable SPAM checking through spamassassin
# and to re-enable antivirus checking.

#
# Default antivirus checking mode
# Please note, that anti-virus checking is DISABLED by
# default.
# If You wish to enable it, please uncomment the following lines:


@bypass_virus_checks_maps = (
   \%bypass_virus_checks, \@bypass_virus_checks_acl, \$bypass_virus_checks_re);


#
# Default SPAM checking mode
# Please note, that anti-spam checking is DISABLED by
# default.
# If You wish to enable it, please uncomment the following lines:


@bypass_spam_checks_maps = (
   \%bypass_spam_checks, \@bypass_spam_checks_acl, \$bypass_spam_checks_re);

1; # ensure a defined return |
Y luego debería echar un vistazo a la configuración de spam y las acciones para spam-/virus-mails en /etc/amavis/conf.d/20-debian_defaults. No es necesario cambiar nada si la configuración predeterminada le parece bien. El archivo contiene muchas explicaciones, por lo que no es necesario explicar la configuración aquí:
vi /etc/amavis/conf.d/20-debian_defaults
[...]
$QUARANTINEDIR = "$MYHOME/virusmails";
$quarantine_subdir_levels = 1; # enable quarantine dir hashing

$log_recip_templ = undef;    # disable by-recipient level-0 log entries
$DO_SYSLOG = 1;              # log via syslogd (preferred)
$syslog_ident = 'amavis';    # syslog ident tag, prepended to all messages
$syslog_facility = 'mail';
$syslog_priority = 'debug';  # switch to info to drop debug output, etc

$enable_db = 1;              # enable use of BerkeleyDB/libdb (SNMP and nanny)
$enable_global_cache = 1;    # enable use of libdb-based cache if $enable_db=1

$inet_socket_port = 10024;   # default listening socket

$sa_spam_subject_tag = '***SPAM*** ';
$sa_tag_level_deflt  = 2.0;  # add spam info headers if at, or above that level
$sa_tag2_level_deflt = 6.31; # add 'spam detected' headers at that level
$sa_kill_level_deflt = 6.31; # triggers spam evasive actions
$sa_dsn_cutoff_level = 10;   # spam level beyond which a DSN is not sent
[...]
$final_virus_destiny      = D_DISCARD;  # (data not lost, see virus quarantine)
$final_banned_destiny     = D_BOUNCE;   # D_REJECT when front-end MTA
$final_spam_destiny       = D_BOUNCE;
$final_bad_header_destiny = D_PASS;     # False-positive prone (for spam)
[...] |
Finalmente, edite /etc/amavis/conf.d/50-user y agregue la línea $pax='pax'; en el medio:
vi /etc/amavis/conf.d/50-user
use strict;

#
# Place your configuration directives here.  They will override those in
# earlier files.
#
# See /usr/share/doc/amavisd-new/ for documentation and examples of
# the directives you can use in this file
#
$pax='pax';

#------------ Do not modify anything below this line -------------
1; # ensure a defined return |
Luego, ejecute estos comandos para agregar el usuario clamav al grupo amavis y reiniciar amavisd-new y ClamAV:
adduser clamav amavis
/etc/init.d/amavis restart
/etc/init.d/clamav-freshclam restart
/etc/init.d/clamav-daemon restart
Ahora tenemos que configurar Postfix para canalizar el correo electrónico entrante a través de amavisd-new:
postconf -e 'content_filter =amavis:[127.0.0.1]:10024'
postconf -e 'receive_override_options =no_address_mappings'
Luego agregue las siguientes líneas a /etc/postfix/master.cf:
vi /etc/postfix/master.cf
[...]
amavis unix - - - - 2 smtp
        -o smtp_data_done_timeout=1200
        -o smtp_send_xforward_command=yes

127.0.0.1:10025 inet n - - - - smtpd
        -o content_filter=
        -o local_recipient_maps=
        -o relay_recipient_maps=
        -o smtpd_restriction_classes=
        -o smtpd_client_restrictions=
        -o smtpd_helo_restrictions=
        -o smtpd_sender_restrictions=
        -o smtpd_recipient_restrictions=permit_mynetworks,reject
        -o mynetworks=127.0.0.0/8
        -o strict_rfc821_envelopes=yes
-o receive_override_options=no_unknown_recipient_checks,no_header_body_checks |
Luego reinicie Postfix:
/etc/init.d/postfix restart
Ahora corre
netstat -tap
y debería ver Postfix (maestro) escuchando en el puerto 25 (smtp) y 10025, y amavisd-new en el puerto 10024:
[email protected]:/etc/courier# netstat -tap
Conexiones activas de Internet (servidores y establecidas)
Proto Recv-Q Send-Q Dirección local Dirección extranjera Estado PID/Nombre del programa
tcp 0 0*:http*:*escucha 6134 /apache2
tcp 0 0*:ssh*:*escucha 610 /sshd
tcp 0 0*:smtp*:*escucha 23128 /maestro
tcp 0 0 localhost.localdo:10024*:*escucha 21937 /amavisd-new (
tcp 0 0 localhost.localdo:10025*:*escucha 23128 /maestro
tcp 0 0 localhost.localdo:mysql* :*Escuche 4308 /mysqld
tcp 0 52 server1.example.com:ssh 192.168.0.206:57597 Establecido 976/0
tcp6 0 0 [::]:ssh [::] escucha 610 610 /sshd
tcp6 0 0 [::]:smtp [::]:*escucha 23128 /maestro
tcp6 0 0 [::]:imaps [::]:*escucha 18191 /couriertcpd
tcp6 0 0 [::]:POP3S [::]:*Escuchar 18259 /Couriertcpd
tcp6 0 0 [::]:pop3 [::]:*Escuchar 18222 /Couriertcpd
tcp6 0 0 [::]:imap2 [ ::]:* ESCUCHA 18154/couriertcpd
[email protected]:/etc/courier#
Razor, Pyzor y DCC son filtros de spam que utilizan una red de filtrado colaborativo. Para instalar Razor y Pyzor, ejecute
apt-get install razor pyzor
DCC no está disponible en los repositorios de Ubuntu 12.10, por lo que lo instalamos de la siguiente manera:
cd /tmp
wget http://www.dcc-servers.net/dcc/source/dcc-dccproc.tar.Z
tar xzvf dcc-dccproc.tar.Z
cd dcc -dccproc-1.3.143
./configure --with-uid=amavis
make
make install
chown -R amavis:amavis /var/dcc
ln -s /var/dcc/libexec/dccifd /usr/local/bin/dccifd
Ahora tenemos que decirle a SpamAssassin que use estos tres programas. Edite /etc/spamassassin/local.cf y agréguele las siguientes líneas:
vi /etc/spamassassin/local.cf
[...]
#dcc
use_dcc 1
dcc_path /usr/local/bin/dccproc

#pyzor
use_pyzor 1
pyzor_path /usr/bin/pyzor

#razor
use_razor2 1
razor_config /etc/razor/razor-agent.conf

#bayes
use_bayes 1
use_bayes_rules 1
bayes_auto_learn 1 |
Luego debemos habilitar el complemento DCC en SpamAssassin. Abra /etc/spamassassin/v310.pre y quite el comentario de loadplugin Mail::SpamAssassin::Plugin::DCC line:
vi /etc/spamassassin/v310.pre
[...]
# DCC - perform DCC message checks.
#
# DCC is disabled here because it is not open source.  See the DCC
# license for more details.
#
loadplugin Mail::SpamAssassin::Plugin::DCC
[...] |
Puede verificar su configuración de SpamAssassin ejecutando:
spamassassin --lint
No debería mostrar ningún error.
Reinicie amavisd-new después:
/etc/init.d/amavis restart
Ahora actualizamos nuestros conjuntos de reglas de SpamAssassin de la siguiente manera:
sa-update --no-gpg
Creamos un trabajo cron para que los conjuntos de reglas se actualicen regularmente. Ejecutar
crontab -e
para abrir el editor de trabajos cron. Cree el siguiente trabajo cron:
23 4 */2 * * /usr/bin/sa-update --no-gpg &> /dev/null |
Esto actualizará los conjuntos de reglas cada dos días a las 4:23 h.
11 notificaciones de superación de cuota
Si desea recibir notificaciones sobre todas las cuentas de correo electrónico que superan la cuota, cree el archivo /usr/local/sbin/quota_notify:
cd /usr/local/sbin/
vi quota_notify
#!/usr/bin/perl -w

# Author <[email protected]>
#
# This script assumes that virtual_mailbox_base in defined
# in postfix's main.cf file. This directory is assumed to contain
# directories which themselves contain your virtual user's maildirs.
# For example:
#
# -----------/
#            |
#            |
#    home/vmail/domains/
#        |          |
#        |          |
#  example.com/  foo.com/
#                   |
#                   |
#           -----------------
#           |       |       |
#           |       |       |
#         user1/   user2/  user3/
#                           |
#                           |
#                        maildirsize
#

use strict;

my $POSTFIX_CF = "/etc/postfix/main.cf";
my $MAILPROG = "/usr/sbin/sendmail -t";
my $WARNPERCENT = 80;
my @POSTMASTERS = ('[email protected]');
my $CONAME = 'My Company';
my $COADDR = '[email protected]';
my $SUADDR = '[email protected]';
my $MAIL_REPORT = 1;
my $MAIL_WARNING = 1;

#get virtual mailbox base from postfix config
open(PCF, "< $POSTFIX_CF") or die $!;
my $mboxBase;
while (<PCF>) {
   next unless /virtual_mailbox_base\s*=\s*(.*)\s*/;
   $mboxBase = $1;
}
close(PCF);

#assume one level of subdirectories for domain names
my @domains;
opendir(DIR, $mboxBase) or die $!;
while (defined(my $name = readdir(DIR))) {
   next if $name =~ /^\.\.?$/;        #skip '.' and '..'
   next unless (-d "$mboxBase/$name");
   push(@domains, $name);
}
closedir(DIR);
#iterate through domains for username/maildirsize files
my @users;
chdir($mboxBase);
foreach my $domain (@domains) {
        opendir(DIR, $domain) or die $!;
        while (defined(my $name = readdir(DIR))) {
           next if $name =~ /^\.\.?$/;        #skip '.' and '..'
           next unless (-d "$domain/$name");
      push(@users, {"$name\@$domain" => "$mboxBase/$domain/$name"});
        }
}
closedir(DIR);

#get user quotas and percent used
my (%lusers, $report);
foreach my $href (@users) {
   foreach my $user (keys %$href) {
      my $quotafile = "$href->{$user}/maildirsize";
      next unless (-f $quotafile);
      open(QF, "< $quotafile") or die $!;
      my ($firstln, $quota, $used);
      while (<QF>) {
         my $line = $_;
              if (! $firstln) {
                 $firstln = 1;
                 die "Error: corrupt quotafile $quotafile"
                    unless ($line =~ /^(\d+)S/);
                 $quota = $1;
            last if (! $quota);
            next;
         }
         die "Error: corrupt quotafile $quotafile"
            unless ($line =~ /\s*(-?\d+)/);
         $used += $1;
      }
      close(QF);
      next if (! $used);
      my $percent = int($used / $quota * 100);
      $lusers{$user} = $percent unless not $percent;
   }
}

#send a report to the postmasters
if ($MAIL_REPORT) {
   open(MAIL, "| $MAILPROG");
   select(MAIL);
   map {print "To: $_\n"} @POSTMASTERS;
   print "From: $COADDR\n";
   print "Subject: Daily Quota Report.\n";
   print "DAILY QUOTA REPORT:\n\n";
   print "----------------------------------------------\n";
   print "| % USAGE |            ACCOUNT NAME          |\n";
   print "----------------------------------------------\n";
   foreach my $luser ( sort { $lusers{$b} <=> $lusers{$a} } keys %lusers ) {
      printf("|   %3d   | %32s |\n", $lusers{$luser}, $luser);
      print "---------------------------------------------\n";
   }
        print "\n--\n";
        print "$CONAME\n";
        close(MAIL);
}

#email a warning to people over quota
if ($MAIL_WARNING) {
        foreach my $luser (keys (%lusers)) {
           next unless $lusers{$luser} >= $WARNPERCENT;       # skip those under quota
           open(MAIL, "| $MAILPROG");
           select(MAIL);
           print "To: $luser\n";
      map {print "BCC: $_\n"} @POSTMASTERS;
           print "From: $SUADDR\n";
           print "Subject: WARNING: Your mailbox is $lusers{$luser}% full.\n";
           print "Reply-to: $SUADDR\n";
           print "Your mailbox: $luser is $lusers{$luser}% full.\n\n";
           print "Once your e-mail box has exceeded your monthly storage quota\n";
      print "your monthly billing will be automatically adjusted.\n";
      print "Please consider deleting e-mail and emptying your trash folder to clear some space.\n\n";
           print "Contact <$SUADDR> for further assistance.\n\n";
           print "Thank You.\n\n";
           print "--\n";
           print "$CONAME\n";
           close(MAIL);
        }
} |
Asegúrate de ajustar las variables en la parte superior (especialmente la dirección de correo electrónico [email protected]).
Debemos hacer que el archivo sea ejecutable:
chmod 755 quota_notify
Ejecutar
crontab -e
para crear un trabajo cron para ese script:
0 0 * * * /usr/local/sbin/quota_notify &> /dev/null |
12 Postfijo de prueba
Para ver si Postfix está listo para SMTP-AUTH y TLS, ejecute
telnet localhost 25
Una vez que haya establecido la conexión con su servidor de correo Postfix, escriba
ehlo localhost
Si ves las líneas
250-STARTTLS
y
250-AUTH PLAIN LOGIN
todo está bien:
[email protected]:/usr/local/sbin# telnet localhost 25
Probando 127.0.0.1...
Conectado a localhost.localdomain.
El carácter de escape es '^]'.
220 server1.example.com ESMTP Postfix (Ubuntu)
<-- ehlo localhost
250-server1.example.com
250-PIPELINING
250-SIZE 10240000
250-VRFY
250-ETRN
250-STARTTLS
250-AUTH INICIO DE SESIÓN
250-AUTH=INICIO DE SESIÓN
250-CÓDIGOS DE ESTADO MEJORADOS
250 -8BITMIME
250 DSN
<-- quit
221 2.0.0 Adiós
Conexión cerrada por host externo.
[email protected]:/usr/local/sbin #
Tipo
quit
para volver al shell del sistema.
13 Completar la base de datos y probar
Para llenar la base de datos, puede usar el shell de MySQL:
mysql -u root -p
USE mail;
Al menos hay que crear entradas en las tablas domains y usuarios :
INSERTAR EN `dominios` (`dominio`) VALUES ('ejemplo.com');
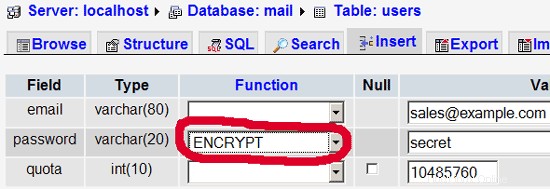
INSERTAR EN `usuarios` (`correo electrónico`, `contraseña`, `cuota`) VALUES ('[email protected]', ENCRIPT('secreto'), 10485760);
(¡Tenga cuidado de utilizar la sintaxis ENCRYPT en la segunda instrucción INSERT para cifrar la contraseña!)
Si desea realizar entradas en las otras dos tablas, se vería así:
INSERTAR EN `reenvíos` (`fuente`, `destino`) VALORES ('[email protected]', '[email protected]');
INSERTAR EN `transporte` (`dominio`, `transporte`) VALORES ('ejemplo.com', 'smtp:mail.ejemplo.com');
Para salir del shell de MySQL, escriba
quit;
Para la mayoría de las personas es más fácil si tienen una interfaz gráfica para MySQL; por lo tanto, también puede usar phpMyAdmin (en este ejemplo bajo http://192.168.0.100/phpmyadmin/ o http://server1.example.com/phpmyadmin/) para administrar el correo base de datos. De nuevo, cuando cree un usuario, asegúrese de utilizar la función ENCRYPT para cifrar la contraseña:
No creo que tenga que explicar más la tabla de dominios y usuarios.
La tabla de reenvíos puede tener entradas como las siguientes:
| fuente | destino | |
| [correo electrónico protegido] | [correo electrónico protegido] | Redirige correos electrónicos de [email protected] a [email protected] |
| @ejemplo.com | [correo electrónico protegido] | Crea una cuenta Catch-All para [email protected] Todos los correos electrónicos a example.com llegarán a [email protected], excepto aquellos que existen en la tabla de usuarios (es decir, si [email protected] existe en la tabla de usuarios, los correos electrónicos a [email protected] seguirán llegando a [email protected]). |
| @ejemplo.com | @otrodominio.tld | Esto redirige todos los correos electrónicos a ejemplo.com al mismo usuario en otrodominio.tld. Por ejemplo, los correos electrónicos a thoma[email protected] se reenviarán a [email protected] |
| [correo electrónico protegido] | [correo electrónico protegido], [correo electrónico protegido] | Reenviar correos electrónicos para [email protected] a dos o más direcciones de correo electrónico. Todas las direcciones de correo electrónico enumeradas en destino reciben una copia del correo electrónico. |
La tabla de transporte puede tener entradas como estas:
| dominio | transporte | |
| ejemplo.com | : | Entrega correos electrónicos para example.com localmente. Esto es como si este registro no existiera en absoluto en esta tabla. |
| ejemplo.com | smtp:mail.otrodominio.tld | Envía todos los correos electrónicos de example.com a través de smtp al servidor mail.anotherdomain.com. |
| ejemplo.com | smtp:mail.otrodominio.tld:2025 | Envía todos los correos electrónicos de example.com a través de smtp al servidor mail.anotherdomain.com, pero en el puerto 2025, no en el 25, que es el puerto predeterminado para smtp. |
| ejemplo.com |
smtp:[1.2.3.4]
smtp:[1.2.3.4]:2025
smtp:[correo.otrodominio.tld] | Los corchetes evitan que Postfix realice búsquedas del registro MX DNS para la dirección entre corchetes. Tiene sentido para las direcciones IP. |
| .ejemplo.com | smtp:mail.otrodominio.tld | El correo de cualquier subdominio de example.com se envía a mail.anotherdomain.tld. |
| * | smtp:mail.anotherdomain.tld | All emails are delivered to mail.anotherdomain.tld. |
| [email protected] | smtp:mail.anotherdomain.tld | Emails for [email protected] are delivered to mail.anotherdomain.tld. |
See
man transport
para más detalles.
Please keep in mind that the order of entries in the transport table is important! The entries will be followed from the top to the bottom.
Important: Postfix uses a caching mechanism for the transports, therefore it might take a while until you changes in the transport table take effect. If you want them to take effect immediately, run
postfix reload
after you have made your changes in the transport table.
14 Send A Welcome Email For Creating Maildir
When you create a new email account and try to fetch emails from it (with POP3/IMAP) you will probably get error messages saying that the Maildir doesn't exist. The Maildir is created automatically when the first email arrives for the new account. Therefore it's a good idea to send a welcome email to a new account.
First, we install the mailx package:
apt-get install mailutils
To send a welcome email to [email protected], we do this:
mailx [email protected]
You will be prompted for the subject. Type in the subject (e.g. Welcome), then press ENTER, and in the next line type your message. When the message is finished, press ENTER again so that you are in a new line, then press CTRL+D; if you don't want to cc the mail, press ENTER again:
[email protected]:/usr/local/sbin# mailx [email protected]
Cc:<-- ENTER
Subject:Welcome <-- ENTER
Welcome! Have fun with your new mail account. <-- ENTER
<-- CTRL+D
[email protected]:/usr/local/sbin#
15 Installing SquirrelMail
SquirrelMail is a webmail interface that will let your users send and receive emails in a browser. This chapter shows how to install it and adjust it to our setup so that users can even change their email account password from the SquirrelMail interface.
To install SquirrelMail, we run:
apt-get install squirrelmail squirrelmail-compatibility php-pear php-db
Next we symlink the Apache configuration that comes with the SquirrelMail package to the /etc/apache2/conf.d directory and restart Apache:
ln -s /etc/squirrelmail/apache.conf /etc/apache2/conf.d/squirrelmail.conf
/etc/init.d/apache2 restart
SquirrelMail comes with some pre-installed plugins, unfortunately none of them is capable of letting us change our email password in our MySQL database. But there's the Change SQL Password plugin which we can install manually:
cd /usr/share/squirrelmail/plugins
wget http://www.squirrelmail.org/plugins/change_sqlpass-3.3-1.2.tar.gz
tar xvfz change_sqlpass-3.3-1.2.tar.gz
cd change_sqlpass
cp config.php.sample config.php
Now we must edit config.php and adjust it to our setup. Please adjust the $csp_dsn, $lookup_password_query, $password_update_queries, $password_encryption, $csp_salt_static, and $csp_delimiter variables as follows and comment out $csp_salt_query:
vi config.php
[...]
$csp_dsn = 'mysql://mail_admin:[email protected]/mail';
[...]
$lookup_password_query = 'SELECT count(*) FROM users WHERE email = "%1" AND password = %4';
[...]
$password_update_queries = array('UPDATE users SET password = %4 WHERE email = "%1"');
[...]
$password_encryption = 'MYSQLENCRYPT';
[...]
$csp_salt_static = 'LEFT(password, 2)';
[...]
//$csp_salt_query = 'SELECT salt FROM users WHERE username = "%1"';
[...]
$csp_delimiter = '@';
[...] |
The complete file looks as follows:
<?php

/**
  * SquirrelMail Change SQL Password Plugin
  * Copyright (C) 2001-2002 Tyler Akins
  *               2002 Thijs Kinkhorst <[email protected]>
  *               2002-2005 Paul Lesneiwski <[email protected]>
  * This program is licensed under GPL. See COPYING for details
  *
  * @package plugins
  * @subpackage Change SQL Password
  *
  */


   // Global Variables, don't touch these unless you want to break the plugin
   //
   global $csp_dsn, $password_update_queries, $lookup_password_query,
          $force_change_password_check_query, $password_encryption,
          $csp_salt_query, $csp_salt_static, $csp_secure_port,
          $csp_non_standard_http_port, $csp_delimiter, $csp_debug,
          $min_password_length, $max_password_length, $include_digit_in_password,
          $include_uppercase_letter_in_password, $include_lowercase_letter_in_password,
          $include_nonalphanumeric_in_password;


   // csp_dsn
   //
   // Theoretically, any SQL database supported by Pear should be supported
   // here.  The DSN (data source name) must contain the information needed
   // to connect to your database backend. A MySQL example is included below.
   // For more details about DSN syntax and list of supported database types,
   // please see:
   //   http://pear.php.net/manual/en/package.database.db.intro-dsn.php
   //
   //$csp_dsn = 'mysql://user:[email protected]/email_users';
   $csp_dsn = 'mysql://mail_admin:[email protected]/mail';


   // lookup_password_query
   //
   // This plugin will always verify the user's old password
   // against their login password, but an extra check can also
   // be done against the database for more security if you
   // desire.  If you do not need the extra password check,
   // make sure this setting is empty.
   //
   // This is a query that returns a positive value if a user
   // and password pair are found in the database.
   //
   // This query should return one value (one row, one column), the
   // value being ideally a one or a zero, simply indicating that
   // the user/password pair does in fact exist in the database.
   //
   //   %1 in this query will be replaced with the full username
   //      (including domain), such as "[email protected]"
   //   %2 in this query will be replaced with the username (without
   //      any domain portion), such as "jose"
   //   %3 in this query will be replaced with the domain name,
   //      such as "example.com"
   //   %4 in this query will be replaced with the current (old)
   //      password in whatever encryption format is needed per other
   //      plugin configuration settings (Note that the syntax of
   //      the password will be provided depending on your encryption
   //      choices, so you NEVER need to provide quotes around this
   //      value in the query here.)
   //   %5 in this query will be replaced with the current (old)
   //      password in unencrypted plain text.  If you do not use any
   //      password encryption, %4 and %5 will be the same values,
   //      except %4 will have double quotes around it and %5 will not.
   //
   //$lookup_password_query = '';
   // TERRIBLE SECURITY: $lookup_password_query = 'SELECT count(*) FROM users WHERE username = "%1" AND plain_password = "%5"';
   //$lookup_password_query = 'SELECT count(*) FROM users WHERE username = "%1" AND crypt_password = %4';
   $lookup_password_query = 'SELECT count(*) FROM users WHERE email = "%1" AND password = %4';


   // password_update_queries
   //
   // An array of SQL queries that will all be executed
   // whenever a password change attempt is made.
   //
   // Any number of queries may be included here.
   // The queries will be executed in the order given here.
   //
   //   %1 in all queries will be replaced with the full username
   //      (including domain), such as "[email protected]"
   //   %2 in all queries will be replaced with the username (without
   //      any domain portion), such as "jose"
   //   %3 in all queries will be replaced with the domain name,
   //      such as "example.com"
   //   %4 in all queries will be replaced with the new password
   //      in whatever encryption format is needed per other
   //      plugin configuration settings (Note that the syntax of
   //      the password will be provided depending on your
   //      encryption choices, so you NEVER need to provide quotes
   //      around this value in the queries here.)
   //   %5 in all queries will be replaced with the new password
   //      in unencrypted plain text - BEWARE!  If you do not use
   //      any password encryption, %4 and %5 will be the same
   //      values, except %4 will have double quotes around it
   //      and %5 will not.
   //
//   $password_update_queries = array(
//            'UPDATE users SET crypt_password = %4 WHERE username = "%1"',
//            'UPDATE user_flags SET force_change_pwd = 0 WHERE username = "%1"',
//            'UPDATE users SET crypt_password = %4, force_change_pwd = 0 WHERE username = "%1"',
//                                   );
   $password_update_queries = array('UPDATE users SET password = %4 WHERE email = "%1"');


   // force_change_password_check_query
   //
   // A query that checks for a flag that indicates if a user
   // should be forced to change their password.  This query
   // should return one value (one row, one column) which is
   // zero if the user does NOT need to change their password,
   // or one if the user should be forced to change it now.
   //
   // This setting should be an empty string if you do not wish
   // to enable this functionality.
   //
   //   %1 in this query will be replaced with the full username
   //      (including domain), such as "[email protected]"
   //   %2 in this query will be replaced with the username (without
   //      any domain portion), such as "jose"
   //   %3 in this query will be replaced with the domain name,
   //      such as "example.com"
   //
   //$force_change_password_check_query = 'SELECT IF(force_change_pwd = "yes", 1, 0) FROM users WHERE username = "%1"';
   //$force_change_password_check_query = 'SELECT force_change_pwd FROM users WHERE username = "%1"';
   $force_change_password_check_query = '';


   // password_encryption
   //
   // What encryption method do you use to store passwords
   // in your database?  Please use one of the following,
   // exactly as you see it:
   //
   //   NONE          Passwords are stored as plain text only
   //   MYSQLPWD      Passwords are stored using the MySQL password() function
   //   MYSQLENCRYPT  Passwords are stored using the MySQL encrypt() function
   //   PHPCRYPT      Passwords are stored using the PHP crypt() function
   //   MD5CRYPT      Passwords are stored using encrypted MD5 algorithm
   //   MD5           Passwords are stored as MD5 hash
   //
   //$password_encryption = 'MYSQLPWD';
   $password_encryption = 'MYSQLENCRYPT';


   // csp_salt_query
   // csp_salt_static
   //
   // Encryption types that need a salt need to know where to get
   // that salt.  If you have a constant, known salt value, you
   // should define it in $csp_salt_static.  Otherwise, leave that
   // value empty and define a value for the $csp_salt_query.
   //
   // Leave both values empty if you do not need (or use) salts
   // to encrypt your passwords.
   //
   // The query should return one value (one row, one column) which
   // is the salt value for the current user's password.  This
   // query is ignored if $csp_salt_static is anything but empty.
   //
   //   %1 in this query will be replaced with the full username
   //      (including domain), such as "[email protected]"
   //   %2 in this query will be replaced with the username (without
   //      any domain portion), such as "jose"
   //   %3 in this query will be replaced with the domain name,
   //      such as "example.com"
   //
   //$csp_salt_static = 'LEFT(crypt_password, 2)';
   //$csp_salt_static = '"a4"';  // use this format with MYSQLENCRYPT
   //$csp_salt_static = '$2$blowsomefish$';  // use this format with PHPCRYPT
   //$csp_salt_static = '';
   $csp_salt_static = 'LEFT(password, 2)';

   //$csp_salt_query = 'SELECT SUBSTRING_INDEX(crypt_password, '$', 1) FROM users WHERE username = "%1"';
   //$csp_salt_query = 'SELECT SUBSTRING(crypt_password, (LENGTH(SUBSTRING_INDEX(crypt_password, '$', 2)) + 2)) FROM users WHERE username = "%1"';
   //$csp_salt_query = 'SELECT salt FROM users WHERE username = "%1"';
   //$csp_salt_query = '';


   // csp_secure_port
   //
   // You may ensure that SSL encryption is used during password
   // change by setting this to the port that your HTTPS is served
   // on (443 is typical).  Set to zero if you do not wish to force
   // an HTTPS connection when users are changing their passwords.
   //
   // You may override this value for certain domains, users, or
   // service levels through the Virtual Host Login (vlogin) plugin
   // by setting a value(s) for $vlogin_csp_secure_port in the vlogin
   // configuration.
   //
   $csp_secure_port = 0;
   //$csp_secure_port = 443;


   // csp_non_standard_http_port
   //
   // If you serve standard HTTP web requests on a non-standard
   // port (anything other than port 80), you should specify that
   // port number here.  Set to zero otherwise.
   //
   // You may override this value for certain domains, users, or
   // service levels through the Virtual Host Login (vlogin) plugin
   // by setting a value(s) for $vlogin_csp_non_standard_http_port
   // in the vlogin configuration.
   //
   //$csp_non_standard_http_port = 8080;
   $csp_non_standard_http_port = 0;


   // min_password_length
   // max_password_length
   // include_digit_in_password
   // include_uppercase_letter_in_password
   // include_lowercase_letter_in_password
   // include_nonalphanumeric_in_password
   //
   // You can set the minimum and maximum password lengths that
   // you accept or leave those settings as zero to indicate that
   // no limit should be applied.
   //
   // Turn on any of the other settings here to check that the
   // new password contains at least one digit, upper case letter,
   // lower case letter and/or one non-alphanumeric character.
   //
   $min_password_length = 6;
   $max_password_length = 0;
   $include_digit_in_password = 0;
   $include_uppercase_letter_in_password = 0;
   $include_lowercase_letter_in_password = 0;
   $include_nonalphanumeric_in_password = 0;


   // csp_delimiter
   //
   // if your system has usernames with something other than
   // an "@" sign separating the user and domain portion,
   // specify that character here
   //
   //$csp_delimiter = '|';
   $csp_delimiter = '@';


   // debug mode
   //
   $csp_debug = 0;


?> |
Now we must go into the SquirrelMail configuration and tell SquirrelMail that we use Courier as our POP3 and IMAP server and enable the Change SQL Password and the Compatibility plugins:
/usr/sbin/squirrelmail-configure
You'll see the following menu. Navigate through it as indicated:
SquirrelMail Configuration : Read: config.php (1.4.0)
---------------------------------------------------------
Main Menu --
1. Organization Preferences
2. Server Settings
3. Folder Defaults
4. General Options
5. Themes
6. Address Books
7. Message of the Day (MOTD)
8. Plugins
9. Database
10. Languages
D. Set pre-defined settings for specific IMAP servers
C Turn color on
S Save data
Q Quit
Command >> <-- D
SquirrelMail Configuration : Read: config.php
---------------------------------------------------------
While we have been building SquirrelMail, we have discovered some
preferences that work better with some servers that don't work so
well with others. If you select your IMAP server, this option will
set some pre-defined settings for that server.
Please note that you will still need to go through and make sure
everything is correct. Esto no lo cambia todo. There are
only a few settings that this will change.
Please select your IMAP server:
bincimap = Binc IMAP server
courier = Courier IMAP server
cyrus = Cyrus IMAP server
dovecot = Dovecot Secure IMAP server
exchange = Microsoft Exchange IMAP server
hmailserver = hMailServer
macosx = Mac OS X Mailserver
mercury32 = Mercury/32
uw = University of Washington's IMAP server
gmail = IMAP access to Google mail (Gmail) accounts
quit = Do not change anything
Command >> <-- courier
imap_server_type = courier
default_folder_prefix = INBOX.
trash_folder = Trash
sent_folder = Sent
draft_folder = Drafts
show_prefix_option = false
default_sub_of_inbox = false
show_contain_subfolder s_option = false
optional_delimiter = .
delete_folder = true
Press enter to continue... <-- press ENTER
SquirrelMail Configuration : Read: config.php (1.4.0)
---------------------------------------------------------
Main Menu --
1. Organization Preferences
2. Server Settings
3. Folder Defaults
4. General Options
5. Themes
6. Address Books
7. Message of the Day (MOTD)
8. Plugins
9. Database
10. Languages
D. Set pre-defined settings for specific IMAP servers
C Turn color on
S Save data
Q Quit
Command >> <-- 8
SquirrelMail Configuration : Read: config.php (1.4.0)
---------------------------------------------------------
Plugins
Installed Plugins
1. view_as_html
Available Plugins:
2. administrator
3. bug_report
4. calendar
5. change_sqlpass
6. compatibility
7. delete_move_next
8. demo
9. filters
10. fortune
11. info
12. listcommands
13. mail_fetch
14. message_details
15. newmail
16. sent_subfolders
17. spamcop
18. squirrelspell
19. test
20. translate
R Return to Main Menu
C Turn color on
S Save data
Q Quit
Command >> <-- 6 (or whatever number the compatibility plugin has - it's needed by the change_sqlpass plugin)
SquirrelMail Configuration : Read: config.php (1.4.0)
---------------------------------------------------------
Plugins
Installed Plugins
1. view_as_html
2. compatibility
Available Plugins:
3. administrator
4. bug_report
5. calendar
6. change_sqlpass
7. delete_move_next
8. demo
9. filters
10. fortune
11. info
12. listcommands
13. mail_fetch
14. message_details
15. newmail
16. sent_subfolders
17. spamcop
18. squirrelspell
19. test
20. translate
R Return to Main Menu
C Turn color on
S Save data
Q Quit
Command >> <-- 6 (the number of the change_sqlpass plugin)
SquirrelMail Configuration : Read: config.php (1.4.0)
---------------------------------------------------------
Plugins
Installed Plugins
1. view_as_html
2. compatibility
3. change_sqlpass
Available Plugins:
4. administrator
5. bug_report
6. calendar
7. delete_move_next
8. demo
9. filters
10. fortune
11. info
12. listcommands
13. mail_fetch
14. message_details
15. newmail
16. sent_subfolders
17. spamcop
18. squirrelspell
19. test
20. translate
R Return to Main Menu
C Turn color on
S Save data
Q Quit
Command >> <-- S
SquirrelMail Configuration : Read: config.php (1.4.0)
---------------------------------------------------------
Plugins
Installed Plugins
1. view_as_html
2. compatibility
3. change_sqlpass
Available Plugins:
4. administrator
5. bug_report
6. calendar
7. delete_move_next
8. demo
9. filters
10. fortune
11. info
12. listcommands
13. mail_fetch
14. message_details
15. newmail
16. sent_subfolders
17. spamcop
18. squirrelspell
19. test
20. translate
R Return to Main Menu
C Turn color on
S Save data
Q Quit
Command >> S
Data saved in config.php
Press enter to continue... <-- press ENTER
SquirrelMail Configuration : Read: config.php (1.4.0)
---------------------------------------------------------
Plugins
Installed Plugins
1. view_as_html
2. compatibility
3. change_sqlpass
Available Plugins:
4. administrator
5. bug_report
6. calendar
7. delete_move_next
8. demo
9. filters
10. fortune
11. info
12. listcommands
13. mail_fetch
14. message_details
15. newmail
16. sent_subfolders
17. spamcop
18. squirrelspell
19. test
20. translate
R Return to Main Menu
C Turn color on
S Save data
Q Quit
Command >> <-- Q
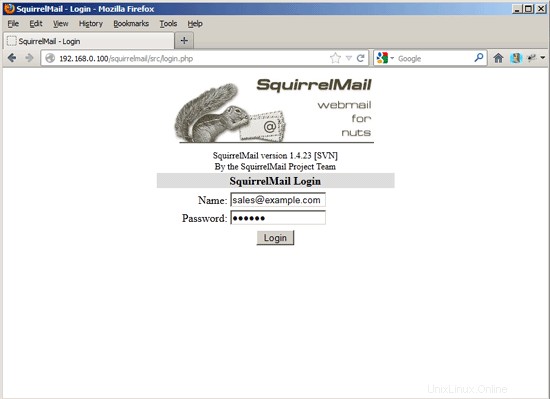
Now you can type in http://server1.example.com/squirrelmail or http://192.168.0.100/squirrelmail in your browser to access SquirrelMail.
Log in with your email address (e.g. [email protected]) and your password:
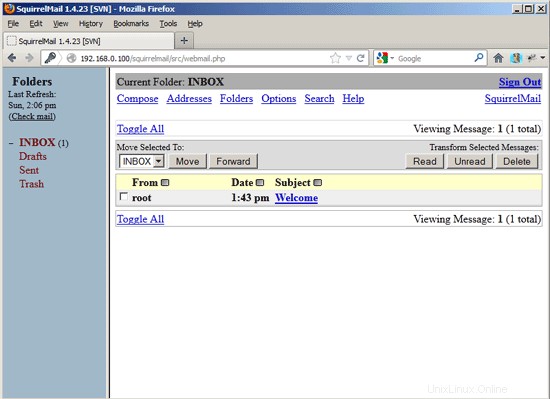
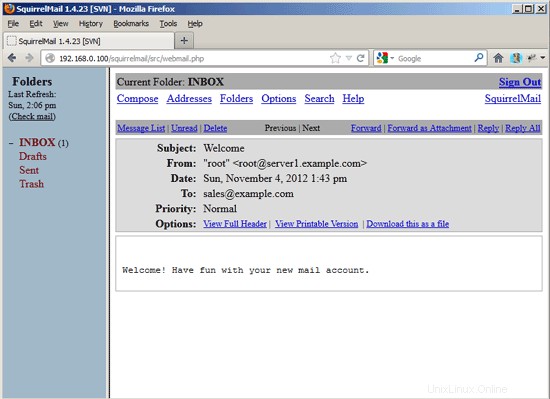
You should find the welcome email in your inbox:
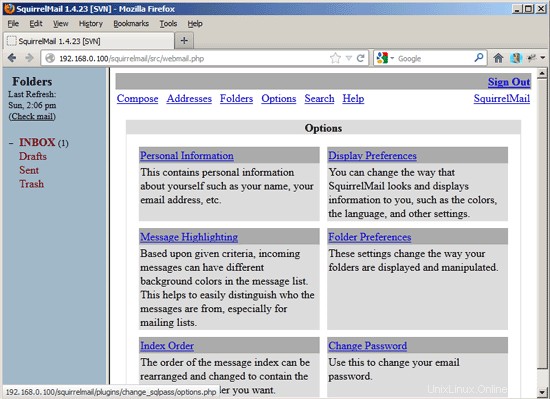
To change your password, go to Options and then select Change Password:
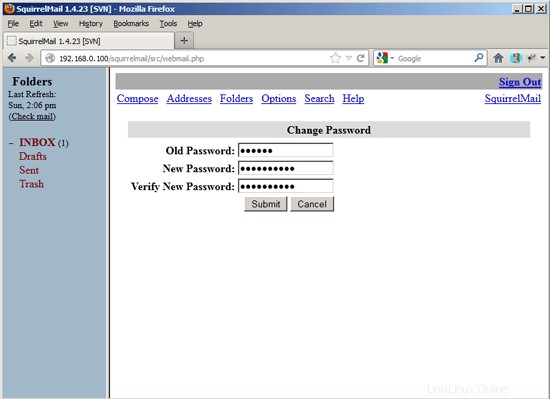
Type in your current password and then your new password twice:
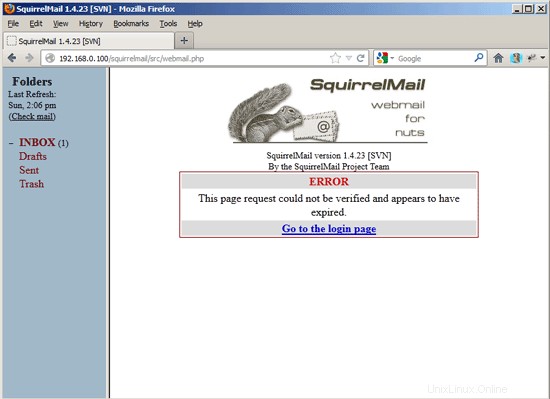
If the password has been changed successfully, you will see the following error message which means you must log in again with your new password (because the old one isn't active anymore):
16 VMA (Virtual Mail Admin Interface)
Virtual Mail Admin (VMA) is a small PHP-based web app written to manage the email system set up in this guide. I didn't test it, but I thought I'd share.
This is what the developer (Charl Loubser) wrote to me in an email:
"Hi There,
I don't know if you'll like this, or if this has any use to you, but I thought I'd Share:
I wrote a silly little webapp for the setup you did in the Howto:https://www.howtoforge.com/virtual-users-domains-postfix-courier-mysql-squirrelmail-ubuntu-10.04
If you approve and think it worthy of sharing on your tutorial, you are more than welcome, and can feel free to do so.
As mentioned in the readme, this is not a perfect app, but it does the job for now, and I'd thing it's relatively safe in a closed environment (LAN setup between servers).
The rar file with the app is attached, but can also be downloaded at :http://code.google.com/p/vma/"
17 References
- Tutorial:ISP-style Email Service with Debian-Sarge and Postfix 2.1:http://workaround.org/articles/ispmail-sarge/
- Postfix + Quota:http://vhcs.net/new/modules/newbb/viewtopic.php?topic_id=3496&forum=17
- Mail Passwords Encrypted using saslauthd:http://www.syscp.de/docs/public/contrib/cryptedmailpws
18 Links
- Postfix MTA:http://www.postfix.org/
- Postfix Quota Patch:http://web.onda.com.br/nadal/
- phpMyAdmin:http://www.phpmyadmin.net/
- SquirrelMail:http://www.squirrelmail.org/
- Ubuntu:http://www.ubuntu.com/
- Virtual Mail Admin Interface (VMA):http://code.google.com/p/vma/