Este tutorial tiene Copyright (c) 2013 por Falko Timme. Se deriva de un tutorial de Christoph Haas que puede encontrar en http://workaround.org. Puede utilizar este tutorial bajo la licencia Creative Commons 2.5 o cualquier versión posterior.
Este documento describe cómo instalar un servidor de correo Postfix basado en usuarios y dominios virtuales, es decir, usuarios y dominios que se encuentran en una base de datos MySQL. También demostraré la instalación y configuración de Courier (Courier-POP3, Courier-IMAP), para que Courier pueda autenticarse contra la misma base de datos MySQL que usa Postfix.
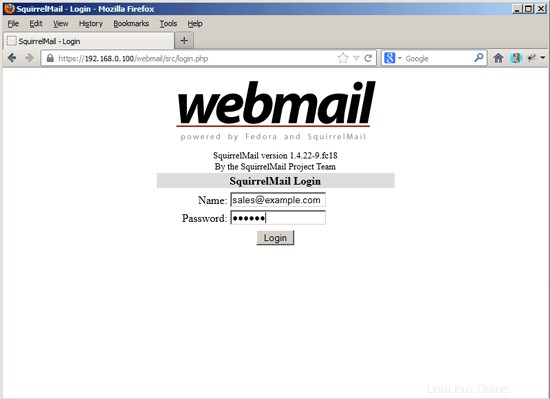
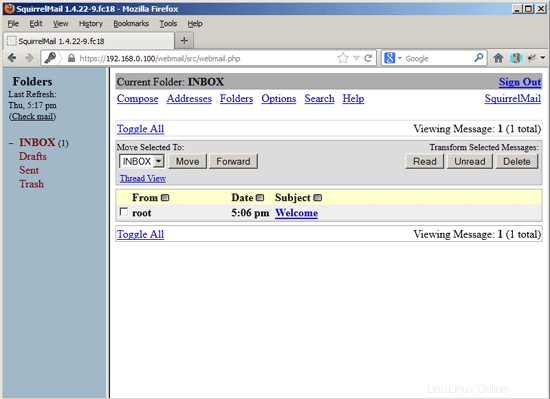
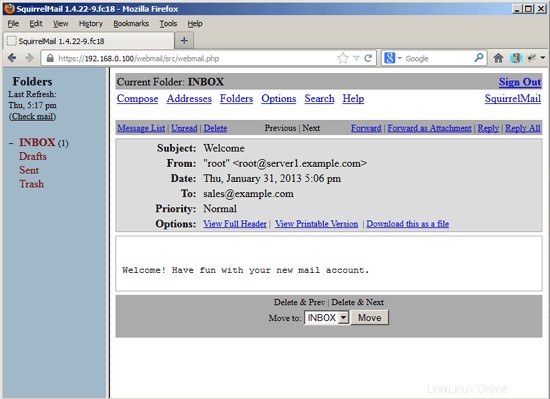
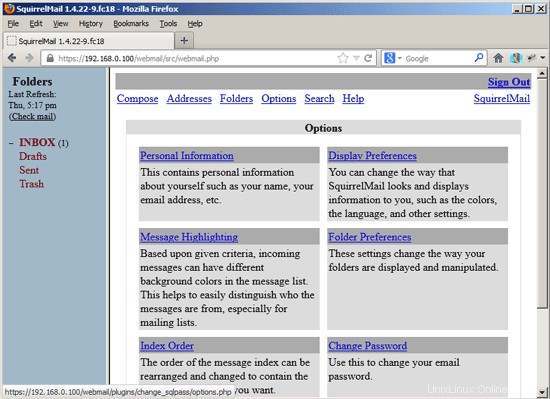
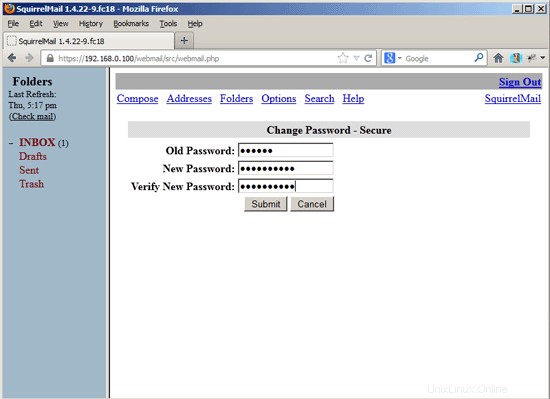
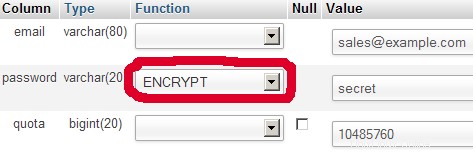
El servidor Postfix resultante es capaz de SMTP-AUTH y TLS y cuota (La cuota no está integrada en Postfix de forma predeterminada, le mostraré cómo parchear su Postfix de manera adecuada). Las contraseñas se almacenan en encriptadas formulario en la base de datos (la mayoría de los documentos que encontré trataban con contraseñas de texto sin formato, lo que es un riesgo de seguridad). Además de eso, este tutorial cubre la instalación de Amavisd , Asesino de spam y ClamAV para que los correos electrónicos sean escaneados en busca de spam y virus. También mostraré cómo instalar SquirrelMail como una interfaz de correo web para que los usuarios puedan leer y enviar correos electrónicos y cambiar sus contraseñas.
La ventaja de una configuración "virtual" de este tipo (usuarios y dominios virtuales en una base de datos MySQL) es que tiene mucho más rendimiento que una configuración basada en usuarios "reales" del sistema. Con esta configuración virtual, su servidor de correo puede manejar miles de dominios y usuarios. Además, es más fácil de administrar porque solo tiene que lidiar con la base de datos MySQL cuando agrega nuevos usuarios/dominios o edita los existentes. No más comandos postmap para crear archivos db, no más recargas de Postfix, etc. Para la administración de la base de datos MySQL, puede usar herramientas basadas en web como phpMyAdmin, que también se instalará en este tutorial. La tercera ventaja es que los usuarios tienen una dirección de correo electrónico como nombre de usuario (en lugar de un nombre de usuario + una dirección de correo electrónico) que es más fácil de entender y tener en cuenta.
Este howto pretende ser una guía práctica; no cubre los antecedentes teóricos. Se tratan en muchos otros documentos en la web.
¡Este documento viene sin garantía de ningún tipo! Quiero decir que esta no es la única forma de establecer un sistema de este tipo. Hay muchas maneras de lograr este objetivo, pero este es el camino que tomo. ¡No emito ninguna garantía de que esto funcione para usted!
1 nota preliminar
Este tutorial se basa en Fedora 18 x86_64, por lo que debe configurar una instalación básica del servidor Fedora 18 antes de continuar con este tutorial. El sistema debe tener una dirección IP estática. Uso 192.168.0.100 como mi dirección IP en este tutorial y server1.example.com como nombre de host.
Debe asegurarse de que el cortafuegos esté desactivado (al menos por ahora).
También asegúrese de que SELinux esté deshabilitado:
Edite /etc/selinux/config y establezca SELINUX=disabled:
vi /etc/selinux/config
# This file controls the state of SELinux on the system. # SELINUX= can take one of these three values: # enforcing - SELinux security policy is enforced. # permissive - SELinux prints warnings instead of enforcing. # disabled - No SELinux policy is loaded. SELINUX=disabled # SELINUXTYPE= can take one of these two values: # targeted - Targeted processes are protected, # minimum - Modification of targeted policy. Only selected processes are protected. # mls - Multi Level Security protection. SELINUXTYPE=targeted |
[...] ## Allow root to run any commands anywhere root ALL=(ALL) ALL falko ALL=(ALL) ALL [...] |
[...] # Patches Patch0: postfix-vda-v11-2.9.4.patch Patch1: postfix-2.7.0-config.patch Patch2: postfix-2.6.1-files.patch Patch3: postfix-alternatives.patch Patch8: postfix-large-fs.patch Patch9: pflogsumm-1.1.3-datecalc.patch [...] %prep %setup -q # Apply obligatory patches %patch0 -p1 -b .vda-v11 %patch1 -p1 -b .config %patch2 -p1 -b .files %patch3 -p1 -b .alternatives %patch8 -p1 -b .large-fs [...] |
# phpMyAdmin - Web based MySQL browser written in php
#
# Allows only localhost by default
#
# But allowing phpMyAdmin to anyone other than localhost should be considered
# dangerous unless properly secured by SSL

Alias /phpMyAdmin /usr/share/phpMyAdmin
Alias /phpmyadmin /usr/share/phpMyAdmin

<Directory /usr/share/phpMyAdmin/>
#   <IfModule mod_authz_core.c>
#     # Apache 2.4
#     <RequireAny>
#       Require ip 127.0.0.1
#       Require ip ::1
#     </RequireAny>
#   </IfModule>
#   <IfModule !mod_authz_core.c>
#     # Apache 2.2
#     Order Deny,Allow
#     Deny from All
#     Allow from 127.0.0.1
#     Allow from ::1
#   </IfModule>
   Require all granted
</Directory>

<Directory /usr/share/phpMyAdmin/setup/>
   <IfModule mod_authz_core.c>
     # Apache 2.4
     <RequireAny>
       Require ip 127.0.0.1
       Require ip ::1
     </RequireAny>
   </IfModule>
   <IfModule !mod_authz_core.c>
     # Apache 2.2
     Order Deny,Allow
     Deny from All
     Allow from 127.0.0.1
     Allow from ::1
   </IfModule>
</Directory>

# These directories do not require access over HTTP - taken from the original
# phpMyAdmin upstream tarball
#
<Directory /usr/share/phpMyAdmin/libraries/>
    Order Deny,Allow
    Deny from All
    Allow from None
</Directory>

<Directory /usr/share/phpMyAdmin/setup/lib/>
    Order Deny,Allow
    Deny from All
    Allow from None
</Directory>

<Directory /usr/share/phpMyAdmin/setup/frames/>
    Order Deny,Allow
    Deny from All
    Allow from None
</Directory>

# This configuration prevents mod_security at phpMyAdmin directories from
# filtering SQL etc.  This may break your mod_security implementation.
#
#<IfModule mod_security.c>
#    <Directory /usr/share/phpMyAdmin/>
#        SecRuleInheritance Off
#    </Directory>
#</IfModule> |
| dominio | ||
| ejemplo.com |
| fuente | destino | |
| [correo electrónico protegido] | [correo electrónico protegido] |
| correo electrónico | contraseña | cuota |
| [correo electrónico protegido] | No9.E4skNvGa. ("secreto" en forma encriptada) | 10485760 |
| dominio | transporte | |
| ejemplo.com | smtp:[1.2.3.4] |
user = mail_admin password = mail_admin_password dbname = mail query = SELECT domain AS virtual FROM domains WHERE domain='%s' hosts = 127.0.0.1 |
user = mail_admin password = mail_admin_password dbname = mail query = SELECT destination FROM forwardings WHERE source='%s' hosts = 127.0.0.1 |
user = mail_admin password = mail_admin_password dbname = mail query = SELECT CONCAT(SUBSTRING_INDEX(email,'@',-1),'/',SUBSTRING_INDEX(email,'@',1),'/') FROM users WHERE email='%s' hosts = 127.0.0.1 |
user = mail_admin password = mail_admin_password dbname = mail query = SELECT email FROM users WHERE email='%s' hosts = 127.0.0.1 |
user = mail_admin password = mail_admin_password dbname = mail query = SELECT transport FROM transport WHERE domain='%s' hosts = 127.0.0.1 |
user = mail_admin password = mail_admin_password dbname = mail query = SELECT quota FROM users WHERE email='%s' hosts = 127.0.0.1 |
pwcheck_method: authdaemond log_level: 3 mech_list: PLAIN LOGIN authdaemond_path:/var/spool/authdaemon/socket |
[...] authmodulelist="authmysql" #authmodulelist="authuserdb authpam authpgsql authldap authmysql authsqlite authcustom authpipe" [...] |
MYSQL_SERVER localhost MYSQL_USERNAME mail_admin MYSQL_PASSWORD mail_admin_password MYSQL_PORT 0 MYSQL_DATABASE mail MYSQL_USER_TABLE users MYSQL_CRYPT_PWFIELD password #MYSQL_CLEAR_PWFIELD password MYSQL_UID_FIELD 5000 MYSQL_GID_FIELD 5000 MYSQL_LOGIN_FIELD email MYSQL_HOME_FIELD "/home/vmail" MYSQL_MAILDIR_FIELD CONCAT(SUBSTRING_INDEX(email,'@',-1),'/',SUBSTRING_INDEX(email,'@',1),'/') #MYSQL_NAME_FIELD MYSQL_QUOTA_FIELD quota |
[...] CN=server1.example.com [...] |
[...] CN=server1.example.com [...] |
[...] postmaster: root root: [email protected] [...] |
[...] postmaster: root root: administrator [...] |
$mydomain = 'example.com'; # a convenient default for other settings |
$mydomain = 'localhost'; #$mydomain = 'example.com'; # a convenient default for other settings |
$sa_tag_level_deflt = 2.0; # add spam info headers if at, or above that level $sa_tag2_level_deflt = 6.2; # add 'spam detected' headers at that level $sa_kill_level_deflt = 6.9; # triggers spam evasive actions (e.g. blocks mail) $sa_dsn_cutoff_level = 10; # spam level beyond which a DSN is not sent |
$sa_tag_level_deflt = 2.0; # add spam info headers if at, or above that level $sa_tag2_level_deflt = 4.0; # add 'spam detected' headers at that level $sa_kill_level_deflt = $sa_tag2_level_deflt; # triggers spam evasive actions (e.g. blocks mail) $sa_dsn_cutoff_level = 10; # spam level beyond which a DSN is not sent #$sa_tag_level_deflt = 2.0; # add spam info headers if at, or above that level #$sa_tag2_level_deflt = 6.2; # add 'spam detected' headers at that level #$sa_kill_level_deflt = 6.9; # triggers spam evasive actions (e.g. blocks mail) #$sa_dsn_cutoff_level = 10; # spam level beyond which a DSN is not sent |
# @lookup_sql_dsn = # ( ['DBI:mysql:database=mail;host=127.0.0.1;port=3306', 'user1', 'passwd1'], # ['DBI:mysql:database=mail;host=host2', 'username2', 'password2'], # ["DBI:SQLite:dbname=$MYHOME/sql/mail_prefs.sqlite", '', ''] ); # @storage_sql_dsn = @lookup_sql_dsn; # none, same, or separate database |
# @lookup_sql_dsn =
#   ( ['DBI:mysql:database=mail;host=127.0.0.1;port=3306', 'user1', 'passwd1'],
#     ['DBI:mysql:database=mail;host=host2', 'username2', 'password2'],
#     ["DBI:SQLite:dbname=$MYHOME/sql/mail_prefs.sqlite", '', ''] );
# @storage_sql_dsn = @lookup_sql_dsn;  # none, same, or separate database

@lookup_sql_dsn =
   ( ['DBI:mysql:database=mail;host=127.0.0.1;port=3306', 'mail_admin', 'mail_admin_password'] );

$sql_select_policy = 'SELECT "Y" as local FROM domains WHERE CONCAT("@",domain) IN (%k)';

$sql_select_white_black_list = undef;  # undef disables SQL white/blacklisting

$recipient_delimiter = '+';                # (default is '+')

$replace_existing_extension = 1;        # (default is false)

$localpart_is_case_sensitive = 0; # (default is false) |
# $recipient_delimiter = '+'; # undef disables address extensions altogether # when enabling addr extensions do also Postfix/main.cf: recipient_delimiter=+ |
$recipient_delimiter = undef; # undef disables address extensions altogether # $recipient_delimiter = '+'; # undef disables address extensions altogether # when enabling addr extensions do also Postfix/main.cf: recipient_delimiter=+ |
$final_virus_destiny = D_DISCARD; $final_banned_destiny = D_BOUNCE; $final_spam_destiny = D_DISCARD; $final_bad_header_destiny = D_BOUNCE; |
$final_virus_destiny = D_REJECT; $final_banned_destiny = D_REJECT; $final_spam_destiny = D_PASS; $final_bad_header_destiny = D_PASS; #$final_virus_destiny = D_DISCARD; #$final_banned_destiny = D_BOUNCE; #$final_spam_destiny = D_DISCARD; #$final_bad_header_destiny = D_BOUNCE; |
$pax='pax'; 1; # insure a defined return value |
use strict;

# a minimalistic configuration file for amavisd-new with all necessary settings
#
#   see amavisd.conf-default for a list of all variables with their defaults;
#   for more details see documentation in INSTALL, README_FILES/*
#   and at http://www.ijs.si/software/amavisd/amavisd-new-docs.html


# COMMONLY ADJUSTED SETTINGS:

# @bypass_virus_checks_maps = (1);  # controls running of anti-virus code
# @bypass_spam_checks_maps  = (1);  # controls running of anti-spam code
# $bypass_decode_parts = 1;         # controls running of decoders&dearchivers

$max_servers = 2;            # num of pre-forked children (2..30 is common), -m
$daemon_user  = 'amavis';    # (no default;  customary: vscan or amavis), -u
$daemon_group = 'amavis';    # (no default;  customary: vscan or amavis), -g

$mydomain = 'localhost';
#$mydomain = 'example.com';   # a convenient default for other settings

$MYHOME = '/var/spool/amavisd';   # a convenient default for other settings, -H
$TEMPBASE = "$MYHOME/tmp";   # working directory, needs to exist, -T
$ENV{TMPDIR} = $TEMPBASE;    # environment variable TMPDIR, used by SA, etc.
$QUARANTINEDIR = undef;      # -Q
# $quarantine_subdir_levels = 1;  # add level of subdirs to disperse quarantine
# $release_format = 'resend';     # 'attach', 'plain', 'resend'
# $report_format  = 'arf';        # 'attach', 'plain', 'resend', 'arf'

# $daemon_chroot_dir = $MYHOME;   # chroot directory or undef, -R

$db_home   = "$MYHOME/db";        # dir for bdb nanny/cache/snmp databases, -D
# $helpers_home = "$MYHOME/var";  # working directory for SpamAssassin, -S
$lock_file = "/var/run/amavisd/amavisd.lock";  # -L
$pid_file  = "/var/run/amavisd/amavisd.pid";   # -P
#NOTE: create directories $MYHOME/tmp, $MYHOME/var, $MYHOME/db manually

$log_level = 0;              # verbosity 0..5, -d
$log_recip_templ = undef;    # disable by-recipient level-0 log entries
$do_syslog = 1;              # log via syslogd (preferred)
$syslog_facility = 'mail';   # Syslog facility as a string
           # e.g.: mail, daemon, user, local0, ... local7

$enable_db = 1;              # enable use of BerkeleyDB/libdb (SNMP and nanny)
# $enable_zmq = 1;           # enable use of ZeroMQ (SNMP and nanny)
$nanny_details_level = 2;    # nanny verbosity: 1: traditional, 2: detailed
$enable_dkim_verification = 1;  # enable DKIM signatures verification
$enable_dkim_signing = 1;    # load DKIM signing code, keys defined by dkim_key

@local_domains_maps = ( [".$mydomain"] );  # list of all local domains

@mynetworks = qw( 127.0.0.0/8 [::1] [FE80::]/10 [FEC0::]/10
                  10.0.0.0/8 172.16.0.0/12 192.168.0.0/16 );

$unix_socketname = "$MYHOME/amavisd.sock";  # amavisd-release or amavis-milter
               # option(s) -p overrides $inet_socket_port and $unix_socketname

$inet_socket_port = 10024;   # listen on this local TCP port(s)
# $inet_socket_port = [10024,10026];  # listen on multiple TCP ports

$policy_bank{'MYNETS'} = {   # mail originating from @mynetworks
  originating => 1,  # is true in MYNETS by default, but let's make it explicit
  os_fingerprint_method => undef,  # don't query p0f for internal clients
};

# it is up to MTA to re-route mail from authenticated roaming users or
# from internal hosts to a dedicated TCP port (such as 10026) for filtering
$interface_policy{'10026'} = 'ORIGINATING';

$policy_bank{'ORIGINATING'} = {  # mail supposedly originating from our users
  originating => 1,  # declare that mail was submitted by our smtp client
  allow_disclaimers => 1,  # enables disclaimer insertion if available
  # notify administrator of locally originating malware
  virus_admin_maps => ["virusalert\@$mydomain"],
  spam_admin_maps  => ["virusalert\@$mydomain"],
  warnbadhsender   => 1,
  # forward to a smtpd service providing DKIM signing service
  forward_method => 'smtp:[127.0.0.1]:10027',
  # force MTA conversion to 7-bit (e.g. before DKIM signing)
  smtpd_discard_ehlo_keywords => ['8BITMIME'],
  bypass_banned_checks_maps => [1],  # allow sending any file names and types
  terminate_dsn_on_notify_success => 0,  # don't remove NOTIFY=SUCCESS option
};

$interface_policy{'SOCK'} = 'AM.PDP-SOCK'; # only applies with $unix_socketname

# Use with amavis-release over a socket or with Petr Rehor's amavis-milter.c
# (with amavis-milter.c from this package or old amavis.c client use 'AM.CL'):
$policy_bank{'AM.PDP-SOCK'} = {
  protocol => 'AM.PDP',
  auth_required_release => 0,  # do not require secret_id for amavisd-release
};

$sa_tag_level_deflt  = 2.0;  # add spam info headers if at, or above that level
$sa_tag2_level_deflt = 4.0;  # add 'spam detected' headers at that level
$sa_kill_level_deflt = $sa_tag2_level_deflt;  # triggers spam evasive actions (e.g. blocks mail)
$sa_dsn_cutoff_level = 10;   # spam level beyond which a DSN is not sent
#$sa_tag_level_deflt  = 2.0;  # add spam info headers if at, or above that level
#$sa_tag2_level_deflt = 6.2;  # add 'spam detected' headers at that level
#$sa_kill_level_deflt = 6.9;  # triggers spam evasive actions (e.g. blocks mail)
#$sa_dsn_cutoff_level = 10;   # spam level beyond which a DSN is not sent
$sa_crediblefrom_dsn_cutoff_level = 18; # likewise, but for a likely valid From
# $sa_quarantine_cutoff_level = 25; # spam level beyond which quarantine is off
$penpals_bonus_score = 8;    # (no effect without a @storage_sql_dsn database)
$penpals_threshold_high = $sa_kill_level_deflt;  # don't waste time on hi spam
$bounce_killer_score = 100;  # spam score points to add for joe-jobbed bounces

$sa_mail_body_size_limit = 400*1024; # don't waste time on SA if mail is larger
$sa_local_tests_only = 0;    # only tests which do not require internet access?

# @lookup_sql_dsn =
#   ( ['DBI:mysql:database=mail;host=127.0.0.1;port=3306', 'user1', 'passwd1'],
#     ['DBI:mysql:database=mail;host=host2', 'username2', 'password2'],
#     ["DBI:SQLite:dbname=$MYHOME/sql/mail_prefs.sqlite", '', ''] );
# @storage_sql_dsn = @lookup_sql_dsn;  # none, same, or separate database

@lookup_sql_dsn =
   ( ['DBI:mysql:database=mail;host=127.0.0.1;port=3306', 'mail_admin', 'mail_admin_password'] );

$sql_select_policy = 'SELECT "Y" as local FROM domains WHERE CONCAT("@",domain) IN (%k)';

$sql_select_white_black_list = undef;  # undef disables SQL white/blacklisting

$recipient_delimiter = '+';                # (default is '+')

$replace_existing_extension = 1;        # (default is false)

$localpart_is_case_sensitive = 0;        # (default is false)

# $timestamp_fmt_mysql = 1; # if using MySQL *and* msgs.time_iso is TIMESTAMP;
#   defaults to 0, which is good for non-MySQL or if msgs.time_iso is CHAR(16)

$virus_admin               = undef;                    # notifications recip.

$mailfrom_notify_admin     = undef;                    # notifications sender
$mailfrom_notify_recip     = undef;                    # notifications sender
$mailfrom_notify_spamadmin = undef;                    # notifications sender
$mailfrom_to_quarantine = ''; # null return path; uses original sender if undef

@addr_extension_virus_maps      = ('virus');
@addr_extension_banned_maps     = ('banned');
@addr_extension_spam_maps       = ('spam');
@addr_extension_bad_header_maps = ('badh');
$recipient_delimiter = undef;  # undef disables address extensions altogether
# $recipient_delimiter = '+';  # undef disables address extensions altogether
# when enabling addr extensions do also Postfix/main.cf: recipient_delimiter=+

$path = '/usr/local/sbin:/usr/local/bin:/usr/sbin:/sbin:/usr/bin:/bin';
# $dspam = 'dspam';

$MAXLEVELS = 14;
$MAXFILES = 1500;
$MIN_EXPANSION_QUOTA =      100*1024;  # bytes  (default undef, not enforced)
$MAX_EXPANSION_QUOTA = 300*1024*1024;  # bytes  (default undef, not enforced)

$sa_spam_subject_tag = '***Spam*** ';
$defang_virus  = 1;  # MIME-wrap passed infected mail
$defang_banned = 1;  # MIME-wrap passed mail containing banned name
# for defanging bad headers only turn on certain minor contents categories:
$defang_by_ccat{CC_BADH.",3"} = 1;  # NUL or CR character in header
$defang_by_ccat{CC_BADH.",5"} = 1;  # header line longer than 998 characters
$defang_by_ccat{CC_BADH.",6"} = 1;  # header field syntax error


# OTHER MORE COMMON SETTINGS (defaults may suffice):

# $myhostname = 'host.example.com';  # must be a fully-qualified domain name!

# $notify_method  = 'smtp:[127.0.0.1]:10025';
# $forward_method = 'smtp:[127.0.0.1]:10025';  # set to undef with milter!

$final_virus_destiny      = D_REJECT;
$final_banned_destiny     = D_REJECT;
$final_spam_destiny       = D_PASS;
$final_bad_header_destiny = D_PASS;
#$final_virus_destiny      = D_DISCARD;
#$final_banned_destiny     = D_BOUNCE;
#$final_spam_destiny       = D_DISCARD;  #!!!  D_DISCARD / D_REJECT
#$final_bad_header_destiny = D_BOUNCE;
# $bad_header_quarantine_method = undef;

# $os_fingerprint_method = 'p0f:*:2345';  # to query p0f-analyzer.pl

## hierarchy by which a final setting is chosen:
##   policy bank (based on port or IP address) -> *_by_ccat
##   *_by_ccat (based on mail contents) -> *_maps
##   *_maps (based on recipient address) -> final configuration value


# SOME OTHER VARIABLES WORTH CONSIDERING (see amavisd.conf-default for all)

# $warnbadhsender,
# $warnvirusrecip, $warnbannedrecip, $warnbadhrecip, (or @warn*recip_maps)
#
# @bypass_virus_checks_maps, @bypass_spam_checks_maps,
# @bypass_banned_checks_maps, @bypass_header_checks_maps,
#
# @virus_lovers_maps, @spam_lovers_maps,
# @banned_files_lovers_maps, @bad_header_lovers_maps,
#
# @blacklist_sender_maps, @score_sender_maps,
#
# $clean_quarantine_method, $virus_quarantine_to, $banned_quarantine_to,
# $bad_header_quarantine_to, $spam_quarantine_to,
#
# $defang_bad_header, $defang_undecipherable, $defang_spam


# REMAINING IMPORTANT VARIABLES ARE LISTED HERE BECAUSE OF LONGER ASSIGNMENTS

@keep_decoded_original_maps = (new_RE(
  qr'^MAIL$',   # retain full original message for virus checking
  qr'^MAIL-UNDECIPHERABLE$', # recheck full mail if it contains undecipherables
  qr'^(ASCII(?! cpio)|text|uuencoded|xxencoded|binhex)'i,
# qr'^Zip archive data',     # don't trust Archive::Zip
));


$banned_filename_re = new_RE(

### BLOCKED ANYWHERE
# qr'^UNDECIPHERABLE$',  # is or contains any undecipherable components
  qr'^\.(exe-ms|dll)$',                   # banned file(1) types, rudimentary
# qr'^\.(exe|lha|cab|dll)$',              # banned file(1) types

### BLOCK THE FOLLOWING, EXCEPT WITHIN UNIX ARCHIVES:
# [ qr'^\.(gz|bz2)$'             => 0 ],  # allow any in gzip or bzip2
  [ qr'^\.(rpm|cpio|tar)$'       => 0 ],  # allow any in Unix-type archives

  qr'.\.(pif|scr)$'i,                     # banned extensions - rudimentary
# qr'^\.zip$',                            # block zip type

### BLOCK THE FOLLOWING, EXCEPT WITHIN ARCHIVES:
# [ qr'^\.(zip|rar|arc|arj|zoo)$'=> 0 ],  # allow any within these archives

  qr'^application/x-msdownload$'i,        # block these MIME types
  qr'^application/x-msdos-program$'i,
  qr'^application/hta$'i,

# qr'^message/partial$'i,         # rfc2046 MIME type
# qr'^message/external-body$'i,   # rfc2046 MIME type

# qr'^(application/x-msmetafile|image/x-wmf)$'i,  # Windows Metafile MIME type
# qr'^\.wmf$',                            # Windows Metafile file(1) type

  # block certain double extensions in filenames
  qr'^(?!cid:).*\.[^./]*[A-Za-z][^./]*\.\s*(exe|vbs|pif|scr|bat|cmd|com|cpl|dll)[.\s]*$'i,

# qr'\{[0-9a-f]{8}(-[0-9a-f]{4}){3}-[0-9a-f]{12}\}?'i, # Class ID CLSID, strict
# qr'\{[0-9a-z]{4,}(-[0-9a-z]{4,}){0,7}\}?'i, # Class ID extension CLSID, loose

  qr'.\.(exe|vbs|pif|scr|cpl)$'i,             # banned extension - basic
# qr'.\.(exe|vbs|pif|scr|cpl|bat|cmd|com)$'i, # banned extension - basic+cmd
# qr'.\.(ade|adp|app|bas|bat|chm|cmd|com|cpl|crt|emf|exe|fxp|grp|hlp|hta|
#        inf|ini|ins|isp|js|jse|lib|lnk|mda|mdb|mde|mdt|mdw|mdz|msc|msi|
#        msp|mst|ocx|ops|pcd|pif|prg|reg|scr|sct|shb|shs|sys|vb|vbe|vbs|vxd|
#        wmf|wsc|wsf|wsh)$'ix,                # banned extensions - long
# qr'.\.(asd|asf|asx|url|vcs|wmd|wmz)$'i,     # consider also
# qr'.\.(ani|cur|ico)$'i,                 # banned cursors and icons filename
# qr'^\.ani$',                            # banned animated cursor file(1) type
# qr'.\.(mim|b64|bhx|hqx|xxe|uu|uue)$'i,  # banned extension - WinZip vulnerab.
);
# See http://support.microsoft.com/default.aspx?scid=kb;EN-US;q262631
# and http://www.cknow.com/vtutor/vtextensions.htm


# ENVELOPE SENDER SOFT-WHITELISTING / SOFT-BLACKLISTING

@score_sender_maps = ({ # a by-recipient hash lookup table,
                        # results from all matching recipient tables are summed

# ## per-recipient personal tables  (NOTE: positive: black, negative: white)
# '[email protected]'  => [{'[email protected]' => 10.0}],
# '[email protected]'  => [{'.ebay.com'                 => -3.0}],
# '[email protected]'  => [{'[email protected]' => -7.0,
#                           '.cleargreen.com'           => -5.0}],

  ## site-wide opinions about senders (the '.' matches any recipient)
  '.' => [  # the _first_ matching sender determines the score boost

   new_RE(  # regexp-type lookup table, just happens to be all soft-blacklist
    [qr'^(bulkmail|offers|cheapbenefits|earnmoney|foryou)@'i         => 5.0],
    [qr'^(greatcasino|investments|lose_weight_today|market\.alert)@'i=> 5.0],
    [qr'^(money2you|MyGreenCard|new\.tld\.registry|opt-out|opt-in)@'i=> 5.0],
    [qr'^(optin|saveonlsmoking2002k|specialoffer|specialoffers)@'i   => 5.0],
    [qr'^(stockalert|stopsnoring|wantsome|workathome|yesitsfree)@'i  => 5.0],
    [qr'^(your_friend|greatoffers)@'i                                => 5.0],
    [qr'^(inkjetplanet|marketopt|MakeMoney)\d*@'i                    => 5.0],
   ),

#  read_hash("/var/amavis/sender_scores_sitewide"),

   { # a hash-type lookup table (associative array)
     '[email protected]'                        => -3.0,
     '[email protected]'              => -3.0,
     '[email protected]'                    => -3.0,
     '[email protected]'                  => -3.0,
     'securityfocus.com'                      => -3.0,
     '[email protected]'       => -3.0,
     '[email protected]'      => -3.0,
     '[email protected]'      => -3.0,
     '[email protected]'=> -3.0,
     '[email protected]' => -3.0,
     'spamassassin.apache.org'                => -3.0,
     '[email protected]'   => -3.0,
     '[email protected]'        => -3.0,
     '[email protected]'     => -3.0,
     '[email protected]'   => -3.0,
     '[email protected]' => -3.0,
     '[email protected]'                => -3.0,
     '[email protected]'               => -3.0,
     '[email protected]'                  => -3.0,
     '[email protected]'          => -3.0,
     '[email protected]'           => -3.0,
     '[email protected]'       => -3.0,
     '[email protected]'          => -3.0,
     '[email protected]'            => -3.0,
     '[email protected]'            => -3.0,
     '[email protected]'                => -5.0,
     '[email protected]'           => -3.0,
     'returns.groups.yahoo.com'               => -3.0,
     '[email protected]'           => -3.0,
     lc('[email protected]')    => -3.0,
     lc('[email protected]') => -5.0,

     # soft-blacklisting (positive score)
     '[email protected]'                     =>  3.0,
     '.example.net'                           =>  1.0,

   },
  ],  # end of site-wide tables
});


@decoders = (
  ['mail', \&do_mime_decode],
# [[qw(asc uue hqx ync)], \&do_ascii],  # not safe
  ['F',    \&do_uncompress, ['unfreeze', 'freeze -d', 'melt', 'fcat'] ],
  ['Z',    \&do_uncompress, ['uncompress', 'gzip -d', 'zcat'] ],
  ['gz',   \&do_uncompress, 'gzip -d'],
  ['gz',   \&do_gunzip],
  ['bz2',  \&do_uncompress, 'bzip2 -d'],
  ['xz',   \&do_uncompress,
           ['xzdec', 'xz -dc', 'unxz -c', 'xzcat'] ],
  ['lzma', \&do_uncompress,
           ['lzmadec', 'xz -dc --format=lzma',
            'lzma -dc', 'unlzma -c', 'lzcat', 'lzmadec'] ],
  ['lrz',  \&do_uncompress,
           ['lrzip -q -k -d -o -', 'lrzcat -q -k'] ],
  ['lzo',  \&do_uncompress, 'lzop -d'],
  ['rpm',  \&do_uncompress, ['rpm2cpio.pl', 'rpm2cpio'] ],
  [['cpio','tar'], \&do_pax_cpio, ['pax', 'gcpio', 'cpio'] ],
           # ['/usr/local/heirloom/usr/5bin/pax', 'pax', 'gcpio', 'cpio']
  ['deb',  \&do_ar, 'ar'],
# ['a',    \&do_ar, 'ar'],  # unpacking .a seems an overkill
  ['rar',  \&do_unrar, ['unrar', 'rar'] ],
  ['arj',  \&do_unarj, ['unarj', 'arj'] ],
  ['arc',  \&do_arc,   ['nomarch', 'arc'] ],
  ['zoo',  \&do_zoo,   ['zoo', 'unzoo'] ],
  ['doc',  \&do_ole,   'ripole'],
  ['cab',  \&do_cabextract, 'cabextract'],
  ['tnef', \&do_tnef_ext, 'tnef'],
  ['tnef', \&do_tnef],
# ['lha',  \&do_lha,   'lha'],  # not safe, use 7z instead
# ['sit',  \&do_unstuff, 'unstuff'],  # not safe
  [['zip','kmz'], \&do_7zip,  ['7za', '7z'] ],
  [['zip','kmz'], \&do_unzip],
  ['7z',   \&do_7zip,  ['7zr', '7za', '7z'] ],
  [[qw(7z zip gz bz2 Z tar)],
           \&do_7zip,  ['7za', '7z'] ],
  [[qw(xz lzma jar cpio arj rar swf lha iso cab deb rpm)],
           \&do_7zip,  '7z' ],
  ['exe',  \&do_executable, ['unrar','rar'], 'lha', ['unarj','arj'] ],
);


@av_scanners = (

# ### http://www.sophos.com/
# ['Sophos-SSSP',
#   \&ask_daemon, ["{}", 'sssp:/var/run/savdi/sssp.sock'],
#           # or: ["{}", 'sssp:[127.0.0.1]:4010'],
#   qr/^DONE OK\b/m, qr/^VIRUS\b/m, qr/^VIRUS\s*(\S*)/m ],

# ### http://www.clanfield.info/sophie/ (http://www.vanja.com/tools/sophie/)
# ['Sophie',
#   \&ask_daemon, ["{}/\n", 'sophie:/var/run/sophie'],
#   qr/(?x)^ 0+ ( : | [\000\r\n]* $)/,  qr/(?x)^ 1 ( : | [\000\r\n]* $)/,
#   qr/(?x)^ [-+]? \d+ : (.*?) [\000\r\n]* $/m ],

# ### http://www.csupomona.edu/~henson/www/projects/SAVI-Perl/
# ['Sophos SAVI', \&ask_daemon, ['{}','savi-perl:'] ],

# ['Avira SAVAPI',
#   \&ask_daemon, ["*", 'savapi:/var/tmp/.savapi3', 'product-id'],
#   qr/^(200|210)/m,  qr/^(310|420|319)/m,
#   qr/^(?:310|420)[,\s]*(?:.* <<< )?(.+?)(?: ; |$)/m ],
# settings for the SAVAPI3.conf: ArchiveScan=1, HeurLevel=2, MailboxScan=1

  ### http://www.clamav.net/
  ['ClamAV-clamd',
    \&ask_daemon, ["CONTSCAN {}\n", "/var/spool/amavisd/clamd.sock"],
    qr/\bOK$/m, qr/\bFOUND$/m,
    qr/^.*?: (?!Infected Archive)(.*) FOUND$/m ],
  # NOTE: run clamd under the same user as amavisd - or run it under its own
  #   uid such as clamav, add user clamav to the amavis group, and then add
  #   AllowSupplementaryGroups to clamd.conf;
  # NOTE: match socket name (LocalSocket) in clamav.conf to the socket name in
  #   this entry; when running chrooted one may prefer a socket under $MYHOME.

# ### http://www.clamav.net/ and CPAN  (memory-hungry! clamd is preferred)
# # note that Mail::ClamAV requires perl to be build with threading!
# ['Mail::ClamAV', \&ask_daemon, ['{}','clamav-perl:'],
#   [0], [1], qr/^INFECTED: (.+)/m],

# ### http://www.openantivirus.org/
# ['OpenAntiVirus ScannerDaemon (OAV)',
#   \&ask_daemon, ["SCAN {}\n", '127.0.0.1:8127'],
#   qr/^OK/m, qr/^FOUND: /m, qr/^FOUND: (.+)/m ],

# ### http://www.vanja.com/tools/trophie/
# ['Trophie',
#   \&ask_daemon, ["{}/\n", 'trophie:/var/run/trophie'],
#   qr/(?x)^ 0+ ( : | [\000\r\n]* $)/m,  qr/(?x)^ 1 ( : | [\000\r\n]* $)/m,
#   qr/(?x)^ [-+]? \d+ : (.*?) [\000\r\n]* $/m ],

# ### http://www.grisoft.com/
# ['AVG Anti-Virus',
#   \&ask_daemon, ["SCAN {}\n", '127.0.0.1:55555'],
#   qr/^200/m, qr/^403/m, qr/^403[- ].*: ([^\r\n]+)/m ],

# ### http://www.f-prot.com/
# ['F-Prot fpscand',  # F-PROT Antivirus for BSD/Linux/Solaris, version 6
#   \&ask_daemon,
#   ["SCAN FILE {}/*\n", '127.0.0.1:10200'],
#   qr/^(0|8|64) /m,
#   qr/^([1235679]|1[01345]) |<[^>:]*(?i)(infected|suspicious|unwanted)/m,
#   qr/(?i)<[^>:]*(?:infected|suspicious|unwanted)[^>:]*: ([^>]*)>/m ],

# ### http://www.f-prot.com/
# ['F-Prot f-protd',  # old version
#   \&ask_daemon,
#   ["GET {}/*?-dumb%20-archive%20-packed HTTP/1.0\r\n\r\n",
#     ['127.0.0.1:10200', '127.0.0.1:10201', '127.0.0.1:10202',
#      '127.0.0.1:10203', '127.0.0.1:10204'] ],
#   qr/(?i)<summary[^>]*>clean<\/summary>/m,
#   qr/(?i)<summary[^>]*>infected<\/summary>/m,
#   qr/(?i)<name>(.+)<\/name>/m ],

# ### http://www.sald.com/, http://www.dials.ru/english/, http://www.drweb.ru/
# ['DrWebD', \&ask_daemon,   # DrWebD 4.31 or later
#   [pack('N',1).  # DRWEBD_SCAN_CMD
#    pack('N',0x00280001).   # DONT_CHANGEMAIL, IS_MAIL, RETURN_VIRUSES
#    pack('N',     # path length
#      length("$TEMPBASE/amavis-yyyymmddTHHMMSS-xxxxx/parts/pxxx")).
#    '{}/*'.       # path
#    pack('N',0).  # content size
#    pack('N',0),
#    '/var/drweb/run/drwebd.sock',
#  # '/var/amavis/var/run/drwebd.sock',   # suitable for chroot
#  # '/usr/local/drweb/run/drwebd.sock',  # FreeBSD drweb ports default
#  # '127.0.0.1:3000',                    # or over an inet socket
#   ],
#   qr/\A\x00[\x10\x11][\x00\x10]\x00/sm,        # IS_CLEAN,EVAL_KEY; SKIPPED
#   qr/\A\x00[\x00\x01][\x00\x10][\x20\x40\x80]/sm,# KNOWN_V,UNKNOWN_V,V._MODIF
#   qr/\A.{12}(?:infected with )?([^\x00]+)\x00/sm,
# ],
# # NOTE: If using amavis-milter, change length to:
# # length("$TEMPBASE/amavis-milter-xxxxxxxxxxxxxx/parts/pxxx").

  ### http://www.kaspersky.com/  (kav4mailservers)
  ['KasperskyLab AVP - aveclient',
    ['/usr/local/kav/bin/aveclient','/usr/local/share/kav/bin/aveclient',
     '/opt/kav/5.5/kav4mailservers/bin/aveclient','aveclient'],
    '-p /var/run/aveserver -s {}/*',
    [0,3,6,8], qr/\b(INFECTED|SUSPICION|SUSPICIOUS)\b/m,
    qr/(?:INFECTED|WARNING|SUSPICION|SUSPICIOUS) (.+)/m,
  ],
  # NOTE: one may prefer [0],[2,3,4,5], depending on how suspicious,
  # currupted or protected archives are to be handled

  ### http://www.kaspersky.com/
  ['KasperskyLab AntiViral Toolkit Pro (AVP)', ['avp'],
    '-* -P -B -Y -O- {}', [0,3,6,8], [2,4],    # any use for -A -K   ?
    qr/infected: (.+)/m,
    sub {chdir('/opt/AVP') or die "Can't chdir to AVP: $!"},
    sub {chdir($TEMPBASE) or die "Can't chdir back to $TEMPBASE $!"},
  ],

  ### The kavdaemon and AVPDaemonClient have been removed from Kasperky
  ### products and replaced by aveserver and aveclient
  ['KasperskyLab AVPDaemonClient',
    [ '/opt/AVP/kavdaemon',       'kavdaemon',
      '/opt/AVP/AvpDaemonClient', 'AvpDaemonClient',
      '/opt/AVP/AvpTeamDream',    'AvpTeamDream',
      '/opt/AVP/avpdc', 'avpdc' ],
    "-f=$TEMPBASE {}", [0,8], [3,4,5,6], qr/infected: ([^\r\n]+)/m ],
    # change the startup-script in /etc/init.d/kavd to:
    #   DPARMS="-* -Y -dl -f=/var/amavis /var/amavis"
    #   (or perhaps:   DPARMS="-I0 -Y -* /var/amavis" )
    # adjusting /var/amavis above to match your $TEMPBASE.
    # The '-f=/var/amavis' is needed if not running it as root, so it
    # can find, read, and write its pid file, etc., see 'man kavdaemon'.
    # defUnix.prf: there must be an entry "*/var/amavis" (or whatever
    #   directory $TEMPBASE specifies) in the 'Names=' section.
    # cd /opt/AVP/DaemonClients; configure; cd Sample; make
    # cp AvpDaemonClient /opt/AVP/
    # su - vscan -c "${PREFIX}/kavdaemon ${DPARMS}"

  ### http://www.centralcommand.com/
  ['CentralCommand Vexira (new) vascan',
    ['vascan','/usr/lib/Vexira/vascan'],
    "-a s --timeout=60 --temp=$TEMPBASE -y $QUARANTINEDIR ".
    "--log=/var/log/vascan.log {}",
    [0,3], [1,2,5],
    qr/(?x)^\s* (?:virus|iworm|macro|mutant|sequence|trojan)\ found:\ ( [^\]\s']+ )\ \.\.\.\ /m ],
    # Adjust the path of the binary and the virus database as needed.
    # 'vascan' does not allow to have the temp directory to be the same as
    # the quarantine directory, and the quarantine option can not be disabled.
    # If $QUARANTINEDIR is not used, then another directory must be specified
    # to appease 'vascan'. Move status 3 to the second list if password
    # protected files are to be considered infected.

  ### http://www.avira.com/
  ### old Avira AntiVir 2.x (ex H+BEDV) or old CentralCommand Vexira Antivirus
  ['Avira AntiVir', ['antivir','vexira'],
    '--allfiles -noboot -nombr -rs -s -z {}', [0], qr/ALERT:|VIRUS:/m,
    qr/(?x)^\s* (?: ALERT: \s* (?: \[ | [^']* ' ) |
         (?i) VIRUS:\ .*?\ virus\ '?) ( [^\]\s']+ )/m ],
    # NOTE: if you only have a demo version, remove -z and add 214, as in:
    #  '--allfiles -noboot -nombr -rs -s {}', [0,214], qr/ALERT:|VIRUS:/,

  ### http://www.avira.com/
  ### Avira for UNIX 3.x
  ['Avira AntiVir', ['avscan'],
   '-s --batch --alert-action=none {}', [0,4], qr/(?:ALERT|FUND):/m,
   qr/(?:ALERT|FUND): (?:.* <<< )?(.+?)(?: ; |$)/m ],

  ### http://www.commandsoftware.com/
  ['Command AntiVirus for Linux', 'csav',
    '-all -archive -packed {}', [50], [51,52,53],
    qr/Infection: (.+)/m ],

  ### http://www.symantec.com/
  ['Symantec CarrierScan via Symantec CommandLineScanner',
    'cscmdline', '-a scan -i 1 -v -s 127.0.0.1:7777 {}',
    qr/^Files Infected:\s+0$/m, qr/^Infected\b/m,
    qr/^(?:Info|Virus Name):\s+(.+)/m ],

  ### http://www.symantec.com/
  ['Symantec AntiVirus Scan Engine',
    'savsecls', '-server 127.0.0.1:7777 -mode scanrepair -details -verbose {}',
    [0], qr/^Infected\b/m,
    qr/^(?:Info|Virus Name):\s+(.+)/m ],
    # NOTE: check options and patterns to see which entry better applies

# ### http://www.f-secure.com/products/anti-virus/  version 5.52
#  ['F-Secure Antivirus for Linux servers',
#   ['/opt/f-secure/fsav/bin/fsav', 'fsav'],
#   '--virus-action1=report --archive=yes --auto=yes '.
#   '--dumb=yes --list=no --mime=yes {}', [0], [3,4,6,8],
#   qr/(?:infection|Infected|Suspected|Riskware): (.+)/m ],
#   # NOTE: internal archive handling may be switched off by '--archive=no'
#   #   to prevent fsav from exiting with status 9 on broken archives

  ### http://www.f-secure.com/ version 9.14
   ['F-Secure Linux Security',
    ['/opt/f-secure/fsav/bin/fsav', 'fsav'],
    '--virus-action1=report --archive=yes --auto=yes '.
    '--list=no --nomimeerr {}', [0], [3,4,6,8],
    qr/(?:infection|Infected|Suspected|Riskware): (.+)/m ],
    # NOTE: internal archive handling may be switched off by '--archive=no'
    #   to prevent fsav from exiting with status 9 on broken archives

# ### http://www.avast.com/
# ['avast! Antivirus daemon',
#   \&ask_daemon,        # greets with 220, terminate with QUIT
#   ["SCAN {}\015\012QUIT\015\012", '/var/run/avast4/mailscanner.sock'],
#   qr/\t\[\+\]/m, qr/\t\[L\]\t/m, qr/\t\[L\]\t([^[ \t\015\012]+)/m ],

# ### http://www.avast.com/
# ['avast! Antivirus - Client/Server Version', 'avastlite',
#   '-a /var/run/avast4/mailscanner.sock -n {}', [0], [1],
#   qr/\t\[L\]\t([^[ \t\015\012]+)/m ],

  ['CAI InoculateIT', 'inocucmd',  # retired product
    '-sec -nex {}', [0], [100],
    qr/was infected by virus (.+)/m ],
  # see: http://www.flatmtn.com/computer/Linux-Antivirus_CAI.html

  ### http://www3.ca.com/Solutions/Product.asp?ID=156  (ex InoculateIT)
  ['CAI eTrust Antivirus', 'etrust-wrapper',
    '-arc -nex -spm h {}', [0], [101],
    qr/is infected by virus: (.+)/m ],
    # NOTE: requires suid wrapper around inocmd32; consider flag: -mod reviewer
    # see http://marc.theaimsgroup.com/?l=amavis-user&m=109229779912783

  ### http://mks.com.pl/english.html
  ['MkS_Vir for Linux (beta)', ['mks32','mks'],
    '-s {}/*', [0], [1,2],
    qr/--[ \t]*(.+)/m ],

  ### http://mks.com.pl/english.html
  ['MkS_Vir daemon', 'mksscan',
    '-s -q {}', [0], [1..7],
    qr/^... (\S+)/m ],

# ### http://www.nod32.com/,  version v2.52 (old)
# ['ESET NOD32 for Linux Mail servers',
#   ['/opt/eset/nod32/bin/nod32cli', 'nod32cli'],
#    '--subdir --files -z --sfx --rtp --adware --unsafe --pattern --heur '.
#    '-w -a --action-on-infected=accept --action-on-uncleanable=accept '.
#    '--action-on-notscanned=accept {}',
#   [0,3], [1,2], qr/virus="([^"]+)"/m ],

# ### http://www.eset.com/, version v2.7 (old)
# ['ESET NOD32 Linux Mail Server - command line interface',
#   ['/usr/bin/nod32cli', '/opt/eset/nod32/bin/nod32cli', 'nod32cli'],
#   '--subdir {}', [0,3], [1,2], qr/virus="([^"]+)"/m ],

# ### http://www.eset.com/, version 2.71.12
# ['ESET Software ESETS Command Line Interface',
#   ['/usr/bin/esets_cli', 'esets_cli'],
#   '--subdir {}', [0], [1,2,3], qr/virus="([^"]+)"/m ],

  ### http://www.eset.com/, version 3.0
  ['ESET Software ESETS Command Line Interface',
    ['/usr/bin/esets_cli', 'esets_cli'],
    '--subdir {}', [0], [1,2,3],
    qr/:\s*action="(?!accepted)[^"]*"\n.*:\s*virus="([^"]*)"/m ],

  ## http://www.nod32.com/,  NOD32LFS version 2.5 and above
  ['ESET NOD32 for Linux File servers',
    ['/opt/eset/nod32/sbin/nod32','nod32'],
    '--files -z --mail --sfx --rtp --adware --unsafe --pattern --heur '.
    '-w -a --action=1 -b {}',
    [0], [1,10], qr/^object=.*, virus="(.*?)",/m ],

# Experimental, based on posting from Rado Dibarbora (Dibo) on 2002-05-31
# ['ESET Software NOD32 Client/Server (NOD32SS)',
#   \&ask_daemon2,    # greets with 200, persistent, terminate with QUIT
#   ["SCAN {}/*\r\n", '127.0.0.1:8448' ],
#   qr/^200 File OK/m, qr/^201 /m, qr/^201 (.+)/m ],

  ### http://www.norman.com/products_nvc.shtml
  ['Norman Virus Control v5 / Linux', 'nvcc',
    '-c -l:0 -s -u -temp:$TEMPBASE {}', [0,10,11], [1,2,14],
    qr/(?i).* virus in .* -> \'(.+)\'/m ],

  ### http://www.pandasoftware.com/
  ['Panda CommandLineSecure 9 for Linux',
    ['/opt/pavcl/usr/bin/pavcl','pavcl'],
    '-auto -aex -heu -cmp -nbr -nor -nos -eng -nob {}',
    qr/Number of files infected[ .]*: 0+(?!\d)/m,
    qr/Number of files infected[ .]*: 0*[1-9]/m,
    qr/Found virus :\s*(\S+)/m ],
  # NOTE: for efficiency, start the Panda in resident mode with 'pavcl -tsr'
  # before starting amavisd - the bases are then loaded only once at startup.
  # To reload bases in a signature update script:
  #   /opt/pavcl/usr/bin/pavcl -tsr -ulr; /opt/pavcl/usr/bin/pavcl -tsr
  # Please review other options of pavcl, for example:
  #  -nomalw, -nojoke, -nodial, -nohackt, -nospyw, -nocookies

# ### http://www.pandasoftware.com/
# ['Panda Antivirus for Linux', ['pavcl'],
#   '-TSR -aut -aex -heu -cmp -nbr -nor -nso -eng {}',
#   [0], [0x10, 0x30, 0x50, 0x70, 0x90, 0xB0, 0xD0, 0xF0],
#   qr/Found virus :\s*(\S+)/m ],

# GeCAD AV technology is acquired by Microsoft; RAV has been discontinued.
# Check your RAV license terms before fiddling with the following two lines!
# ['GeCAD RAV AntiVirus 8', 'ravav',
#   '--all --archive --mail {}', [1], [2,3,4,5], qr/Infected: (.+)/m ],
# # NOTE: the command line switches changed with scan engine 8.5 !
# # (btw, assigning stdin to /dev/null causes RAV to fail)

  ### http://www.nai.com/
  ['NAI McAfee AntiVirus (uvscan)', 'uvscan',
    '--secure -rv --mime --summary --noboot - {}', [0], [13],
    qr/(?x) Found (?:
        \ the\ (.+)\ (?:virus|trojan)  |
        \ (?:virus|trojan)\ or\ variant\ ([^ ]+)  |
        :\ (.+)\ NOT\ a\ virus)/m,
  # sub {$ENV{LD_PRELOAD}='/lib/libc.so.6'},
  # sub {delete $ENV{LD_PRELOAD}},
  ],
  # NOTE1: with RH9: force the dynamic linker to look at /lib/libc.so.6 before
  # anything else by setting environment variable LD_PRELOAD=/lib/libc.so.6
  # and then clear it when finished to avoid confusing anything else.
  # NOTE2: to treat encrypted files as viruses replace the [13] with:
  #  qr/^\s{5,}(Found|is password-protected|.*(virus|trojan))/

  ### http://www.virusbuster.hu/en/
  ['VirusBuster', ['vbuster', 'vbengcl'],
    "{} -ss -i '*' -log=$MYHOME/vbuster.log", [0], [1],
    qr/: '(.*)' - Virus/m ],
  # VirusBuster Ltd. does not support the daemon version for the workstation
  # engine (vbuster-eng-1.12-linux-i386-libc6.tgz) any longer. The names of
  # binaries, some parameters AND return codes have changed (from 3 to 1).
  # See also the new Vexira entry 'vascan' which is possibly related.

# ### http://www.virusbuster.hu/en/
# ['VirusBuster (Client + Daemon)', 'vbengd',
#   '-f -log scandir {}', [0], [3],
#   qr/Virus found = (.*);/m ],
# # HINT: for an infected file it always returns 3,
# # although the man-page tells a different story

  ### http://www.cyber.com/
  ['CyberSoft VFind', 'vfind',
    '--vexit {}/*', [0], [23], qr/##==>>>> VIRUS ID: CVDL (.+)/m,
  # sub {$ENV{VSTK_HOME}='/usr/lib/vstk'},
  ],

  ### http://www.avast.com/
  ['avast! Antivirus', ['/usr/bin/avastcmd','avastcmd'],
    '-a -i -n -t=A {}', [0], [1], qr/\binfected by:\s+([^ \t\n\[\]]+)/m ],

  ### http://www.ikarus-software.com/
  ['Ikarus AntiVirus for Linux', 'ikarus',
    '{}', [0], [40], qr/Signature (.+) found/m ],

  ### http://www.bitdefender.com/
  ['BitDefender', 'bdscan',  # new version
    '--action=ignore --no-list {}', qr/^Infected files\s*:\s*0+(?!\d)/m,
    qr/^(?:Infected files|Identified viruses|Suspect files)\s*:\s*0*[1-9]/m,
    qr/(?:suspected|infected)\s*:\s*(.*)(?:\033|$)/m ],

  ### http://www.bitdefender.com/
  ['BitDefender', 'bdc',  # old version
    '--arc --mail {}', qr/^Infected files *:0+(?!\d)/m,
    qr/^(?:Infected files|Identified viruses|Suspect files) *:0*[1-9]/m,
    qr/(?:suspected|infected): (.*)(?:\033|$)/m ],
  # consider also: --all --nowarn --alev=15 --flev=15.  The --all argument may
  # not apply to your version of bdc, check documentation and see 'bdc --help'

  ### ArcaVir for Linux and Unix http://www.arcabit.pl/
  ['ArcaVir for Linux', ['arcacmd','arcacmd.static'],
    '-v 1 -summary 0 -s {}', [0], [1,2],
    qr/(?:VIR|WIR):[ \t]*(.+)/m ],

# ### a generic SMTP-client interface to a SMTP-based virus scanner
# ['av_smtp', \&ask_av_smtp,
#   ['{}', 'smtp:[127.0.0.1]:5525', '[email protected]'],
#   qr/^2/, qr/^5/, qr/^\s*(.*?)\s*$/m ],

# ['File::Scan', sub {Amavis::AV::ask_av(sub{
#   use File::Scan; my($fn)[email protected]_;
#   my($f)=File::Scan->new(max_txt_size=>0, max_bin_size=>0);
#   my($vname) = $f->scan($fn);
#   $f->error ? (2,"Error: ".$f->error)
#   : ($vname ne '') ? (1,"$vname FOUND") : (0,"Clean")}, @_) },
#   ["{}/*"], [0], [1], qr/^(.*) FOUND$/m ],

# ### fully-fledged checker for JPEG marker segments of invalid length
# ['check-jpeg',
#   sub { use JpegTester (); Amavis::AV::ask_av(\&JpegTester::test_jpeg, @_) },
#   ["{}/*"], undef, [1], qr/^(bad jpeg: .*)$/m ],
# # NOTE: place file JpegTester.pm somewhere where Perl can find it,
# #       for example in /usr/local/lib/perl5/site_perl

);


@av_scanners_backup = (

  ### http://www.clamav.net/   - backs up clamd or Mail::ClamAV
  ['ClamAV-clamscan', 'clamscan',
    "--stdout --no-summary -r --tempdir=$TEMPBASE {}",
    [0], qr/:.*\sFOUND$/m, qr/^.*?: (?!Infected Archive)(.*) FOUND$/m ],

# ### http://www.clamav.net/ - using remote clamd scanner as a backup
# ['ClamAV-clamdscan', 'clamdscan',
#   "--stdout --no-summary --config-file=/etc/clamd-client.conf {}",
#   [0], qr/:.*\sFOUND$/m, qr/^.*?: (?!Infected Archive)(.*) FOUND$/m ],

# ['ClamAV-clamd-stream',
#   \&ask_daemon, ["*", 'clamd:/var/run/clamav/clamd.sock'],
#   qr/\bOK$/m, qr/\bFOUND$/m,
#   qr/^.*?: (?!Infected Archive)(.*) FOUND$/m ],

  ### http://www.f-prot.com/   - backs up F-Prot Daemon, V6
  ['F-PROT Antivirus for UNIX', ['fpscan'],
    '--report --mount --adware {}',  # consider: --applications -s 4 -u 3 -z 10
    [0,8,64],  [1,2,3, 4+1,4+2,4+3, 8+1,8+2,8+3, 12+1,12+2,12+3],
    qr/^\[Found\s+[^\]]*\]\s+<([^ \t(>]*)/m ],

  ### http://www.f-prot.com/   - backs up F-Prot Daemon (old)
  ['FRISK F-Prot Antivirus', ['f-prot','f-prot.sh'],
    '-dumb -archive -packed {}', [0,8], [3,6],   # or: [0], [3,6,8],
    qr/(?:Infection:|security risk named) (.+)|\s+contains\s+(.+)$/m ],

  ### http://www.trendmicro.com/   - backs up Trophie
  ['Trend Micro FileScanner', ['/etc/iscan/vscan','vscan'],
    '-za -a {}', [0], qr/Found virus/m, qr/Found virus (.+) in/m ],

  ### http://www.sald.com/, http://drweb.imshop.de/   - backs up DrWebD
  ['drweb - DrWeb Antivirus',  # security LHA hole in Dr.Web 4.33 and earlier
    ['/usr/local/drweb/drweb', '/opt/drweb/drweb', 'drweb'],
    '-path={} -al -go -ot -cn -upn -ok-',
    [0,32], [1,9,33], qr' infected (?:with|by)(?: virus)? (.*)$'m ],

   ### http://www.kaspersky.com/
   ['Kaspersky Antivirus v5.5',
     ['/opt/kaspersky/kav4fs/bin/kav4fs-kavscanner',
      '/opt/kav/5.5/kav4unix/bin/kavscanner',
      '/opt/kav/5.5/kav4mailservers/bin/kavscanner', 'kavscanner'],
     '-i0 -xn -xp -mn -R -ePASBME {}/*', [0,10,15], [5,20,21,25],
     qr/(?:INFECTED|WARNING|SUSPICION|SUSPICIOUS) (.*)/m,
#    sub {chdir('/opt/kav/bin') or die "Can't chdir to kav: $!"},
#    sub {chdir($TEMPBASE) or die "Can't chdir back to $TEMPBASE $!"},
   ],

# Commented out because the name 'sweep' clashes with Debian and FreeBSD
# package/port of an audio editor. Make sure the correct 'sweep' is found
# in the path when enabling.
#
# ### http://www.sophos.com/   - backs up Sophie or SAVI-Perl
# ['Sophos Anti Virus (sweep)', 'sweep',
#   '-nb -f -all -rec -ss -sc -archive -cab -mime -oe -tnef '.
#   '--no-reset-atime {}',
#   [0,2], qr/Virus .*? found/m,
#   qr/^>>> Virus(?: fragment)? '?(.*?)'? found/m,
# ],
# # other options to consider: -idedir=/usr/local/sav

# Always succeeds and considers mail clean.
# Potentially useful when all other scanners fail and it is desirable
# to let mail continue to flow with no virus checking (when uncommented).
# ['always-clean', sub {0}],

);

$pax='pax';
1; # insure a defined return value |
## When changing the periodicity of freshclam runs in the crontab, ## this value must be adjusted also. Its value is the timespan between ## two subsequent freshclam runs in minutes. E.g. for the default ## ## | 0 */3 * * * ... ## ## crontab line, the value is 180 (minutes). # FRESHCLAM_MOD= ## A predefined value for the delay in seconds. By default, the value is ## calculated by the 'hostid' program. This predefined value guarantees ## constant timespans of 3 hours between two subsequent freshclam runs. ## ## This option accepts two special values: ## 'disabled-warn' ... disables the automatic freshclam update and ## gives out a warning ## 'disabled' ... disables the automatic freshclam silently # FRESHCLAM_DELAY= ### !!!!! REMOVE ME !!!!!! ### REMOVE ME: By default, the freshclam update is disabled to avoid ### REMOVE ME: network access without prior activation #FRESHCLAM_DELAY=disabled-warn # REMOVE ME |
[...] # Comment or remove the line below. #Example [...] |
D /var/run/amavisd 0755 amavis root - |
[...]
amavis unix - - - - 2 smtp
        -o smtp_data_done_timeout=1200
        -o smtp_send_xforward_command=yes

127.0.0.1:10025 inet n - - - - smtpd
        -o content_filter=
        -o local_recipient_maps=
        -o relay_recipient_maps=
        -o smtpd_restriction_classes=
        -o smtpd_client_restrictions=
        -o smtpd_helo_restrictions=
        -o smtpd_sender_restrictions=
        -o smtpd_recipient_restrictions=permit_mynetworks,reject
        -o mynetworks=127.0.0.0/8
        -o strict_rfc821_envelopes=yes
-o receive_override_options=no_unknown_recipient_checks,no_header_body_checks |
# These values can be overridden by editing ~/.spamassassin/user_prefs.cf # (see spamassassin(1) for details) # These should be safe assumptions and allow for simple visual sifting # without risking lost emails. #required_hits 5 #report_safe 0 #rewrite_header Subject [SPAM] # dcc use_dcc 1 dcc_path /usr/local/bin/dccproc #pyzor use_pyzor 1 pyzor_path /usr/bin/pyzor #razor use_razor2 1 razor_config /var/spool/amavisd/razor-agent.conf #bayes use_bayes 1 use_bayes_rules 1 bayes_auto_learn 1 |
[...] # DCC - perform DCC message checks. # # DCC is disabled here because it is not open source. See the DCC # license for more details. # loadplugin Mail::SpamAssassin::Plugin::DCC [...] |
23 4 */2 * * /usr/bin/sa-update --no-gpg &> /dev/null |
#!/usr/bin/perl -w

# Author <[email protected]>
#
# This script assumes that virtual_mailbox_base in defined
# in postfix's main.cf file. This directory is assumed to contain
# directories which themselves contain your virtual user's maildirs.
# For example:
#
# -----------/
#            |
#            |
#    home/vmail/domains/
#        |          |
#        |          |
#  example.com/  foo.com/
#                   |
#                   |
#           -----------------
#           |       |       |
#           |       |       |
#         user1/   user2/  user3/
#                           |
#                           |
#                        maildirsize
#

use strict;

my $POSTFIX_CF = "/etc/postfix/main.cf";
my $MAILPROG = "/usr/sbin/sendmail -t";
my $WARNPERCENT = 80;
my @POSTMASTERS = ('[email protected]');
my $CONAME = 'My Company';
my $COADDR = '[email protected]';
my $SUADDR = '[email protected]';
my $MAIL_REPORT = 1;
my $MAIL_WARNING = 1;

#get virtual mailbox base from postfix config
open(PCF, "< $POSTFIX_CF") or die $!;
my $mboxBase;
while (<PCF>) {
   next unless /virtual_mailbox_base\s*=\s*(.*)\s*/;
   $mboxBase = $1;
}
close(PCF);

#assume one level of subdirectories for domain names
my @domains;
opendir(DIR, $mboxBase) or die $!;
while (defined(my $name = readdir(DIR))) {
   next if $name =~ /^\.\.?$/;        #skip '.' and '..'
   next unless (-d "$mboxBase/$name");
   push(@domains, $name);
}
closedir(DIR);
#iterate through domains for username/maildirsize files
my @users;
chdir($mboxBase);
foreach my $domain (@domains) {
        opendir(DIR, $domain) or die $!;
        while (defined(my $name = readdir(DIR))) {
           next if $name =~ /^\.\.?$/;        #skip '.' and '..'
           next unless (-d "$domain/$name");
      push(@users, {"$name\@$domain" => "$mboxBase/$domain/$name"});
        }
}
closedir(DIR);

#get user quotas and percent used
my (%lusers, $report);
foreach my $href (@users) {
   foreach my $user (keys %$href) {
      my $quotafile = "$href->{$user}/maildirsize";
      next unless (-f $quotafile);
      open(QF, "< $quotafile") or die $!;
      my ($firstln, $quota, $used);
      while (<QF>) {
         my $line = $_;
              if (! $firstln) {
                 $firstln = 1;
                 die "Error: corrupt quotafile $quotafile"
                    unless ($line =~ /^(\d+)S/);
                 $quota = $1;
            last if (! $quota);
            next;
         }
         die "Error: corrupt quotafile $quotafile"
            unless ($line =~ /\s*(-?\d+)/);
         $used += $1;
      }
      close(QF);
      next if (! $used);
      my $percent = int($used / $quota * 100);
      $lusers{$user} = $percent unless not $percent;
   }
}

#send a report to the postmasters
if ($MAIL_REPORT) {
   open(MAIL, "| $MAILPROG");
   select(MAIL);
   map {print "To: $_\n"} @POSTMASTERS;
   print "From: $COADDR\n";
   print "Subject: Daily Quota Report.\n";
   print "DAILY QUOTA REPORT:\n\n";
   print "----------------------------------------------\n";
   print "| % USAGE |            ACCOUNT NAME          |\n";
   print "----------------------------------------------\n";
   foreach my $luser ( sort { $lusers{$b} <=> $lusers{$a} } keys %lusers ) {
      printf("|   %3d   | %32s |\n", $lusers{$luser}, $luser);
      print "---------------------------------------------\n";
   }
        print "\n--\n";
        print "$CONAME\n";
        close(MAIL);
}

#email a warning to people over quota
if ($MAIL_WARNING) {
        foreach my $luser (keys (%lusers)) {
           next unless $lusers{$luser} >= $WARNPERCENT;       # skip those under quota
           open(MAIL, "| $MAILPROG");
           select(MAIL);
           print "To: $luser\n";
      map {print "BCC: $_\n"} @POSTMASTERS;
           print "From: $SUADDR\n";
           print "Subject: WARNING: Your mailbox is $lusers{$luser}% full.\n";
           print "Reply-to: $SUADDR\n";
           print "Your mailbox: $luser is $lusers{$luser}% full.\n\n";
           print "Once your e-mail box has exceeded your monthly storage quota\n";
      print "your monthly billing will be automatically adjusted.\n";
      print "Please consider deleting e-mail and emptying your trash folder to clear some space.\n\n";
           print "Contact <$SUADDR> for further assistance.\n\n";
           print "Thank You.\n\n";
           print "--\n";
           print "$CONAME\n";
           close(MAIL);
        }
} |
0 0 * * * /usr/local/sbin/quota_notify &> /dev/null |
| fuente | destino | |
| [correo electrónico protegido] | [correo electrónico protegido] | Redirige correos electrónicos de [email protected] a [email protected] |
| @ejemplo.com | [correo electrónico protegido] | Crea una cuenta Catch-All para [email protected] Todos los correos electrónicos a example.com llegarán a [email protected], excepto aquellos que existen en la tabla de usuarios (es decir, si [email protected] existe en la tabla de usuarios, los correos electrónicos a [email protected] seguirán llegando a [email protected]). |
| @ejemplo.com | @otrodominio.tld | Esto redirige todos los correos electrónicos a ejemplo.com al mismo usuario en otrodominio.tld. Por ejemplo, los correos electrónicos a [email protected] se reenviarán a [email protected] |
| [correo electrónico protegido] | [correo electrónico protegido], [correo electrónico protegido] | Reenviar correos electrónicos para [email protected] a dos o más direcciones de correo electrónico. Todas las direcciones de correo electrónico enumeradas en destino reciben una copia del correo electrónico. |
| dominio | transporte | |
| ejemplo.com | : | Entrega correos electrónicos para example.com localmente. Esto es como si este registro no existiera en esta tabla. |
| ejemplo.com | smtp:mail.otrodominio.tld | Envía todos los correos electrónicos de example.com a través de smtp al servidor mail.anotherdomain.com. |
| ejemplo.com | smtp:mail.otrodominio.tld:2025 | Envía todos los correos electrónicos de example.com a través de smtp al servidor mail.anotherdomain.com, pero en el puerto 2025, no en el 25, que es el puerto predeterminado para smtp. |
| ejemplo.com |
smtp:[1.2.3.4] | Los corchetes evitan que Postfix realice búsquedas del registro MX DNS para la dirección entre corchetes. Tiene sentido para las direcciones IP. |
| .ejemplo.com | smtp:mail.otrodominio.tld | El correo para cualquier subdominio de ejemplo.com se envía a correo.otrodominio.tld. |
| * | smtp:mail.otrodominio.tld | Todos los correos electrónicos se envían a mail.anotherdomain.tld. |
| [correo electrónico protegido] | smtp:mail.otrodominio.tld | Los correos electrónicos para [email protected] se envían a mail.anotherdomain.tld. |
#
# SquirrelMail is a webmail package written in PHP.
#

Alias /webmail /usr/share/squirrelmail

<Directory "/usr/share/squirrelmail/plugins/squirrelspell/modules">
  Deny from all
</Directory>

# this section makes squirrelmail use https connections only, for this you
# need to have mod_ssl installed. If you want to use unsecure http
# connections, just remove this section:
<Directory /usr/share/squirrelmail>
  Require all granted
  RewriteEngine  on
  RewriteCond    %{HTTPS} !=on
  RewriteRule (.*) https://%{HTTP_HOST}%{REQUEST_URI}
</Directory> |
[...]
$csp_dsn = 'mysql://mail_admin:[email protected]/mail';
[...]
$lookup_password_query = 'SELECT count(*) FROM users WHERE email = "%1" AND password = %4';
[...]
$password_update_queries = array('UPDATE users SET password = %4 WHERE email = "%1"');
[...]
$password_encryption = 'MYSQLENCRYPT';
[...]
$csp_salt_static = 'LEFT(password, 2)';
[...]
//$csp_salt_query = 'SELECT salt FROM users WHERE username = "%1"';
[...]
$csp_delimiter = '@';
[...] |
<?php

/**
  * SquirrelMail Change SQL Password Plugin
  * Copyright (C) 2001-2002 Tyler Akins
  *               2002 Thijs Kinkhorst <[email protected]>
  *               2002-2005 Paul Lesneiwski <[email protected]>
  * This program is licensed under GPL. See COPYING for details
  *
  * @package plugins
  * @subpackage Change SQL Password
  *
  */


   // Global Variables, don't touch these unless you want to break the plugin
   //
   global $csp_dsn, $password_update_queries, $lookup_password_query,
          $force_change_password_check_query, $password_encryption,
          $csp_salt_query, $csp_salt_static, $csp_secure_port,
          $csp_non_standard_http_port, $csp_delimiter, $csp_debug,
          $min_password_length, $max_password_length, $include_digit_in_password,
          $include_uppercase_letter_in_password, $include_lowercase_letter_in_password,
          $include_nonalphanumeric_in_password;


   // csp_dsn
   //
   // Theoretically, any SQL database supported by Pear should be supported
   // here.  The DSN (data source name) must contain the information needed
   // to connect to your database backend. A MySQL example is included below.
   // For more details about DSN syntax and list of supported database types,
   // please see:
   //   http://pear.php.net/manual/en/package.database.db.intro-dsn.php
   //
   //$csp_dsn = 'mysql://user:[email protected]/email_users';
   $csp_dsn = 'mysql://mail_admin:[email protected]/mail';


   // lookup_password_query
   //
   // This plugin will always verify the user's old password
   // against their login password, but an extra check can also
   // be done against the database for more security if you
   // desire.  If you do not need the extra password check,
   // make sure this setting is empty.
   //
   // This is a query that returns a positive value if a user
   // and password pair are found in the database.
   //
   // This query should return one value (one row, one column), the
   // value being ideally a one or a zero, simply indicating that
   // the user/password pair does in fact exist in the database.
   //
   //   %1 in this query will be replaced with the full username
   //      (including domain), such as "[email protected]"
   //   %2 in this query will be replaced with the username (without
   //      any domain portion), such as "jose"
   //   %3 in this query will be replaced with the domain name,
   //      such as "example.com"
   //   %4 in this query will be replaced with the current (old)
   //      password in whatever encryption format is needed per other
   //      plugin configuration settings (Note that the syntax of
   //      the password will be provided depending on your encryption
   //      choices, so you NEVER need to provide quotes around this
   //      value in the query here.)
   //   %5 in this query will be replaced with the current (old)
   //      password in unencrypted plain text.  If you do not use any
   //      password encryption, %4 and %5 will be the same values,
   //      except %4 will have double quotes around it and %5 will not.
   //
   //$lookup_password_query = '';
   // TERRIBLE SECURITY: $lookup_password_query = 'SELECT count(*) FROM users WHERE username = "%1" AND plain_password = "%5"';
   //$lookup_password_query = 'SELECT count(*) FROM users WHERE username = "%1" AND crypt_password = %4';
   $lookup_password_query = 'SELECT count(*) FROM users WHERE email = "%1" AND password = %4';


   // password_update_queries
   //
   // An array of SQL queries that will all be executed
   // whenever a password change attempt is made.
   //
   // Any number of queries may be included here.
   // The queries will be executed in the order given here.
   //
   //   %1 in all queries will be replaced with the full username
   //      (including domain), such as "[email protected]"
   //   %2 in all queries will be replaced with the username (without
   //      any domain portion), such as "jose"
   //   %3 in all queries will be replaced with the domain name,
   //      such as "example.com"
   //   %4 in all queries will be replaced with the new password
   //      in whatever encryption format is needed per other
   //      plugin configuration settings (Note that the syntax of
   //      the password will be provided depending on your
   //      encryption choices, so you NEVER need to provide quotes
   //      around this value in the queries here.)
   //   %5 in all queries will be replaced with the new password
   //      in unencrypted plain text - BEWARE!  If you do not use
   //      any password encryption, %4 and %5 will be the same
   //      values, except %4 will have double quotes around it
   //      and %5 will not.
   //
//   $password_update_queries = array(
//            'UPDATE users SET crypt_password = %4 WHERE username = "%1"',
//            'UPDATE user_flags SET force_change_pwd = 0 WHERE username = "%1"',
//            'UPDATE users SET crypt_password = %4, force_change_pwd = 0 WHERE username = "%1"',
//                                   );
     $password_update_queries = array('UPDATE users SET password = %4 WHERE email = "%1"');


   // force_change_password_check_query
   //
   // A query that checks for a flag that indicates if a user
   // should be forced to change their password.  This query
   // should return one value (one row, one column) which is
   // zero if the user does NOT need to change their password,
   // or one if the user should be forced to change it now.
   //
   // This setting should be an empty string if you do not wish
   // to enable this functionality.
   //
   //   %1 in this query will be replaced with the full username
   //      (including domain), such as "[email protected]"
   //   %2 in this query will be replaced with the username (without
   //      any domain portion), such as "jose"
   //   %3 in this query will be replaced with the domain name,
   //      such as "example.com"
   //
   //$force_change_password_check_query = 'SELECT IF(force_change_pwd = "yes", 1, 0) FROM users WHERE username = "%1"';
   //$force_change_password_check_query = 'SELECT force_change_pwd FROM users WHERE username = "%1"';
   $force_change_password_check_query = '';


   // password_encryption
   //
   // What encryption method do you use to store passwords
   // in your database?  Please use one of the following,
   // exactly as you see it:
   //
   //   NONE          Passwords are stored as plain text only
   //   MYSQLPWD      Passwords are stored using the MySQL password() function
   //   MYSQLENCRYPT  Passwords are stored using the MySQL encrypt() function
   //   PHPCRYPT      Passwords are stored using the PHP crypt() function
   //   MD5CRYPT      Passwords are stored using encrypted MD5 algorithm
   //   MD5           Passwords are stored as MD5 hash
   //
   //$password_encryption = 'MYSQLPWD';
   $password_encryption = 'MYSQLENCRYPT';


   // csp_salt_query
   // csp_salt_static
   //
   // Encryption types that need a salt need to know where to get
   // that salt.  If you have a constant, known salt value, you
   // should define it in $csp_salt_static.  Otherwise, leave that
   // value empty and define a value for the $csp_salt_query.
   //
   // Leave both values empty if you do not need (or use) salts
   // to encrypt your passwords.
   //
   // The query should return one value (one row, one column) which
   // is the salt value for the current user's password.  This
   // query is ignored if $csp_salt_static is anything but empty.
   //
   //   %1 in this query will be replaced with the full username
   //      (including domain), such as "[email protected]"
   //   %2 in this query will be replaced with the username (without
   //      any domain portion), such as "jose"
   //   %3 in this query will be replaced with the domain name,
   //      such as "example.com"
   //
   //$csp_salt_static = 'LEFT(crypt_password, 2)';
   //$csp_salt_static = '"a4"';  // use this format with MYSQLENCRYPT
   //$csp_salt_static = '$2$blowsomefish$';  // use this format with PHPCRYPT
   //$csp_salt_static = '';
   $csp_salt_static = 'LEFT(password, 2)';

   //$csp_salt_query = 'SELECT SUBSTRING_INDEX(crypt_password, '$', 1) FROM users WHERE username = "%1"';
   //$csp_salt_query = 'SELECT SUBSTRING(crypt_password, (LENGTH(SUBSTRING_INDEX(crypt_password, '$', 2)) + 2)) FROM users WHERE username = "%1"';
   //$csp_salt_query = 'SELECT salt FROM users WHERE username = "%1"';
   //$csp_salt_query = '';


   // csp_secure_port
   //
   // You may ensure that SSL encryption is used during password
   // change by setting this to the port that your HTTPS is served
   // on (443 is typical).  Set to zero if you do not wish to force
   // an HTTPS connection when users are changing their passwords.
   //
   // You may override this value for certain domains, users, or
   // service levels through the Virtual Host Login (vlogin) plugin
   // by setting a value(s) for $vlogin_csp_secure_port in the vlogin
   // configuration.
   //
   $csp_secure_port = 0;
   //$csp_secure_port = 443;


   // csp_non_standard_http_port
   //
   // If you serve standard HTTP web requests on a non-standard
   // port (anything other than port 80), you should specify that
   // port number here.  Set to zero otherwise.
   //
   // You may override this value for certain domains, users, or
   // service levels through the Virtual Host Login (vlogin) plugin
   // by setting a value(s) for $vlogin_csp_non_standard_http_port
   // in the vlogin configuration.
   //
   //$csp_non_standard_http_port = 8080;
   $csp_non_standard_http_port = 0;


   // min_password_length
   // max_password_length
   // include_digit_in_password
   // include_uppercase_letter_in_password
   // include_lowercase_letter_in_password
   // include_nonalphanumeric_in_password
   //
   // You can set the minimum and maximum password lengths that
   // you accept or leave those settings as zero to indicate that
   // no limit should be applied.
   //
   // Turn on any of the other settings here to check that the
   // new password contains at least one digit, upper case letter,
   // lower case letter and/or one non-alphanumeric character.
   //
   $min_password_length = 6;
   $max_password_length = 0;
   $include_digit_in_password = 0;
   $include_uppercase_letter_in_password = 0;
   $include_lowercase_letter_in_password = 0;
   $include_nonalphanumeric_in_password = 0;


   // csp_delimiter
   //
   // if your system has usernames with something other than
   // an "@" sign separating the user and domain portion,
   // specify that character here
   //
   //$csp_delimiter = '|';
   $csp_delimiter = '@';


   // debug mode
   //
   $csp_debug = 0;


?> |
<?php /** * Local config overrides. * * You can override the config.php settings here. * Don't do it unless you know what you're doing. * Use standard PHP syntax, see config.php for examples. * * @copyright © 2002-2006 The SquirrelMail Project Team * @license http://opensource.org/licenses/gpl-license.php GNU Public License * @version $Id$ * @package squirrelmail * @subpackage config */ //$default_folder_prefix = ''; ?> |