Nginx (pronunciado "motor x") es un servidor HTTP gratuito, de código abierto y de alto rendimiento. Nginx es conocido por su estabilidad, rico conjunto de funciones, configuración simple y bajo consumo de recursos. Este tutorial muestra cómo puede instalar Nginx en un servidor CentOS 7 compatible con PHP (a través de PHP-FPM) y MySQL (Mariadb).
1 nota preliminar
En este tutorial utilizo el nombre de host server1.example.com con la dirección IP 192.168.1.105. Estas configuraciones pueden diferir para usted, por lo que debe reemplazarlas cuando corresponda.
2 Habilitar repositorios adicionales
Nginx no está disponible en los repositorios oficiales de CentOS, por lo que incluimos el repositorio del proyecto Nginx para instalarlo:
vi /etc/yum.repos.d/nginx.repo
 [nginx]
     name=nginx repo
     baseurl=http://nginx.org/packages/centos/$releasever/$basearch/
     gpgcheck=0
     enabled=1
3 Instalación de MySQL
Primero instalamos Mariadb. Mariadb es una bifurcación libre de MySQL. Ejecute este comando en el shell:
yum install mariadb mariadb-server net-tools
Luego creamos los enlaces de inicio del sistema para MySQL (para que MySQL se inicie automáticamente cada vez que se inicia el sistema) e iniciamos el servidor MySQL:
systemctl enable mariadb.service
systemctl start mariadb.service
Ahora verifique que la red esté habilitada. Ejecutar
netstat -tap | grep mysql
Debería mostrar algo como esto:
[[email protected] ~]# netstat -tap | grep mysql
tcp 0 0 0.0.0.0:mysql 0.0.0.0:* LISTEN 10623/mysqld
Ejecutar
mysql_secure_installation
para establecer una contraseña para el usuario root (¡de lo contrario, cualquiera puede acceder a su base de datos MySQL!):
[[email protected] ~]# mysql_secure_installation
/usr/bin/mysql_secure_installation: line 379: find_mysql_client: command not found
NOTE: RUNNING ALL PARTS OF THIS SCRIPT IS RECOMMENDED FOR ALL MariaDB
SERVERS IN PRODUCTION USE! PLEASE READ EACH STEP CAREFULLY!
In order to log into MariaDB to secure it, we'll need the current
password for the root user. If you've just installed MariaDB, and
you haven't set the root password yet, the password will be blank,
so you should just press enter here.
Enter current password for root (enter for none):
OK, successfully used password, moving on...
Setting the root password ensures that nobody can log into the MariaDB
root user without the proper authorisation.
Set root password? [Y/n] <-- ENTER
New password: <-- yourrootsqlpassword
Re-enter new password: <-- yourrootsqlpassword
Password updated successfully!
Reloading privilege tables..
... Success!
By default, a MariaDB installation has an anonymous user, allowing anyone
to log into MariaDB without having to have a user account created for
them. This is intended only for testing, and to make the installation
go a bit smoother. You should remove them before moving into a
production environment.
Remove anonymous users? [Y/n] <-- ENTER
... Success!
Normally, root should only be allowed to connect from 'localhost'. This
ensures that someone cannot guess at the root password from the network.
Disallow root login remotely? [Y/n] <-- ENTER
... Success!
By default, MariaDB comes with a database named 'test' that anyone can
access. This is also intended only for testing, and should be removed
before moving into a production environment.
Remove test database and access to it? [Y/n] <-- ENTER
- Dropping test database...
... Success!
- Removing privileges on test database...
... Success!
Reloading the privilege tables will ensure that all changes made so far
will take effect immediately.
Reload privilege tables now? [Y/n] <-- ENTER
... Success!
Cleaning up...
All done! If you've completed all of the above steps, your MariaDB
installation should now be secure.
Thanks for using MariaDB!
[[email protected] ~]#
[[correo electrónico protegido] ~]# mysql_secure_installation
4 Instalación de Nginx
Nginx está disponible como un paquete de nginx.org que podemos instalar de la siguiente manera:
yum install nginx
Luego creamos los enlaces de inicio del sistema para nginx y lo iniciamos:
systemctl enable nginx.service
systemctl start nginx.service
Hay posibilidades de que reciba un error como que el puerto 80 ya está en uso, el mensaje de error será así
[[email protected] ~]# service nginx start
Starting nginx: nginx: [emerg] bind() to 0.0.0.0:80 failed (98: Address already in use)
nginx: [emerg] bind() to 0.0.0.0:80 failed (98: Address already in use)
nginx: [emerg] bind() to 0.0.0.0:80 failed (98: Address already in use)
nginx: [emerg] bind() to 0.0.0.0:80 failed (98: Address already in use)
nginx: [emerg] bind() to 0.0.0.0:80 failed (98: Address already in use)
nginx: [emerg] still could not bind()
                                                           [FAILED]
[[email protected] ~]#
Entonces significa que hay posibilidades de que el servicio apache se ejecute allí. Detenga el servicio y vuelva a iniciar el servicio para NGINX de la siguiente manera
systemctl stop httpd.service
yum remove httpd
systemctl disable httpd.service
systemctl enable nginx.service
systemctl start nginx.service
Y abra los puertos http y https en el firewall
firewall-cmd --permanent --zone=public --add-service=http
firewall-cmd --permanent --zone=public --add-service=https
firewall-cmd --reload
La salida resultante en el shell se verá así:
[[email protected] ~]# firewall-cmd --permanent --zone=public --add-service=http
success
[[email protected] ~]# firewall-cmd --permanent --zone=public --add-service=https
success
[[email protected] ~]# firewall-cmd --reload
success
[[email protected] ~]#
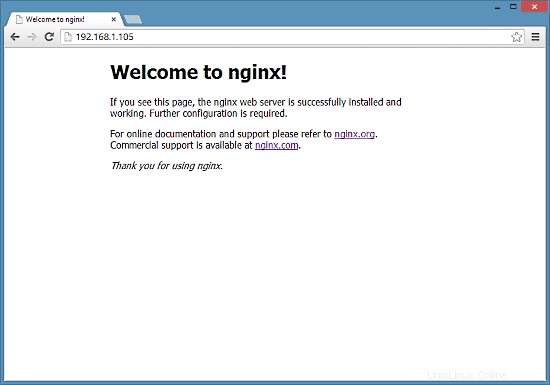
Escriba la dirección IP o el nombre de host de su servidor web en un navegador (por ejemplo, http://192.168.1.105), y debería ver la página de bienvenida de nginx: