Askbot es un software de foro de preguntas y respuestas gratuito, de código abierto y altamente personalizable escrito en Python y Django. Es simple, liviano y muy similar a otros software de foros StackOverflow y YahooAnswers. Askbot proporciona un montón de características que incluyen etiquetas y categorías, notificaciones por correo electrónico, sistema basado en karma, votación, moderación de contenido y muchas más.
En este tutorial, le mostraremos cómo instalar el software de foro Askbot en CentOS 8 con Let's Encrypt SSL.
Requisitos
- Un servidor que ejecuta CentOS 8.
- Se ha configurado una contraseña de root en su servidor.
Instalar dependencias requeridas
Antes de comenzar, deberá instalar algunas dependencias requeridas en su sistema.
Primero, instale las "Herramientas de desarrollo" con el siguiente comando:
dnf group install 'Development Tools'
A continuación, instale el repositorio EPEL y otras dependencias de Python con el siguiente comando:
dnf install epel-release -y
dnf install python2-pip python2-devel python2-six -y
Una vez que todos los paquetes necesarios estén instalados, puede continuar con el siguiente paso.
Instalar y configurar PostgreSQL
Askbot usa PostgreSQL para almacenar sus datos. Por lo tanto, deberá instalarlo en su sistema. Puede instalarlo con el siguiente comando:
dnf install postgresql-server postgresql-devel postgresql-contrib -y
Una vez instalado, inicialice la base de datos con el siguiente comando:
postgresql-setup initdb
Deberías obtener el siguiente resultado:
WARNING: using obsoleted argument syntax, try --help
WARNING: arguments transformed to: postgresql-setup --initdb --unit postgresql
 * Initializing database in '/var/lib/pgsql/data'
 * Initialized, logs are in /var/lib/pgsql/initdb_postgresql.log
A continuación, inicie el servicio PostgreSQL y habilítelo para que se inicie después de reiniciar el sistema con el siguiente comando:
systemctl start postgresql
systemctl enable postgresql
A continuación, inicie sesión en el shell de PostgreSQL con el siguiente comando:
su - postgres
[[email protected] ~]$ psql
Salida:
psql (10.6)
Type "help" for help.
postgres=#
A continuación, cree una base de datos y un usuario para Askbot con el siguiente comando:
postgres=# create database askbot;
postgres=# create user askbot with password 'password';
A continuación, otorga todos los privilegios al askbot con el siguiente comando:
postgres=# grant all privileges on database askbot to askbot;
Finalmente, salga del shell de PostgreSQL con el siguiente comando:
postgres=# \q
A continuación, deberá configurar la autenticación de usuario local para PostgreSQL. Puede hacerlo editando el archivo pg_hba.conf:
nano /var/lib/pgsql/data/pg_hba.conf
Reemplace peer con md5 en las siguientes líneas:
local   all             all                                    md5
host    all             all             127.0.0.1/32           md5
host    all             all             ::1/128                md5
Guarde y cierre el archivo cuando haya terminado. Luego, reinicie el servicio PostgreSQL para aplicar los cambios:
systemctl restart postgresql
Instalar y configurar Askbot
Antes de instalar Askbot, deberá crear un usuario para Askbot. Puede crear un nuevo usuario de Askbot y establecer una contraseña con el siguiente comando:
useradd -m -s /bin/bash askbot
passwd askbot
A continuación, agregue el usuario de Askbot al grupo de ruedas para acceder al comando sudo:
usermod -a -G wheel askbot
Luego, instale el paquete python virtualenv con el siguiente comando:
pip2 install virtualenv six
Una vez instalado, cambie el usuario a askbot y cree un nuevo entorno virtual para Askbot con el siguiente comando:
su - askbot
virtualenv askbot
Debería ver el siguiente resultado:
created virtual environment CPython2.7.16.final.0-64 in 663ms
  creator CPython2Posix(dest=/home/askbot/askbot, clear=False, global=False)
  seeder FromAppData(download=False, pip=latest, setuptools=latest, wheel=latest, via=copy, app_data_dir=/tmp/tmp9YFr7B/seed-app-data/v1)
  activators PythonActivator,CShellActivator,FishActivator,PowerShellActivator,BashActivator
A continuación, cambie el directorio a askbot y active el entorno virtual con el siguiente comando:
cd askbot
source bin/activate
Salida:
(askbot) [[email protected] askbot]$
Luego, instale Askbot y otras dependencias requeridas con el siguiente comando:
pip2 install six==1.10.0
pip2 install askbot psycopg2
A continuación, cree un nuevo directorio para su aplicación, cambie el directorio a su aplicación y configure Askbot con el siguiente comando:
mkdir myapp
cd myapp
askbot-setup
Debería ver el siguiente resultado:
Deploying Askbot - Django Q&A forum application
Problems installing? -> please email [email protected]

To CANCEL - hit Ctr-C at any time

Enter directory path (absolute or relative) to deploy
askbot. To choose current directory - enter "."
> .
Tipo "." y pulsa Intro continuar. Debería ver el siguiente resultado:
Please select database engine:
1 - for postgresql, 2 - for sqlite, 3 - for mysql, 4 - oracle
type 1/2/3/4: 1
Escriba 1 para seleccionar un motor de base de datos postgresql y presione Entrar para continuar. Debería ver el siguiente resultado:
Please enter database name (required)
> askbot

Please enter database user (required)
> askbot

Please enter database password (required)
> password
Proporcione los detalles de su base de datos de Askbot y presione Enter . Una vez finalizada la instalación, debería ver el siguiente resultado:
Copying files:
* __init__.py
* manage.py
* urls.py
* django.wsgi
Creating settings file
settings file created

copying directories:  * doc
* cron
* upfiles

Done. Please find further instructions at http://askbot.org/doc/
A continuación, genere los archivos estáticos y la base de datos de Askbot Django con el siguiente comando:
python manage.py collectstatic
python manage.py syncdb
Proporcione su nombre de usuario, correo electrónico y contraseña de administrador deseados como se muestra a continuación:
You have installed Django's auth system, and don't have any superusers defined.
Would you like to create one now? (yes/no): yes
Username (leave blank to use 'askbot'): askbotadmin
Email address: [email protected]
Password:
Password (again):
Superuser created successfully.
Instalar y configurar uWSGI
A continuación, deberá instalar uWSGI en su sistema. uWSGI es una herramienta de software utilizada para ejecutar aplicaciones web basadas en Python. Puede instalarlo con el siguiente comando:
pip2 install uwsgi
Después de instalar uWSGI, cree un nuevo directorio para uWSGI con el siguiente comando:
mkdir -p /etc/uwsgi/sites
A continuación, cree un nuevo archivo de configuración de uWSGI como se muestra a continuación:
nano /etc/uwsgi/sites/askbot.ini
Agregue las siguientes líneas:
[uwsgi]

chdir = /home/askbot/askbot/myapp
home = /home/askbot/askbot
static-map = /m=/home/askbot/askbot/myapp/static
wsgi-file = /home/askbot/askbot/myapp/django.wsgi
master = true
processes = 5
# Askbot will running under the sock file
socket = /run/uwsgi/askbot.sock
chmod-socket = 664
uid = askbot
gid = nginx
vacuum = true
# uWSGI Log file
ogto = /var/log/uwsgi.log
Crear un archivo de servicio Systemd para uWSGI
A continuación, deberá crear un archivo de servicio systemd para administrar el servicio uWSGI. Puedes crearlo con el siguiente comando:
nano /etc/systemd/system/uwsgi.service
Agregue las siguientes líneas:
[Unit]
Description=uWSGI service

[Service]
ExecStartPre=/bin/bash -c 'mkdir -p /run/uwsgi; chown askbot:nginx /run/uwsgi'
ExecStart=/bin/uwsgi --emperor /etc/uwsgi/sites
Restart=always
KillSignal=SIGQUIT
Type=notify
NotifyAccess=all

[Install]
WantedBy=multi-user.target
Guarde y cierre el archivo cuando haya terminado. Luego, vuelva a cargar el demonio systemd con el siguiente comando:
systemctl daemon-reload
Instalar y configurar Nginx
A continuación, deberá instalar y configurar Nginx para servir su aplicación Askbot.
Primero, instale el servidor web Nginx con el siguiente comando:
dnf install nginx -y
Una vez instalado, cree un nuevo archivo de configuración de host virtual para Askbot:
nano /etc/nginx/conf.d/askbot.conf
Agregue las siguientes líneas:
server {
         listen 80;
         server_name askbot.linuxbuz.com;
         location / {
         include         uwsgi_params;
         uwsgi_pass	 unix:/run/uwsgi/askbot.sock;
    }
 }
Guarde y cierre el archivo. Luego, inicie el servicio Nginx y uWSGI y habilítelos para que se inicien después de reiniciar el sistema con el siguiente comando:
systemctl start nginx
systemctl enable nginx
systemctl start uwsgi
systemctl enable uwsgi
Proteja Askbot con Let's Encrypt SSL
A continuación, deberá instalar la utilidad Certbot en su sistema para descargar e instalar Let's Encrypt SSL para el dominio de Askbot.
Puede instalar el cliente Certbot con el siguiente comando:
wget https://dl.eff.org/certbot-auto
mv certbot-auto /usr/local/bin/certbot-auto
chown root /usr/local/bin/certbot-auto
chmod 0755 /usr/local/bin/certbot-auto
A continuación, obtenga e instale un certificado SSL para su dominio de Askbot con el siguiente comando:
certbot-auto --nginx -d askbot.linuxbuz.com
El comando anterior instalará primero todas las dependencias requeridas en su servidor. Una vez instalado, se le pedirá que proporcione una dirección de correo electrónico y acepte el término del servicio como se muestra a continuación:
Saving debug log to /var/log/letsencrypt/letsencrypt.log
Plugins selected: Authenticator nginx, Installer nginx
Enter email address (used for urgent renewal and security notices) (Enter 'c' to
cancel): [email protected]

- - - - - - - - - - - - - - - - - - - - - - - - - - - - - - - - - - - - - - - -
Please read the Terms of Service at
https://letsencrypt.org/documents/LE-SA-v1.2-November-15-2017.pdf. You must
agree in order to register with the ACME server at
https://acme-v02.api.letsencrypt.org/directory
- - - - - - - - - - - - - - - - - - - - - - - - - - - - - - - - - - - - - - - -
(A)gree/(C)ancel: A

- - - - - - - - - - - - - - - - - - - - - - - - - - - - - - - - - - - - - - - -
Would you be willing to share your email address with the Electronic Frontier
Foundation, a founding partner of the Let's Encrypt project and the non-profit
organization that develops Certbot? We'd like to send you email about our work
encrypting the web, EFF news, campaigns, and ways to support digital freedom.
- - - - - - - - - - - - - - - - - - - - - - - - - - - - - - - - - - - - - - - -
(Y)es/(N)o: Y

Obtaining a new certificate
Performing the following challenges:
http-01 challenge for askbot.linuxbuz.com
Waiting for verification...
Cleaning up challenges
Deploying Certificate to VirtualHost /etc/nginx/conf.d/askbot.conf
A continuación, seleccione si desea redirigir o no el tráfico HTTP a HTTPS como se muestra a continuación:
Please choose whether or not to redirect HTTP traffic to HTTPS, removing HTTP access.
- - - - - - - - - - - - - - - - - - - - - - - - - - - - - - - - - - - - - - - -
1: No redirect - Make no further changes to the webserver configuration.
2: Redirect - Make all requests redirect to secure HTTPS access. Choose this for
new sites, or if you're confident your site works on HTTPS. You can undo this
change by editing your web server's configuration.
- - - - - - - - - - - - - - - - - - - - - - - - - - - - - - - - - - - - - - - -
Select the appropriate number [1-2] then [enter] (press 'c' to cancel): 2
Tipo 2 y pulsa Intro continuar. Una vez finalizada la instalación, debería ver el siguiente resultado:
Redirecting all traffic on port 80 to ssl in /etc/nginx/conf.d/askbot.conf

- - - - - - - - - - - - - - - - - - - - - - - - - - - - - - - - - - - - - - - -
Congratulations! You have successfully enabled https://askbot.linuxbuz.com

You should test your configuration at:
https://www.ssllabs.com/ssltest/analyze.html?d=askbot.linuxbuz.com
- - - - - - - - - - - - - - - - - - - - - - - - - - - - - - - - - - - - - - - -

IMPORTANT NOTES:
 - Congratulations! Your certificate and chain have been saved at:
   /etc/letsencrypt/live/askbot.linuxbuz.com/fullchain.pem
   Your key file has been saved at:
   /etc/letsencrypt/live/askbot.linuxbuz.com/privkey.pem
   Your cert will expire on 2020-06-11. To obtain a new or tweaked
   version of this certificate in the future, simply run certbot-auto
   again with the "certonly" option. To non-interactively renew *all*
   of your certificates, run "certbot-auto renew"
 - If you like Certbot, please consider supporting our work by:

   Donating to ISRG / Let's Encrypt:   https://letsencrypt.org/donate
   Donating to EFF:                    https://eff.org/donate-le
Configurar Firewall y SELinux
A continuación, deberá crear una regla de firewall para permitir el servicio HTTP y HTTPS desde redes externas. Puedes permitirlo con el siguiente comando:
firewall-cmd --permanent --add-service=http
firewall-cmd --permanent --add-service=https
firewall-cmd --reload
De forma predeterminada, SELinux está habilitado en CentOS 8. Se recomienda deshabilitarlo para que Askbot funcione correctamente. Puede desactivarlo editando el archivo /etc/selinux/config:
nano /etc/selinux/config
Busque la siguiente línea:
SELINUX=enforcing
Y reemplácelo con la siguiente línea:
SELINUX=disabled
Guarde y cierre el archivo. Luego, reinicie su sistema para aplicar los cambios:
Acceder a Askbot
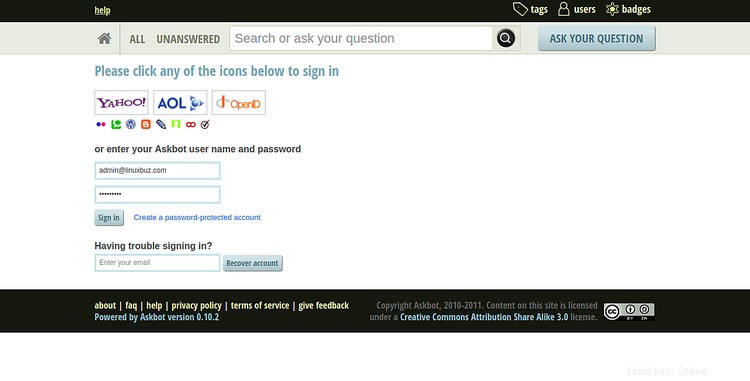
Ahora, abra su navegador web y escriba la URL https://askbot.linuxbuz.com. Será redirigido a la siguiente pantalla:

Haga clic en el signo en botón. Debería ver la página de inicio de sesión de Askbot en la siguiente pantalla:
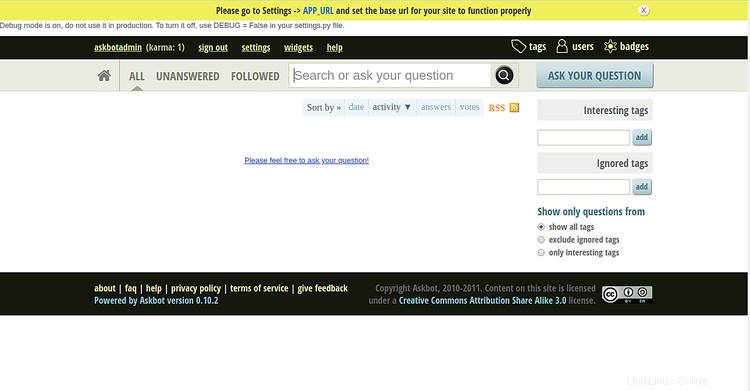
Proporcione su nombre de usuario y contraseña de administrador de Askbot y haga clic en Firmar en botón. Debería ver el panel de Askbot en la siguiente pantalla:
Conclusión
¡Felicidades! Ha instalado y configurado con éxito el foro de Askbot en CentOS 8 y lo ha asegurado con Let's Encrypt SSL. Ahora puede comenzar a crear una pregunta y respuesta con Askbot.