FreeIPA es una solución integrada de identidad y autenticación de código abierto para sistemas basados en Linux y Unix. Proporciona autenticación centralizada mediante el almacenamiento de datos sobre usuarios, grupos, hosts y otros objetos. Proporciona un servicio de gestión de identidad integrado para Linux, Mac y Windows. FreeIPA se basa en 389 Directory Server, Kerberos, SSSD, Dogtag, NTP y DNS. Proporciona una interfaz basada en web para administrar usuarios y clientes de Linux en su dominio desde la ubicación central.
En este tutorial, le mostraremos cómo instalar el servidor FreeIPA en CentOS 8.
Requisitos
- Un servidor que ejecuta CentOS 8.
- Se configura una contraseña de root en el servidor.
Configurar nombre de host
Primero, deberá configurar el nombre de host completo en su sistema. Puede configurarlo con el siguiente comando:
hostnamectl set-hostname freeipa.mydomain10.com
A continuación, edite el archivo /etc/hosts y agregue la IP de su servidor y el nombre de host:
nano /etc/hosts
Agregue las siguientes líneas:
45.58.43.185 freeipa.mydomain10.com
Guarde y cierre el archivo cuando haya terminado.
Instalar servidor FreeIPA
De forma predeterminada, el paquete FreeIPA no está disponible en el repositorio estándar de CentOS. Por lo tanto, deberá habilitar el repositorio idm:DL1 en su sistema.
Puede habilitarlo con el siguiente comando:
dnf module enable idm:DL1
A continuación, sincroniza el repositorio con el siguiente comando:
dnf distro-sync
A continuación, ejecute el siguiente comando para instalar el servidor FreeIPA en su sistema.
dnf install ipa-server ipa-server-dns -y
Una vez completada la instalación, puede continuar con el siguiente paso.
Configurar servidor FreeIPA
A continuación, deberá configurar el servidor FreeIPA. Puede configurarlo con el siguiente comando:
ipa-server-install
Se le pedirá que configure el DNS integrado como se muestra a continuación:
The log file for this installation can be found in /var/log/ipaserver-install.log
ipa-server-install

The log file for this installation can be found in /var/log/ipaserver-install.log
==============================================================================
This program will set up the IPA Server.
Version 4.8.4

This includes:
  * Configure a stand-alone CA (dogtag) for certificate management
  * Configure the NTP client (chronyd)
  * Create and configure an instance of Directory Server
  * Create and configure a Kerberos Key Distribution Center (KDC)
  * Configure Apache (httpd)
  * Configure the KDC to enable PKINIT

To accept the default shown in brackets, press the Enter key.

Do you want to configure integrated DNS (BIND)? [no]:
Presione Entrar para seleccionar no. Se le pedirá que proporcione el nombre de host de su servidor:
Enter the fully qualified domain name of the computer on which you're setting up server software. Using the form. Example: master.example.com. Server host name [freeipa.mydomain10.com]:
Presione Entrar para seleccionar el nombre de host predeterminado. Se le pedirá que confirme su nombre de dominio como se muestra a continuación:
The domain name has been determined based on the host name.

Please confirm the domain name [mydomain10.com]:
Presione Entrar para seleccionar el nombre de dominio predeterminado. Se le pedirá que configure la contraseña del administrador del directorio como se muestra a continuación:
The kerberos protocol requires a Realm name to be defined.
This is typically the domain name converted to uppercase.

Please provide a realm name [MYDOMAIN10.COM]:
Certain directory server operations require an administrative user.
This user is referred to as the Directory Manager and has full access
to the Directory for system management tasks and will be added to the
instance of directory server created for IPA.
The password must be at least 8 characters long.

Directory Manager password:
Password (confirm):
Proporcione su contraseña deseada y presione Entrar. Se le pedirá que configure la contraseña de administrador de IPA como se muestra a continuación:
The IPA server requires an administrative user, named 'admin'.
This user is a regular system account used for IPA server administration.

IPA admin password:
Password (confirm):
Proporcione su contraseña deseada y presione Entrar. Se le pedirá que configure el servidor NTP como se muestra a continuación:
Do you want to configure chrony with NTP server or pool address? [no]:
Pulse Intro para seleccionar la opción predeterminada. Deberías obtener el siguiente resultado:
The IPA Master Server will be configured with:
Hostname:       freeipa.mydomain10.com
IP address(es): 45.58.43.185
Domain name:    mydomain10.com
Realm name:     MYDOMAIN10.COM

The CA will be configured with:
Subject DN:   CN=Certificate Authority,O=MYDOMAIN10.COM
Subject base: O=MYDOMAIN10.COM
Chaining:     self-signed

Continue to configure the system with these values? [no]: yes
Escriba sí y presione Entrar para configurar el sistema con los valores anteriores. Una vez que se complete la configuración, debería obtener el siguiente resultado:
SSSD enabled
Configured /etc/openldap/ldap.conf
Configured /etc/ssh/ssh_config
Configured /etc/ssh/sshd_config
Configuring mydomain10.com as NIS domain.
Client configuration complete.
The ipa-client-install command was successful

unable to resolve host name freeipa.mydomain10.com. to IP address, ipa-ca DNS record will be incomplete
unable to resolve host name freeipa.mydomain10.com. to IP address, ipa-ca DNS record will be incomplete
Please add records in this file to your DNS system: /tmp/ipa.system.records._u0fzahd.db
==============================================================================
Setup complete

Next steps:
	1. You must make sure these network ports are open:
		TCP Ports:
		  * 80, 443: HTTP/HTTPS
		  * 389, 636: LDAP/LDAPS
		  * 88, 464: kerberos
		UDP Ports:
		  * 88, 464: kerberos
		  * 123: ntp

	2. You can now obtain a kerberos ticket using the command: 'kinit admin'
	   This ticket will allow you to use the IPA tools (e.g., ipa user-add)
	   and the web user interface.

Be sure to back up the CA certificates stored in /root/cacert.p12
These files are required to create replicas. The password for these
files is the Directory Manager password
The ipa-server-install command was successful
Una vez que haya terminado, puede continuar con el siguiente paso.
Configurar Firewall y SELinux
Si firewalld está instalado en su sistema, deberá permitir algunos puertos utilizados por FreeIPA. Puede permitirlos con el siguiente comando:
firewall-cmd --add-service={http,https,dns,ntp,freeipa-ldap,freeipa-ldaps} --permanent A continuación, vuelva a cargar el firewalld con el siguiente comando para aplicar los cambios:
firewall-cmd --reload
A continuación, también deberá deshabilitar SELinux en su sistema.
Puede deshabilitar SELinux editando el archivo /etc/selinux/config:
nano /etc/selinux/config
Busque la siguiente línea:
SELINUX=enforcing
Y reemplácelo con la siguiente línea:
SELINUX=permissive
Guarde y cierre el archivo. Luego, reinicie su sistema para aplicar los cambios:
Acceder a la interfaz de usuario web de FreeIPA
Ahora, abra su navegador web y acceda a la interfaz web de FreeIPA usando la URL https://freeipa.mydomain10.com. Será redirigido a la página de inicio de sesión de FreeIPA como se muestra a continuación:
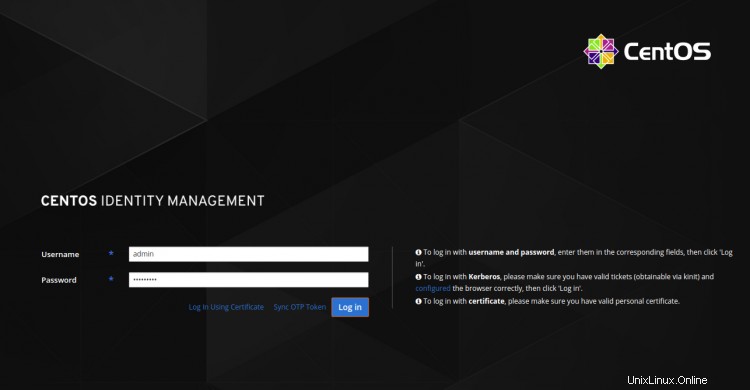
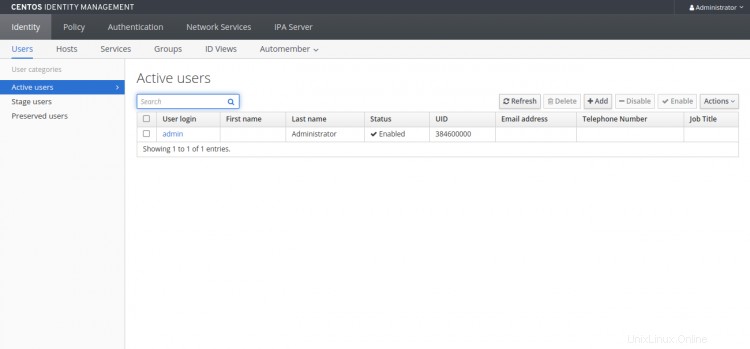
Proporcione su nombre de usuario y contraseña de administrador y haga clic en Iniciar sesión en botón. Debería ver el panel de FreeIPA en la siguiente página:
Trabajando con FreeIPA CLI
FreeIPA también proporciona una herramienta de línea de comandos para agregar un nuevo usuario, grupo, principal de servicio y otorgar acceso de escritura a ciertos atributos de un grupo a otro.
Antes de usar la herramienta CLI, deberá obtener un ticket de Kerberos con el siguiente comando:
kinit admin
Se le pedirá que proporcione la contraseña como se muestra a continuación:
Password for [email protected]:
Proporcione su contraseña de administrador y presione Entrar para obtener un ticket de Kerberos.
A continuación, ejecute el siguiente comando para comprobar la caducidad del ticket:
klist
Deberías obtener el siguiente resultado:
Ticket cache: KCM:0
Default principal: [email protected]

Valid starting       Expires              Service principal
2020-09-28T03:36:54  2020-09-29T03:36:50  krbtgt/[email protected]
A continuación, agregue una nueva cuenta de usuario con el siguiente comando:
ipa user-add user1 --first=hit --last=jethva [email protected] --password
Deberías obtener el siguiente resultado:
Password:
Enter Password again to verify:
------------------
Added user "user1"
------------------
  User login: user1
  First name: hit
  Last name: jethva
  Full name: hit jethva
  Display name: hit jethva
  Initials: hj
  Home directory: /home/user1
  GECOS: hit jethva
  Login shell: /bin/sh
  Principal name: [email protected]
  Principal alias: [email protected]
  User password expiration: 20200928073905Z
  Email address: [email protected]
  UID: 384600001
  GID: 384600001
  Password: True
  Member of groups: ipausers
  Kerberos keys available: True
También puede enumerar todas las cuentas de usuario en su sistema con el siguiente comando:
ipa user-find
Debería ver el siguiente resultado:
---------------
2 users matched
---------------
  User login: admin
  Last name: Administrator
  Home directory: /home/admin
  Login shell: /bin/bash
  Principal alias: [email protected]
  UID: 384600000
  GID: 384600000
  Account disabled: False

  User login: user1
  First name: hit
  Last name: jethva
  Home directory: /home/user1
  Login shell: /bin/sh
  Principal name: [email protected]
  Principal alias: [email protected]
  Email address: [email protected]
  UID: 384600001
  GID: 384600001
  Account disabled: False
----------------------------
Number of entries returned 2
Conclusión
¡Felicidades! Ha instalado y configurado con éxito el servidor FreeIPA en CentOS 8. Ahora puede instalar el cliente FreeIPA y agregarlo al servidor FreeIPA para centralizar la autenticación. Siéntase libre de preguntarme si tiene alguna pregunta.