Introducción
Panel Plesk es un software comercial de automatización de centros de datos y alojamiento web. En este artículo, aprenderá a instalar Plesk Obsidian en CentOS/RHEL 8.
Es un panel de control centralizado.
Puede crear y administrar varios sitios desde un solo tablero. También puede ejecutar actualizaciones, supervisar el rendimiento e incorporar nuevos clientes potenciales, todo desde el mismo lugar.
Plesk, con la última versión Obsidian 18.x, está disponible en las siguientes configuraciones de licencia:
- Edición de administración web de Plesk: Hasta 10 dominios. Para la administración básica de sitios web simples, sin las herramientas y características extendidas.
- Edición Plesk Web Pro: Para gestionar hasta 30 dominios. También incluye Plesk WordPress Toolkit con todas las funciones.
- Edición de alojamiento web de Plesk: Dominios ilimitados. El administrador también puede crear cuentas de revendedor adicionales.
El precio de la licencia también distingue si una licencia se puede utilizar para un servidor dedicado o un servidor virtualizado. Las licencias para servidores dedicados suelen ser un poco más caras.
Plesk vende directamente las tres licencias por un precio mensual o anual. Las tres ediciones también se pueden obtener a través de revendedores de licencias oficiales. Los precios detallados de Plesk están disponibles en su sitio web oficial.
Actualizar paquetes de servidor Linux
Actualice su sistema operativo Linux ejecutando el siguiente comando.
# dnf update -yInstalar Plesk Panel en CentOS 8
Aquí, estamos instalando el Panel Plesk (Obsidian) usando la Consola del Instalador.
Descargue el instalador de Plesk Obsidian con el comando wget
[root@unixcop ~]#  wget https://autoinstall.plesk.com/plesk-installer
--2021-08-24 07:51:56--  https://autoinstall.plesk.com/plesk-installer
Resolving autoinstall.plesk.com (autoinstall.plesk.com)... 185.93.2.19, 185.93.2.27, 185.93.2.6, ...
Connecting to autoinstall.plesk.com (autoinstall.plesk.com)|185.93.2.19|:443... connected.
HTTP request sent, awaiting response... 200 OK
Length: 15740 (15K) [application/octet-stream]
Saving to: 'plesk-installer'

plesk-installer                       100%[=======================================================================>]  15.37K  --.-KB/s    in 0s

2021-08-24 07:51:57 (282 MB/s) - 'plesk-installer' saved [15740/15740]

[root@unixcop ~]#
Haga que el archivo descargado sea ejecutable.
# chmod +x plesk-installerInstale y configure Parallels Plesk Panel y los componentes de software dependientes con el siguiente script de descarga.
[root@unixcop ~]# ./plesk-installer

The Plesk Installation and Upgrade Wizard will guide you through
the installation or upgrade process.
===============================================================================

------ IMPORTANT ------

* New installation of product(s) should be performed on clean servers only.

* Before upgrading Plesk, be sure to back up your data.

* By using this Wizard you agree to the terms and conditions described at
  http://www.plesk.com/legal/terms/ and those of the Plesk End User
  License Agreement.

Available actions:
(F) Go forward
(Q) Cancel installation

Select an action [F/q]: F
Checking for installed packages...
Downloading file products.inf3: 100% was finished.
Downloading file pool/PSA_18.0.37_6686/release.inf3: 100% was finished.
Downloading file pool/PSA_18.0.36_6324/release.inf3: 100% was finished.
Downloading file pool/PSA_18.0.35_6216/release.inf3: 100% was finished.
Downloading file pool/PSA_18.0.34_5691/release.inf3: 100% was finished.
Downloading file pool/PSA_18.0.33_5467/release.inf3: 100% was finished.
Downloading file pool/PSA_18.0.32_4963/release.inf3: 100% was finished.
Downloading file pool/PSA_18.0.31_4832/release.inf3: 100% was finished.
Downloading file plesk.inf3: 100% was finished.
Downloading file ppsmbe.inf3: 100% was finished.
Downloading file sitebuilder.inf3: 100% was finished.
Downloading file sso.inf3: 100% was finished.
Downloading file PHP80_17/release.inf3: 100% was finished.
Downloading file php80.inf3: 100% was finished.
Downloading file php72.inf3: 100% was finished.
Downloading file PHP74_17/release.inf3: 100% was finished.
Downloading file php74.inf3: 100% was finished.
Downloading file PHP73_17/release.inf3: 100% was finished.
Downloading file php73.inf3: 100% was finished.
Downloading file php71.inf3: 100% was finished.
Downloading file setemplates.inf3: 100% was finished.
Downloading file pp-sitebuilder.inf3: 100% was finished.
Downloading file billing.inf3: 100% was finished.
Downloading file mysql.inf3: 100% was finished.
Downloading file apache.inf3: 100% was finished.
Downloading file nginx.inf3: 100% was finished.
Downloading file php70.inf3: 100% was finished.
Downloading file php56.inf3: 100% was finished.
Downloading file php55.inf3: 100% was finished.
Downloading file php54.inf3: 100% was finished.
Downloading file php53.inf3: 100% was finished.
Downloading file php52.inf3: 100% was finished.
Downloading file pmm.inf3: 100% was finished.
Downloading file pool/PSA_18.0.37_6686/plesk-18.0.37-cos8-x86_64.inf3: 100% was finished.
Downloading Extensions Catalog feed...
Downloading file https://ext.plesk.com/api/v4/packages?platform=unix&version=18.0.37&ai-compatible: 0%
Downloading file pool/PHP_7.1.33_96/php71-cos8-x86_64.inf3: 100% was finished.
Downloading file pool/PHP_7.2.34_150/php72-cos8-x86_64.inf3: 100% was finished.
Downloading file PHP73_17/php73-cos8-x86_64.inf3: 100% was finished.
Downloading file PHP74_17/php74-cos8-x86_64.inf3: 100% was finished.
Downloading file PHP80_17/php80-cos8-x86_64.inf3: 100% was finished.
Downloading file SITEBUILDER_18.0.29/sitebuilder-18.0.29-rhall-all.inf3: 100% was finished.
gpg-pubkey-8483c65d-5ccc5b19 gpg(CentOS (CentOS Official Signing Key) <security@centos.org>)
gpg-pubkey-914bdf7e-55c05220 gpg(Plesk Team <info@plesk.com>)
El script del instalador muestra el enlace a la licencia de Plesk Obsidian. Presione F tecla para avanzar.
Select the installation type for Plesk Obsidian
===============================================================================

Installation types for the product:

 1. (*) Recommended
       Install typically used components. Recommended for general use.

 2. ( ) Full
       Install all available components.

 3. ( ) Custom
       Custom components selection. Recommended only for experienced users.


Available actions:
(F) Go forward
(B) Go back
(Q) Cancel installation

Select an action or a number [F/b/q/1-3]: F
gpg-pubkey-8483c65d-5ccc5b19 gpg(CentOS (CentOS Official Signing Key) <security@centos.org>)
gpg-pubkey-914bdf7e-55c05220 gpg(Plesk Team <info@plesk.com>)
Retrieving information about the installed license key...
Launching component and product checkers...
Downloading file pool/PSA_18.0.37_6686/examiners/repository_check.sh: 100% was finished.
Downloading file pool/PSA_18.0.37_6686/examiners/disk_space_check.sh: 100% was finished.
Downloading file pool/PSA_18.0.37_6686/examiners/sh_cmd.sh: 100% was finished.
Start downloading 1 files of unknown size and 0 delta RPMs
Downloading CentOS Linux 8 - PowerTools 2105086/2451404 [total 2105086/unknown B 0/1 files]
Download CentOS Linux 8 - PowerTools   2451404B 0:00:18 [total 0/unknown B 1/1 files]
Start downloading 1 files of unknown size and 0 delta RPMs
Downloading PLESK_18_0_37 dist 0/0 [total 0/unknown B 0/1 files]
Download PLESK_18_0_37 dist   3091B 0:00:30 [total 0/unknown B 1/1 files]
Start downloading 1 files of unknown size and 0 delta RPMs
Seleccione el tipo de instalación. Recomendar predeterminado opción es buena para usted, presione 'F' para continuar.
Preparing Your System for Product Installation
===============================================================================

There are 368 packages required for the product to function properly which
were not found in your system.

There are 0 packages that need to be upgraded
in order to install the product.


Available actions:
(F) Go forward
(B) Go back
(Q) Cancel installation
(S) Show the list of packages

Select an action [F/b/q/s]: F
Installing packages
Last metadata expiration check: 0:00:07 ago on Tue Aug 24 08:28:47 2021.
Start downloading 71 files of 61853988 size and 0 delta RPMs
Download libjpeg-turbo-1.5.3-10.el8.x86_64.rpm   159432B [total 415324/61853988B 1/71 files]
Download psmisc-23.1-5.el8.x86_64.rpm   154364B [total 437255/61853988B 2/71 files]
Download perl-libnet-3.11-3.el8.noarch.rpm   123784B [total 693470/61853988B 3/71 files]
Download libpq-13.3-1.el8_4.x86_64.rpm   201952B [total 1200486/61853988B 4/71 files]
Download plesk-libboost-1.65-1.65.1-1centos.8.191004.1513.x86_64.rpm   7934B [total 1398572/61853988B 5/71 files]
Download plesk-libboost-date-time1.65-1.65.1-1centos.8.191004.1513.x86_64.rpm   28928B [total 1614916/61853988B 6/71 files]
Download plesk-libboost-filesystem1.65-1.65.1-1centos.8.191004.1513.x86_64.rpm   59098B [total 1884686/61853988B 7/71 files]
Download sqlite-3.26.0-13.el8.x86_64.rpm   683476B 0:00:05 [total 1948721/61853988B 8/71 files]
Luego presione F para avanzar como se muestra arriba.
Components and product check results:
Installation is finished

  	                           Congratulations!

  	The installation has been finished. Plesk is now running on your server.

  	To complete the configuration process, browse either of URLs:
  	  * https://recursing-mendel.156-217-118-33.plesk.page/login?secret=EuF_wUNNPilzfym-fP-Gs-Hl9eceHNG3sPbTkLUMFWrGlAnG
  	  * https://192.168.13.131/login?secret=EuF_wUNNPilzfym-fP-Gs-Hl9eceHNG3sPbTkLUMFWrGlAnG

  	Use the username 'admin' to log in. To log in as 'admin', use the 'plesk login' command.
  	You can also log in as 'root' using your 'root' password.

  	Use the 'plesk' command to manage the server. Run 'plesk help' for more info.

  	Use the following commands to start and stop the Plesk web interface:
  	'service psa start' and 'service psa stop' respectively.

  	If you would like to migrate your subscriptions from other hosting panel
  	or older Plesk version to this server, please check out our assistance
  	options: https://www.plesk.com/professional-services/


The changes were applied successfully.


[root@unixcop ~]#
Así que Plesk Panel se instaló correctamente
Nota
La URL anterior al final de la instalación se utilizará para acceder a Plesk Obsidian por primera vez.
Nota
el PSA El servicio puede expresar un problema en el inicio, por lo que debe verificar la unidad de servicio systemd para PSA.
También inícielo con el siguiente comando y luego verifique si se está ejecutando o no con el estado systemctl comando.
[root@unixcop ~]# systemctl start psa.service
[root@unixcop ~]# systemctl status psa.service
● psa.service - Plesk Panel
   Loaded: loaded (/usr/lib/systemd/system/psa.service; enabled; vendor preset: disabled)
   Active: active (exited) since Tue 2021-08-24 09:00:58 EDT; 44min ago
 Main PID: 33013 (code=exited, status=0/SUCCESS)
    Tasks: 0 (limit: 6242)
   Memory: 0B
   CGroup: /system.slice/psa.service

Aug 24 09:00:58 recursing-mendel.156-217-118-33.plesk.page systemd[1]: Starting Plesk Panel...
Aug 24 09:00:58 recursing-mendel.156-217-118-33.plesk.page systemd[1]: Started Plesk Panel.
[root@unixcop ~]#
Para mí no hay problema.
Si el estado del servicio PSA es muerto o inactivo luego edite la unidad systemd de PSA con el editor.
# vim /etc/systemd/system/multi-user.target.wants/psa.servicey cambie el tipo de one-shot a sencillo como se muestra a continuación.
[Unit]
Description=Plesk Panel
Wants=sw-cp-server.service sw-engine.service
Wants=mariadb.service mysql.service
After=network.target mariadb.service mysql.service

[Service]
Type=simple
RemainAfterExit=yes
ExecStart=/bin/true

[Install]
WantedBy=multi-user.target
Luego, vuelva a cargar el demonio para iniciar el servicio PSA ahora con los siguientes comandos:
# systemctl daemon-reload
# systemctl start psa.service
También verifique nuevamente el estado del servicio PSA. Encontrará que el servicio PSA se ha iniciado con éxito.
Configurar el cortafuegos de Linux
Plesk Panel se ejecuta en el puerto HTTP. por esta razón, debe permitirlo en el firewall de Linux con los siguientes comandos:
[root@unixcop ~]# firewall-cmd --permanent --add-service=http
success
[root@unixcop ~]# firewall-cmd --reload
success
[root@unixcop ~]#
Panel de acceso a Plesk
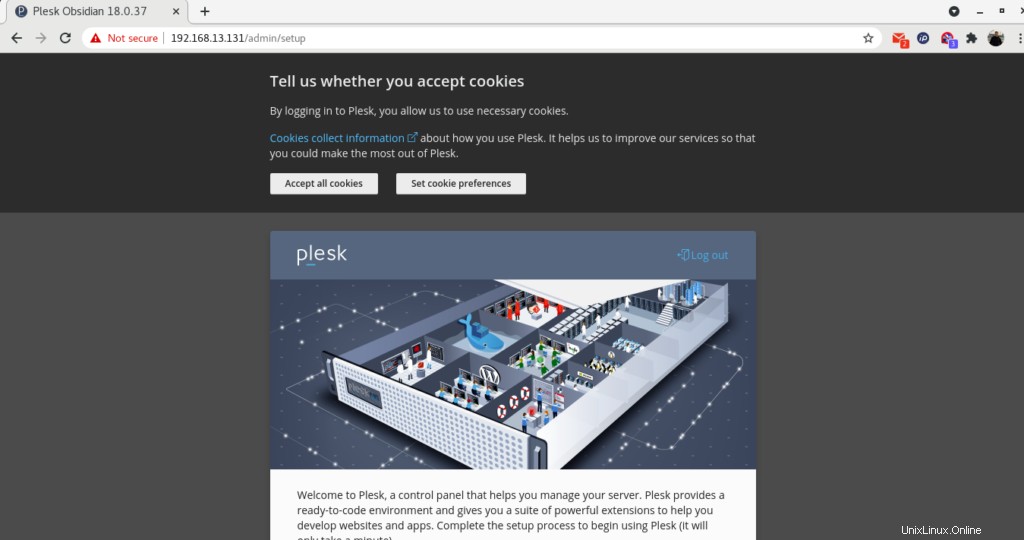
Use la URL provista por el instalador de Plesk que mencionamos arriba e Nota para acceder a la interfaz web de Obsidian.
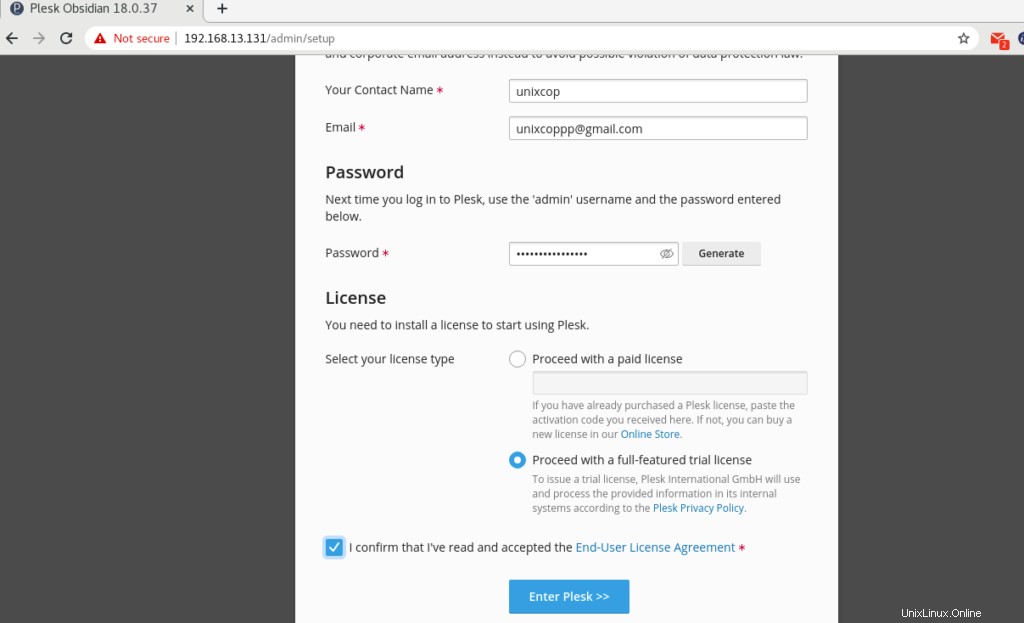
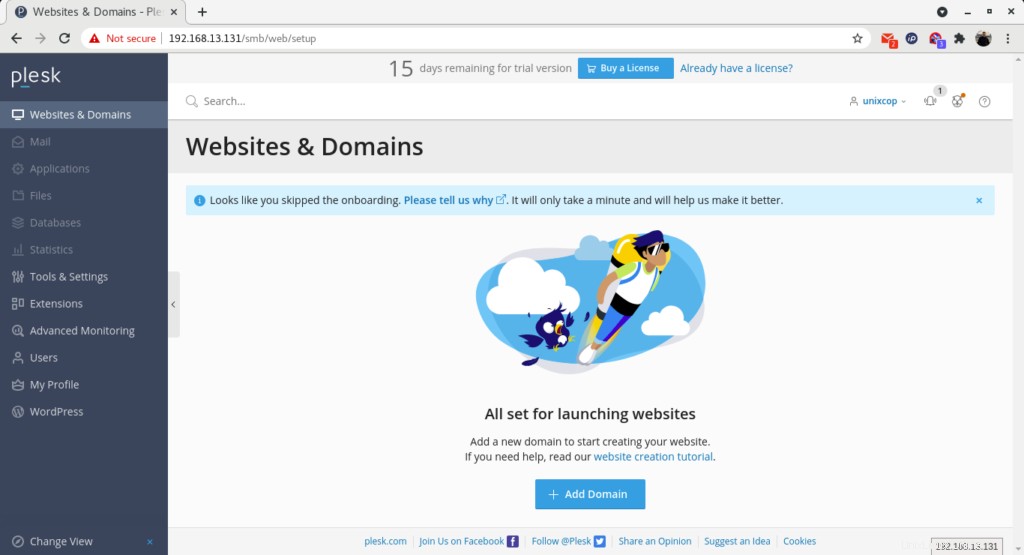
Luego proporcione la información de contacto, configure la contraseña para el usuario administrador y seleccione el tipo de licencia. (opción:Continuar con una licencia de prueba con todas las funciones) como se muestra a continuación.
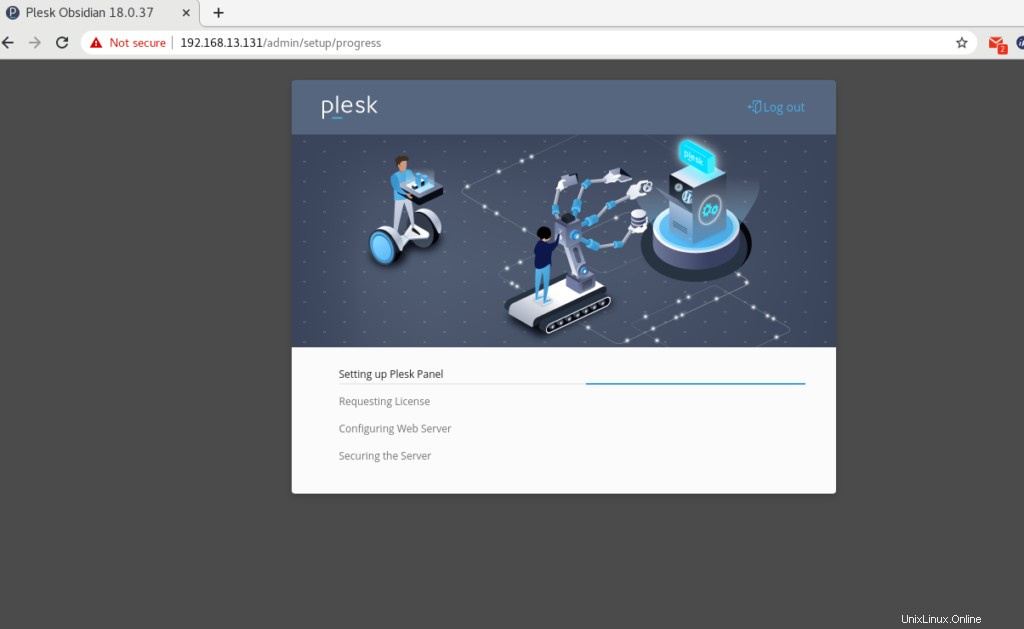
Plesk está configurando Plesk Panel por usted.
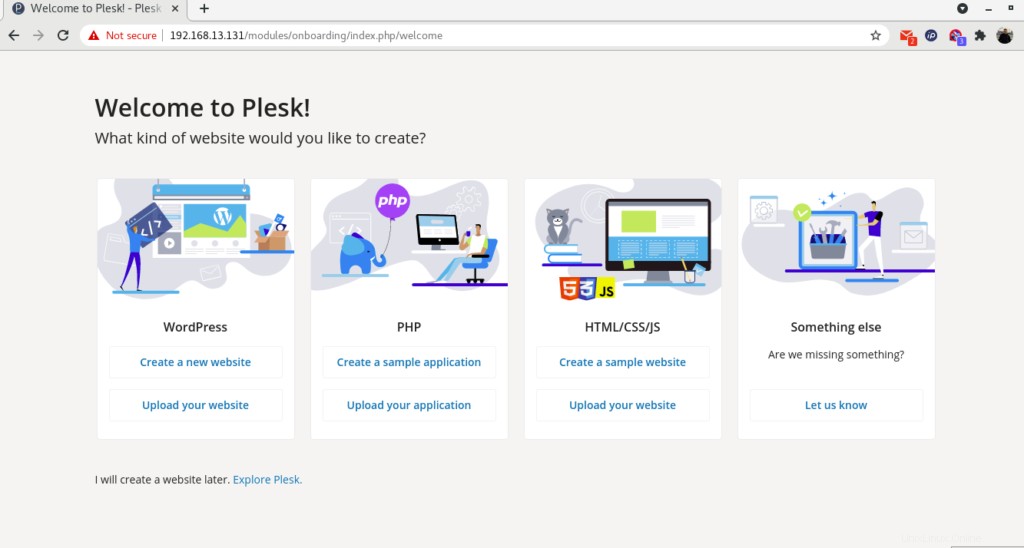
Con una configuración exitosa, Plesk lo redirigirá a la página de Introducción como se muestra arriba.
Haga clic en “Explorar Plesk ” para avanzar al panel de Plesk.
Versión Plesk
Puede comprobar la versión de plesk con el comando
[root@unixcop ~]# plesk -v
Product version: Plesk Obsidian 18.0.37.2
     OS version: CentOS 8.4.2105 x86_64
     Build date: 2021/08/09 18:00
       Revision: 1dff6684b76d24eb5432e13e6870e5795482e0a1
[root@unixcop ~]#
Conclusión
Así que ha instalado correctamente Parallel Plesk Panel (Obsidian) en CentOS/RHEL 8.
Para obtener más información sobre Plesk, puede visitar su sitio web oficial aquí.