El servidor perfecto - Ubuntu 14.10 con Apache, PHP, MySQL, PureFTPD, BIND , Postfix, Dovecot y ISPConfig
Este tutorial muestra cómo instalar un servidor Ubuntu 14.10 (Utopic Unicorn) (con Apache2, BIND, Dovecot) para la instalación de ISPConfig 3 y cómo instalar ISPConfig 3. ISPConfig 3 es un panel de control de alojamiento web que le permite configurar lo siguiente servicios a través de un navegador web:servidor web Apache o nginx, servidor de correo Postfix, servidor Courier o Dovecot IMAP/POP3, servidor de nombres MySQL, BIND o MyDNS, PureFTPd, SpamAssassin, ClamAV y muchos más. Esta configuración cubre la instalación de Apache (en lugar de nginx), BIND (en lugar de MyDNS) y Dovecot (en lugar de Courier).
Manual de ISPConfig 3
Para aprender a usar ISPConfig 3, recomiendo descargar el Manual de ISPConfig 3.
En más de 300 páginas, cubre el concepto detrás de ISPConfig (administrador, revendedores, clientes), explica cómo instalar y actualizar ISPConfig 3, incluye una referencia para todos los formularios y campos de formulario en ISPConfig junto con ejemplos de entradas válidas y proporciona tutoriales para las tareas más comunes en ISPConfig 3. También explica cómo hacer que su servidor sea más seguro y viene con una sección de resolución de problemas al final.
1. Nota Preliminar
En este tutorial utilizo el nombre de host server1.example.com con la dirección IP 192.168.0.100 y la puerta de enlace 192.168.0.1. Estas configuraciones pueden diferir para usted, por lo que debe reemplazarlas cuando corresponda. Antes de continuar, debe tener una instalación mínima básica de Ubuntu 14.10 como se explica en el tutorial.
2. Edite /etc/apt/sources.list y actualice su instalación de Linux
Edite /etc/apt/sources.list. Comente o elimine el CD de instalación del archivo y asegúrese de que los repositorios Universe y Multiverse estén habilitados. Debería verse así:
nano /etc/apt/sources.list
#

# deb cdrom:[Ubuntu-Server 14.10 _Utopic Unicorn_ - Release amd64 (20141022.2)]/ utopic main restricted

#deb cdrom:[Ubuntu-Server 14.10 _Utopic Unicorn_ - Release amd64 (20141022.2)]/ utopic main restricted

# See http://help.ubuntu.com/community/UpgradeNotes for how to upgrade to
# newer versions of the distribution.
deb http://de.archive.ubuntu.com/ubuntu/ utopic main restricted
deb-src http://de.archive.ubuntu.com/ubuntu/ utopic main restricted

## Major bug fix updates produced after the final release of the
## distribution.
deb http://de.archive.ubuntu.com/ubuntu/ utopic-updates main restricted
deb-src http://de.archive.ubuntu.com/ubuntu/ utopic-updates main restricted

## N.B. software from this repository is ENTIRELY UNSUPPORTED by the Ubuntu
## team. Also, please note that software in universe WILL NOT receive any
## review or updates from the Ubuntu security team.
deb http://de.archive.ubuntu.com/ubuntu/ utopic universe
deb-src http://de.archive.ubuntu.com/ubuntu/ utopic universe
deb http://de.archive.ubuntu.com/ubuntu/ utopic-updates universe
deb-src http://de.archive.ubuntu.com/ubuntu/ utopic-updates universe

## N.B. software from this repository is ENTIRELY UNSUPPORTED by the Ubuntu
## team, and may not be under a free licence. Please satisfy yourself as to
## your rights to use the software. Also, please note that software in
## multiverse WILL NOT receive any review or updates from the Ubuntu
## security team.
deb http://de.archive.ubuntu.com/ubuntu/ utopic multiverse
deb-src http://de.archive.ubuntu.com/ubuntu/ utopic multiverse
deb http://de.archive.ubuntu.com/ubuntu/ utopic-updates multiverse
deb-src http://de.archive.ubuntu.com/ubuntu/ utopic-updates multiverse

## N.B. software from this repository may not have been tested as
## extensively as that contained in the main release, although it includes
## newer versions of some applications which may provide useful features.
## Also, please note that software in backports WILL NOT receive any review
## or updates from the Ubuntu security team.
deb http://de.archive.ubuntu.com/ubuntu/ utopic-backports main restricted universe multiverse
deb-src http://de.archive.ubuntu.com/ubuntu/ utopic-backports main restricted universe multiverse

deb http://security.ubuntu.com/ubuntu utopic-security main restricted
deb-src http://security.ubuntu.com/ubuntu utopic-security main restricted
deb http://security.ubuntu.com/ubuntu utopic-security universe
deb-src http://security.ubuntu.com/ubuntu utopic-security universe
deb http://security.ubuntu.com/ubuntu utopic-security multiverse
deb-src http://security.ubuntu.com/ubuntu utopic-security multiverse

## Uncomment the following two lines to add software from Canonical's
## 'partner' repository.
## This software is not part of Ubuntu, but is offered by Canonical and the
## respective vendors as a service to Ubuntu users.
# deb http://archive.canonical.com/ubuntu utopic partner
# deb-src http://archive.canonical.com/ubuntu utopic partner

## Uncomment the following two lines to add software from Ubuntu's
## 'extras' repository.
## This software is not part of Ubuntu, but is offered by third-party
## developers who want to ship their latest software.
# deb http://extras.ubuntu.com/ubuntu utopic main
# deb-src http://extras.ubuntu.com/ubuntu utopic main
Entonces corre
apt-get update
para actualizar la base de datos de paquetes apt y
apt-get upgrade
para instalar las últimas actualizaciones (si las hay). Si ve que se instala un nuevo kernel como parte de las actualizaciones, debe reiniciar el sistema después:
reboot
3. Cambiar el caparazón predeterminado
/bin/sh es un enlace simbólico a /bin/dash, sin embargo, necesitamos /bin/bash, no /bin/dash. Por lo tanto hacemos esto:
dpkg-reconfigure dash
¿Usar guión como shell del sistema predeterminado (/bin/sh)? <-- No
Si no hace esto, la instalación de ISPConfig fallará.
4. Deshabilitar AppArmor
AppArmor es una extensión de seguridad (similar a SELinux) que debería proporcionar seguridad extendida. En mi opinión, no lo necesitas para configurar un sistema seguro, y suele causar más problemas que ventajas (piensa en ello después de haber realizado una semana de resolución de problemas porque algún servicio no estaba funcionando como se esperaba, y luego descubra que todo estaba bien, solo AppArmor estaba causando el problema). Por lo tanto, lo deshabilito (esto es obligatorio si desea instalar ISPConfig más adelante).
Podemos desactivarlo así:
service apparmor stop
update-rc.d -f apparmor remove
apt-get remove apparmor apparmor-utils
Es una buena idea sincronizar el reloj del sistema con un NTP (n red t tiempo p rotocol) servidor a través de Internet. Simplemente ejecuta
apt-get install ntp ntpdate
y la hora de su sistema siempre estará sincronizada.
6. Instale Postfix, Dovecot, MySQL, phpMyAdmin, rkhunter, binutils
Para instalar postfix, debemos detener y eliminar sendmail
service sendmail stop; update-rc.d -f sendmail remove
Ahora podemos instalar Postfix, Dovecot, MySQL, rkhunter y binutils con un solo comando:
apt-get install postfix postfix-mysql postfix-doc mariadb-client mariadb-server openssl getmail4 rkhunter binutils dovecot-imapd dovecot-pop3d dovecot-mysql dovecot-sieve sudo
Se le harán las siguientes preguntas:
Nueva contraseña para el usuario "root" de MySQL:<-- yourrootsqlpassword
Repetir la contraseña para el usuario "root" de MySQL:<-- yourrootsqlpassword
¿Crear un certificado SSL autofirmado?:<-- Sí
Nombre de host:<-- server1.example.com
Solo local:<-- OK
Tipo general de configuración de correo:<-- Sitio de Internet
Nombre de correo del sistema:<- - servidor1.ejemplo.com
A continuación, abra TLS/SSL y los puertos de envío en Postfix:
nano /etc/postfix/master.cf
Descomente las secciones de envío y smtps de la siguiente manera:agregue la línea -o smtpd_client_restrictions=permit_sasl_authenticated, rechace ambas secciones y deje todo lo comentado a partir de entonces:
[...]
submission inet n       -       -       -       -       smtpd
  -o syslog_name=postfix/submission
  -o smtpd_tls_security_level=encrypt
  -o smtpd_sasl_auth_enable=yes
  -o smtpd_client_restrictions=permit_sasl_authenticated,reject
#  -o smtpd_reject_unlisted_recipient=no
#  -o smtpd_client_restrictions=$mua_client_restrictions
#  -o smtpd_helo_restrictions=$mua_helo_restrictions
#  -o smtpd_sender_restrictions=$mua_sender_restrictions
#  -o smtpd_recipient_restrictions=permit_sasl_authenticated,reject
#  -o milter_macro_daemon_name=ORIGINATING
smtps     inet  n       -       -       -       -       smtpd
  -o syslog_name=postfix/smtps
  -o smtpd_tls_wrappermode=yes
  -o smtpd_sasl_auth_enable=yes
  -o smtpd_client_restrictions=permit_sasl_authenticated,reject
#  -o smtpd_reject_unlisted_recipient=no
#  -o smtpd_client_restrictions=$mua_client_restrictions
#  -o smtpd_helo_restrictions=$mua_helo_restrictions
#  -o smtpd_sender_restrictions=$mua_sender_restrictions
#  -o smtpd_recipient_restrictions=permit_sasl_authenticated,reject
#  -o milter_macro_daemon_name=ORIGINATING
[...]
Reinicie Postfix después:
service postfix restart
Queremos que MySQL escuche en todas las interfaces, no solo en localhost, por lo tanto, editamos /etc/mysql/my.cnf y comentamos la línea bind-address =127.0.0.1:
nano /etc/mysql/my.cnf
[...]
# Instead of skip-networking the default is now to listen only on
# localhost which is more compatible and is not less secure.
#bind-address           = 127.0.0.1
[...]
Luego reiniciamos MySQL:
service mysql restart
Ahora verifique que la red esté habilitada. Ejecutar
netstat -tap | grep mysql
La salida debería verse así:
[email protected]:~# netstat -tap | grep mysql
tcp        0      0 *:mysql                 *:*                     LISTEN      24603/mysqld
[email protected]:~#
7. Instale Amavisd-new, SpamAssassin y Clamav
Para instalar amavisd-new, SpamAssassin y ClamAV, ejecutamos
apt-get install amavisd-new spamassassin clamav clamav-daemon zoo unzip bzip2 arj nomarch lzop cabextract apt-listchanges libnet-ldap-perl libauthen-sasl-perl clamav-docs daemon libio-string-perl libio-socket-ssl-perl libnet-ident-perl zip libnet-dns-perl
La configuración de ISPConfig 3 usa amavisd que carga la biblioteca de filtros SpamAssassin internamente, por lo que podemos detener SpamAssassin para liberar RAM:
service spamassassin stop
update-rc.d -f spamassassin remove
Para ejecutar el uso de clamav
freshclam
service clamav-daemon start
El servidor perfecto - Ubuntu 14.10 con Apache, PHP, MySQL, PureFTPD, BIND, Postfix, Dovecot e ISPConfig - Página 2
8. Instale Apache2, PHP5, phpMyAdmin, FCGI, suExec, Pear y mcrypt
Apache2, PHP5, phpMyAdmin, FCGI, suExec, Pear y mcrypt se pueden instalar de la siguiente manera:
apt-get install apache2 apache2-doc apache2-utils libapache2-mod-php5 php5 php5-common php5-gd php5-mysql php5-imap phpmyadmin php5-cli php5-cgi libapache2-mod-fcgid apache2-suexec php-pear php-auth php5-mcrypt mcrypt php5-imagick imagemagick libapache2-mod-suphp libruby libapache2-mod-python php5-curl php5-intl php5-memcache php5-memcached php5-ming php5-ps php5-pspell php5-recode php5-sqlite php5-tidy php5-xmlrpc php5-xsl memcached
Verá la siguiente pregunta:
Servidor web para reconfigurar automáticamente:<-- apache2
¿Configurar base de datos para phpmyadmin con dbconfig-common? <-- No
Luego ejecute el siguiente comando para habilitar los módulos de Apache suexec, rewrite, ssl, actions e include (además de dav, dav_fs y auth_digest si desea usar WebDAV):
a2enmod suexec rewrite ssl actions include cgi
a2enmod dav_fs dav auth_digest
A continuación, abra /etc/apache2/mods-disponible/suphp.conf...
nano /etc/apache2/mods-available/suphp.conf
... y comente la sección
<IfModule mod_suphp.c>
    #<FilesMatch "\.ph(p3?|tml)$">
    #    SetHandler application/x-httpd-suphp
    #</FilesMatch>
        suPHP_AddHandler application/x-httpd-suphp

    <Directory />
        suPHP_Engine on
    </Directory>

    # By default, disable suPHP for debian packaged web applications as files
    # are owned by root and cannot be executed by suPHP because of min_uid.
    <Directory /usr/share>
        suPHP_Engine off
    </Directory>

# # Use a specific php config file (a dir which contains a php.ini file)
#       suPHP_ConfigPath /etc/php5/cgi/suphp/
# # Tells mod_suphp NOT to handle requests with the type <mime-type>.
#       suPHP_RemoveHandler <mime-type>
</IfModule>
Reinicie Apache después:
service apache2 restart
Si desea alojar archivos Ruby con la extensión .rb en sus sitios web creados a través de ISPConfig, debe comentar la línea application/x-ruby rb en /etc/mime.types:
nano /etc/mime.types
[...]
#application/x-ruby                             rb
[...]
(Esto es necesario solo para archivos .rb; los archivos de Ruby con la extensión .rbx funcionan de inmediato).
Reinicie Apache después:
service apache2 restart
8.1 Xcaché
Xcache es un caché de código de operación de PHP gratuito y abierto para almacenar en caché y optimizar el código intermedio de PHP. Es similar a otros cachés de código de operación de PHP, como eAccelerator y APC. Se recomienda encarecidamente tener uno de estos instalados para acelerar su página PHP.
Xcache se puede instalar de la siguiente manera:
apt-get install php5-xcache
Ahora reinicie Apache:
service apache2 restart
8.2 PHP-FPM
A partir de ISPConfig 3.0.5, hay un modo PHP adicional que puede seleccionar para usar con Apache:PHP-FPM.
Para usar PHP-FPM con Apache, necesitamos el módulo de Apache mod_fastcgi (no mezcle esto con mod_fcgid; son muy similares, pero no puede usar PHP-FPM con mod_fcgid). Podemos instalar PHP-FPM y mod_fastcgi de la siguiente manera:
apt-get install libapache2-mod-fastcgi php5-fpm
Asegúrese de habilitar el módulo y reiniciar Apache:
a2enmod actions fastcgi alias
service apache2 restart
8.3 Versiones adicionales de PHP
A partir de ISPConfig 3.0.5, es posible tener varias versiones de PHP en un servidor (seleccionables a través de ISPConfig) que se pueden ejecutar a través de FastCGI y PHP-FPM. Para aprender a crear versiones adicionales de PHP (PHP-FPM y FastCGI) y cómo configurar ISPConfig, consulte este tutorial:Cómo usar varias versiones de PHP (PHP-FPM y FastCGI) con ISPConfig 3 (Ubuntu 12.10) (funciona para Ubuntu 14.10 también).
9. Instalar Mailman
Desde la versión 3.0.4, ISPConfig también le permite administrar (crear/modificar/eliminar) listas de correo de Mailman. Si desea utilizar esta función, instale Mailman de la siguiente manera:
apt-get install mailman
Seleccione al menos un idioma, por ejemplo:
Idiomas admitidos:<-- en (inglés)
Lista de sitios que faltan <-- Ok
Antes de que podamos iniciar Mailman, se debe crear una primera lista de correo llamada mailman:
newlist mailman
[email protected]:~# newlist mailman
Ingrese el correo electrónico de la persona que ejecuta la lista: <-- dirección de correo electrónico del administrador, por ej. [email protected]
Contraseña inicial del cartero: <-- contraseña de administrador para la lista de carteros
Para terminar de crear tu lista de correo, debes editar tu archivo /etc/aliases (o
equivalente) agregando las siguientes líneas y posiblemente ejecutando el programa
`newaliases':
## mailman mailing list
mailman: "|/var/lib/mailman/mail/mailman post mailman"
mailman-admin: "|/var/lib/mailman/mail/mailman admin mailman"
mailman-bounces: "|/var/lib/mailman/mail/mailman bounces mailman"
mailman-confirm: "|/var/lib/mailman/mail/mailman confirm mailman"
mailman-join: "|/var/lib/mailman/mail/mailman join mailman"
mailman -leave: "|/var/lib/mailman/mail/mailman leave mailman"
mailman-propietario: "|/var/lib/mailman/mail/mailman propietario mailman"
mailman-request: " |/var/lib/mailman/mail/mailman solicitar mailman"
mailman-subscribe: "|/var/lib/mailman/mail/mailman subscribe mailma n"
mailman-unsubscribe: "|/var/lib/mailman/mail/mailman unsubscribe mailman"
Pulse enter para notificar al propietario de mailman... <-- ENTRAR
[email protected]:~#
Abra /etc/aliases luego...
nano /etc/aliases
... y agregue las siguientes líneas:
[...]
## mailman mailing list
mailman:              "|/var/lib/mailman/mail/mailman post mailman"
mailman-admin:        "|/var/lib/mailman/mail/mailman admin mailman"
mailman-bounces:      "|/var/lib/mailman/mail/mailman bounces mailman"
mailman-confirm:      "|/var/lib/mailman/mail/mailman confirm mailman"
mailman-join:         "|/var/lib/mailman/mail/mailman join mailman"
mailman-leave:        "|/var/lib/mailman/mail/mailman leave mailman"
mailman-owner:        "|/var/lib/mailman/mail/mailman owner mailman"
mailman-request:      "|/var/lib/mailman/mail/mailman request mailman"
mailman-subscribe:    "|/var/lib/mailman/mail/mailman subscribe mailman"
mailman-unsubscribe:  "|/var/lib/mailman/mail/mailman unsubscribe mailman"
Ejecutar
newaliases
después y reinicie Postfix:
service postfix restart
Finalmente debemos habilitar la configuración de Mailman Apache:
ln -s /etc/mailman/apache.conf /etc/apache2/conf-available/mailman.conf
Esto define el alias /cgi-bin/mailman/ para todos los vhosts de Apache, lo que significa que puede acceder a la interfaz de administración de Mailman para obtener una lista en http://
En http://
Reinicie Apache después:
service apache2 restart
Luego inicie el demonio Mailman:
service mailman start
PureFTPd y la cuota se pueden instalar con el siguiente comando:
apt-get install pure-ftpd-common pure-ftpd-mysql quota quotatool
Edite el archivo /etc/default/pure-ftpd-common...
nano /etc/default/pure-ftpd-common
... y asegúrese de que el modo de inicio esté configurado como autónomo y establezca VIRTUALCHROOT=true:
[...]
STANDALONE_OR_INETD=standalone
[...]
VIRTUALCHROOT=true
[...]
Ahora configuramos PureFTPd para permitir sesiones FTP y TLS. FTP es un protocolo muy inseguro porque todas las contraseñas y todos los datos se transfieren en texto claro. Mediante el uso de TLS, toda la comunicación se puede cifrar, lo que hace que el FTP sea mucho más seguro.
Si desea permitir sesiones FTP y TLS, ejecute
echo 1 > /etc/pure-ftpd/conf/TLS
Para usar TLS, debemos crear un certificado SSL. Lo creo en /etc/ssl/private/, por lo tanto, primero creo ese directorio:
mkdir -p /etc/ssl/private/
Posteriormente, podemos generar el certificado SSL de la siguiente manera:
openssl req -x509 -nodes -days 7300 -newkey rsa:2048 -keyout /etc/ssl/private/pure-ftpd.pem -out /etc/ssl/private/pure-ftpd.pem
Nombre del país (código de 2 letras) [AU]:<-- Ingrese el nombre de su país (por ejemplo, "DE").
Nombre del estado o provincia (nombre completo) [Algún estado]:<-- Ingrese el nombre de su estado o provincia.
Nombre de la localidad (p. ej., ciudad) []:<-- Ingrese su ciudad.
Nombre de la organización (p. ej., empresa) [Internet Widgits Pty Ltd]:<-- Ingrese el nombre de su organización (p. ej., el nombre de su empresa).
Nombre de la unidad organizativa (p. ej., sección) []:<-- Ingrese el nombre de su unidad organizativa (p. ej., "Departamento de TI").
Nombre común (p. ej., SU nombre) []:<-- Ingrese el nombre de dominio completo del sistema (p. ej., "servidor1.ejemplo.com").
Dirección de correo electrónico []:<-- Ingrese su dirección de correo electrónico.
Cambiar los permisos del certificado SSL:
chmod 600 /etc/ssl/private/pure-ftpd.pem
Luego reinicie PureFTPd:
service pure-ftpd-mysql restart
[email protected]:~# service pure-ftpd-mysql restart
Restarting ftp server: Running: /usr/sbin/pure-ftpd-mysql-virtualchroot -l mysql:/etc/pure-ftpd/db/mysql.conf -l pam -8 UTF-8 -u 1000 -E -O clf:/var/log/pure-ftpd/transfer.log -Y 1 -B
[email protected]:~#
Edite /etc/fstab. El mío se ve así (agregué, usrjquota=quota.user,grpjquota=quota.group,jqfmt=vfsv0 a la partición con el punto de montaje /):
nano /etc/fstab
# /etc/fstab: static file system information.
#
# Use 'blkid' to print the universally unique identifier for a
# device; this may be used with UUID= as a more robust way to name devices
# that works even if disks are added and removed. See fstab(5).
#
# <file system> <mount point>   <type>  <options>       <dump>  <pass>
/dev/mapper/server1--vg-root /               ext4    errors=remount-ro,usrjquota=quota.user,grpjquota=quota.group,jqfmt=vfsv0 0       1
# /boot was on /dev/sda1 during installation
UUID=9b8299f1-b2a2-4231-9ba1-4540fad76b0f /boot           ext2    defaults        0       2
/dev/mapper/server1--vg-swap_1 none            swap    sw              0       0
Para habilitar la cuota, ejecute estos comandos:
mount -o remount /
quotacheck -avugm
quotaon -avug
BIND se puede instalar de la siguiente manera:
apt-get install bind9 dnsutils
Vlogger, webalizer y AWstats se pueden instalar de la siguiente manera:
apt-get install vlogger webalizer awstats geoip-database libclass-dbi-mysql-perl
Abra /etc/cron.d/awstats luego...
nano /etc/cron.d/awstats
... y comentar todo en ese archivo:
#MAILTO=root

#*/10 * * * * www-data [ -x /usr/share/awstats/tools/update.sh ] && /usr/share/awstats/tools/update.sh

# Generate static reports:
#10 03 * * * www-data [ -x /usr/share/awstats/tools/buildstatic.sh ] && /usr/share/awstats/tools/buildstatic.sh
Solo se necesita Jailkit si desea chrootear a los usuarios de SSH. Se puede instalar de la siguiente manera (importante:Jailkit se debe instalar antes de ISPConfig - ¡no se puede instalar después!):
apt-get install build-essential autoconf automake1.9 libtool flex bison debhelper binutils-gold
cd /tmp
wget http://olivier.sessink.nl/jailkit/jailkit-2.17.tar.gz
tar xvfz jailkit-2.17.tar.gz
cd jailkit-2.17
./debian/rules binary
Ahora puede instalar el paquete Jailkit .deb de la siguiente manera:
cd ..
dpkg -i jailkit_2.17-1_*.deb
rm -rf jailkit-2.17*
Esto es opcional pero recomendado, porque el monitor ISPConfig intenta mostrar el registro:
apt-get install fail2ban
Para hacer que fail2ban monitoree PureFTPd y Dovecot, cree el archivo /etc/fail2ban/jail.local:
nano /etc/fail2ban/jail.local
[pureftpd]
enabled  = true
port     = ftp
filter   = pureftpd
logpath  = /var/log/syslog
maxretry = 3

[dovecot-pop3imap]
enabled = true
filter = dovecot-pop3imap
action = iptables-multiport[name=dovecot-pop3imap, port="pop3,pop3s,imap,imaps", protocol=tcp]
logpath = /var/log/mail.log
maxretry = 5

[postfix-sasl]
enabled  = true
port     = smtp
filter   = postfix-sasl
logpath  = /var/log/mail.log
maxretry = 3
Luego cree los siguientes dos archivos de filtro:
nano /etc/fail2ban/filter.d/pureftpd.conf
[Definition]
failregex = .*pure-ftpd: \(.*@<HOST>\) \[WARNING\] Authentication failed for user.*
ignoreregex =
nano /etc/fail2ban/filter.d/dovecot-pop3imap.conf
[Definition]
failregex = (?: pop3-login|imap-login): .*(?:Authentication failure|Aborted login \(auth failed|Aborted login \(tried to use disabled|Disconnected \(auth failed|Aborted login \(\d+ authentication attempts).*rip=(?P<host>\S*),.*
ignoreregex =
Agregue la línea ignoreregex faltante en el archivo postfix-sasl:
echo "ignoreregex =" >> /etc/fail2ban/filter.d/postfix-sasl.conf
Reinicie fail2ban después:
service fail2ban restart
El servidor perfecto - Ubuntu 14.10 con Apache, PHP, MySQL, PureFTPD, BIND, Postfix, Dovecot e ISPConfig - Página 3
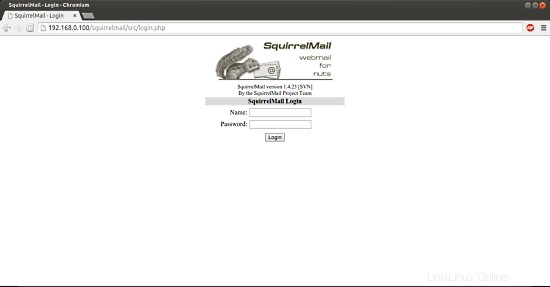
15 Instalar SquirrelMail
Para instalar el cliente de correo web SquirrelMail, ejecute
apt-get install squirrelmail
Luego configure SquirrelMail:
squirrelmail-configure
Debemos decirle a SquirrelMail que estamos usando Dovecot-IMAP/-POP3:
Configuración de SquirrelMail: Leer: config.php (1.4.0)
--------------------------------- ------------------------
Menú principal --
1. Preferencias de la organización
2. Configuración del servidor
3. Valores predeterminados de carpeta
4. Opciones generales
5. Temas
6. Libretas de direcciones
7. Mensaje del día (MOTD)
8. Complementos
9. Base de datos
10. Idiomas
D. Establecer configuraciones predefinidas para servidores IMAP específicos
C Activar color
S Guardar datos
Q Salir
Comando >> <-- D
Configuración de SquirrelMail: Leer: config.php
--------------------------- ------------------------------
Mientras construimos SquirrelMail, hemos descubierto algunas
preferencias que funcionan mejor con algunos servidores que no funcionan
tan bien con otros. Si selecciona su servidor IMAP, esta opción
establecerá algunas configuraciones predefinidas para ese servidor.
Tenga en cuenta que aún tendrá que pasar y asegurarse de que
todo sea correcto. Esto no lo cambia todo. Hay
solo unas pocas configuraciones que esto cambiará.
Seleccione su servidor IMAP:
bincimap = servidor Binc IMAP
courier = servidor IMAP de Courier
cyrus = servidor IMAP de Cyrus
dovecot = Dovecot Secure IMAP servidor
exchange = Microsoft Exchange IMAP server
hmailserver = hMailServer
macosx = Mac OS X Mailserver
mercury32 = Mercury/32
uw = Universidad de Washington IMAserver /> gmail = Acceso IMAP a cuentas de correo de Google (Gmail)
salir = No cambiar nada
Comando >> <-- dovecot
Configuración de SquirrelMail:Leer:config.php
------------------------------------------------------ ----------------------------------
Mientras construimos SquirrelMail, hemos descubierto algunas
preferencias que funcionan mejor con algunos servidores que no funcionan tan
bien con los demás. Si selecciona su servidor IMAP, esta opción
establecerá algunas configuraciones predefinidas para ese servidor.
Tenga en cuenta que aún tendrá que pasar y asegurarse de que
todo sea correcto. Esto no lo cambia todo. Hay
solo unas pocas configuraciones que esto cambiará.
Seleccione su servidor IMAP:
bincimap = servidor Binc IMAP
courier = servidor IMAP de Courier
cyrus = servidor IMAP de Cyrus
dovecot = Dovecot Secure IMAP servidor
exchange = Microsoft Exchange IMAP server
hmailserver = hMailServer
macosx = Mac OS X Mailserver
mercury32 = Mercury/32
uw = Universidad de Washington IMAserver /> gmail = Acceso IMAP a cuentas de Google mail (Gmail)
salir = No cambiar nada
Comando >> dovecot
imap_server_type = dovecot
default_folder_prefix =
Trash_folder =Trash
Sent_folder =SED
Draft_Folder =Drafts
show_prefix_option =false
default_sub_of_inbox =false
show_contain_subfolders_option =false
opcional_del imitador = detectar
delete_folder = falso
Presione cualquier tecla para continuar... <-- presione una tecla
Configuración de SquirrelMail : Leer: config .php (1.4.0)
--------------------------------------- ------------------
Menú principal --
1. Preferencias de la organización
2. Configuración del servidor
3. Valores predeterminados de carpeta
4. Opciones generales
5. Temas
6. Libretas de direcciones
7. Mensaje del día (MOTD)
8. Complementos
9. Base de datos
10. Idiomas
D. Establecer configuraciones predefinidas para servidores IMAP específicos
C Activar color
S Guardar datos
Q Salir
Comando >> <-- S
Configuración de SquirrelMail: Leer: config.php (1.4.0)
---------------------- --------------------------------------------------
Menú principal --
1. Preferencias de la organización
2. Configuración del servidor
3. Valores predeterminados de carpeta
4. Opciones generales
5. Temas
6. Libretas de direcciones
7. Mensaje del día (MOTD)
8. Complementos
9. Base de datos
10. Idiomas
D. Establecer configuraciones predefinidas para servidores IMAP específicos
C Activar color
S Guardar datos
Q Salir
Comando >> <-- Q
Ahora configuraremos SquirrelMail para que pueda usarlo desde sus sitios web (creados a través de ISPConfig) usando los alias /squirrelmail o /webmail. Entonces, si su sitio web es www.example.com, podrá acceder a SquirrelMail usando www.example.com/squirrelmail o www.example.com/webmail.
SquirrelMail's Apache configuration is in the file /etc/squirrelmail/apache.conf, but this file isn't loaded by Apache because it is not in the /etc/apache2/conf.d/ directory. Therefore we create a symlink called squirrelmail.conf in the /etc/apache2/conf.d/ directory that points to /etc/squirrelmail/apache.conf and reload Apache afterwards:
cd /etc/apache2/conf-available/
ln -s ../../squirrelmail/apache.conf squirrelmail.conf
service apache2 reload
Now open /etc/apache2/conf.d/squirrelmail.conf...
nano /etc/apache2/conf-available/squirrelmail.conf
... and add the following lines to the
[...]
<Directory /usr/share/squirrelmail>
  Options FollowSymLinks
  <IfModule mod_php5.c>
    AddType application/x-httpd-php .php
    php_flag magic_quotes_gpc Off
    php_flag track_vars On
    php_admin_flag allow_url_fopen Off
    php_value include_path .
    php_admin_value upload_tmp_dir /var/lib/squirrelmail/tmp
    php_admin_value open_basedir /usr/share/squirrelmail:/etc/squirrelmail:/var/lib/squirrelmail:/etc/hostname:/etc/mailname
    php_flag register_globals off
  </IfModule>
  <IfModule mod_dir.c>
    DirectoryIndex index.php
  </IfModule>

  # access to configtest is limited by default to prevent information leak
  <Files configtest.php>
    order deny,allow
    deny from all
    allow from 127.0.0.1
  </Files>
</Directory>
[...]
Create the directory /var/lib/squirrelmail/tmp...
mkdir /var/lib/squirrelmail/tmp
... and make it owned by the user www-data:
chown www-data /var/lib/squirrelmail/tmp
Next we need to enable the squirrelmail with apache2.
a2enconf squirrelmail
Reload Apache again:
service apache2 reload
That's it already - /etc/apache2/conf.d/squirrelmail.conf defines an alias called /squirrelmail that points to SquirrelMail's installation directory /usr/share/squirrelmail.
You can now access SquirrelMail from your web site as follows:
http://192.168.0.100/squirrelmail
http://www.example.com/squirrelmail
You can also access it from the ISPConfig control panel vhost (after you have installed ISPConfig, see the next chapter) as follows (this doesn't need any configuration in ISPConfig):
http://server1.example.com:8080/squirrelmail
If you'd like to use the alias /webmail instead of /squirrelmail, simply open /etc/apache2/conf.d/squirrelmail.conf...
nano /etc/apache2/conf-available/squirrelmail.conf
... and add the line Alias /webmail /usr/share/squirrelmail:
Alias /squirrelmail /usr/share/squirrelmail
Alias /webmail /usr/share/squirrelmail
[...]
Then reload Apache:
service apache2 reload
Now you can access Squirrelmail as follows:
http:// 192.168.0.100/webmail
http://www.example.com/webmail
http://server1.example.com:8080/webmail (after you have installed ISPConfig, see the next chapter)
If you'd like to define a vhost like webmail.example.com where your users can access SquirrelMail, you'd have to add the following vhost configuration to /etc/apache2/conf.d/squirrelmail.conf:
nano /etc/apache2/conf.d/squirrelmail.conf
[...]
<VirtualHost *:80>
  DocumentRoot /usr/share/squirrelmail
  ServerName webmail.example.com
</VirtualHost>
Of course, there must be a DNS record for webmail.example.com that points to the IP address that you use in the vhost configuration. Also make sure that the vhost webmail.example.com does not exist in ISPConfig (otherwise both vhosts will interfere with each other!).
Now reload Apache...
service apache2 reload
... and you can access SquirrelMail under http://webmail.example.com
16. Install ISPConfig 3
To install ISPConfig 3 from the latest released version, do this:
cd /tmp
wget http://www.ispconfig.org/downloads/ISPConfig-3-stable.tar.gz
tar xfz ISPConfig-3-stable.tar.gz
cd ispconfig3_install/install/
The next step is to run
php -q install.php
This will start the ISPConfig 3 installer. The installer will configure all services like Postfix, Dovecot, etc. for you. A manual setup as required for ISPConfig 2 (perfect setup guides) is not necessary.
[email protected]:/tmp/ispconfig3_install/install# php -q install.php
--------------------------------------------------------------------------------
_____ ___________ _____ __ _ ____
|_ _/ ___| ___ \ / __ \ / _(_) /__ \
| | \ `--.| |_/ / | / \/ ___ _ __ | |_ _ __ _ _/ /
| | `--. \ __/ | | / _ \| '_ \| _| |/ _` | |_ |
_| |_/\__/ / | | \__/\ (_) | | | | | | | (_| | ___\ \
\___/\____/\_| \____/\___/|_| |_|_| |_|\__, | \____/
__/ |
|___/
--------------------------------------------------------------------------------
>> Initial configuration
Operating System:14.10 UNKNOWN
Following will be a few questions for primary configuration so be careful.
Default values are in [brackets] and can be accepted with
Tap in "quit" (without the quotes) to stop the installer.
Select language (en,de) [en]: <-- ENTER
Installation mode (standard,expert) [standard]: <-- ENTER
Full qualified hostname (FQDN) of the server, eg server1.domain.tld [server1.example.com]: <-- ENTER
MySQL server hostname [localhost]: <-- ENTER
MySQL root username [root]: <-- ENTER
MySQL root password []: <-- yourroot sqlpassword
MySQL database to create [dbispconfig]: <-- ENTER
MySQL charset [utf8]: <-- ENTER
Generating a 4096 bit RSA private key
............................................................................++
.....................++
writing new private key to 'smtpd.key'
-----
You are about to be asked to enter information that will be incorporated
into your certificate request.
What you are about to enter is what is called a Distinguished Name or a DN.
There are quite a few fields but you can leave some blank
For some fields there will be a default value,
If you enter '.', the field will be left blank.
-----
Country Name (2 letter code) [AU]: <-- ENTER
State or Province Name (full name) [Some-State]: <-- ENTER
Locality Name (eg, city) []: <-- ENTER
Organization Name (eg, company) [Internet Widgits Pty Ltd]: <-- ENTER
Organizational Unit Name (eg, section) []: <-- ENTER
Common Name (e.g. server FQDN or YOUR name) []: <-- ENTER
Email Address []: <-- ENTER
Configuring Jailkit
Configuring Dovecot
Configuring Spamassassin
Configuring Amavisd
Configuring Getmail
Configuring Pureftpd
Configuring BIND
Configuring Apache
Configuring Vlogger
Configuring Apps vhost
Configuring Bastille Firewall
Configuring Fail2ban
Installing ISPConfig
ISPConfig Port [8080]: <-- ENTER
Do you want a secure (SSL) connection to the ISPConfig web interface (y,n) [y]: <-- ENTER
Generating RSA private key, 4096 bit long modulus
..........++
......++ e is 65537 (0x10001)
You are about to be asked to enter information that will be incorporated
into your certificate request.
What you are about to enter is what is called a Distinguished Name or a DN.
There are quite a few fields but you can leave some blank
For some fields there will be a default value,
If you enter '.', the field will be left blank.
-----
Country Name (2 letter code) [AU]: <-- ENTER
State or Province Name (full name) [Some-State]: <-- ENTER
Locality Name (eg, city) []: <-- ENTER
Organization Name (eg, company) [Internet Widgits Pty Ltd]: <-- ENTER
Organizational Unit Name (eg, section) []: <-- ENTER
Common Name (e.g. server FQDN or YOUR name) []: <-- ENTER
Email Address []: <-- ENTER
Please enter the following 'extra' attributes
to be sent with your certificate request
A challenge password []: <-- ENTER
An optional company name []: <-- ENTER
writing RSA key
Configuring DBServer
Installing ISPConfig crontab
no crontab for root
no crontab for getmail
Restarting services ...
Rather than invoking init scripts through /etc/init.d, use the service(8)
utility, e.g. service mysql restart
Since the script you are attempting to invoke has been converted to an
Upstart job, you may also use the stop(8) and then start(8) utilities,
e.g. stop mysql ; start mysql. The restart(8) utility is also available.
mysql stop/waiting
mysql start/running, process 2817
* Stopping Postfix Mail Transport Agent postfix
/usr/sbin/postconf: warning: /etc/postfix/main.cf: undefined parameter: virtual_mailbox_limit_maps
...done.
* Starting Postfix Mail Transport Agent postfix
postconf: warning: /etc/postfix/main.cf: undefined parameter: virtual_mailbox_limit_maps
postconf: warning: /etc/postfix/main.cf: undefined parameter: virtual_mailbox_limit_maps
postconf: warning: /etc/postfix/main.cf: undefined parameter: virtual_mailbox_limit_maps
postconf: warning: /etc/postfix/main.cf: undefined parameter: virtual_mailbox_limit_maps
postconf: warning: /etc/postfix/main.cf: undefined parameter: virtual_mailbox_limit_maps
postconf: warning: /etc/postfix/main.cf: undefined parameter: virtual_mailbox_limit_maps
/usr/sbin/postconf: warning: /etc/postfix/main.cf: undefined parameter: virtual_mailbox_limit_maps
/usr/sbin/postconf: warning: /etc/postfix/main.cf: undefined parameter: virtual_mailbox_limit_maps
/usr/sbin/postconf: warning: /etc/postfix/main.cf: undefined parameter: virtual_mailbox_limit_maps
/usr/sbin/postconf: warning: /etc/postfix/main.cf: und efined parameter: virtual_mailbox_limit_maps
/usr/sbin/postconf: warning: /etc/postfix/main.cf: undefined parameter: virtual_mailbox_limit_maps
/usr/sbin/postconf: warning: /etc/postfix/main.cf: undefined parameter: virtual_mailbox_limit_maps
/usr/sbin/postconf: warning: /etc/postfix/main.cf: undefined parameter: virtual_mailbox_limit_maps
/usr/sbin/postconf: warning: /etc/postfix/main.cf: undefined parameter: virtual_mailbox_limit_maps
/usr/sbin/postconf: warning: /etc/postfix/main.cf: undefined parameter: virtual_mailbox_limit_maps
/usr/sbin/postconf: warning: /etc/postfix/main.cf: undefined parameter: virtual_mailbox_limit_maps
/usr/sbin/postconf: warning: /etc/postfix/main.cf: undefined parameter: virtual_mailbox_limit_maps
/usr/sbin/postconf: warning: /etc/postfix/main.cf: undefined parameter: virtual_mailbox_limit_maps
/usr/sbin/postconf: warning: /etc/postfix/main.cf: undefined parameter: virtual_mailbox_limit_maps
/usr /sbin/postconf: warning: /etc/postfix/main.cf: undefined parameter: virtual_mailbox_limit_maps
/usr/sbin/postconf: warning: /etc/postfix/main.cf: undefined parameter: virtual_mailbox_limit_maps
/usr/sbin/postconf: warning: /etc/postfix/main.cf: undefined parameter: virtual_mailbox_limit_maps
...done.
Stopping amavisd: amavisd-new.
Starting amavisd: amavisd-new.
* Stopping ClamAV daemon clamd
...done.
* Starting ClamAV daemon clamd
...done.
Rather than invoking init scripts through /etc/init.d, use the service(8)
utility, e.g. service dovecot restart
Since the script you are attempting to invoke has been converted to an
Upstart job, you may also use the stop(8) and then start(8) utilities,
e.g. stop dovecot ; start dovecot. The restart(8) utility is also available.
dovecot stop/waiting
dovecot start/running, process 3962
* Restarting web server apache2
[Fri Apr 26 00:55:00 2013] [warn] NameVirtualHost *:443 has no VirtualHosts
[Fri Apr 26 00:55:00 2013] [warn] NameVirtualHost *:80 has no VirtualHosts
[Fri Apr 26 00:55:01 2013] [warn] NameVirtualHost *:443 has no VirtualHosts
[Fri Apr 26 00:55:01 2013] [warn] NameVirtualHost *:80 has no VirtualHosts
... waiting ...done.
Restarting ftp server: Running: /usr/sbin/pure-ftpd-mysql-virtualchroot -l mysql:/etc/pure-ftpd/db/mysql.conf -l pam -A -b -u 1000 -D -H -Y 1 -E -8 UTF-8 -O clf:/var/log/pure-ftpd/transfer.log -B
Installation completed.
[email protected]:/tmp/ispconfig3_install/install#
The installer automatically configures all underlying services, so no manual configuration is needed.
You now also have the possibility to let the installer create an SSL vhost for the ISPConfig control panel, so that ISPConfig can be accessed using https:// instead of http://. To achieve this, just press ENTER when you see this question:Do you want a secure (SSL) connection to the ISPConfig web interface (y,n) [y]:.
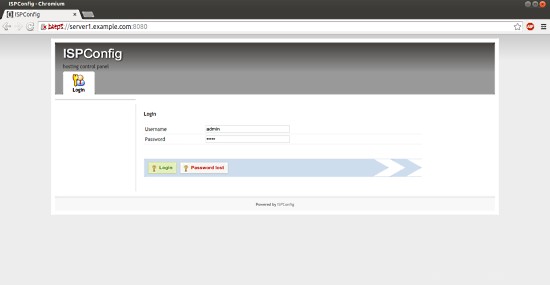
Afterwards you can access ISPConfig 3 under http(s)://server1.example.com:8080/ or http(s)://192.168.0.100:8080/ ( http or https depends on what you chose during installation). Log in with the username admin and the password admin (you should change the default password after your first login):
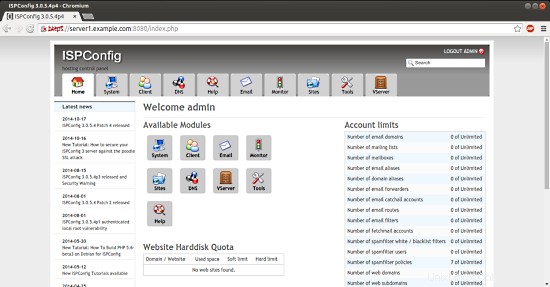
The system is now ready to be used.
16.1 ISPConfig 3 Manual
In order to learn how to use ISPConfig 3, I strongly recommend to download the ISPConfig 3 Manual.
On more than 300 pages, it covers the concept behind ISPConfig (admin, resellers, clients), explains how to install and update ISPConfig 3, includes a reference for all forms and form fields in ISPConfig together with examples of valid inputs, and provides tutorials for the most common tasks in ISPConfig 3. It also lines out how to make your server more secure and comes with a troubleshooting section at the end.
17. Additional Notes
17.1 OpenVZ
If the Ubuntu server that you've just set up in this tutorial is an OpenVZ container (virtual machine), you should do this on the host system (I'm assuming that the ID of the OpenVZ container is 101 - replace it with the correct VPSID on your system):
VPSID=101
for CAP in CHOWN DAC_READ_SEARCH SETGID SETUID NET_BIND_SERVICE NET_ADMIN SYS_CHROOT SYS_NICE CHOWN DAC_READ_SEARCH SETGID SETUID NET_BIND_SERVICE NET_ADMIN SYS_CHROOT SYS_NICE
do
  vzctl set $VPSID --capability ${CAP}:on --save
done
18. Links
- Ubuntu:http://www.ubuntu.com/
- ISPConfig:http://www.ispconfig.org/