Esta guía describirá cómo instalar y configurar FBAMP en el sistema operativo FreeBSD, que es similar a un LÁMPARA pila en Linux. FBAMP es un acrónimo que representa una colección de software basado en FreeBSD OS, Apache HTTP servidor, el servidor web de código abierto más popular en Internet, MariaDB sistema de gestión de bases de datos relacionales (RDBMS ), una bifurcación de MySQL motor de base de datos y PHP del lado del servidor.
Requisitos
- Una nueva instalación de FreeBSD
- Configuraciones iniciales de FreeBSD
- Acceso directo a la consola o SSH en caso de una conexión remota a FreeBSD.
- Una dirección IP estática configurada en una interfaz de red.
Paso 1:Instale Apache en FreeBSD
Las versiones están precompiladas en un paquete binario y son proporcionadas por FreeBSD PORTS repositorios Para mostrar todos los archivos binarios de paquetes de Apache proporcionados por PORTS , emita el siguiente comando.
# ls /usr/ports/www/ | grep apache

También puede buscar paquetes de Apache precompilados disponibles en FreeBSD emitiendo el siguiente comando.
# pkg search apache2
# pkg install apache24
# sysrc apache24_enable="yes"
Un método alternativo para habilitar el demonio de Apache sería editar y agregar manualmente la línea apache24_enable="yes" en /etc/rc.conf archivo como se ilustra en la siguiente captura de pantalla.
http://IP-orFQDN ) como se muestra en la siguiente captura de pantalla.
# service apache24 start
El directorio webroot predeterminado del servidor web Apache en FreeBSD 11.x se encuentra en /usr/local/www/apache24/data/ ruta del sistema. Allí encontrará un pequeño index.html archivo que puede editar como prefiera.
Paso 2:Instalar PHP en FreeBSD
# ls /usr/ports/lang/ | grep php
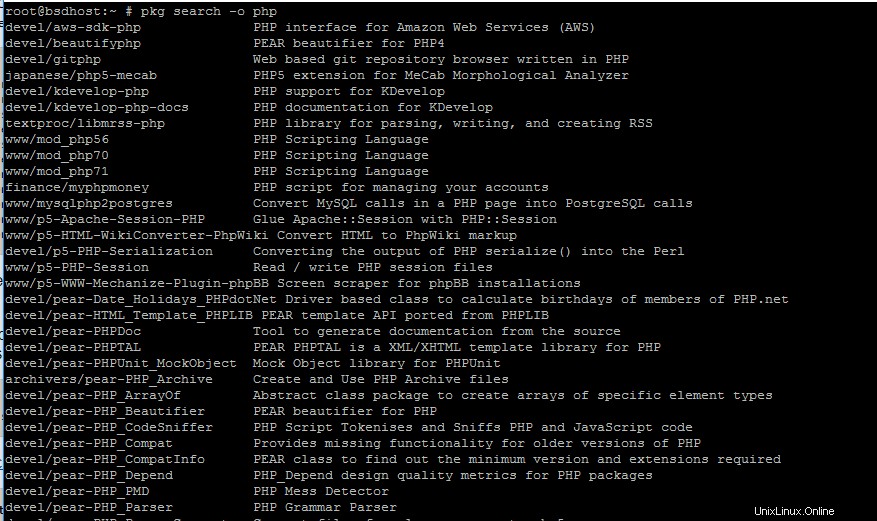
Un método alternativo para buscar todos los FreeBSD PHP disponibles versiones del paquete es ejecutando el siguiente comando.
# pkg search -o php
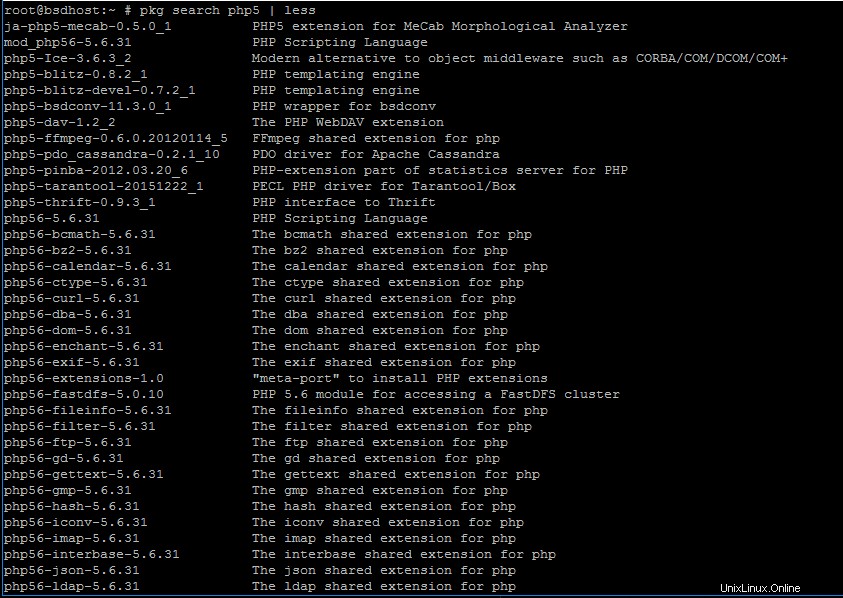
# pkg search php5 |less
# pkg search php7
# pkg search php71
# pkg install php71 mod_php71 php71-mbstring php71-mcrypt php71-zlib php71-curl php71-gd php71-json
# nano /usr/local/etc/apache24/Includes/php.conf
Agregue las siguientes líneas a php.conf archivo.
<IfModule dir_module>
    DirectoryIndex index.php index.html
    <FilesMatch "\.php$">
        SetHandler application/x-httpd-php
    </FilesMatch>
    <FilesMatch "\.phps$">
        SetHandler application/x-httpd-php-source
    </FilesMatch>
</IfModule>
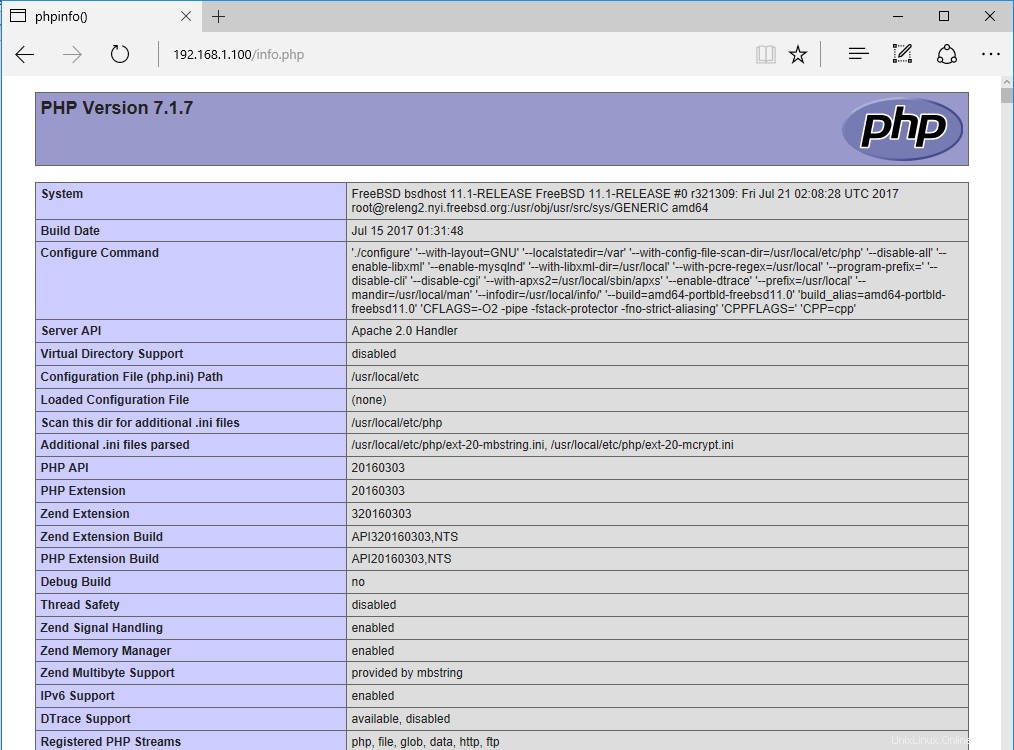
# echo '<?php phpinfo(); ?>' | tee -a /usr/local/www/apache24/data/info.php
Reinicie el demonio de Apache para aplicar los cambios.
# service apache24 restart
A continuación, visite el siguiente URI en un navegador para ver el resumen de PHP.
http://IP-or-FQDN/info.php
# cp /usr/local/etc/php.ini-production /usr/local/etc/php.ini-production.bakup
# ln -s /usr/local/etc/php.ini-production /usr/local/etc/php.ini
Paso 3:Instale MariaDB en FreeBSD
Para mostrar qué componentes están disponibles para MariaDB o MySQL bases de datos, emita los siguientes comandos. En esta guía, instalaremos la base de datos MariaDB sobre MySQL (que ahora es propiedad y está desarrollada activamente por Oracle).
# ls -al /usr/ports/databases/ | grep mariadb
# pkg search -o mariadb
# ls -al /usr/ports/databases/ | grep mysql
# pkg search -o mysql5
Ejecute el siguiente comando para instalar el servidor y cliente MariaDB y el PHP 7.1 requerido módulo necesario para acceder a la base de datos a través de la puerta de enlace del servidor Apache.
# pkg install mariadb102-server mariadb102-client php71-mysqli
# sysrc mysql_enable="yes"
# service mysql-server start
# /usr/local/bin/mysql_secure_installation
Salida de muestra
Salida del script de instalación segura de MySQLNOTE: RUNNING ALL PARTS OF THIS SCRIPT IS RECOMMENDED FOR ALL MariaDB
SERVERS IN PRODUCTION USE! PLEASE READ EACH STEP CAREFULLY!
In order to log into MariaDB to secure it, we'll need the current
password for the root user. If you've just installed MariaDB, and
you haven't set the root password yet, the password will be blank,
so you should just press enter here.
Enter current password for root (enter for none):
OK, successfully used password, moving on...
Setting the root password ensures that nobody can log into the MariaDB
root user without the proper authorisation.
Set root password? [Y/n] y
New password:
Re-enter new password:
Password updated successfully!
Reloading privilege tables..
... Success!
By default, a MariaDB installation has an anonymous user, allowing anyone
to log into MariaDB without having to have a user account created for
them. This is intended only for testing, and to make the installation
go a bit smoother. You should remove them before moving into a
production environment.
Remove anonymous users? [Y/n] y
... Success!
Normally, root should only be allowed to connect from 'localhost'. This
ensures that someone cannot guess at the root password from the network.
Disallow root login remotely? [Y/n] y
... Success!
By default, MariaDB comes with a database named 'test' that anyone can
access. This is also intended only for testing, and should be removed
before moving into a production environment.
Remove test database and access to it? [Y/n] y
- Dropping test database...
... Success!
- Removing privileges on test database...
... Success!
Reloading the privilege tables will ensure that all changes made so far
will take effect immediately.
Reload privilege tables now? [Y/n] y
... Success!
Cleaning up...
All done! If you've completed all of the above steps, your MariaDB
installation should now be secure.
Thanks for using MariaDB!
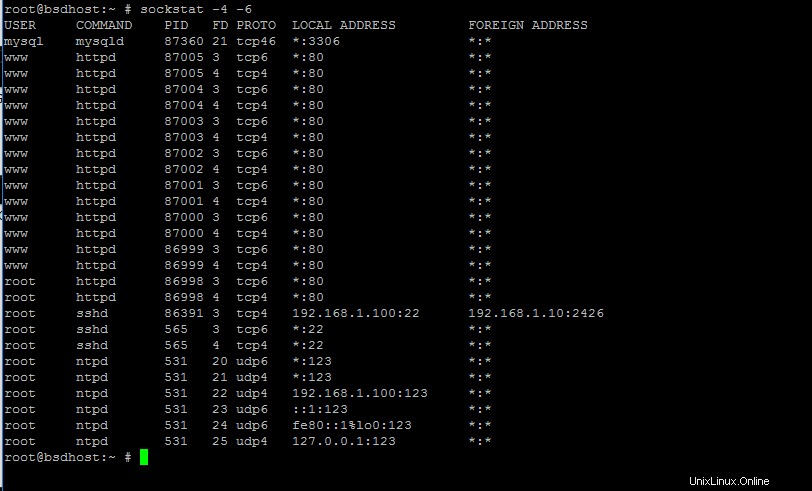
# lsof -i4 -i6
# sockstat -4 -6
# sysrc mysql_args="--bind-address=127.0.0.1"
# service mysql-server restart
or
# /usr/local/etc/rc.d/mysql-server restart
# lsof -i4 | grep mysql
# netstat -an | grep 3306
# sockstat -4 | grep 3306
# mysql -u root -p -e "show databases"
¡Eso es todo! Ha instalado con éxito el servidor web Apache con la base de datos MariaDB y el intérprete de PHP en FreeBSD. Ahora puede comenzar a implementar un sitio web de WordPress en poco tiempo.
En el próximo tutorial, discutiremos algunos temas avanzados de FPBAMP, como habilitar y crear hosts virtuales de Apache, habilitar el módulo de reescritura requerido por .htaccess archivo para que funcione correctamente y cómo proteger las conexiones de Apache mediante un certificado autofirmado o un certificado gratuito ofrecido por la entidad Let's Encrypt.