En este tutorial aprenderemos a instalar WordPress en FAMP apilar en FreeBSD . FAMP stack es un acrónimo que significa FreeBSD Unix sistema operativo, Apache HTTP server (un popular servidor web de código abierto), MariaDB sistema de gestión de base de datos relacional ( MySQL bifurcación de la base de datos actualmente mantenida por la comunidad), y PHP lenguaje de programación dinámico que se ejecuta en el lado del servidor.
WordPress es el marco CMS más famoso del mundo que se utiliza para crear blogs simples o sitios web profesionales.
Requisitos
- Guía de instalación de FreeBSD
Paso 1:Instale la pila FAMP en FreeBSD
El primer servicio que necesita instalar en FreeBSD es Apache HTTP servidor. Para instalar Apache 2.4 Paquete binario del servidor HTTP a través de los repositorios de puertos oficiales de FreeBSD, emita el siguiente comando en la consola de su servidor.
# pkg install apache24
# sysrc apache24_enable="yes"
# service apache24 start
http://yourdomain.tld
# pkg install php71 php71-mysqli mod_php71 php71-mbstring php71-gd php71-json php71-mcrypt php71-zlib php71-curl
# nano /usr/local/etc/apache24/Includes/php.conf
Agregue la siguiente configuración a php.conf archivo.
<IfModule dir_module>
    DirectoryIndex index.php index.html
    <FilesMatch "\.php$">
        SetHandler application/x-httpd-php
    </FilesMatch>
    <FilesMatch "\.phps$">
        SetHandler application/x-httpd-php-source
    </FilesMatch>
</IfModule>
# service apache24 restart
# pkg install mariadb102-client mariadb102-server
# sysrc mysql_enable="YES"
# service mysql-server start
# /usr/local/bin/mysql_secure_installation
Salida de muestra
NOTE: RUNNING ALL PARTS OF THIS SCRIPT IS RECOMMENDED FOR ALL MariaDB
      SERVERS IN PRODUCTION USE!  PLEASE READ EACH STEP CAREFULLY!

In order to log into MariaDB to secure it, we'll need the current
password for the root user.  If you've just installed MariaDB, and
you haven't set the root password yet, the password will be blank,
so you should just press enter here.

Enter current password for root (enter for none):
OK, successfully used password, moving on...

Setting the root password ensures that nobody can log into the MariaDB
root user without the proper authorisation.
Set root password? [Y/n] y
New password:
Re-enter new password:
Password updated successfully!
Reloading privilege tables..
 ... Success!
By default, a MariaDB installation has an anonymous user, allowing anyone
to log into MariaDB without having to have a user account created for
them.  This is intended only for testing, and to make the installation
go a bit smoother.  You should remove them before moving into a
production environment.
Remove anonymous users? [Y/n] y
 ... Success!
Normally, root should only be allowed to connect from 'localhost'.  This
ensures that someone cannot guess at the root password from the network.
Disallow root login remotely? [Y/n] y
 ... Success!
By default, MariaDB comes with a database named 'test' that anyone can
access.  This is also intended only for testing, and should be removed
before moving into a production environment.
Remove test database and access to it? [Y/n] y
 - Dropping test database...
 ... Success!
 - Removing privileges on test database...
 ... Success!
Reloading the privilege tables will ensure that all changes made so far
will take effect immediately.
Reload privilege tables now? [Y/n] y
 ... Success!
Cleaning up...
All done!  If you've completed all of the above steps, your MariaDB
installation should now be secure.
Thanks for using MariaDB!
Elija un nombre descriptivo para esta base de datos, cree un usuario y una contraseña de base de datos para administrar esta base de datos.
# mysql -u root -p
MariaDB [(none)]> create database wordpress;
MariaDB [(none)]> grant all privileges on wordpress.* to 'user_wordpress'@'localhost' identified by 'password';
MariaDB [(none)]> flush privileges;
Paso 2:Instalar WordPress en FreeBSD
Extraiga el tarball y copie todos los archivos de instalación de WordPress en la raíz del documento de Apache emitiendo los siguientes comandos.
# wget https://wordpress.org/latest.tar.gz
# tar xfz latest.tar.gz
# cp -rf wordpress/* /usr/local/www/apache24/data/
# chown -R root:www /usr/local/www/apache24/data/
# chmod -R 775 /usr/local/www/apache24/data/
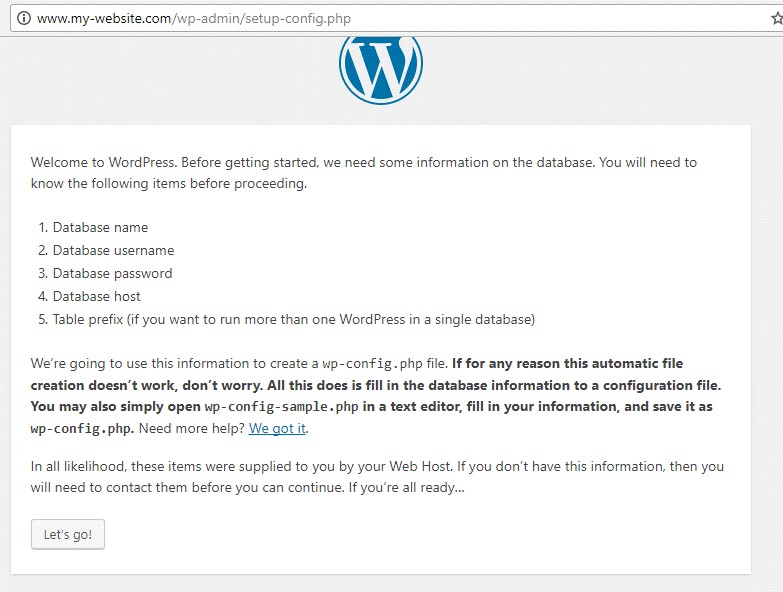
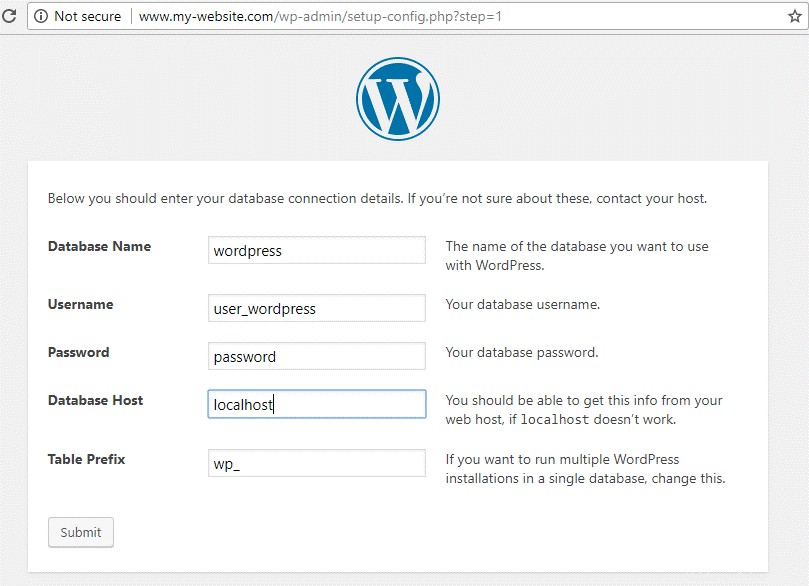
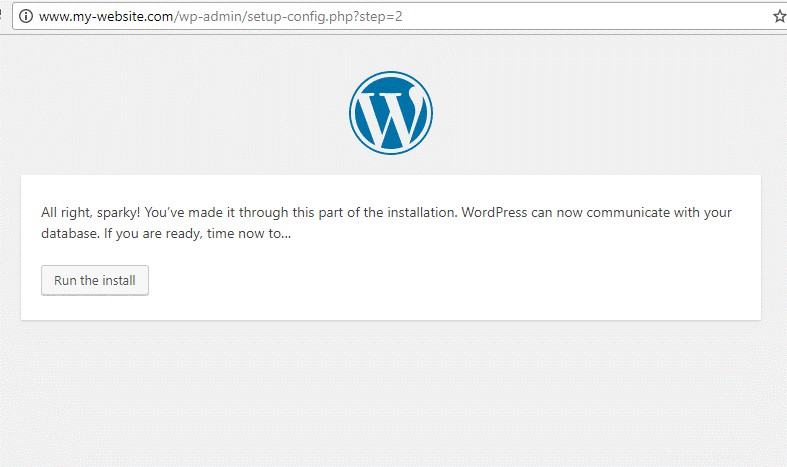
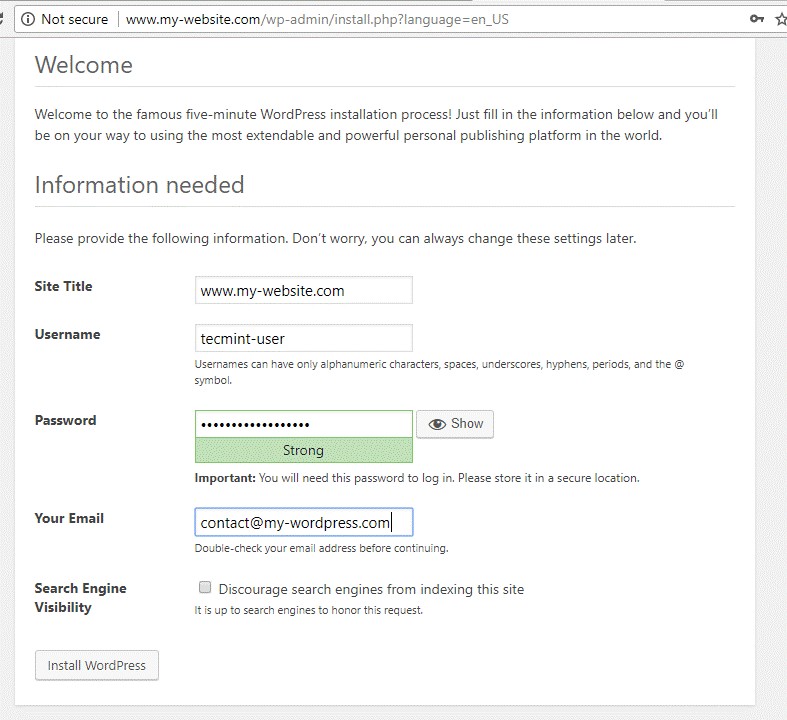
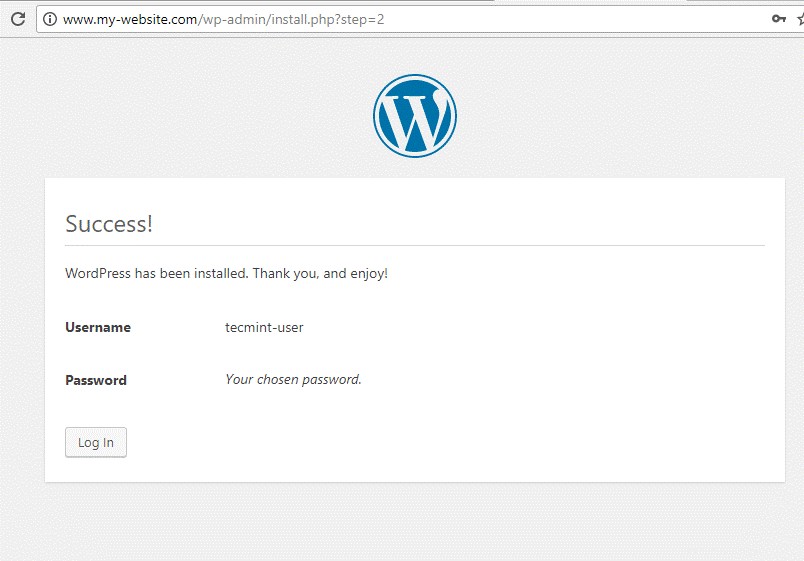
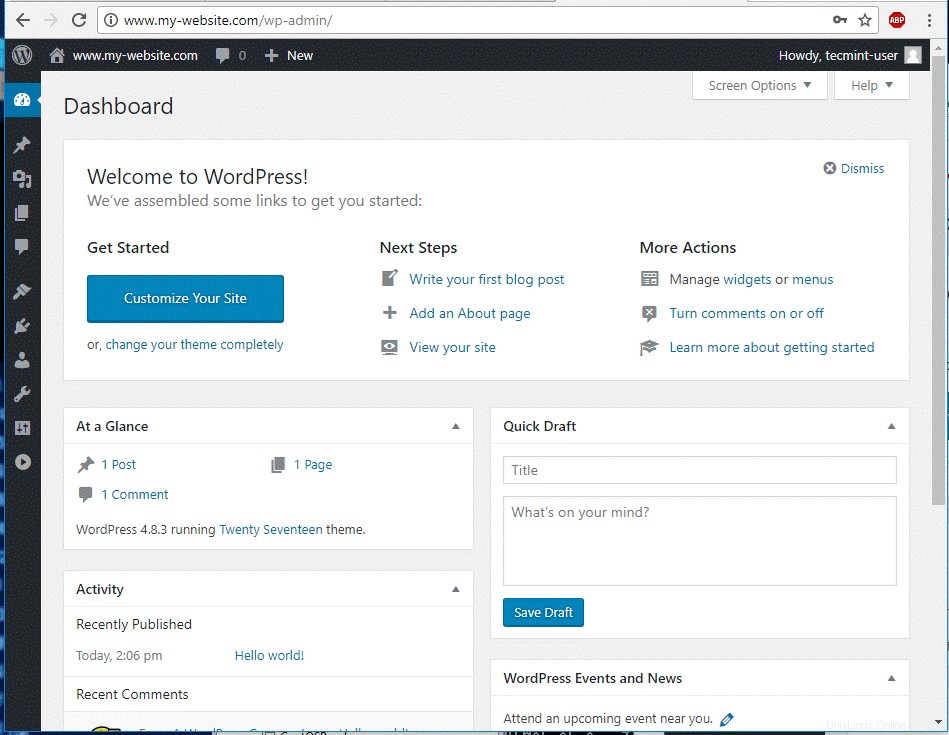
http://yourdomain.tld
¡Felicidades! Ha instalado con éxito el sistema de administración de contenido de WordPress bajo la pila FAMP en FreeBSD.