Seafile es una plataforma de intercambio de archivos basada en la nube gratuita y de código abierto que se puede utilizar para almacenar archivos y sincronizar los datos en varios dispositivos. Seafile es un sistema de almacenamiento autohospedado y de alto rendimiento que le permite alojar en sus propios servidores privados. Seafile es de uso gratuito y muy similar a otros proveedores de almacenamiento, incluidos OwnCloud, NextCloud, Google Drive y DropBox.
Con Seafile, puede acceder y sincronizar sus archivos, contactos y datos en PC y dispositivos móviles.
Seafile viene con un amplio conjunto de características que incluyen compatibilidad con el cifrado del cliente, compatibilidad con el control de versiones, autenticación LDAP, autenticación de dos factores, integración de antivirus, integración de la aplicación web de Office, uso compartido de enlaces públicos, sincronización de archivos confiable, compatibilidad con Drive Client y mucho más. .
En este tutorial, explicaremos cómo instalar y configurar un servidor Seafile con Nginx como proxy inverso en Ubuntu 18.04.
Requisitos
- Un Ubuntu 18.04 VPS nuevo en Atlantic.Net Cloud Platform.
- Un nombre de dominio válido dirigido a su dirección IP de VPS. En este tutorial, usaremos seafile.example.com.
Nota :Puede consultar la Guía de DNS de Atlantic para administrar los registros de DNS.
Paso 1:crear el servidor en la nube de Atlantic.Net
Primero, inicie sesión en su servidor en la nube de Atlantic.Net. Cree un nuevo servidor, eligiendo Ubuntu 18.04 como sistema operativo con al menos 2 GB de RAM. Conéctese a su servidor en la nube a través de SSH e inicie sesión con las credenciales resaltadas en la parte superior de la página.
Una vez que haya iniciado sesión en su servidor Ubuntu 18.04, ejecute el siguiente comando para actualizar su sistema base con los últimos paquetes disponibles.
apt-get update -y
Paso 2:instalar las dependencias requeridas
Primero, deberá instalar todas las dependencias necesarias para la instalación del servidor Seafile. Puede instalarlos todos ejecutando el siguiente comando:
apt-get install python2.7 libpython2.7 python-setuptools python-pil python-ldap python-urllib3 ffmpeg python-pip python-mysqldb python-memcache python-requests unzip wget -y
Una vez que todas las dependencias estén instaladas, puede continuar con el siguiente paso.
Paso 3:instalar Nginx y MariaDB
A continuación, deberá instalar el servidor web Nginx y el servidor de base de datos MariaDB en su servidor. Puede instalarlos ejecutando el siguiente comando:
apt-get install nginx mariadb-server mariadb-client -y
Una vez completada la instalación, inicie el servicio Nginx y MariaDB y habilítelo para que se inicie después de reiniciar el sistema:
systemctl start nginx
systemctl start mariadb
systemctl enable nginx
systemctl enable mariadb
Una vez que haya terminado, puede continuar con el siguiente paso.
Paso 4:crear una base de datos para Seafile
Seafile consta de tres componentes principales:Seahub, servidor Seafile y servidor Ccnet. Cada componente requiere una base de datos separada para almacenar sus datos. Deberá crear una base de datos separada para cada uno de estos componentes.
Para hacerlo, inicie sesión en el shell de MariaDB con el siguiente comando:
mysql -u root -p
Proporcione su contraseña raíz cuando se le solicite y luego cree las bases de datos requeridas con los siguientes comandos:
CREATE DATABASE seafiledb character set = 'utf8';
CREATE DATABASE ccnetdb character set = 'utf8';
CREATE DATABASE seahubdb character set = 'utf8';
A continuación, cree el usuario de la base de datos con el siguiente comando:
CREATE USER 'seafileuser'@'localhost' IDENTIFIED BY 'password';
A continuación, otorgue todos los privilegios al usuario de la base de datos de Seafile con el siguiente comando:
GRANT ALL ON seafiledb.* TO 'seafileuser'@'localhost' IDENTIFIED BY 'password' WITH GRANT OPTION;
GRANT ALL ON ccnetdb.* TO 'seafileuser'@'localhost' IDENTIFIED BY 'password' WITH GRANT OPTION;
GRANT ALL ON seahubdb.* TO 'seafileuser'@'localhost' IDENTIFIED BY 'password' WITH GRANT OPTION;
A continuación, elimine los privilegios y salga del shell de MariaDB con el siguiente comando:
FLUSH PRIVILEGES;
EXIT;
En este punto, ha creado todas las bases de datos necesarias para almacenar los datos de Seafile.
Paso 5:instalar el servidor Seafile
A continuación, descargue la última versión de Seafile desde su sitio web oficial con el comando wget:
wget https://download.seadrive.org/seafile-server_7.0.5_x86-64.tar.gz
Una vez descargado, extraiga el archivo descargado con el siguiente comando:
tar -xvzf seafile-server_7.0.5_x86-64.tar.gz
A continuación, copie el directorio extraído en el directorio raíz web de Nginx:
cp -r seafile-server-7.0.5 /var/www/html/seafile
A continuación, inicie el script de instalación de Seafile con el siguiente comando:
cd /var/www/html/seafile
./setup-seafile-mysql.sh
Durante la instalación, se le pedirá que responda varias preguntas como se muestra a continuación:
Checking python on this machine ...
  Checking python module: python-mysqldb ... Done.

-----------------------------------------------------------------
This script will guide you to setup your seafile server using MySQL.
Make sure you have read seafile server manual at

        https://github.com/haiwen/seafile/wiki

Press ENTER to continue
-----------------------------------------------------------------


What is the name of the server? It will be displayed on the client.
3 - 15 letters or digits
[ server name ] seafile

What is the ip or domain of the server?
For example: www.mycompany.com, 192.168.1.101
[ This server's ip or domain ] seafile.example.com

Where do you want to put your seafile data?
Please use a volume with enough free space
[ default "/var/www/html/seafile-data" ]

Which port do you want to use for the seafile fileserver?
[ default "8082" ]

-------------------------------------------------------
Please choose a way to initialize seafile databases:
-------------------------------------------------------

[1] Create new ccnet/seafile/seahub databases
[2] Use existing ccnet/seafile/seahub databases

[ 1 or 2 ] 2

What is the host of mysql server?
[ default "localhost" ]

What is the port of mysql server?
[ default "3306" ]

Which mysql user to use for seafile?
[ mysql user for seafile ] seafileuser

What is the password for mysql user "seafileuser"?
[ password for seafileuser ]

verifying password of user seafileuser ...  done

Enter the existing database name for ccnet:
[ ccnet database ] ccnetdb

verifying user "seafileuser" access to database ccnetdb ...  done

Enter the existing database name for seafile:
[ seafile database ] seafiledb

verifying user "seafileuser" access to database seafiledb ...  done

Enter the existing database name for seahub:
[ seahub database ] seahubdb

verifying user "seafileuser" access to database seahubdb ...  done

---------------------------------
This is your configuration
---------------------------------

    server name:            seafile
    server ip/domain:       seafile.example.com

    seafile data dir:       /var/www/html/seafile-data
    fileserver port:        8082

    database:               use existing
    ccnet database:         ccnetdb
    seafile database:       seafiledb
    seahub database:        seahubdb
    database user:          seafileuser


---------------------------------
Press ENTER to continue, or Ctrl-C to abort
---------------------------------
Una vez que la instalación se haya completado con éxito, debería obtener el siguiente resultado:
-----------------------------------------------------------------
Your seafile server configuration has been finished successfully.
-----------------------------------------------------------------

run seafile server:     ./seafile.sh { start | stop | restart }
run seahub  server:     ./seahub.sh  { start <port> | stop | restart <port> }

-----------------------------------------------------------------
If you are behind a firewall, remember to allow input/output of these tcp ports:
-----------------------------------------------------------------

port of seafile fileserver:   8082
port of seahub:               8000

When problems occur, Refer to

        https://github.com/haiwen/seafile/wiki

for information.
A continuación, otorgue permisos a Seafile con el siguiente comando:
chown -R www-data:www-data /var/www/html/
A continuación, deberá agregar una configuración de FILE_SERVER_ROOT en el archivo seahub_settings.py:
nano /var/www/html/conf/seahub_settings.py
Agregue la configuración de FILE_SERVER_ROOT como se muestra a continuación:
SECRET_KEY = "x)0=j*l6b+4amq2n^&)c=q5p==exn13%s&6x!*48u4p0p97k)4"
FILE_SERVER_ROOT = 'http://seafile.example.com/seafhttp'
DATABASES = {
    'default': {
        'ENGINE': 'django.db.backends.mysql',
:        'NAME': 'seahubdb',
        'USER': 'seafileuser',
        'PASSWORD': 'password',
        'HOST': '127.0.0.1',
        'PORT': '3306'
    }
}
Guarde y cierre el archivo cuando haya terminado.
Paso 6:crear un usuario administrador para Seafile
A continuación, deberá crear un usuario administrador y establecer una contraseña para Seafile. Para hacerlo, cambie el directorio a seafile e inicie el servicio seafile con el siguiente comando:
cd /var/www/html/seafile
su -p -l www-data -s /bin/bash -c "./seafile.sh start"
A continuación, inicie el servicio seahub y cree una cuenta de administrador con el siguiente comando:
su -p -l www-data -s /bin/bash -c "./seahub.sh start"
Se le pedirá que proporcione su dirección de correo electrónico y contraseña de administrador como se muestra a continuación:
LC_ALL is not set in ENV, set to en_US.UTF-8
Starting seahub at port 8000 ...

----------------------------------------
It's the first time you start the seafile server. Now let's create the admin account
----------------------------------------

What is the email for the admin account?
[ admin email ] example@unixlinux.online

What is the password for the admin account?
[ admin password ]

Enter the password again:
[ admin password again ]


----------------------------------------
Successfully created seafile admin
----------------------------------------

Seahub is started

Done.
Una vez que haya terminado, detenga los servicios seafile y seahub:
su -p -l www-data -s /bin/bash -c "./seafile.sh stop"
su -p -l www-data -s /bin/bash -c "./seahub.sh stop"
Paso 7:cree un archivo Systemd para Seafile y Seahub
A continuación, deberá crear un archivo de unidad systemd para que Seafile y Seahub administren el servicio.
Primero, cree un archivo de servicio Seafile con el siguiente comando:
nano /etc/systemd/system/seafile.service
Agregue las siguientes líneas:
[Unit]
Description=Seafile
After= mysql.service
After=network.target

[Service]
User=www-data
Group=www-data

Type=forking
ExecStart=/var/www/html/seafile-server-latest/seafile.sh start
ExecStop=/var/www/html/seafile-server-latest/seafile.sh stop

[Install]
WantedBy=multi-user.target
Guarde y cierre el archivo. Luego, cree un archivo de servicio systemd para Seahub con el siguiente comando:
nano /etc/systemd/system/seahub.service
Agregue las siguientes líneas:
[Unit]
Description=Seafile
After= mysql.service
After=network.target

[Service]
User=www-data
Group=www-data
Type=forking

ExecStart=/var/www/html/seafile-server-latest/seahub.sh start
ExecStop=/var/www/html/seafile-server-latest/seahub.sh stop

[Install]
WantedBy=multi-user.target
Guarde y cierre el archivo. Luego, vuelva a cargar el demonio systemd con el siguiente comando:
systemctl daemon-reload
A continuación, reinicie el servicio Seafile y Seahub y habilítelos para que se inicien después de reiniciar el sistema con el siguiente comando:
systemctl start seafile
systemctl enable seafile
systemctl start seahub
systemctl enable seahub
Para verificar el servicio Seafile, ejecute el siguiente comando:
systemctl status seafile
Salida:
● seafile.service - Seafile
   Loaded: loaded (/etc/systemd/system/seafile.service; disabled; vendor preset: enabled)
   Active: active (running) since Thu 2019-11-28 08:48:31 UTC; 8s ago
  Process: 15487 ExecStart=/var/www/html/seafile-server-latest/seafile.sh start (code=exited, status=0/SUCCESS)
    Tasks: 16 (limit: 1150)
   CGroup: /system.slice/seafile.service
           ├─15522 /var/www/html/seafile/seafile/bin/seafile-controller -c /var/www/html/ccnet -d /var/www/html/seafile-data -F /var/www/html/c
           ├─15524 ccnet-server -F /var/www/html/conf -c /var/www/html/ccnet -f /var/www/html/logs/ccnet.log -d -P /var/www/html/pids/ccnet.pid
           └─15527 seaf-server -F /var/www/html/conf -c /var/www/html/ccnet -d /var/www/html/seafile-data -l /var/www/html/logs/seafile.log -P

Nov 28 08:48:28 ubuntu1804 systemd[1]: Starting Seafile...
Para verificar el servicio Seahub, ejecute el siguiente comando:
systemctl estado seahub
Salida:
● seahub.service - Seafile
   Loaded: loaded (/etc/systemd/system/seahub.service; disabled; vendor preset: enabled)
   Active: active (running) since Thu 2019-11-28 08:50:49 UTC; 18s ago
  Process: 15547 ExecStart=/var/www/html/seafile-server-latest/seahub.sh start (code=exited, status=0/SUCCESS)
 Main PID: 15573 (python2.7)
    Tasks: 6 (limit: 1150)
   CGroup: /system.slice/seahub.service
           ├─15573 python2.7 /var/www/html/seafile/seahub/thirdpart/gunicorn seahub.wsgi:application -c /var/www/html/conf/gunicorn.conf --prel
           ├─15579 python2.7 /var/www/html/seafile/seahub/thirdpart/gunicorn seahub.wsgi:application -c /var/www/html/conf/gunicorn.conf --prel
           ├─15580 python2.7 /var/www/html/seafile/seahub/thirdpart/gunicorn seahub.wsgi:application -c /var/www/html/conf/gunicorn.conf --prel
           ├─15581 python2.7 /var/www/html/seafile/seahub/thirdpart/gunicorn seahub.wsgi:application -c /var/www/html/conf/gunicorn.conf --prel
           ├─15582 python2.7 /var/www/html/seafile/seahub/thirdpart/gunicorn seahub.wsgi:application -c /var/www/html/conf/gunicorn.conf --prel
           └─15583 python2.7 /var/www/html/seafile/seahub/thirdpart/gunicorn seahub.wsgi:application -c /var/www/html/conf/gunicorn.conf --prel

Nov 28 08:50:43 ubuntu1804 systemd[1]: Starting Seafile...
Paso 8:configurar el proxy inverso con Nginx
A continuación, deberá instalar y configurar Nginx como un proxy inverso para que Seafile reenvíe las solicitudes de los clientes desde los puertos 8000 y 8082 al puerto 80 de Nginx.
Para hacerlo, cree un archivo de configuración de host virtual Nginx con el siguiente comando:
nano /etc/nginx/sites-available/seafile
Agregue las siguientes líneas:
server {
    listen 80;
    listen [::]:80;
    root /var/www/html/seafile;
    server_name  seafile.example.com;

     client_max_body_size 100M;

     autoindex off;

     access_log /var/log/nginx/example.com.access.log;
     error_log /var/log/nginx/example.com.error.log;

     location / {
            proxy_pass         http://127.0.0.1:8000;
            proxy_set_header   Host $host;
            proxy_set_header   X-Real-IP $remote_addr;
            proxy_set_header   X-Forwarded-For $proxy_add_x_forwarded_for;
            proxy_set_header   X-Forwarded-Host $server_name;
            proxy_read_timeout  1200s;
        }

     location /seafhttp {
            rewrite ^/seafhttp(.*)$ $1 break;
            proxy_pass http://127.0.0.1:8082;
            proxy_set_header   X-Forwarded-For $proxy_add_x_forwarded_for;
            proxy_connect_timeout  36000s;
            proxy_read_timeout  36000s;
            proxy_send_timeout  36000s;
            send_timeout  36000s;
        }
    location /media {
            root /var/www/html/seafile-server-latest/seahub;
        }
}
Guarde y cierre el archivo cuando haya terminado. Luego, habilite el host virtual Nginx con el siguiente comando:
ln -s /etc/nginx/sites-available/seafile /etc/nginx/sites-enabled/
Finalmente, reinicie el servicio Nginx con el siguiente comando:
systemctl restart nginx
Paso 9:acceda a la interfaz web de Seafile
Ahora, abra su navegador web y navegue por la URL http://seafile.example.com. Debería ver la página de inicio de sesión de Seafile:
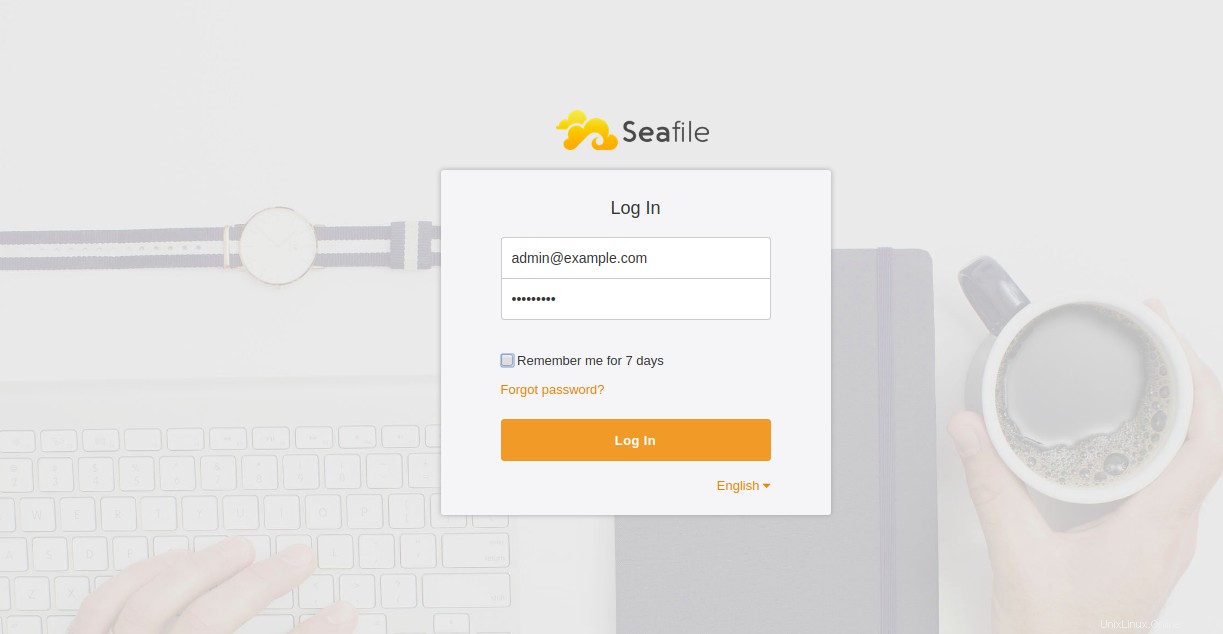
Proporcione su nombre de usuario y contraseña de administrador y haga clic en Iniciar sesión botón. Debería ver el panel predeterminado de Seafile:

Conclusión
En el tutorial anterior, aprendimos cómo instalar el servidor Seafile con Nginx como proxy inverso en Ubuntu 18.04 VPS. Espero que ahora tenga suficiente conocimiento para alojar su propio servidor de archivos compartidos usando Seafile. ¡Comience hoy con Seafile en un VPS de Atlantic.Net!