El Servidor Perfecto - Ubuntu Natty Narwhal (Ubuntu 11.04) [ISPConfig 2]
Este tutorial muestra cómo configurar un servidor Ubuntu Natty Narwhal (Ubuntu 11.04) que ofrece todos los servicios que necesitan los ISP y los hosters:servidor web Apache (compatible con SSL), servidor de correo Postfix con SMTP-AUTH y TLS, servidor BIND DNS, Proftpd Servidor FTP, servidor MySQL, Courier POP3/IMAP, Cuota, Firewall, etc. Al final, debe tener un sistema que funcione de manera confiable y, si lo desea, puede instalar el panel de control de alojamiento web gratuito ISPConfig 2 (es decir, ISPConfig se ejecuta en él). fuera de la caja).
Usaré el siguiente software:
- Servidor web:Apache 2.2.17 con PHP 5.3.5, Python, Ruby y WebDAV
- Servidor de base de datos:MySQL 5.1.54
- Servidor de correo:Postfix
- Servidor DNS:BIND9
- Servidor FTP:proftpd
- POP3/IMAP:usaré el formato Maildir y, por lo tanto, instalaré Courier-POP3/Courier-IMAP.
- Webalizer para estadísticas de sitios web
Tenga en cuenta que esta configuración no funciona para ISPConfig 3 ! ¡Es válido solo para ISPConfig 2!
Primero quiero decir que esta no es la única forma de establecer un sistema de este tipo. Hay muchas maneras de lograr este objetivo, pero este es el camino que tomo. ¡No emito ninguna garantía de que esto funcione para usted!
1 Requisitos
Para instalar dicho sistema, necesitará lo siguiente:
- el CD del servidor Ubuntu 11.04, disponible aquí:http://releases.ubuntu.com/releases/11.04/ubuntu-11.04-server-i386.iso (i386) o http://releases.ubuntu.com/releases /11.04/ubuntu-11.04-servidor-amd64.iso (x86_64)
- una conexión rápida a Internet.
2 Nota Preliminar
En este tutorial utilizo el nombre de host server1.example.com con la dirección IP 192.168.0.100 y la puerta de enlace 192.168.0.1. Estas configuraciones pueden diferir para usted, por lo que debe reemplazarlas cuando corresponda.
3 El Sistema Base
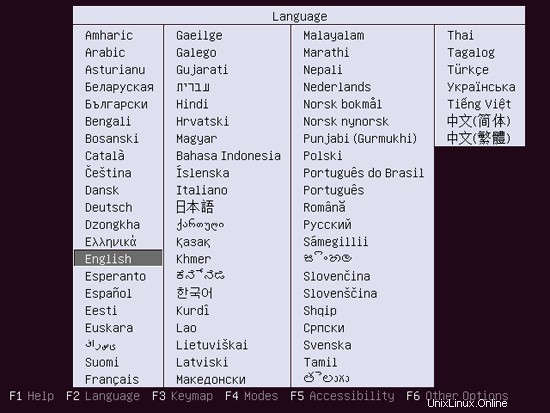
Inserte su CD de instalación de Ubuntu en su sistema y arranque desde él. Seleccione su idioma:
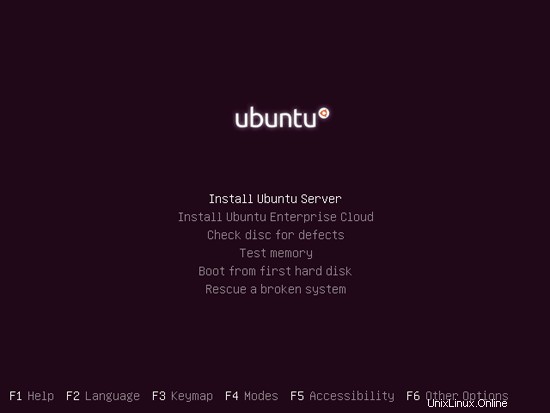
Luego seleccione Instalar Servidor Ubuntu:
Elige tu idioma de nuevo (?):

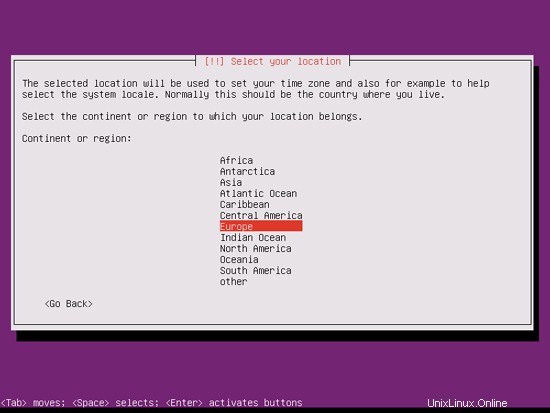
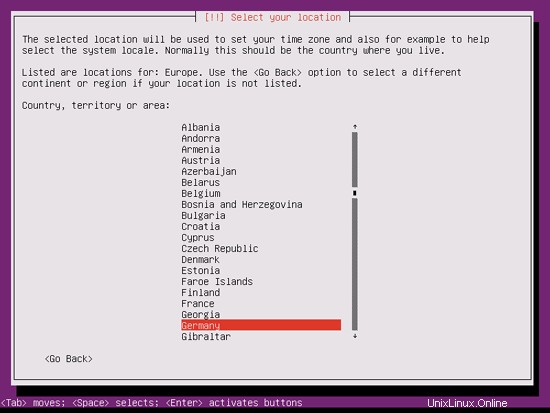
Luego seleccione su ubicación:

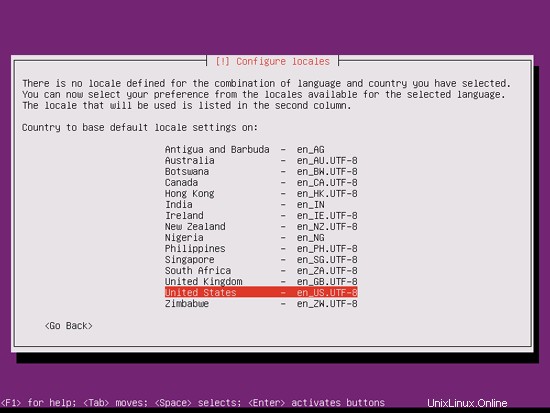
Si ha seleccionado una combinación poco común de idioma y ubicación (como inglés como idioma y Alemania como ubicación, como en mi caso), el instalador podría indicarle que no hay una configuración regional definida para esta combinación; en este caso, debe seleccionar la configuración regional manualmente. Selecciono en_US.UTF-8 aquí:
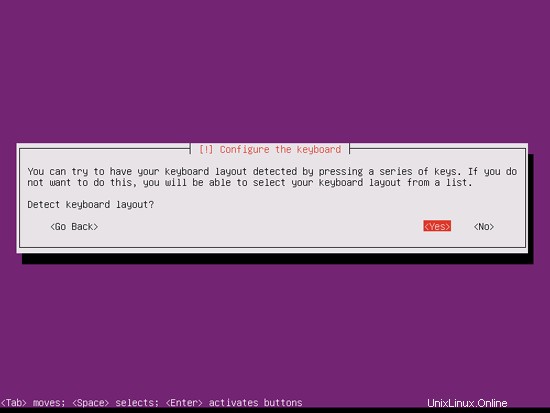
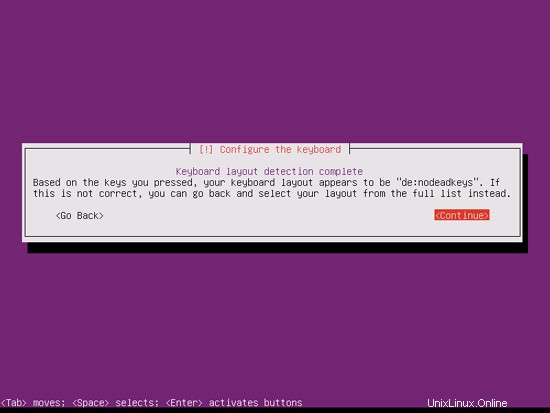
Elija una distribución de teclado (se le pedirá que presione algunas teclas y el instalador intentará detectar su distribución de teclado según las teclas que presionó):
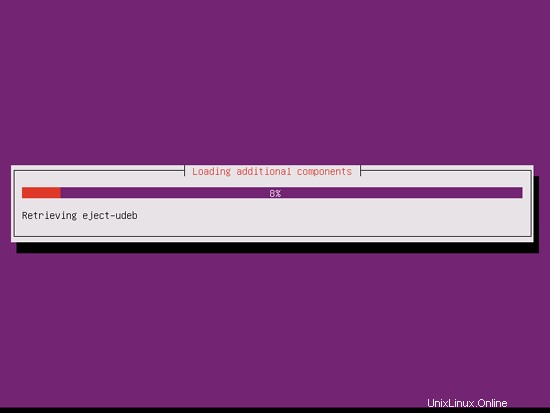
El instalador comprueba el CD de instalación, su hardware y configura la red con DHCP si hay un servidor DHCP en la red:
El servidor perfecto - Ubuntu Natty Narwhal (Ubuntu 11.04) [ISPConfig 2] - Página 2
4 Obtener privilegios de root
Después del reinicio, puede iniciar sesión con su nombre de usuario creado previamente (por ejemplo, administrador). Debido a que debemos ejecutar todos los pasos de este tutorial con privilegios de root, podemos anteponer todos los comandos en este tutorial con la cadena sudo, o convertirnos en root ahora mismo escribiendo
sudo su
(También puede habilitar el inicio de sesión raíz ejecutando
sudo passwd root
y dando a root una contraseña. Luego puede iniciar sesión directamente como root, pero los desarrolladores y la comunidad de Ubuntu lo desaprueban por varias razones. Consulte http://ubuntuforums.org/showthread.php?t=765414.)
5 Instalar el servidor SSH (opcional)
Si no instaló el servidor OpenSSH durante la instalación del sistema, puede hacerlo ahora:
apt-get install ssh openssh-server
A partir de ahora, puede usar un cliente SSH como PuTTY y conectarse desde su estación de trabajo a su servidor Ubuntu 11.04 y seguir los pasos restantes de este tutorial.
6 Instalar vim-nox (Opcional)
Usaré vi como mi editor de texto en este tutorial. El programa vi predeterminado tiene un comportamiento extraño en Ubuntu y Debian; para arreglar esto, instalamos vim-nox:
apt-get install vim-nox
(No tienes que hacer esto si usas un editor de texto diferente como joe o nano).
7 Configurar la red
Debido a que el instalador de Ubuntu ha configurado nuestro sistema para obtener su configuración de red a través de DHCP, debemos cambiar eso ahora porque un servidor debe tener una dirección IP estática. Edite /etc/network/interfaces y ajústelo a sus necesidades (en este ejemplo de configuración usaré la dirección IP 192.168.0.100 ):
vi /etc/network/interfaces
# This file describes the network interfaces available on your system
# and how to activate them. For more information, see interfaces(5).

# The loopback network interface
auto lo
iface lo inet loopback

# The primary network interface
auto eth0
iface eth0 inet static
        address 192.168.0.100
        netmask 255.255.255.0
        network 192.168.0.0
        broadcast 192.168.0.255
gateway 192.168.0.1 |
127.0.0.1 localhost.localdomain localhost 192.168.0.100 server1.example.com server1 # The following lines are desirable for IPv6 capable hosts ::1 ip6-localhost ip6-loopback fe00::0 ip6-localnet ff00::0 ip6-mcastprefix ff02::1 ip6-allnodes ff02::2 ip6-allrouters |
# # deb cdrom:[Ubuntu-Server 11.04 _Natty Narwhal_ - Release amd64 (20110426)]/ natty main restricted #deb cdrom:[Ubuntu-Server 11.04 _Natty Narwhal_ - Release amd64 (20110426)]/ natty main restricted # See http://help.ubuntu.com/community/UpgradeNotes for how to upgrade to # newer versions of the distribution. deb http://de.archive.ubuntu.com/ubuntu/ natty main restricted deb-src http://de.archive.ubuntu.com/ubuntu/ natty main restricted ## Major bug fix updates produced after the final release of the ## distribution. deb http://de.archive.ubuntu.com/ubuntu/ natty-updates main restricted deb-src http://de.archive.ubuntu.com/ubuntu/ natty-updates main restricted ## N.B. software from this repository is ENTIRELY UNSUPPORTED by the Ubuntu ## team. Also, please note that software in universe WILL NOT receive any ## review or updates from the Ubuntu security team. deb http://de.archive.ubuntu.com/ubuntu/ natty universe deb-src http://de.archive.ubuntu.com/ubuntu/ natty universe deb http://de.archive.ubuntu.com/ubuntu/ natty-updates universe deb-src http://de.archive.ubuntu.com/ubuntu/ natty-updates universe ## N.B. software from this repository is ENTIRELY UNSUPPORTED by the Ubuntu ## team, and may not be under a free licence. Please satisfy yourself as to ## your rights to use the software. Also, please note that software in ## multiverse WILL NOT receive any review or updates from the Ubuntu ## security team. deb http://de.archive.ubuntu.com/ubuntu/ natty multiverse deb-src http://de.archive.ubuntu.com/ubuntu/ natty multiverse deb http://de.archive.ubuntu.com/ubuntu/ natty-updates multiverse deb-src http://de.archive.ubuntu.com/ubuntu/ natty-updates multiverse ## Uncomment the following two lines to add software from the 'backports' ## repository. ## N.B. software from this repository may not have been tested as ## extensively as that contained in the main release, although it includes ## newer versions of some applications which may provide useful features. ## Also, please note that software in backports WILL NOT receive any review ## or updates from the Ubuntu security team. # deb http://de.archive.ubuntu.com/ubuntu/ natty-backports main restricted universe multiverse # deb-src http://de.archive.ubuntu.com/ubuntu/ natty-backports main restricted universe multiverse deb http://security.ubuntu.com/ubuntu natty-security main restricted deb-src http://security.ubuntu.com/ubuntu natty-security main restricted deb http://security.ubuntu.com/ubuntu natty-security universe deb-src http://security.ubuntu.com/ubuntu natty-security universe deb http://security.ubuntu.com/ubuntu natty-security multiverse deb-src http://security.ubuntu.com/ubuntu natty-security multiverse ## Uncomment the following two lines to add software from Canonical's ## 'partner' repository. ## This software is not part of Ubuntu, but is offered by Canonical and the ## respective vendors as a service to Ubuntu users. # deb http://archive.canonical.com/ubuntu natty partner # deb-src http://archive.canonical.com/ubuntu natty partner ## Uncomment the following two lines to add software from Ubuntu's ## 'extras' repository. ## This software is not part of Ubuntu, but is offered by third-party ## developers who want to ship their latest software. # deb http://extras.ubuntu.com/ubuntu natty main # deb-src http://extras.ubuntu.com/ubuntu natty main |
# /etc/fstab: static file system information. # # Use 'blkid -o value -s UUID' to print the universally unique identifier # for a device; this may be used with UUID= as a more robust way to name # devices that works even if disks are added and removed. See fstab(5). # # <file system> <mount point> <type> <options> <dump> <pass> proc /proc proc nodev,noexec,nosuid 0 0 /dev/mapper/server1-root / ext4 errors=remount-ro,usrjquota=quota.user,grpjquota=quota.group,jqfmt=vfsv0 0 1 # /boot was on /dev/sda1 during installation UUID=deae7cd1-b106-47aa-9a7c-512f046d2ebf /boot ext2 defaults 0 2 /dev/mapper/server1-swap_1 none swap sw 0 0 /dev/fd0 /media/floppy0 auto rw,user,noauto,exec,utf8 0 0 |
# run resolvconf? RESOLVCONF=yes # startup options for the server OPTIONS="-u bind -t /var/lib/named" |
$AddUnixListenSocket /var/lib/named/dev/log |
[...] # Instead of skip-networking the default is now to listen only on # localhost which is more compatible and is not less secure. #bind-address = 127.0.0.1 [...] |
# See /usr/share/postfix/main.cf.dist for a commented, more complete version


# Debian specific:  Specifying a file name will cause the first
# line of that file to be used as the name.  The Debian default
# is /etc/mailname.
#myorigin = /etc/mailname

smtpd_banner = $myhostname ESMTP $mail_name (Ubuntu)
biff = no

# appending .domain is the MUA's job.
append_dot_mydomain = no

# Uncomment the next line to generate "delayed mail" warnings
#delay_warning_time = 4h

readme_directory = no

# TLS parameters
smtpd_tls_cert_file = /etc/postfix/ssl/smtpd.crt
smtpd_tls_key_file = /etc/postfix/ssl/smtpd.key
smtpd_use_tls = yes
smtpd_tls_session_cache_database = btree:${data_directory}/smtpd_scache
smtp_tls_session_cache_database = btree:${data_directory}/smtp_scache

# See /usr/share/doc/postfix/TLS_README.gz in the postfix-doc package for
# information on enabling SSL in the smtp client.

myhostname = server1.example.com
alias_maps = hash:/etc/aliases
alias_database = hash:/etc/aliases
myorigin = /etc/mailname
mydestination = server1.example.com, localhost.example.com, localhost.localdomain, localhost
relayhost =
mynetworks = 127.0.0.0/8 [::ffff:127.0.0.0]/104 [::1]/128
mailbox_command = procmail -a "$EXTENSION"
mailbox_size_limit = 0
recipient_delimiter = +
inet_interfaces = all
inet_protocols = all
smtpd_sasl_local_domain =
smtpd_sasl_auth_enable = yes
smtpd_sasl_security_options = noanonymous
broken_sasl_auth_clients = yes
smtpd_sasl_authenticated_header = yes
smtpd_recipient_restrictions = permit_sasl_authenticated,permit_mynetworks,reject_unauth_destination
smtpd_tls_auth_only = no
smtp_use_tls = yes
smtp_tls_note_starttls_offer = yes
smtpd_tls_CAfile = /etc/postfix/ssl/cacert.pem
smtpd_tls_loglevel = 1
smtpd_tls_received_header = yes
smtpd_tls_session_cache_timeout = 3600s
tls_random_source = dev:/dev/urandom |
# # Settings for saslauthd daemon # Please read /usr/share/doc/sasl2-bin/README.Debian for details. # # Should saslauthd run automatically on startup? (default: no) START=yes # Description of this saslauthd instance. Recommended. # (suggestion: SASL Authentication Daemon) DESC="SASL Authentication Daemon" # Short name of this saslauthd instance. Strongly recommended. # (suggestion: saslauthd) NAME="saslauthd" # Which authentication mechanisms should saslauthd use? (default: pam) # # Available options in this Debian package: # getpwent -- use the getpwent() library function # kerberos5 -- use Kerberos 5 # pam -- use PAM # rimap -- use a remote IMAP server # shadow -- use the local shadow password file # sasldb -- use the local sasldb database file # ldap -- use LDAP (configuration is in /etc/saslauthd.conf) # # Only one option may be used at a time. See the saslauthd man page # for more information. # # Example: MECHANISMS="pam" MECHANISMS="pam" # Additional options for this mechanism. (default: none) # See the saslauthd man page for information about mech-specific options. MECH_OPTIONS="" # How many saslauthd processes should we run? (default: 5) # A value of 0 will fork a new process for each connection. THREADS=5 # Other options (default: -c -m /var/run/saslauthd) # Note: You MUST specify the -m option or saslauthd won't run! # # WARNING: DO NOT SPECIFY THE -d OPTION. # The -d option will cause saslauthd to run in the foreground instead of as # a daemon. This will PREVENT YOUR SYSTEM FROM BOOTING PROPERLY. If you wish # to run saslauthd in debug mode, please run it by hand to be safe. # # See /usr/share/doc/sasl2-bin/README.Debian for Debian-specific information. # See the saslauthd man page and the output of 'saslauthd -h' for general # information about these options. # # Example for postfix users: "-c -m /var/spool/postfix/var/run/saslauthd" #OPTIONS="-c -m /var/run/saslauthd" OPTIONS="-c -m /var/spool/postfix/var/run/saslauthd -r" |
[...] CN=server1.example.com [...] |
[...] CN=server1.example.com [...] |
<IfModule mod_dir.c>

          #DirectoryIndex index.html index.cgi index.pl index.php index.xhtml index.htm
          DirectoryIndex index.html index.htm index.shtml index.cgi index.php index.php3 index.pl index.xhtml

</IfModule> |
[...] #application/x-ruby rb [...] |
[...] #application/x-httpd-php phtml pht php #application/x-httpd-php-source phps #application/x-httpd-php3 php3 #application/x-httpd-php3-preprocessed php3p #application/x-httpd-php4 php4 #application/x-httpd-php5 php5 [...] |
Edit /etc/apache2/mods-enabled/php5.conf and comment out the SetHandler lines:
vi /etc/apache2/mods-enabled/php5.conf
<IfModule mod_php5.c>
    <FilesMatch "\.ph(p3?|tml)$">
        #SetHandler application/x-httpd-php
    </FilesMatch>
    <FilesMatch "\.phps$">
        #SetHandler application/x-httpd-php-source
    </FilesMatch>
    # To re-enable php in user directories comment the following lines
    # (from <IfModule ...> to </IfModule>.) Do NOT set it to On as it
    # prevents .htaccess files from disabling it.
    <IfModule mod_userdir.c>
        <Directory /home/*/public_html>
            php_admin_value engine Off
        </Directory>
    </IfModule>
</IfModule> |
Then restart Apache:
/etc/init.d/apache2 restart
18 Proftpd
In order to install Proftpd, run
apt-get install proftpd ucf
You will be asked a question:
Run proftpd:<-- standalone
For security reasons add the following lines to /etc/proftpd/proftpd.conf (thanks to Reinaldo Carvalho; more information can be found here:http://proftpd.org/localsite/Userguide/linked/userguide.html):
vi /etc/proftpd/proftpd.conf
[...] DefaultRoot ~ ServerIdent on "FTP Server ready." [...] |
ISPConfig expects the configuration to be in /etc/proftpd.conf instead of /etc/proftpd/proftpd.conf, therefore we create a symlink (you can skip this command if you don't want to install ISPConfig):
ln -s /etc/proftpd/proftpd.conf /etc/proftpd.conf
Then restart Proftpd:
/etc/init.d/proftpd restart
The Perfect Server - Ubuntu Natty Narwhal (Ubuntu 11.04) [ISPConfig 2] - Page 7
19 Webalizer
To install webalizer, just run
apt-get install webalizer geoip-database
20 Synchronize the System Clock
It is a good idea to synchronize the system clock with an NTP (n etwork t ime p rotocol) server over the internet. Simply run
apt-get install ntp ntpdate
and your system time will always be in sync.
21 Install Some Perl Modules Needed By SpamAssassin (Comes With ISPConfig)
Run
apt-get install libhtml-parser-perl libdb-file-lock-perl libnet-dns-perl libnetaddr-ip-perl perl-modules
22 ISPConfig
The configuration of the server is now finished, and if you wish you can now install ISPConfig on it. Please check out the ISPConfig installation manual:http://www.ispconfig.org/manual_installation.htm
Before you install ISPConfig, there's one important thing you must do. Open /usr/include/stdio.h and replace getline with parseline in line 671:
vi /usr/include/stdio.h
[...]
   This function is not part of POSIX and therefore no official
   cancellation point.  But due to similarity with an POSIX interface
   or due to the implementation it is a cancellation point and
   therefore not marked with __THROW.  */
extern _IO_ssize_t parseline (char **__restrict __lineptr,
                            size_t *__restrict __n,
                            FILE *__restrict __stream) __wur;
#endif
[...] |
If you don't do this, the installation will fail because of the following error:
htpasswd.c:101:error:conflicting types for 'getline'
/usr/include/stdio.h:671:note:previous declaration of 'getline' was here
make[2]:*** [htpasswd.o] Error 1
make[2]:Leaving directory `/home/ISPConfig-2.2.stable/install_ispconfig/compile_aps/apache_1.3.41/src/support'
make[1]:*** [build-support] Error 1
make[1]:Leaving directory `/home/ISPConfig-2.2.stable/install_ispconfig/compile_aps/apache_1.3.41'
make:*** [build] Error 2
ERROR:Could not make Apache
You can undo the change to /usr/include/stdio.h after the successful ISPConfig installation (but don't forget to change it back whenever you want to update ISPConfig!).
22.1 A Note On SuExec
If you want to run CGI scripts under suExec, you should specify /var/www as the home directory for websites created by ISPConfig as Ubuntu's suExec is compiled with /var/www as Doc_Root. Run
/usr/lib/apache2/suexec -V
and the output should look like this:
example@unixlinux.online:~# /usr/lib/apache2/suexec -V
-D AP_DOC_ROOT="/var/www"
-D AP_GID_MIN=100
-D AP_HTTPD_USER="www-data"
-D AP_LOG_EXEC="/var/log/apache2/suexec.log"
-D AP_SAFE_PATH="/usr/local/bin:/usr/bin:/bin"
-D AP_UID_MIN=100
-D AP_USERDIR_SUFFIX="public_html"
example@unixlinux.online:~#
So if you want to use suExec with ISPConfig, don't change the default web root (which is /var/www) if you use expert mode during the ISPConfig installation (in standard mode you can't change the web root anyway so you'll be able to use suExec in any case).
23 Links
- Ubuntu:http://www.ubuntu.com/
- ISPConfig:http://www.ispconfig.org/
-
El escritorio perfecto:Ubuntu 11.04 (Natty Narwhal) (con el escritorio clásico de Ubuntu)
-
Cómo actualizar un servidor Ubuntu 7.10 ("La configuración perfecta" + ISPConfig) a Ubuntu 8.04 LTS
-
Cómo actualizar un servidor Ubuntu 7.04 ("La configuración perfecta" + ISPConfig) a Ubuntu 7.10
-
El servidor perfecto - Fedora 15 x86_64 [ISPConfig 2]
-
El servidor perfecto - Fedora 15 x86_64 [ISPConfig 3]
El servidor perfecto - CentOS 5.7 x86_64 [ISPConfig 3]
El servidor perfecto - CentOS 6.0 x86_64 [ISPConfig 2]
El servidor perfecto - CentOS 6.0 x86_64 [ISPConfig 3]
El servidor perfecto - Ubuntu 12.04 LTS (Apache2, BIND, Dovecot, ISPConfig 3)
El servidor perfecto - Ubuntu 12.10 (Apache2, BIND, Dovecot, ISPConfig 3)
El servidor perfecto - Ubuntu 13.04 (Apache2, BIND, Dovecot, ISPConfig 3)