Wekan es un Tablero Kanban gratuito y de código abierto creado con el marco Meteor JavaScript y se distribuye bajo la licencia MIT. Es muy similar a Workflowy y Trello que lo ayuda a administrar las tareas del día a día, preparar listas de tareas pendientes, administrar a otras personas, etc. Viene con una interfaz web totalmente receptiva y traducida a muchos idiomas. Wekan viene con un amplio conjunto de características que incluyen Exportar tablero de Wekan, Importar tablero de Trello, Configuración de SMTP, Restaurar un tablero archivado, Módulo de administración de usuarios, Funciones de arrastrar y soltar, y muchas más.
En este tutorial, le mostraremos cómo instalar la placa Wekan Kanban con Nginx como servidor proxy en Debian 10.
Requisitos
- Un servidor que ejecuta Debian 10.
- Un nombre de dominio válido apuntado con la IP de su servidor.
- Se ha configurado una contraseña raíz en su servidor.
Cómo empezar
Antes de comenzar, se recomienda actualizar su servidor con la última versión usando el siguiente comando:
apt-get update -y
 apt-get upgrade -y
Una vez que su servidor esté actualizado, reinícielo para implementar los cambios.
Instalar Wekan
La forma más fácil de instalar Wekan en Debian 10 es usando snap. De forma predeterminada, el paquete snap está disponible en el repositorio de Debian 10. Puede instalarlo ejecutando el siguiente comando:
apt-get install snapd -y
Una vez que el complemento está instalado/bloqueado, puede instalar Wekan ejecutando el siguiente comando:
snap install wekan
Una vez que Wekan esté instalado, iniciará el servicio Wekan y Mongodb automáticamente.
Puede ver el estado del servicio Wekan con el siguiente comando:
systemctl status snap.wekan.wekan
Debería ver el siguiente resultado:
? snap.wekan.wekan.service - Service for snap application wekan.wekan
   Loaded: loaded (/etc/systemd/system/snap.wekan.wekan.service; enabled; vendor preset: enabled)
   Active: active (running) since Sun 2019-12-22 07:43:34 UTC; 7s ago
 Main PID: 7836 (wekan-control)
    Tasks: 11 (limit: 2359)
   Memory: 156.3M
   CGroup: /system.slice/snap.wekan.wekan.service
           ??7836 /bin/bash /snap/wekan/678/bin/wekan-control
           ??8522 /snap/wekan/678/bin/node main.js

Dec 22 07:43:35 debian10 wekan.wekan[7836]: HEADER_LOGIN_EMAIL=Header login email. Example for siteminder: HEADEREMAILADDRESS (default value)
Dec 22 07:43:35 debian10 wekan.wekan[7836]: LOGOUT_WITH_TIMER=false (default value)
Dec 22 07:43:35 debian10 wekan.wekan[7836]: LOGOUT_IN= (default value)
Dec 22 07:43:35 debian10 wekan.wekan[7836]: LOGOUT_ON_HOURS= (default value)
Dec 22 07:43:35 debian10 wekan.wekan[7836]: LOGOUT_ON_MINUTES= (default value)
Dec 22 07:43:35 debian10 wekan.wekan[7836]: DEFAULT_AUTHENTICATION_METHOD= (default value)
Dec 22 07:43:35 debian10 wekan.wekan[7836]: ATTACHMENTS_STORE_PATH= (default value)
Dec 22 07:43:35 debian10 wekan.wekan[7836]: MONGO_URL=mongodb://127.0.0.1:27019/wekan
Dec 22 07:43:37 debian10 wekan.wekan[7836]: Presence started serverId=ijqY8RbEWv8Hg9RSb
Dec 22 07:43:38 debian10 wekan.wekan[7836]: Meteor APM: completed instrumenting the app
De forma predeterminada, Wekan se ejecuta en el puerto 8080. Si desea cambiar el puerto de Wekan a 3001, ejecute el siguiente comando:
snap set wekan port='3001'
A continuación, reinicie el servicio Wekan y MongoDB para aplicar los cambios:
systemctl restart snap.wekan.mongodb
 systemctl restart snap.wekan.wekan
Administrar los servicios de Wekan y MongoDB
Para iniciar y detener el servicio Wekan, ejecute el siguiente comando:
systemctl stop snap.wekan.wekan
 systemctl start snap.wekan.wekan
Para iniciar y detener el servicio MongoDB, ejecute el siguiente comando:
systemctl stop snap.wekan.mongodb
 systemctl start snap.wekan.mongodb
Configurar Nginx como proxy inverso
Wekan ahora está instalado y escuchando en el puerto 3001 . A continuación, es una buena idea ejecutar Wekan detrás del proxy Nginx.
Para hacerlo, primero instale el servidor web Nginx usando el siguiente comando:
apt-get install nginx -y
Una vez instalado, abra el archivo /etc/nginx/nginx.conf y configure hash_bucket_size:
nano /etc/nginx/nginx.conf
Descomente la siguiente línea:
server_names_hash_bucket_size 64;
Guarde y cierre el archivo cuando haya terminado. Luego, reinicie el servicio Nginx para aplicar los cambios:
systemctl restart nginx
A continuación, cree un archivo de host virtual Nginx para Wekan como se muestra a continuación:
nano /etc/nginx/conf.d/wekan.conf
Agregue las siguientes líneas:
map $http_upgrade $connection_upgrade {
    default upgrade;
    ''      close;
}
server {
    listen 80;
    server_name wekan.linuxbuz.com;
    if ($http_user_agent ~ "MSIE" ) {
        return 303 https://browser-update.org/update.html;
    }
    location / {
        proxy_pass http://127.0.0.1:3001;
        proxy_http_version 1.1;
        proxy_set_header Upgrade $http_upgrade; # allow websockets
        proxy_set_header Connection $connection_upgrade;
        proxy_set_header X-Forwarded-For $remote_addr; # preserve client IP
    }
}
Guarde y cierre el archivo cuando haya terminado. Luego, verifique el Nginx para ver si hay algún error de sintaxis con el siguiente comando:
nginx -t
Debería ver el siguiente resultado:
nginx: the configuration file /etc/nginx/nginx.conf syntax is ok
nginx: configuration file /etc/nginx/nginx.conf test is successful
Finalmente, reinicie el servicio Nginx para aplicar los cambios:
systemctl restart nginx
En este punto, Nginx está configurado para reenviar la solicitud al puerto Wekan 3001.
Asegure Wekan con Let's Encrypt Free SSL
A continuación, se recomienda proteger el Wekan con SSL gratuito de Let's Encrypt. Para hacerlo, deberá instalar el cliente Certbot en su servidor. Certbot es un cliente de Let's Encrypt que se puede usar para descargar SSL gratis y configurar Nginx para usar este certificado.
De forma predeterminada, la última versión de Certbot no está disponible en el repositorio predeterminado de Debian 10. Por lo tanto, deberá agregar el repositorio de Certbot en su servidor.
Puede agregar el repositorio usando el siguiente comando:
echo "deb http://ftp.debian.org/debian buster-backports main" >> /etc/apt/sources.list
A continuación, actualice el repositorio e instale el cliente Certbot con el siguiente comando:
apt-get update -y
 apt-get install python-certbot-nginx -t buster-backports
Una vez completada la instalación, ejecute el siguiente comando para obtener e instalar el certificado SSL para su dominio:
certbot --nginx -d wekan.linuxbuz.com
Se le pedirá que proporcione su dirección de correo electrónico y acepte el término del servicio como se muestra a continuación:
Saving debug log to /var/log/letsencrypt/letsencrypt.log
Plugins selected: Authenticator nginx, Installer nginx
Enter email address (used for urgent renewal and security notices) (Enter 'c' to
cancel): [email protected]

- - - - - - - - - - - - - - - - - - - - - - - - - - - - - - - - - - - - - - - -
Please read the Terms of Service at
https://letsencrypt.org/documents/LE-SA-v1.2-November-15-2017.pdf. You must
agree in order to register with the ACME server at
https://acme-v02.api.letsencrypt.org/directory
- - - - - - - - - - - - - - - - - - - - - - - - - - - - - - - - - - - - - - - -
(A)gree/(C)ancel: A

- - - - - - - - - - - - - - - - - - - - - - - - - - - - - - - - - - - - - - - -
Would you be willing to share your email address with the Electronic Frontier
Foundation, a founding partner of the Let's Encrypt project and the non-profit
organization that develops Certbot? We'd like to send you email about our work
encrypting the web, EFF news, campaigns, and ways to support digital freedom.
- - - - - - - - - - - - - - - - - - - - - - - - - - - - - - - - - - - - - - - -
(Y)es/(N)o: N
Obtaining a new certificate
Performing the following challenges:
http-01 challenge for wekan.linuxbuz.com
Waiting for verification...
Cleaning up challenges
Deploying Certificate to VirtualHost /etc/nginx/conf.d/wekan.conf
A continuación, deberá elegir si redirigir o no el tráfico HTTP a HTTPS:
Please choose whether or not to redirect HTTP traffic to HTTPS, removing HTTP access.
- - - - - - - - - - - - - - - - - - - - - - - - - - - - - - - - - - - - - - - -
1: No redirect - Make no further changes to the webserver configuration.
2: Redirect - Make all requests redirect to secure HTTPS access. Choose this for
new sites, or if you're confident your site works on HTTPS. You can undo this
change by editing your web server's configuration.
- - - - - - - - - - - - - - - - - - - - - - - - - - - - - - - - - - - - - - - -
Select the appropriate number [1-2] then [enter] (press 'c' to cancel): 2
Escriba 2 y presione Entrar para iniciar el proceso de instalación. Una vez finalizada la instalación, debería obtener el siguiente resultado:
Redirecting all traffic on port 80 to ssl in /etc/nginx/conf.d/wekan.conf

- - - - - - - - - - - - - - - - - - - - - - - - - - - - - - - - - - - - - - - -
Congratulations! You have successfully enabled https://wekan.linuxbuz.com

You should test your configuration at:
https://www.ssllabs.com/ssltest/analyze.html?d=wekan.linuxbuz.com
- - - - - - - - - - - - - - - - - - - - - - - - - - - - - - - - - - - - - - - -

IMPORTANT NOTES:
 - Congratulations! Your certificate and chain have been saved at:
   /etc/letsencrypt/live/wekan.linuxbuz.com/fullchain.pem
   Your key file has been saved at:
   /etc/letsencrypt/live/wekan.linuxbuz.com/privkey.pem
   Your cert will expire on 2020-03-25. To obtain a new or tweaked
   version of this certificate in the future, simply run certbot again
   with the "certonly" option. To non-interactively renew *all* of
   your certificates, run "certbot renew"
 - Your account credentials have been saved in your Certbot
   configuration directory at /etc/letsencrypt. You should make a
   secure backup of this folder now. This configuration directory will
   also contain certificates and private keys obtained by Certbot so
   making regular backups of this folder is ideal.
 - If you like Certbot, please consider supporting our work by:

   Donating to ISRG / Let's Encrypt:   https://letsencrypt.org/donate
   Donating to EFF:                    https://eff.org/donate-le
Acceder a la interfaz web de Wekan
Ahora abra su navegador web y escriba la URL https://wekan.linuxbuz.com . Será redirigido a la siguiente página:
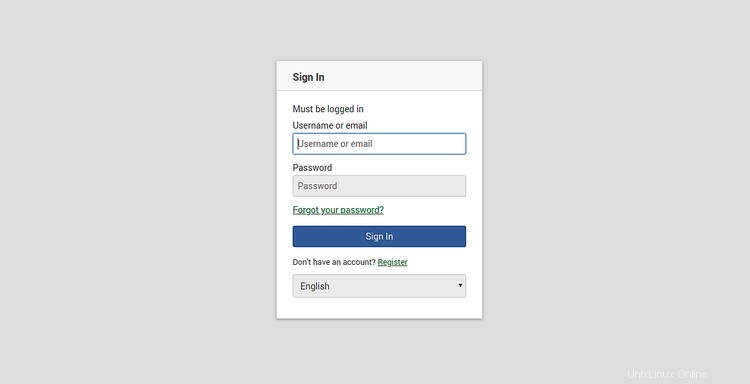
Haga clic en Registrarse botón. Debería ver la siguiente página:
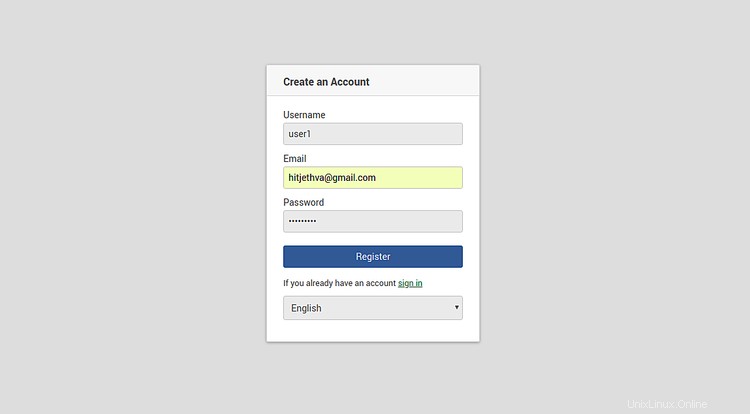
Proporcione su nombre de usuario, contraseña, correo electrónico y haga clic en Registrarse botón. A continuación, haga clic en el signo en botón. Debería ver la siguiente página:
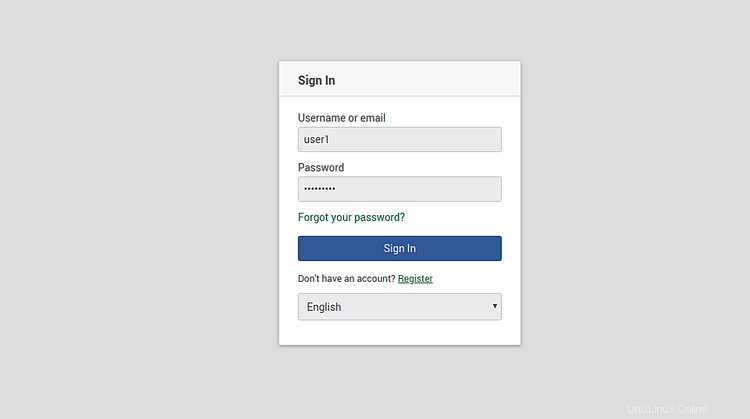
Proporcione su nombre de usuario, contraseña y haga clic en Firmar en botón. Debería ver el panel de Wekan en la siguiente página:
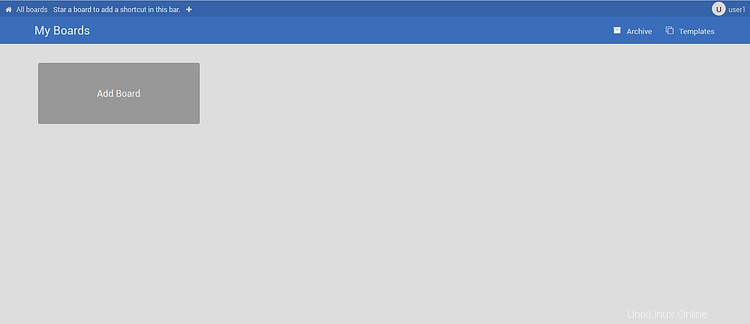
Eso es todo por ahora. Ha instalado correctamente Wekan Kanban en el servidor Debian 10 y lo ha asegurado con SSL gratuito de Let's Encrypt.