El Servidor Perfecto - Ubuntu 11.10 [ISPConfig 3]
Este tutorial muestra cómo preparar un servidor Ubuntu 11.10 (Oneiric Ocelot) para la instalación de ISPConfig 3 y cómo instalar ISPConfig 3. ISPConfig 3 es un panel de control de alojamiento web que le permite configurar los siguientes servicios a través de un navegador web:Apache web servidor, servidor de correo Postfix, MySQL, servidor de nombres BIND o MyDNS, PureFTPd, SpamAssassin, ClamAV y muchos más.
Tenga en cuenta que esta configuración no funciona para ISPConfig 2 ! ¡Es válido solo para ISPConfig 3!
¡No emito ninguna garantía de que esto funcione para usted!
Manual de ISPConfig 3
Para aprender a usar ISPConfig 3, recomiendo descargar el Manual de ISPConfig 3.
En aproximadamente 300 páginas, cubre el concepto detrás de ISPConfig (administrador, revendedores, clientes), explica cómo instalar y actualizar ISPConfig 3, incluye una referencia para todos los formularios y campos de formulario en ISPConfig junto con ejemplos de entradas válidas y proporciona tutoriales para las tareas más comunes en ISPConfig 3. También explica cómo hacer que su servidor sea más seguro y viene con una sección de solución de problemas al final.
Aplicación ISPConfig Monitor para Android
Con la aplicación ISPConfig Monitor, puede verificar el estado de su servidor y averiguar si todos los servicios funcionan como se esperaba. Puede verificar los puertos TCP y UDP y hacer ping a sus servidores. Además de eso, puede usar esta aplicación para solicitar detalles de los servidores que tienen instalado ISPConfig (tenga en cuenta que la versión mínima instalada de ISPConfig 3 compatible con la aplicación ISPConfig Monitor es 3.0.3.3! ); estos detalles incluyen todo lo que sabe del módulo Monitor en el Panel de control de ISPConfig (por ejemplo, servicios, registros de correo y del sistema, cola de correo, información de CPU y memoria, uso del disco, cuota, detalles del sistema operativo, registro de RKHunter, etc.), y por supuesto , como ISPConfig tiene capacidad para varios servidores, puede verificar todos los servidores que están controlados desde su servidor maestro ISPConfig.
Para obtener instrucciones de uso y descarga, visite http://www.ispconfig.org/ispconfig-3/ispconfig-monitor-app-for-android/.
1 Requisitos
Para instalar dicho sistema, necesitará lo siguiente:
- el CD del servidor Ubuntu 11.10, disponible aquí:http://releases.ubuntu.com/releases/11.10/ubuntu-11.10-server-i386.iso (i386) o http://releases.ubuntu.com/releases /11.10/ubuntu-11.10-servidor-amd64.iso (x86_64)
- una conexión rápida a Internet.
2 Nota Preliminar
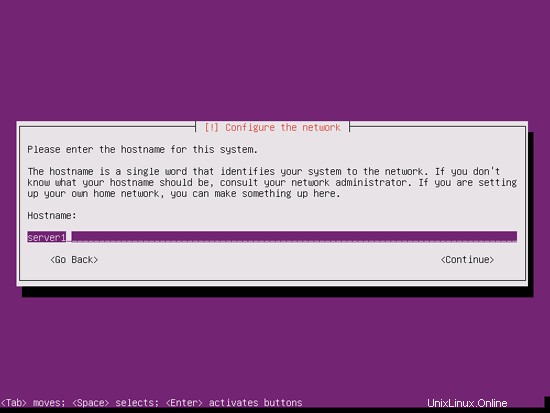
En este tutorial utilizo el nombre de host server1.example.com con la dirección IP 192.168.0.100 y la puerta de enlace 192.168.0.1. Estas configuraciones pueden diferir para usted, por lo que debe reemplazarlas cuando corresponda.
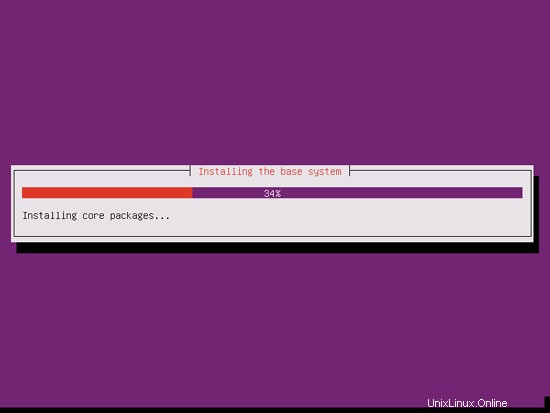
3 El Sistema Base
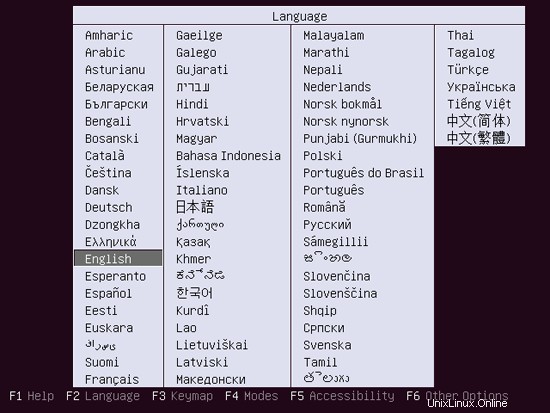
Inserte su CD de instalación de Ubuntu en su sistema y arranque desde él. Seleccione su idioma:
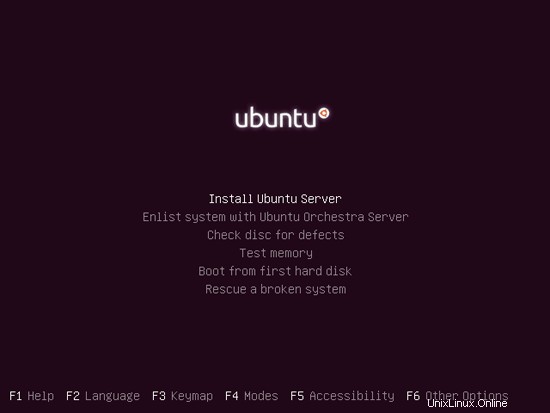
Luego seleccione Instalar Servidor Ubuntu:
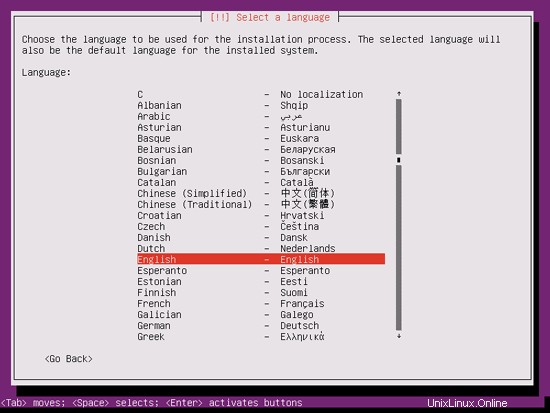
Elige tu idioma de nuevo (?):
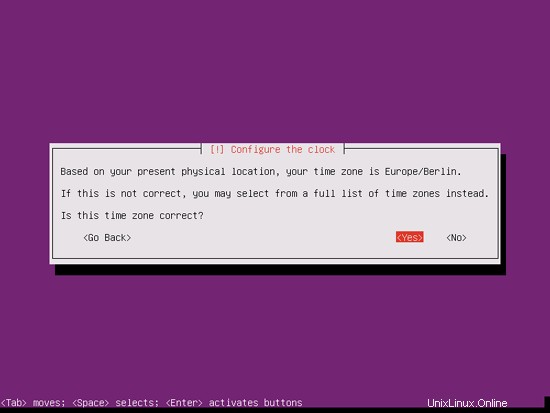
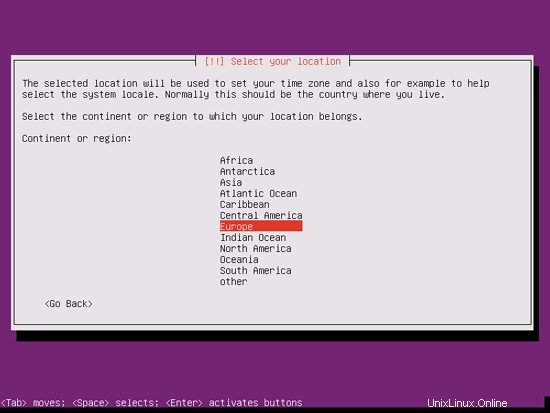
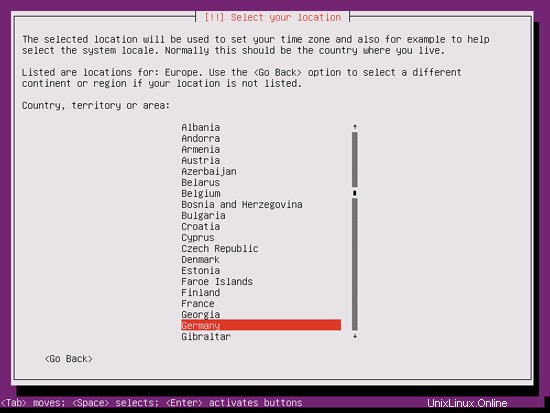
Luego seleccione su ubicación:
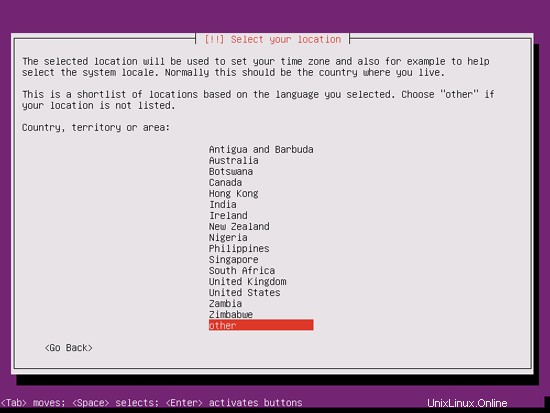
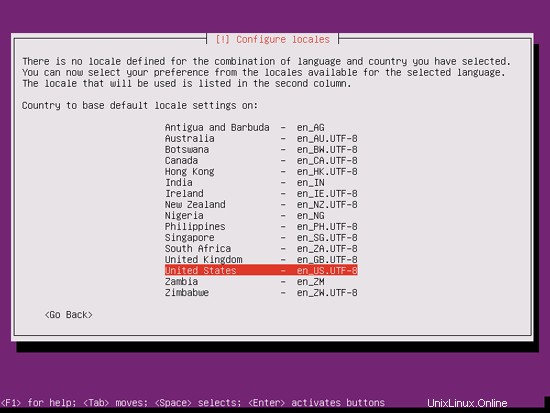
Si ha seleccionado una combinación poco común de idioma y ubicación (como inglés como idioma y Alemania como ubicación, como en mi caso), el instalador podría indicarle que no hay una configuración regional definida para esta combinación; en este caso, debe seleccionar la configuración regional manualmente. Selecciono en_US.UTF-8 aquí:
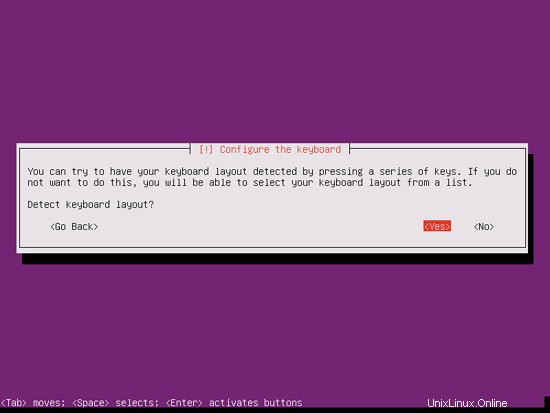
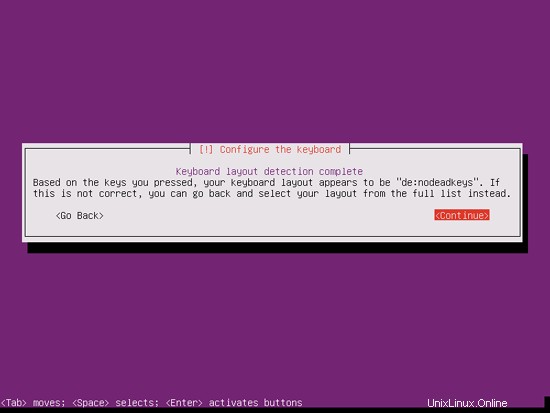
Elija una distribución de teclado (se le pedirá que presione algunas teclas y el instalador intentará detectar su distribución de teclado en función de las teclas que presionó):
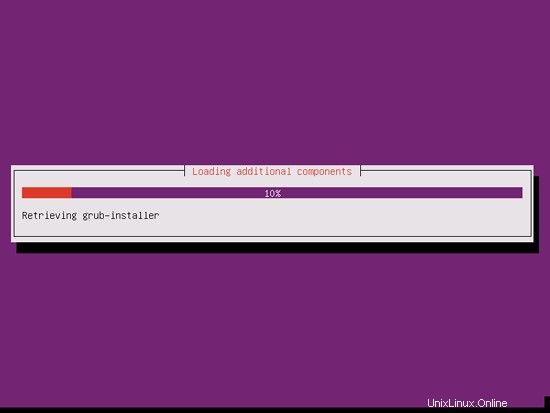
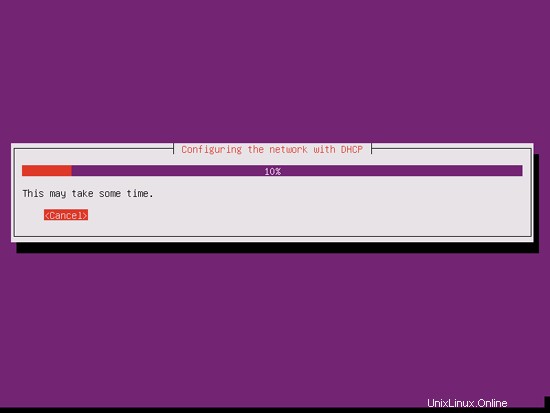
El instalador comprueba el CD de instalación, su hardware y configura la red con DHCP si hay un servidor DHCP en la red:
El servidor perfecto - Ubuntu 11.10 [ISPConfig 3] - Página 2
21 Instalar ISPConfig 3
Para instalar ISPConfig 3 desde la última versión publicada, haga lo siguiente:
cd /tmp
wget http://www.ispconfig.org/downloads/ISPConfig-3-stable.tar.gz
tar xfz ISPConfig-3-stable.tar.gz
cd ispconfig3_install/install/
El siguiente paso es ejecutar
php -q install.php
Esto iniciará el instalador de ISPConfig 3. El instalador configurará todos los servicios como Postfix, SASL, Courier, etc. por usted. No es necesaria una configuración manual como se requiere para ISPConfig 2 (guías de configuración perfectas).
[email protected]:/tmp/ispconfig3_install/install# php -q install.php
------------------- -------------------------------------------------- -----------
_____ ___________ _____ __ _ ____
|_ _/ ___| ___ \ / __ \ / _(_) /__ \
| | \ `--.| |_/ / | / \/ ___ _ __ | |_ _ __ _ _/ /
| | `--. \ __/ | | / _ \| '_ \| _| |/ _` | |_ |
_| |_/\__/ / | | \__/\ (_) | | | | | | | (_| | ___\ \
\___/\____/\_| \____/\___/|_| |_|_| |_|\__, | \____/
__/ |
|___/
-------------------------------------- ---------------------------------------------------------
>> Configuración inicial
Sistema operativo: Debian o versión compatible, desconocida.
A continuación, habrá algunas preguntas para la configuración principal, así que tenga cuidado.
Los valores predeterminados están entre [paréntesis] y se pueden aceptar con .
Toque "salir" (sin las comillas) para detener el instalador.
Seleccionar idioma (en,de) [en]: <-- ENTER
Modo de instalación (estándar, experto) [estándar]: <-- ENTER
Nombre de host completo calificado (FQDN) del servidor, p. ej. servidor1.dominio.tld [servidor1.ejemplo.com]: <-- ENTRAR
MySQL server hostname [localhost]: <-- ENTRAR
MySQL raíz nombre de usuario [raíz]: <-- ENTRAR
Contraseña raíz de MySQL []: <-- sucontraseñarootsql
Base de datos de MySQL para crear [dbispconfig]: <-- ENTRAR
Juego de caracteres de MySQL [utf8]: <-- ENTRAR
Generar una clave privada RSA de 2048 bits
...+++
....................... ..........................................++++
escritura nueva clave privada para 'smtpd.key'
-----
Está a punto de solicitarle que ingrese información que se incorporará
a su solicitud de certificado.
Qué están a punto de ingresar es lo que se llama un nombre distinguido o un DN.
Hay bastantes campos, pero puede dejar algunos en blanco
Para algunos campos habrá un valor predeterminado,
Si ingresa '.', el campo quedará en blanco.
-----
Nombre del país (código de 2 letras) [AU]:<-- ENTRAR
Nombre del estado o provincia ( nombre completo) [Algún estado]: <-- ENTRAR
Nombre de la localidad (por ejemplo, ciudad) []: <-- ENTRAR
Nombre de la organización (por ejemplo, empresa) [Internet Widgits Pty Ltd]: <-- ENTRAR
Nombre de la unidad organizativa (por ejemplo, sección) []: <-- ENTRAR
Nombre común (por ejemplo, SU nombre) []: <-- ENTRAR
Dirección de correo electrónico []: <-- ENTRAR
Configurar Jailkit
Configurar SASL
Configurar PAM
Configurar Courier
Configurar Spamassassin
Configurar Amavisd
Configurar Getmail
Configurar Pureftpd
Configurar BIND
Configurar Apache
Configurar Vlogger
Configurar Aplicaciones vhost
Configurar Firewall
Instalar ISPConfig
Puerto ISPConfig [8080]: <-- ENTRAR
Configurar DBServer
Instalar ISPConfig crontab
no crontab para root
no crontab para getmail
Reiniciar servicios ...
En lugar de invocar scripts de inicio a través de /etc/init. d, utilice la utilidad service(8)
, p. service mysql restart
Como el script que está intentando invocar se ha convertido a un
trabajo Upstart, también puedes utilizar las utilidades stop(8) y luego start(8),
p. ej. detener mysql; iniciar mysql. La utilidad restart(8) también está disponible.
mysql stop/waiting
mysql start/running, process 2302
* Deteniendo Postfix Mail Transport Agent postfix
...hecho.
* Iniciando Postfix Mail Transport Agent postfix
...terminado.
* Deteniendo SASL Authentication Daemon saslauthd
...terminado.
* Iniciando SASL Authentication Daemon saslauthd
...hecho.
Deteniendo amavisd: amavisd-new.
Iniciando amavisd: amavisd-new.
* Deteniendo ClamAV daemon clamd
...hecho.
* Iniciando ClamAV daemon clamd
Bytecode: Security mode set to "TrustSigned".
...hecho.
* Deteniendo los servicios de autenticación de Courier authdaemond
...hecho.
* Iniciando Courier authentication services authdaemond
...terminado.
* Deteniendo Courier IMAP server imapd
...terminado.
* Iniciando Courier IMAP server imapd
...hecho.
* Deteniendo servidor IMAP-SSL de Courier imapd-ssl
...hecho.
* Iniciando servidor IMAP-SSL de Courier imapd-ssl
...hecho.
* Deteniendo servidor POP3 de Courier...
...hecho.
* Iniciando servidor POP3 de Courier.. .
...terminado.
* Deteniendo el servidor POP3-SSL de Courier...
...terminado.
* Iniciando el servidor POP3-SSL de Courier...
...hecho.
* Reiniciando servidor web apache2
... esperando .... ...hecho.
Reiniciando servidor ftp: Ejecutando: /usr/sbin/pure-ftpd -mysql-virtualchroot -l mysql:/etc/pure-ftpd/db/mysql.conf -l pam -8 UTF-8 -O clf:/var/log/pure-ftpd/transfer.log -D -H -b -A -E -u 1000 -Y 1 -B
Instalación completada.
[email protected]:/tmp/ispconfig3_install/install#
El instalador configura automáticamente todos los servicios subyacentes, por lo que no es necesaria una configuración manual.
Luego puede acceder a ISPConfig 3 en http://server1.example.com:8080/ o http://192.168.0.100:8080/. Inicie sesión con el nombre de usuario admin y la contraseña admin (debe cambiar la contraseña predeterminada después de su primer inicio de sesión):
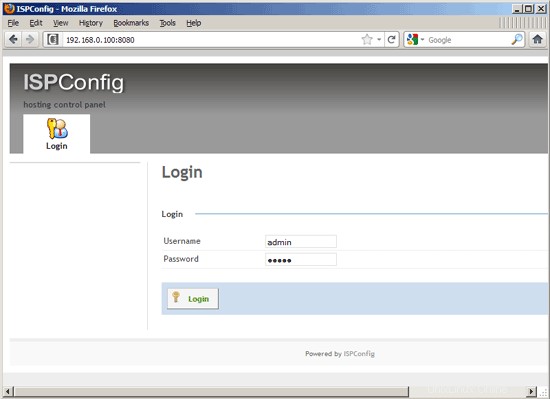
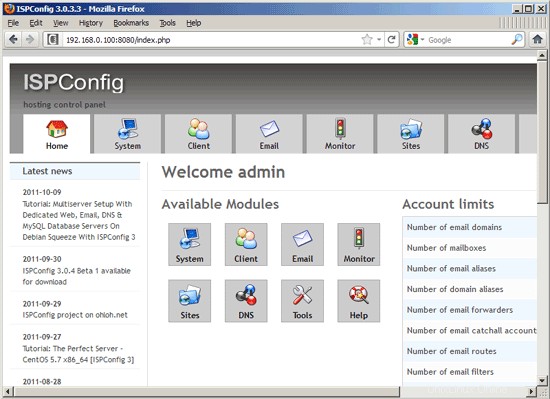
El sistema ahora está listo para ser utilizado.
21.1 Manual ISPConfig 3
Para aprender a usar ISPConfig 3, recomiendo descargar el Manual de ISPConfig 3.
En aproximadamente 300 páginas, cubre el concepto detrás de ISPConfig (administrador, revendedores, clientes), explica cómo instalar y actualizar ISPConfig 3, incluye una referencia para todos los formularios y campos de formulario en ISPConfig junto con ejemplos de entradas válidas y proporciona tutoriales para las tareas más comunes en ISPConfig 3. También explica cómo hacer que su servidor sea más seguro y viene con una sección de solución de problemas al final.
21.2 Aplicación ISPConfig Monitor para Android
Con la aplicación ISPConfig Monitor, puede verificar el estado de su servidor y averiguar si todos los servicios funcionan como se esperaba. Puede verificar los puertos TCP y UDP y hacer ping a sus servidores. Además de eso, puede usar esta aplicación para solicitar detalles de los servidores que tienen instalado ISPConfig (tenga en cuenta que la versión mínima instalada de ISPConfig 3 compatible con la aplicación ISPConfig Monitor es 3.0.3.3! ); estos detalles incluyen todo lo que sabe del módulo Monitor en el Panel de control de ISPConfig (por ejemplo, servicios, registros de correo y del sistema, cola de correo, información de CPU y memoria, uso del disco, cuota, detalles del sistema operativo, registro de RKHunter, etc.), y por supuesto , como ISPConfig tiene capacidad para varios servidores, puede verificar todos los servidores que están controlados desde su servidor maestro ISPConfig.
Para obtener instrucciones de uso y descarga, visite http://www.ispconfig.org/ispconfig-3/ispconfig-monitor-app-for-android/.
22 Notas Adicionales
22.1 OpenVZ
Si el servidor Ubuntu que acaba de configurar en este tutorial es un contenedor OpenVZ (máquina virtual), debe hacer esto en el sistema host (supongo que el ID del contenedor OpenVZ es 101; reemplácelo con el VPSID correcto en su sistema):
VPSID=101
for CAP in CHOWN DAC_READ_SEARCH SETGID SETUID NET_BIND_SERVICE NET_ADMIN SYS_CHROOT SYS_NICE CHOWN DAC_READ_SEARCH SETGID SETUID NET_BIND_SERVICE NET_ADMIN SYS_CHROOT SYS_NICE
do
vzctl set $VPSID --capability ${CAP}:on --save
done
23 Enlaces
- Ubuntu:http://www.ubuntu.com/
- ISPConfig:http://www.ispconfig.org/
El Servidor Perfecto - Ubuntu 11.10 [ISPConfig 3] - Página 3
19 Instalar fail2ban
Esto es opcional pero recomendado, porque el monitor ISPConfig intenta mostrar el registro fail2ban:
apt-get install fail2ban
Para hacer que fail2ban monitoree PureFTPd, SASL y Courier, cree el archivo /etc/fail2ban/jail.local:
vi /etc/fail2ban/jail.local
[pureftpd]
enabled = true
port = ftp
filter = pureftpd
logpath = /var/log/syslog
maxretry = 3
[sasl]
enabled = true
port = smtp
filter = sasl
logpath = /var/log/mail.log
maxretry = 5
[courierpop3]
enabled = true
port = pop3
filter = courierpop3
logpath = /var/log/mail.log
maxretry = 5
[courierpop3s]
enabled = true
port = pop3s
filter = courierpop3s
logpath = /var/log/mail.log
maxretry = 5
[courierimap]
enabled = true
port = imap2
filter = courierimap
logpath = /var/log/mail.log
maxretry = 5
[courierimaps]
enabled = true
port = imaps
filter = courierimaps
logpath = /var/log/mail.log
maxretry = 5 |
Luego cree los siguientes cinco archivos de filtro:
vi /etc/fail2ban/filter.d/pureftpd.conf
[Definition]
failregex = .*pure-ftpd: \(.*@<HOST>\) \[WARNING\] Authentication failed for user.*
ignoreregex = |
vi /etc/fail2ban/filter.d/courierpop3.conf
# Fail2Ban configuration file
#
# $Revision: 100 $
#
[Definition]
# Option: failregex
# Notes.: regex to match the password failures messages in the logfile. The
# host must be matched by a group named "host". The tag "<HOST>" can
# be used for standard IP/hostname matching and is only an alias for
# (?:::f{4,6}:)?(?P<host>\S+)
# Values: TEXT
#
failregex = pop3d: LOGIN FAILED.*ip=\[.*:<HOST>\]
# Option: ignoreregex
# Notes.: regex to ignore. If this regex matches, the line is ignored.
# Values: TEXT
#
ignoreregex = |
vi /etc/fail2ban/filter.d/courierpop3s.conf
# Fail2Ban configuration file
#
# $Revision: 100 $
#
[Definition]
# Option: failregex
# Notes.: regex to match the password failures messages in the logfile. The
# host must be matched by a group named "host". The tag "<HOST>" can
# be used for standard IP/hostname matching and is only an alias for
# (?:::f{4,6}:)?(?P<host>\S+)
# Values: TEXT
#
failregex = pop3d-ssl: LOGIN FAILED.*ip=\[.*:<HOST>\]
# Option: ignoreregex
# Notes.: regex to ignore. If this regex matches, the line is ignored.
# Values: TEXT
#
ignoreregex = |
vi /etc/fail2ban/filter.d/courierimap.conf
# Fail2Ban configuration file
#
# $Revision: 100 $
#
[Definition]
# Option: failregex
# Notes.: regex to match the password failures messages in the logfile. The
# host must be matched by a group named "host". The tag "<HOST>" can
# be used for standard IP/hostname matching and is only an alias for
# (?:::f{4,6}:)?(?P<host>\S+)
# Values: TEXT
#
failregex = imapd: LOGIN FAILED.*ip=\[.*:<HOST>\]
# Option: ignoreregex
# Notes.: regex to ignore. If this regex matches, the line is ignored.
# Values: TEXT
#
ignoreregex = |
vi /etc/fail2ban/filter.d/courierimaps.conf
# Fail2Ban configuration file
#
# $Revision: 100 $
#
[Definition]
# Option: failregex
# Notes.: regex to match the password failures messages in the logfile. The
# host must be matched by a group named "host". The tag "<HOST>" can
# be used for standard IP/hostname matching and is only an alias for
# (?:::f{4,6}:)?(?P<host>\S+)
# Values: TEXT
#
failregex = imapd-ssl: LOGIN FAILED.*ip=\[.*:<HOST>\]
# Option: ignoreregex
# Notes.: regex to ignore. If this regex matches, the line is ignored.
# Values: TEXT
#
ignoreregex = |
Reinicie fail2ban después:
/etc/init.d/fail2ban restart
20 Instalar SquirrelMail
Para instalar el cliente de correo web SquirrelMail, ejecute
apt-get install squirrelmail
Luego configure SquirrelMail:
squirrelmail-configure
Debemos decirle a SquirrelMail que estamos usando Courier-IMAP/-POP3:
Configuración de SquirrelMail: Leer: config.php (1.4.0)
--------------------------------- ------------------------
Menú principal --
1. Preferencias de la organización
2. Configuración del servidor
3. Valores predeterminados de carpeta
4. Opciones generales
5. Temas
6. Libretas de direcciones
7. Mensaje del día (MOTD)
8. Complementos
9. Base de datos
10. Idiomas
D. Establecer configuraciones predefinidas para servidores IMAP específicos
C Activar colores
S Guardar datos
Q Salir
Comando >> <-- D
Configuración de SquirrelMail : Leer: config.php
---- -------------------------------------------------- ---
Mientras construíamos SquirrelMail, hemos descubierto algunas
preferencias que funcionan mejor con algunos servidores que no funcionan tan
bien con otros. Si selecciona su servidor IMAP, esta opción
establecerá algunas configuraciones predefinidas para ese servidor.
Tenga en cuenta que aún tendrá que revisar y asegurarse de que
todo es correcto. Esto no lo cambia todo. Hay
solo algunas configuraciones que esto cambiará.
Seleccione su servidor IMAP:
bincimap = Binc servidor IMAP
courier = Servidor IMAP de Courier
Cyrus =cyrus imap servidor
dovecot =dovecot seguro imap servidor
intercambio =microsoft intercambio imap servidor
hmailserver =hmailserver
macOSX =Mac OS X Mailserver
Mercury32 =Mercury /32
uw = Servidor IMAP de la Universidad de Washington
gmail = Acceso IMAP a cuentas de Google mail (Gmail)
salir = No cambiar nada
Comando >> <-- courier
Configuración de SquirrelMail : Leer: config.php
-------------- ----------------------------------
Mientras construíamos SquirrelMail, hemos descubierto algunos
preferencias que funcionan mejor con algunos servidores que no funcionan tan
bien con otros. Si selecciona su servidor IMAP, esta opción
establecerá algunas configuraciones predefinidas para ese servidor.
Tenga en cuenta que aún tendrá que revisar y asegurarse de que
todo es correcto. Esto no lo cambia todo. Hay
solo algunas configuraciones que esto cambiará.
Seleccione su servidor IMAP:
bincimap = Binc servidor IMAP
courier = Servidor IMAP de Courier
Cyrus =cyrus imap servidor
dovecot =dovecot seguro imap servidor
intercambio =microsoft intercambio imap servidor
hmailserver =hmailserver
macOSX =Mac OS X Mailserver
Mercury32 =Mercury /32
uw = Servidor IMAP de la Universidad de Washington
salir = No cambiar nada
Comando >> courier
imap_server_type = courier
Default_folder_prefix =Inbox.
Trash_folder =Trash
Sent_folder =SED
Draft_Folder =Drafts
show_prefix_option =false
default_sub_of_inbox =false
show_contain_subfolders_option =false
delimitador_opcional = .
delete_folder = true
Presione cualquier tecla para continuar... <-- ENTRAR
Configuración de SquirrelMail : Leer: config.php ( 1.4.0)
------------------------------------------ ---------------
Menú principal --
1. Preferencias de la organización
2. Configuración del servidor
3. Predeterminados de carpeta
4. Opciones generales
5. Temas
6. Libretas de direcciones
7. Mensaje del día (MOTD)
8. Complementos
9. Base de datos
10. Idiomas
D. Establecer configuraciones predefinidas para servidores IMAP específicos
C Activar colores
S Guardar datos
Q Salir
Comando >> <-- S
Configuración de SquirrelMail : Leer: config.php (1.4.0)
-------- -------------------------------------------------
Menú principal --
1. Preferencias de la organización
2. Configuración del servidor
3. Valores predeterminados de carpeta
4. Opciones generales
5. Temas
6. Libretas de direcciones
7. Mensaje de el día (MOTD)
8. Complementos
9. Base de datos
10. Idiomas
D. Establecer configuraciones predefinidas para servidores IMAP específicos
C Activar color
S Guardar datos
Q Salir
Comando >> S
Datos guardados en config.php
Presiona enter para continuar... <-- ENTRAR
Configuración de SquirrelMail : Leer: config.php (1.4.0)
---------- -----------------------------------------------
Menú principal --
1. Preferencias de la organización
2. Configuración del servidor
3. Predeterminados de carpeta
4. Opciones generales
5. Temas
6. Libretas de direcciones
7. Mensaje del día (MOTD)
8. Complementos
9. Base de datos
10. Idiomas
D. Conjunto predefinido configuración para servidores IMAP específicos
C Activar color
S Guardar datos
Q Salir
Comando >> <-- Q
Ahora configuraremos SquirrelMail para que pueda usarlo desde sus sitios web (creados a través de ISPConfig) usando los alias /squirrelmail o /webmail. Entonces, si su sitio web es www.example.com, podrá acceder a SquirrelMail usando www.example.com/squirrelmail o www.example.com/webmail.
La configuración de Apache de SquirrelMail está en el archivo /etc/squirrelmail/apache.conf, pero Apache no carga este archivo porque no está en el directorio /etc/apache2/conf.d/. Por lo tanto, creamos un enlace simbólico llamado squirrelmail.conf en el directorio /etc/apache2/conf.d/ que apunta a /etc/squirrelmail/apache.conf y recargamos Apache después:
cd /etc/apache2/conf.d/
ln -s ../../squirrelmail/apache.conf squirrelmail.conf
/etc/init.d/apache2 reload
Ahora abra /etc/apache2/conf.d/squirrelmail.conf...
vi /etc/apache2/conf.d/squirrelmail.conf
... y agregue las siguientes líneas al contenedor para asegurarse de que se use mod_php para acceder a SquirrelMail, independientemente del modo PHP que seleccione para su sitio web en ISPConfig:
[...]
<Directory /usr/share/squirrelmail>
Options FollowSymLinks
<IfModule mod_php5.c>
AddType application/x-httpd-php .php
php_flag magic_quotes_gpc Off
php_flag track_vars On
php_admin_flag allow_url_fopen Off
php_value include_path .
php_admin_value upload_tmp_dir /var/lib/squirrelmail/tmp
php_admin_value open_basedir /usr/share/squirrelmail:/etc/squirrelmail:/var/lib/squirrelmail:/etc/hostname:/etc/mailname:/var/spool/squirrelmail
php_flag register_globals off
</IfModule>
<IfModule mod_dir.c>
DirectoryIndex index.php
</IfModule>
# access to configtest is limited by default to prevent information leak
<Files configtest.php>
order deny,allow
deny from all
allow from 127.0.0.1
</Files>
</Directory>
[...] |
Cree el directorio /var/lib/squirrelmail/tmp...
mkdir /var/lib/squirrelmail/tmp
... y hacerlo propiedad del usuario www-data:
chown www-data /var/lib/squirrelmail/tmp
Vuelva a cargar Apache:
/etc/init.d/apache2 reload
Eso es todo:/etc/apache2/conf.d/squirrelmail.conf define un alias llamado /squirrelmail que apunta al directorio de instalación de SquirrelMail /usr/share/squirrelmail.
Ahora puede acceder a SquirrelMail desde su sitio web de la siguiente manera:
http://192.168.0.100/squirrelmail
http://www.example.com/squirrelmail
También puede acceder desde el panel de control de ISPConfig vhost (después de haber instalado ISPConfig, consulte el siguiente capítulo) de la siguiente manera (esto no necesita ninguna configuración en ISPConfig):
http://server1.example.com:8080/squirrelmail
Si desea utilizar el alias /webmail en lugar de /squirrelmail, simplemente abra /etc/apache2/conf.d/squirrelmail.conf...
vi /etc/apache2/conf.d/squirrelmail.conf
... y agregue la línea Alias /webmail /usr/share/squirrelmail:
Alias /squirrelmail /usr/share/squirrelmail
Alias /webmail /usr/share/squirrelmail
[...] |
Luego recargar Apache:
/etc/init.d/apache2 reload
Ahora puede acceder a Squirrelmail de la siguiente manera:
http://192.168.0.100/webmail
http://www.example.com/webmail
http://server1.example.com:8080/webmail (después de haber instalado ISPConfig, consulte la próximo capítulo)
Si desea definir un host virtual como webmail.example.com donde sus usuarios pueden acceder a SquirrelMail, debe agregar la siguiente configuración de host virtual a /etc/apache2/conf.d/squirrelmail.conf:
vi /etc/apache2/conf.d/squirrelmail.conf
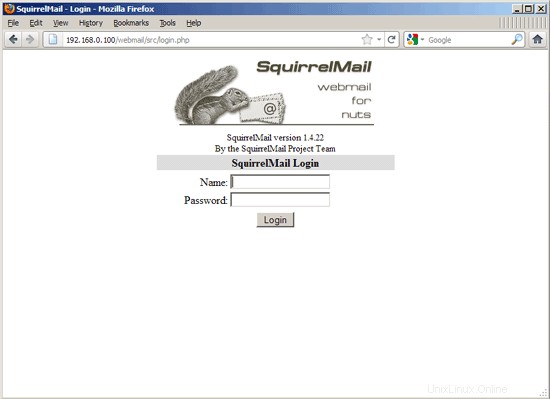
[...]
<VirtualHost 1.2.3.4:80>
DocumentRoot /usr/share/squirrelmail
ServerName webmail.example.com
</VirtualHost> |
Asegúrese de reemplazar 1.2.3.4 con la dirección IP correcta de su servidor. Por supuesto, debe haber un registro DNS para webmail.example.com que apunte a la dirección IP que usa en la configuración de vhost. También asegúrese de que el vhost webmail.example.com no exista en ISPConfig (¡de lo contrario, ambos vhosts interferirán entre sí!).
Ahora vuelve a cargar Apache...
/etc/init.d/apache2 reload
... ¡y puede acceder a SquirrelMail en http://webmail.example.com!
El servidor perfecto - Ubuntu 11.10 [ISPConfig 3] - Página 4
12 Instalar Postfix, Courier, Saslauthd, MySQL, rkhunter, binutils
Podemos instalar Postfix, Courier, Saslauthd, MySQL, rkhunter y binutils con un solo comando:
apt-get install postfix postfix-mysql postfix-doc mysql-client mysql-server courier-authdaemon courier-authlib-mysql courier-pop courier-pop-ssl courier-imap courier-imap-ssl libsasl2-2 libsasl2-modules libsasl2-modules-sql sasl2-bin libpam-mysql openssl getmail4 rkhunter binutils maildrop
Se le harán las siguientes preguntas:
Nueva contraseña para el usuario "root" de MySQL:<-- yourrootsqlpassword
Repita la contraseña para el usuario "root" de MySQL:<-- yourrootsqlpassword
¿Crear directorios para la administración basada en web? <-- No
Tipo general de configuración de correo:<-- Sitio de Internet
Nombre de correo del sistema:<-- server1.example.com
Se requiere certificado SSL <-- Ok
Si descubre (luego de haber configurado su primera cuenta de correo electrónico en ISPConfig) que no puede enviar correos electrónicos y obtiene el siguiente error en /var/log/mail.log...
SASL LOGIN authentication failed: no mechanism available
... vaya a https://www.howtoforge.com/forums/showpost.php?p=265831&postcount=25 para saber cómo resolver el problema.
Queremos que MySQL escuche en todas las interfaces, no solo en localhost, por lo tanto, editamos /etc/mysql/my.cnf y comentamos la línea bind-address =127.0.0.1:
vi /etc/mysql/my.cnf
[...]
# Instead of skip-networking the default is now to listen only on
# localhost which is more compatible and is not less secure.
#bind-address = 127.0.0.1
[...] |
Luego reiniciamos MySQL:
/etc/init.d/mysql restart
Ahora verifique que la red esté habilitada. Ejecutar
netstat -tap | grep mysql
La salida debería verse así:
[email protected]:~# netstat -tap | grep mysql
tcp 0 0 *:mysql *:* LISTEN 22355/mysqld
[email protected]:~#
Durante la instalación, los certificados SSL para IMAP-SSL y POP3-SSL se crean con el nombre de host localhost. Para cambiar esto al nombre de host correcto (server1.example.com en este tutorial), elimine los certificados...
cd /etc/courier
rm -f /etc/courier/imapd.pem
rm -f /etc/courier/pop3d.pem
... y modifique los siguientes dos archivos; reemplace CN=localhost con CN=server1.example.com (también puede modificar los otros valores, si es necesario):
vi /etc/courier/imapd.cnf
[...]
CN=server1.example.com
[...] |
vi /etc/courier/pop3d.cnf
[...]
CN=server1.example.com
[...] |
Luego vuelva a crear los certificados...
mkimapdcert
mkpop3dcert
... y reinicie Courier-IMAP-SSL y Courier-POP3-SSL:
/etc/init.d/courier-imap-ssl restart
/etc/init.d/courier-pop-ssl restart
13 Instale Amavisd-new, SpamAssassin y Clamav
Para instalar amavisd-new, SpamAssassin y ClamAV, ejecutamos
apt-get install amavisd-new spamassassin clamav clamav-daemon zoo unzip bzip2 arj nomarch lzop cabextract apt-listchanges libnet-ldap-perl libauthen-sasl-perl clamav-docs daemon libio-string-perl libio-socket-ssl-perl libnet-ident-perl zip libnet-dns-perl
La configuración de ISPConfig 3 usa amavisd que carga la biblioteca de filtros SpamAssassin internamente, por lo que podemos detener SpamAssassin para liberar RAM:
/etc/init.d/spamassassin stop
update-rc.d -f spamassassin remove
14 Instale Apache2, PHP5, phpMyAdmin, FCGI, suExec, Pear y mcrypt
Apache2, PHP5, phpMyAdmin, FCGI, suExec, Pear y mcrypt se pueden instalar de la siguiente manera:
apt-get install apache2 apache2.2-common apache2-doc apache2-mpm-prefork apache2-utils libexpat1 ssl-cert libapache2-mod-php5 php5 php5-common php5-gd php5-mysql php5-imap phpmyadmin php5-cli php5-cgi libapache2-mod-fcgid apache2-suexec php-pear php-auth php5-mcrypt mcrypt php5-imagick imagemagick libapache2-mod-suphp libruby libapache2-mod-ruby
Verá la siguiente pregunta:
Servidor web para reconfigurar automáticamente:<-- apache2
¿Configurar base de datos para phpmyadmin con dbconfig-common? <-- No
Then run the following command to enable the Apache modules suexec, rewrite, ssl, actions, and include (plus dav, dav_fs, and auth_digest if you want to use WebDAV):
a2enmod suexec rewrite ssl actions include
a2enmod dav_fs dav auth_digest
Restart Apache afterwards:
/etc/init.d/apache2 restart
If you want to host Ruby files with the extension .rb on your web sites created through ISPConfig, you must comment out the line application/x-ruby rb in /etc/mime.types:
vi /etc/mime.types
[...]
#application/x-ruby rb
[...] |
(This is needed only for .rb files; Ruby files with the extension .rbx work out of the box.)
Restart Apache afterwards:
/etc/init.d/apache2 restart
15 Install PureFTPd And Quota
PureFTPd and quota can be installed with the following command:
apt-get install pure-ftpd-common pure-ftpd-mysql quota quotatool
Edit the file /etc/default/pure-ftpd-common...
vi /etc/default/pure-ftpd-common
... and make sure that the start mode is set to standalone and set VIRTUALCHROOT=true:
[...]
STANDALONE_OR_INETD=standalone
[...]
VIRTUALCHROOT=true
[...] |
Now we configure PureFTPd to allow FTP and TLS sessions. FTP is a very insecure protocol because all passwords and all data are transferred in clear text. By using TLS, the whole communication can be encrypted, thus making FTP much more secure.
If you want to allow FTP and TLS sessions, run
echo 1 > /etc/pure-ftpd/conf/TLS
In order to use TLS, we must create an SSL certificate. I create it in /etc/ssl/private/, therefore I create that directory first:
mkdir -p /etc/ssl/private/
Afterwards, we can generate the SSL certificate as follows:
openssl req -x509 -nodes -days 7300 -newkey rsa:2048 -keyout /etc/ssl/private/pure-ftpd.pem -out /etc/ssl/private/pure-ftpd.pem
Country Name (2 letter code) [AU]:<-- Enter your Country Name (e.g., "DE").
State or Province Name (full name) [Some-State]:<-- Enter your State or Province Name.
Locality Name (eg, city) []:<-- Enter your City.
Organization Name (eg, company) [Internet Widgits Pty Ltd]:<-- Enter your Organization Name (e.g., the name of your company).
Organizational Unit Name (eg, section) []:<-- Enter your Organizational Unit Name (e.g. "IT Department").
Common Name (eg, YOUR name) []:<-- Enter the Fully Qualified Domain Name of the system (e.g. "server1.example.com").
Email Address []:<-- Enter your Email Address.
Change the permissions of the SSL certificate:
chmod 600 /etc/ssl/private/pure-ftpd.pem
Then restart PureFTPd:
/etc/init.d/pure-ftpd-mysql restart
Edit /etc/fstab. Mine looks like this (I added ,usrjquota=quota.user,grpjquota=quota.group,jqfmt=vfsv0 to the partition with the mount point /):
vi /etc/fstab
# /etc/fstab: static file system information.
#
# Use 'blkid' to print the universally unique identifier for a
# device; this may be used with UUID= as a more robust way to name devices
# that works even if disks are added and removed. See fstab(5).
#
# <file system> <mount point> <type> <options> <dump> <pass>
proc /proc proc nodev,noexec,nosuid 0 0
/dev/mapper/server1-root / ext4 errors=remount-ro,usrjquota=quota.user,grpjquota=quota.group,jqfmt=vfsv0 0 1
# /boot was on /dev/sda1 during installation
UUID=6fbce377-c3d6-4eb3-8299-88797d4ad18d /boot ext2 defaults 0 2
/dev/mapper/server1-swap_1 none swap sw 0 0
/dev/fd0 /media/floppy0 auto rw,user,noauto,exec,utf8 0 0 |
To enable quota, run these commands:
mount -o remount /
quotacheck -avugm
quotaon -avug
16 Install BIND DNS Server
BIND can be installed as follows:
apt-get install bind9 dnsutils
17 Install Vlogger, Webalizer, And AWstats
Vlogger, webalizer, and AWstats can be installed as follows:
apt-get install vlogger webalizer awstats geoip-database
Open /etc/cron.d/awstats afterwards...
vi /etc/cron.d/awstats
... and comment out both cron jobs in that file:
#*/10 * * * * www-data [ -x /usr/share/awstats/tools/update.sh ] && /usr/share/awstats/tools/update.sh
# Generate static reports:
#10 03 * * * www-data [ -x /usr/share/awstats/tools/buildstatic.sh ] && /usr/share/awstats/tools/buildstatic.sh |
18 Install Jailkit
Jailkit is needed only if you want to chroot SSH users. It can be installed as follows (important:Jailkit must be installed before ISPConfig - it cannot be installed afterwards!):
apt-get install build-essential autoconf automake1.9 libtool flex bison debhelper
cd /tmp
wget http://olivier.sessink.nl/jailkit/jailkit-2.14.tar.gz
tar xvfz jailkit-2.14.tar.gz
cd jailkit-2.14
./debian/rules binary
If the last command gives you an error like...
x86_64-linux-gnu-gcc -lpthread -o jk_socketd jk_socketd.o jk_lib.o utils.o iniparser.o
jk_socketd.o: In function `main':
/tmp/jailkit-2.14/src/jk_socketd.c:474: undefined reference to `pthread_create'
collect2: ld returned 1 exit status
make[2]: *** [jk_socketd] Error 1
make[2]: Leaving directory `/tmp/jailkit-2.14/src'
make[1]: *** [all] Error 2
make[1]: Leaving directory `/tmp/jailkit-2.14'
make: *** [build-arch-stamp] Error 2
[email protected]:/tmp/jailkit-2.14#
... please install gcc-4.4:
apt-get install gcc-4.4
Now take a look at /usr/bin/gcc:
ls -l /usr/bin/gcc*
/usr/bin/gcc should currently be a symlink to /usr/bin/gcc-4.6:
[email protected]:/tmp/jailkit-2.14# ls -l /usr/bin/gcc*
lrwxrwxrwx 1 root root 7 2011-08-14 09:16 /usr/bin/gcc -> gcc-4.6
-rwxr-xr-x 1 root root 259232 2011-10-05 23:56 /usr/bin/gcc-4.4
-rwxr-xr-x 1 root root 349120 2011-09-16 16:31 /usr/bin/gcc-4.6
[email protected]:/tmp/jailkit-2.14#
We change this now so that /usr/bin/gcc links to /usr/bin/gcc-4.4:
ln -sf /usr/bin/gcc-4.4 /usr/bin/gcc
Now build Jailkit as follows:
make clean
./configure
make
make clean
./debian/rules binary
If the ./debian/rules binary command doesn't give you an error this time, you can now install the Jailkit .deb package as follows:
cd ..
dpkg -i jailkit_2.14-1_*.deb
rm -rf jailkit-2.14*
Finally, we change the /usr/bin/gcc symlink so that it points to /usr/bin/gcc-4.6 again:
ln -sf /usr/bin/gcc-4.6 /usr/bin/gcc
The Perfect Server - Ubuntu 11.10 [ISPConfig 3] - Page 5
4 Get root Privileges
After the reboot you can login with your previously created username (e.g. administrator). Because we must run all the steps from this tutorial with root privileges, we can either prepend all commands in this tutorial with the string sudo, or we become root right now by typing
sudo su
(You can as well enable the root login by running
sudo passwd root
and giving root a password. You can then directly log in as root, but this is frowned upon by the Ubuntu developers and community for various reasons. See http://ubuntuforums.org/showthread.php?t=765414.)
5 Install The SSH Server (Optional)
If you did not install the OpenSSH server during the system installation, you can do it now:
apt-get install ssh openssh-server
From now on you can use an SSH client such as PuTTY and connect from your workstation to your Ubuntu 11.10 server and follow the remaining steps from this tutorial.
6 Install vim-nox (Optional)
I'll use vi as my text editor in this tutorial. The default vi program has some strange behaviour on Ubuntu and Debian; to fix this, we install vim-nox:
apt-get install vim-nox
(You don't have to do this if you use a different text editor such as joe or nano.)
Because the Ubuntu installer has configured our system to get its network settings via DHCP, we have to change that now because a server should have a static IP address. Edit /etc/network/interfaces and adjust it to your needs (in this example setup I will use the IP address 192.168.0.100 ):
vi /etc/network/interfaces
# This file describes the network interfaces available on your system
# and how to activate them. For more information, see interfaces(5).
# The loopback network interface
auto lo
iface lo inet loopback
# The primary network interface
auto eth0
iface eth0 inet static
address 192.168.0.100
netmask 255.255.255.0
network 192.168.0.0
broadcast 192.168.0.255
gateway 192.168.0.1 |
Then restart your network:
/etc/init.d/networking restart
Then edit /etc/hosts. Make it look like this:
vi /etc/hosts
127.0.0.1 localhost.localdomain localhost
192.168.0.100 server1.example.com server1
# The following lines are desirable for IPv6 capable hosts
::1 ip6-localhost ip6-loopback
fe00::0 ip6-localnet
ff00::0 ip6-mcastprefix
ff02::1 ip6-allnodes
ff02::2 ip6-allrouters |
Now run
echo server1.example.com > /etc/hostname
/etc/init.d/hostname restart
Afterwards, run
hostname
hostname -f
Both should show server1.example.com now.
8 Edit /etc/apt/sources.list And Update Your Linux Installation
Edit /etc/apt/sources.list. Comment out or remove the installation CD from the file and make sure that the universe and multiverse repositories are enabled. Debería verse así:
vi /etc/apt/sources.list
#
# deb cdrom:[Ubuntu-Server 11.10 _Oneiric Ocelot_ - Release amd64 (20111011)]/ dists/oneiric/main/binary-i386/
# deb cdrom:[Ubuntu-Server 11.10 _Oneiric Ocelot_ - Release amd64 (20111011)]/ dists/oneiric/restricted/binary-i386/
# deb cdrom:[Ubuntu-Server 11.10 _Oneiric Ocelot_ - Release amd64 (20111011)]/ oneiric main restricted
#deb cdrom:[Ubuntu-Server 11.10 _Oneiric Ocelot_ - Release amd64 (20111011)]/ dists/oneiric/main/binary-i386/
#deb cdrom:[Ubuntu-Server 11.10 _Oneiric Ocelot_ - Release amd64 (20111011)]/ dists/oneiric/restricted/binary-i386/
#deb cdrom:[Ubuntu-Server 11.10 _Oneiric Ocelot_ - Release amd64 (20111011)]/ oneiric main restricted
# See http://help.ubuntu.com/community/UpgradeNotes for how to upgrade to
# newer versions of the distribution.
deb http://de.archive.ubuntu.com/ubuntu/ oneiric main restricted
deb-src http://de.archive.ubuntu.com/ubuntu/ oneiric main restricted
## Major bug fix updates produced after the final release of the
## distribution.
deb http://de.archive.ubuntu.com/ubuntu/ oneiric-updates main restricted
deb-src http://de.archive.ubuntu.com/ubuntu/ oneiric-updates main restricted
## N.B. software from this repository is ENTIRELY UNSUPPORTED by the Ubuntu
## team. Also, please note that software in universe WILL NOT receive any
## review or updates from the Ubuntu security team.
deb http://de.archive.ubuntu.com/ubuntu/ oneiric universe
deb-src http://de.archive.ubuntu.com/ubuntu/ oneiric universe
deb http://de.archive.ubuntu.com/ubuntu/ oneiric-updates universe
deb-src http://de.archive.ubuntu.com/ubuntu/ oneiric-updates universe
## N.B. software from this repository is ENTIRELY UNSUPPORTED by the Ubuntu
## team, and may not be under a free licence. Please satisfy yourself as to
## your rights to use the software. Also, please note that software in
## multiverse WILL NOT receive any review or updates from the Ubuntu
## security team.
deb http://de.archive.ubuntu.com/ubuntu/ oneiric multiverse
deb-src http://de.archive.ubuntu.com/ubuntu/ oneiric multiverse
deb http://de.archive.ubuntu.com/ubuntu/ oneiric-updates multiverse
deb-src http://de.archive.ubuntu.com/ubuntu/ oneiric-updates multiverse
## N.B. software from this repository may not have been tested as
## extensively as that contained in the main release, although it includes
## newer versions of some applications which may provide useful features.
## Also, please note that software in backports WILL NOT receive any review
## or updates from the Ubuntu security team.
deb http://de.archive.ubuntu.com/ubuntu/ oneiric-backports main restricted universe multiverse
deb-src http://de.archive.ubuntu.com/ubuntu/ oneiric-backports main restricted universe multiverse
deb http://security.ubuntu.com/ubuntu oneiric-security main restricted
deb-src http://security.ubuntu.com/ubuntu oneiric-security main restricted
deb http://security.ubuntu.com/ubuntu oneiric-security universe
deb-src http://security.ubuntu.com/ubuntu oneiric-security universe
deb http://security.ubuntu.com/ubuntu oneiric-security multiverse
deb-src http://security.ubuntu.com/ubuntu oneiric-security multiverse
## Uncomment the following two lines to add software from Canonical's
## 'partner' repository.
## This software is not part of Ubuntu, but is offered by Canonical and the
## respective vendors as a service to Ubuntu users.
# deb http://archive.canonical.com/ubuntu oneiric partner
# deb-src http://archive.canonical.com/ubuntu oneiric partner
## Uncomment the following two lines to add software from Ubuntu's
## 'extras' repository.
## This software is not part of Ubuntu, but is offered by third-party
## developers who want to ship their latest software.
# deb http://extras.ubuntu.com/ubuntu oneiric main
# deb-src http://extras.ubuntu.com/ubuntu oneiric main |
Entonces corre
apt-get update
to update the apt package database and
apt-get upgrade
to install the latest updates (if there are any). If you see that a new kernel gets installed as part of the updates, you should reboot the system afterwards:
reboot
9 Change The Default Shell
/bin/sh is a symlink to /bin/dash, however we need /bin/bash, not /bin/dash. Therefore we do this:
dpkg-reconfigure dash
Use dash as the default system shell (/bin/sh)? <-- No
If you don't do this, the ISPConfig installation will fail.
10 Disable AppArmor
AppArmor es una extensión de seguridad (similar a SELinux) que debería proporcionar seguridad extendida. En mi opinión, no lo necesitas para configurar un sistema seguro, y suele causar más problemas que ventajas (piensa en ello después de haber realizado una semana de resolución de problemas porque algún servicio no estaba funcionando como se esperaba, y luego descubra que todo estaba bien, solo AppArmor estaba causando el problema). Por lo tanto, lo deshabilito (esto es obligatorio si desea instalar ISPConfig más adelante).
Podemos desactivarlo así:
/etc/init.d/apparmor stop
update-rc.d -f apparmor remove
apt-get remove apparmor apparmor-utils
11 Synchronize the System Clock
It is a good idea to synchronize the system clock with an NTP (n etwork t ime p rotocol) server over the Internet. Simplemente ejecuta
apt-get install ntp ntpdate
and your system time will always be in sync.
The Perfect Server - Ubuntu 11.10 [ISPConfig 3] - Page 6
Enter the hostname. In this example, my system is called server1.example.com , so I enter server1 :
Please check if the installer detected your time zone correctly. If so, select Yes, otherwise No:
Now you have to partition your hard disk. For simplicity's sake I select Guided - use entire disk and set up LVM - this will create one volume group with two logical volumes, one for the / file system and another one for swap (of course, the partitioning is totally up to you - if you know what you're doing, you can also set up your partitions manually).
Select the disk that you want to partition:
When you're asked Write the changes to disks and configure LVM?, select Yes:
If you have selected Guided - use entire disk and set up LVM, the partitioner will create one big volume group that uses all the disk space. You can now specify how much of that disk space should be used by the logical volumes for / and swap. It makes sense to leave some space unused so that you can later on expand your existing logical volumes or create new ones - this gives you more flexibility.
When you're finished, hit Yes when you're asked Write the changes to disks?:
Afterwards, your new partitions are being created and formatted:
Now the base system is being installed:
Create a user, for example the user Administrator with the user name administrator (don't use the user name admin as it is a reserved name on Ubuntu 11.10):
I don't need an encrypted private directory, so I choose No here:
Next the package manager apt gets configured. Leave the HTTP proxy line empty unless you're using a proxy server to connect to the Internet:
I'm a little bit old-fashioned and like to update my servers manually to have more control, therefore I select No automatic updates. Of course, it's up to you what you select here:
We need a DNS, mail, and LAMP server, but nevertheless I don't select any of them now because I like to have full control over what gets installed on my system. We will install the needed packages manually later on. The only item I select here is OpenSSH server so that I can immediately connect to the system with an SSH client such as PuTTY after the installation has finished:
The installation continues:
The GRUB boot loader gets installed:
Select Yes when you are asked Install the GRUB boot loader to the master boot record?:
The base system installation is now finished. Remove the installation CD from the CD drive and hit Continue to reboot the system:
On to the next step...