XWiki es un software wiki gratuito y de código abierto escrito en Java que se ejecuta en un contenedor de servlet como Tomcat, JBoss, etc. XWiki usa bases de datos como MySQL o PostgreSQL para almacenar su información. XWiki nos permite almacenar datos estructurados y ejecutar el script del servidor dentro de la interfaz wiki. Puede alojar varios blogs y administrar o ver sus archivos y carpetas con XWiki.
XWiki viene con muchas características, algunas de ellas se enumeran a continuación:
- Admite control de versiones y ACL.
- Le permite buscar en la wiki completa usando comodines.
- Exporte fácilmente páginas wiki a PDF, ODT, RTF, XML y HTML.
- Organización de contenido e importación de contenido.
- Edición de página usando el editor WYSIWYG.
Requisitos
- Un servidor con Ubuntu 16.04.
- Un usuario no root con privilegios sudo.
Actualizar el Sistema
Antes de comenzar, deberá actualizar el repositorio de Ubuntu a la última versión. Puedes hacer esto usando el siguiente comando:
sudo apt-get update -y
sudo apt-get upgrade -y
Una vez que el repositorio esté actualizado, reinicie el sistema para aplicar todas las actualizaciones.
Instalar Java
Xwiki es una aplicación basada en Java, por lo que primero deberá instalar Java 8. Por defecto, Java 8 no está disponible en el repositorio de Ubuntu. Puede instalar Java 8 agregando el repositorio PPA webupd8team a su sistema.
Primero, agregue el PPA ejecutando el siguiente comando:
sudo add-apt-repository ppa:webupd8team/java
A continuación, actualice el repositorio con el siguiente comando:
sudo apt-get update -y
Una vez que el repositorio esté actualizado, puede instalar Java 8 ejecutando el siguiente comando:
sudo apt-get install oracle-java8-installer -y
Después de instalar Java, puede verificar la versión de Java con el siguiente comando:
java -version
Debería ver el siguiente resultado:
Java version "1.8.0_91"
Java(TM) SE Runtime Environment (build 1.8.0_91-b14)
Java HotSpot(TM) 64-Bit Server VM (build 25.91-b14, mixed mode)
Descargar e Instalar Xwiki
A continuación, deberá descargar el archivo de instalación proporcionado por XWiki. Puedes descargarlo usando el siguiente comando:
wget http://download.forge.ow2.org/xwiki/xwiki-enterprise-installer-generic-8.1-standard.jar
Una vez que se completa la descarga, puede instalar el archivo del paquete descargado usando el comando java como se muestra a continuación:
sudo java -jar xwiki-enterprise-installer-generic-8.1-standard.jar
Debería ver el siguiente resultado:
28 Jan, 2018 6:57:37 PM INFO: Logging initialized at level 'INFO'
28 Jan, 2018 6:57:37 PM INFO: Commandline arguments:
28 Jan, 2018 6:57:37 PM INFO: Detected platform: ubuntu_linux,version=3.19.0-25-generic,arch=x64,symbolicName=null,javaVersion=1.7.0_151
28 Jan, 2018 6:57:37 PM WARNING: Failed to determine hostname and IP address
Welcome to the installation of XWiki Enterprise 8.1!
The homepage is at: http://xwiki.org/

Press 1 to continue, 2 to quit, 3 to redisplay
Ahora, presiona 1 para continuar con la instalación, debería ver el siguiente resultado:
Please read the following information:

 XWiki Enterprise - Readme


 XWiki Enterprise Overview
XWiki Enterprise is a second generation Wiki engine, features professional features like
 Wiki, Blog, Comments, User Rights, LDAP Authentication, PDF Export, and a lot more.
XWiki Enterprise also includes an advanced form and scripting engine which makes it an ideal
 development environment for constructing data-based intranet applications. It has powerful
 extensibility features, supports scripting, extensions and is based on a highly modular
 architecture. The scripting engine allows to access a powerful API for accessing the XWiki
 repository in read and write mode.
XWiki Enterprise is used by major companies around the world and has strong
 Support for a professional usage of XWiki.
 Pointers
Here are some pointers to get you started with XWiki once you have finished installing it:

The documentation can be found on the XWiki.org web site
If you notice any issue please file a an issue in our issue tracker
If you wish to talk to XWiki users or developers please use our
 Mailing lists & Forum
You can also access XWiki's
 source code
If you need commercial support please visit the
 Support page


Press 1 to continue, 2 to quit, 3 to redisplay
Ahora, presiona 1 para continuar con la instalación, debería ver el siguiente resultado:
See the NOTICE file distributed with this work for additional
information regarding copyright ownership.
This is free software; you can redistribute it and/or modify it
under the terms of the GNU Lesser General Public License as
published by the Free Software Foundation; either version 2.1 of
the License, or (at your option) any later version.
This software is distributed in the hope that it will be useful,
but WITHOUT ANY WARRANTY; without even the implied warranty of
MERCHANTABILITY or FITNESS FOR A PARTICULAR PURPOSE. See the GNU
Lesser General Public License for more details.
You should have received a copy of the GNU Lesser General Public
License along with this software; if not, write to the Free
Software Foundation, Inc., 51 Franklin St, Fifth Floor, Boston, MA
02110-1301 USA, or see the FSF site: http://www.fsf.org.

Press 1 to accept, 2 to reject, 3 to redisplay
Ahora, presiona 1 para aceptar el acuerdo de licencia, debería ver el siguiente resultado:
Select the installation path:  [/usr/local/XWiki Enterprise 8.1]

Press 1 to continue, 2 to quit, 3 to redisplay
Ahora, presiona enter y presiona 1 para seleccionar la ruta de instalación predeterminada, debería ver el siguiente resultado:
  [x] Pack 'Core' required
????????????????????????????????????????????????????????????????????????????????
  [x] Include optional pack 'Default Wiki'
????????????????????????????????????????????????????????????????????????????????
Enter Y for Yes, N for No:
Y
Press 1 to continue, 2 to quit, 3 to redisplay
Ahora, presiona Y y presiona 1 para continuar con la instalación, debería ver el siguiente resultado:
[ Starting to unpack ]
[ Processing package: Core (1/2) ]
[ Processing package: Default Wiki (2/2) ]
[ Unpacking finished ]
Ahora, se le pedirá que cree accesos directos para el usuario, puede presionar 'Y' para agregarlos. A continuación, se le pedirá que genere un script de instalación automática, simplemente presione Entrar para seleccionar el valor predeterminado, una vez que finalice la instalación, debería ver el siguiente resultado:
????????????????????????????????????????????????????????????????????????????????????????????????????????????????????????????????????????????????
Generate an automatic installation script
????????????????????????????????????????????????????????????????????????????????????????????????????????????????????????????????????????????????
Enter Y for Yes, N for No:
Y
Select the installation script (path must be absolute)[/usr/local/XWiki Enterprise 8.1/auto-install.xml]

Installation was successful
application installed on /usr/local/XWiki Enterprise 8.1
[ Writing the uninstaller data ... ]
[ Console installation done ]
Ahora, XWiki está instalado en su sistema, es hora de iniciar el script de inicio de XWiki como se muestra a continuación:
cd /usr/local/XWiki Enterprise 8.1
sudo bash start_xwiki.sh
Por favor, espere un tiempo para iniciar los procesos. Ahora, deberías ver algunos mensajes en la terminal como se muestra a continuación:
start_xwiki.sh: 79: start_xwiki.sh:
Starting Jetty on port 8080, please wait...
2018-01-28 19:12:41.842:INFO::main: Logging initialized @1266ms
2018-01-28 19:12:42.905:INFO:oejs.Server:main: jetty-9.2.13.v20150730
2018-01-28 19:12:42.956:INFO:oejs.AbstractNCSARequestLog:main: Opened /usr/local/XWiki Enterprise 8.1/data/logs/2018_01_28.request.log
2018-01-28 19:12:42.965:INFO:oejdp.ScanningAppProvider:main: Deployment monitor [file:/usr/local/XWiki%20Enterprise%208.1/jetty/contexts/] at interval 0
2018-01-28 19:13:31,485 [main] INFO  o.x.s.s.i.EmbeddedSolrInstance - Starting embedded Solr server...
2018-01-28 19:13:31,507 [main] INFO  o.x.s.s.i.EmbeddedSolrInstance - Using Solr home directory: [data/solr]
2018-01-28 19:13:43,371 [main] INFO  o.x.s.s.i.EmbeddedSolrInstance - Started embedded Solr server.
2018-01-28 19:13:46.556:INFO:oejsh.ContextHandler:main: Started [email protected]{/xwiki,file:/usr/local/XWiki%20Enterprise%208.1/webapps/xwiki/,AVAILABLE}{/xwiki}
2018-01-28 19:13:46.697:INFO:oejsh.ContextHandler:main: Started [email protected]{/,file:/usr/local/XWiki%20Enterprise%208.1/webapps/root/,AVAILABLE}{/root}
2018-01-28 19:13:46.776:INFO:oejs.ServerConnector:main: Started [email protected]{HTTP/1.1}{0.0.0.0:8080}
XWiki ahora está funcionando, es hora de acceder a la interfaz web de XWiki.
Acceder a XWiki
XWiki se ejecuta en el puerto 8080 , por lo que deberá permitir el puerto 8080 a través del firewall. Primero, habilite el firewall UFW con el siguiente comando:
sudo ufw enable
A continuación, permita el puerto 8080 a través del cortafuegos UFW con el siguiente comando:
sudo ufw allow 8080/tcp
A continuación, vuelva a cargar las reglas del cortafuegos para aplicar todos los cambios ejecutando el siguiente comando:
sudo ufw reload
Puede obtener el estado del cortafuegos UFW con el siguiente comando:
sudo ufw status
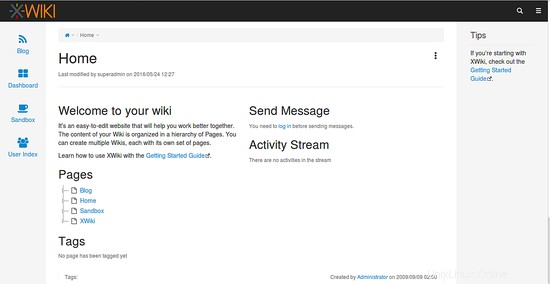
Ahora, abre tu navegador web y escribe la URL http://your-server-ip:8080 , será redirigido a la página de inicio de XWiki como se muestra a continuación:
Puede detener el servidor XWiki en cualquier momento presionando Ctrl + C botón en la terminal.
Conclusión
¡Felicidades! Ha instalado y configurado con éxito XWiki en el servidor Ubuntu 16.04. Espero que ahora pueda alojar fácilmente su propio sitio wiki usando XWiki en el servidor Ubuntu 16.04. Para obtener más información, puede consultar la página de documentación oficial de XWiki en https://www.xwiki.org/xwiki/bin/view/Documentation/. Siéntase libre de comentarme si tiene alguna pregunta.