Introducción
ONLYOFFICE es un software gratuito de código abierto que permite a los equipos administrar proyectos, relaciones con los clientes y documentos en un solo lugar. Aunque Ubuntu es la distribución de Linux más conocida, no queremos que los usuarios de otras distribuciones se sientan excluidos. Esta guía mostrará los pasos a seguir para instalar el sistema colaborativo ONLYOFFICE en Red Hat/CentOS.
Requisitos del sistema
Para que ONLYOFFICE funcione correctamente, su máquina debe cumplir con algunos requisitos del sistema y tener algunos componentes adicionales instalados:
- RAM:2 GB o más
- Archivo de intercambio:al menos 2 GB
- HDD:al menos 2 GB de espacio libre
- mono:versión 3.2 o posterior
- MySQL:versión 5.6 o posterior
- nginx
Instale algunos requisitos previos y habilite repositorios adicionales para (para CentOS 7):
yum -y install nano yum-utils
yum -y install epel-release
yum install http://dev.mysql.com/get/mysql-community-release-el7-5.noarch.rpm
Los componentes que se encuentran en el repositorio del sistema se instalarán automáticamente en la instalación de ONLYOFFICE mediante el comando yum install.
Si faltan algunos de estos componentes, siga las instrucciones de sus sitios web oficiales.
Habilite el servicio MySQL e inicie mysql:
systemctl enable mysqld.service
systemctl start mysqld.service
Establezca una contraseña de MySQL (la contraseña inicial está vacía) y elimine la base de datos de prueba:
mysql_secure_installation
El comando lo guiará de forma interactiva a través del proceso de seguridad de mysql como se describe a continuación:
[[email protected] ~]# mysql_secure_installation
NOTE: RUNNING ALL PARTS OF THIS SCRIPT IS RECOMMENDED FOR ALL MySQL
 SERVERS IN PRODUCTION USE! PLEASE READ EACH STEP CAREFULLY!
In order to log into MySQL to secure it, we'll need the current
password for the root user. If you've just installed MySQL, and
you haven't set the root password yet, the password will be blank,
so you should just press enter here.
Enter current password for root (enter for none):
OK, successfully used password, moving on...
Setting the root password ensures that nobody can log into the MySQL
root user without the proper authorisation.
Set root password? [Y/n] Y
New password:
Re-enter new password:
Password updated successfully!
Reloading privilege tables..
 ... Success!
By default, a MySQL installation has an anonymous user, allowing anyone
to log into MySQL without having to have a user account created for
them. This is intended only for testing, and to make the installation
go a bit smoother. You should remove them before moving into a
production environment.
Remove anonymous users? [Y/n] y
 ... Success!
Normally, root should only be allowed to connect from 'localhost'. This
ensures that someone cannot guess at the root password from the network.
Disallow root login remotely? [Y/n] y
 ... Success!
By default, MySQL comes with a database named 'test' that anyone can
access. This is also intended only for testing, and should be removed
before moving into a production environment.
Remove test database and access to it? [Y/n] y
 - Dropping test database...
ERROR 1008 (HY000) at line 1: Can't drop database 'test'; database doesn't exist
 ... Failed! Not critical, keep moving...
 - Removing privileges on test database...
 ... Success!
Reloading the privilege tables will ensure that all changes made so far
will take effect immediately.
Reload privilege tables now? [Y/n] y
 ... Success!
All done! If you've completed all of the above steps, your MySQL
installation should now be secure.
Thanks for using MySQL!
Cleaning up...
Instalando ONLYOFFICE
Paso 1. Abra la Terminal usando Ctrl+Alt+T
Paso 2. Agregue el repositorio yum ONLYOFFICE.
Para hacerlo, cree /etc/yum.repos.d /onlyoffice.repo archivo con el siguiente contenido:
nano /etc/yum.repos.d/onlyoffice.repo
[onlyoffice]
name=onlyoffice repo
baseurl=http://download.onlyoffice.com/repo/centos/noarch/
gpgcheck=0
enabled=1
Paso 3. Instala ONLYOFFICE desde el repositorio
Simplemente ejecute el siguiente comando:
sudo yum install onlyoffice
Configurando ONLYOFFICE
Antes de iniciar ONLYOFFICE por primera vez, es necesario crear la base de datos y configurar la conexión a ella.
Para ello, ejecute el script de configuración:
chmod +x /var/www/onlyoffice/configure.sh
/var/www/onlyoffice/configure.sh
Le pedirá de manera interactiva que ingrese los parámetros de conexión de MySQL, cree la base de datos, actualice los archivos de configuración y ejecute todos los servicios.
Tenga en cuenta:el script no crea usuarios para la base de datos y no cambia las contraseñas de los usuarios existentes.
[[email protected] ~]# /var/www/onlyoffice/configure.sh
-bash: /var/www/onlyoffice/configure.sh: Permission denied
[[email protected] ~]# chmod +x /var/www/onlyoffice/configure.sh
[[email protected] ~]# /var/www/onlyoffice/configure.sh
Configuring MySQL access...
Host: localhost
Database name: onlyoffice
User: root
Password: <- enter the mysql root password here
Trying to establish MySQL connection... OK
Installing MySQL database... Warning: Using a password on the command line interface can be insecure.
Warning: Using a password on the command line interface can be insecure.
Warning: Using a password on the command line interface can be insecure.
Warning: Using a password on the command line interface can be insecure.
OK
Restarting services... OK
Luego cambia la línea
listen 80 default_server;
a
listen 81 default_server;
en el archivo /etc/nginx/nginx.conf ya que ONLYOFFICE define su propio host virtual predeterminado en el puerto 80 y habilita e inicia nginx:
nano /etc/nginx/nginx.conf
Luego habilite e inicie nginx:
systemctl enable nginx.service
systemctl start nginx.service
Ejecutando ONLYOFFICE
Para abrir su oficina en el navegador web, ingrese localhost (http://127.0.0.1) o la IP externa de su servidor si no tiene un escritorio instalado en la barra de direcciones de su navegador. Se abrirá la página de bienvenida:
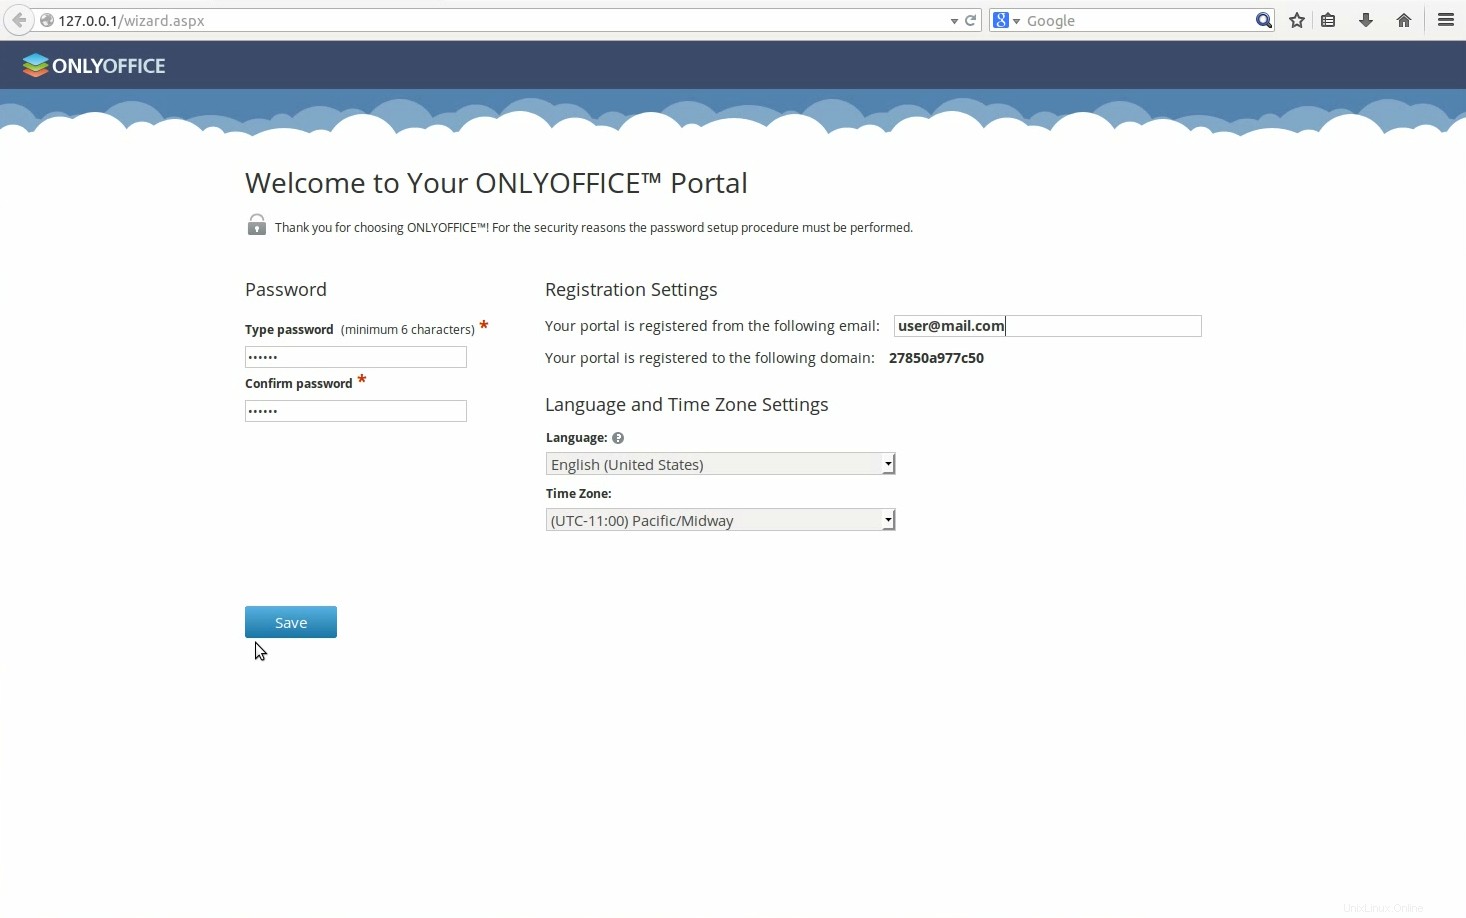
Ingrese una contraseña y especifique la dirección de correo electrónico que usará para acceder a su ONLYOFFICE la próxima vez.
¡Listo! ¡Puedes empezar a trabajar!
Consejos y trucos
- Sugerencia 1. ONLYOFFICE usa Mono v. 3.2 o posterior, para instalarlo consulte las instrucciones oficiales. Si está instalado para averiguar su versión actual, ejecute el siguiente comando:mono --version.
- Sugerencia 2. Para instalar la última versión de nginx, siga las instrucciones oficiales.
- Consejo 3. ONLYOFFICE requiere MySQL versión 5.6 o posterior. Para instalarlo en su máquina, consulte las instrucciones oficiales.
- Sugerencia 4. Una vez instalado ONLYOFFICE, es posible que deba personalizarlo y administrarlo para que se ajuste a sus necesidades. Todas las instrucciones necesarias se pueden encontrar en el sitio web oficial de ONLYOFFICE.
- Sugerencia 5. Para instalar ONLYOFFICE mediante la interfaz gráfica de usuario, descargue el archivo de instalación de SourceForge.
- Consejo 6. Si busca la forma más sencilla y segura de instalar ONLYOFFICE, utilice el servicio Docker.
Enlaces
- SOLO OFICINA