Passbolt es un administrador de contraseñas de código abierto que le permite almacenar y compartir su contraseña de forma segura. Está diseñado para que las organizaciones pequeñas y medianas almacenen y compartan la credencial de inicio de sesión entre los miembros del equipo. Es autohospedado y está disponible en ediciones comunitarias y basadas en suscripción.
En este tutorial, le mostraremos cómo instalar el administrador de contraseñas Passbolt con Nginx y Let's Encrypt SSL en CentOS 8.
Requisitos
- Un servidor que ejecuta CentOS 8.
- Un nombre de dominio válido apuntado con la IP de su servidor.
- Se ha configurado una contraseña raíz en su servidor.
Instalar servidor LEMP
Primero, instale el servidor de base de datos Nginx y MariaDB usando el siguiente comando:
dnf install nginx mariadb-server -y
A continuación, deberá instalar la última versión de PHP y otras extensiones de PHP requeridas en su servidor. De forma predeterminada, la última versión de PHP no está disponible en el repositorio predeterminado de CentOS. Por lo tanto, deberá agregar EPEL y REMI repo a su sistema.
Puede agregar ambos repositorios con el siguiente comando:
dnf install epel-release -y
dnf install https://rpms.remirepo.net/enterprise/remi-release-8.rpm -y
A continuación, deshabilite el repositorio PHP predeterminado y habilite el repositorio REMI con el siguiente comando:
dnf module reset php
dnf module enable php:remi-7.4
Luego, instale PHP con otras dependencias requeridas ejecutando el siguiente comando:
dnf install php php-fpm php-intl php-gd php-mysqli php-json php-pear php-devel php-mbstring php-fpm git make unzip -y
Después de instalar todos los paquetes, deberá editar el archivo de configuración de PHP-FPM y cambiar el usuario y el grupo a Nginx.
nano /etc/php-fpm.d/www.conf
Cambie las siguientes líneas:
user = nginx
group = nginx
Guarde y cierre el archivo y luego cambie la propiedad del directorio de la sesión:
chgrp nginx /var/lib/php/session
A continuación, inicie el servicio Nginx, MariaDB y PHP-FPM y habilítelos para que se inicien al reiniciar el sistema con el siguiente comando:
systemctl start mariadb nginx php-fpm
systemctl enable mariadb nginx php-fpm
A continuación, deberá instalar la extensión GNUPG en su sistema. Puede instalarlo ejecutando los siguientes comandos:
dnf config-manager --set-enabled powertools
dnf install gpgme-devel
pecl install gnupg
echo "extension=gnupg.so" > /etc/php.d/gnupg.ini
A continuación, reinicie el servicio PHP-FPM para aplicar los cambios:
systemctl restart php-fpm
Instalar compositor
Composer es un administrador de dependencias para PHP. Deberá instalarlo en su sistema.
Primero, descargue el archivo de instalación de Composer con el siguiente comando:
php -r "copy('https://getcomposer.org/installer', 'composer-setup.php');" A continuación, instale Composer con el siguiente comando:
php composer-setup.php --install-dir=/usr/local/bin --filename=composer
Deberías obtener el siguiente resultado:
All settings correct for using Composer
Downloading...

Composer (version 2.0.11) successfully installed to: /usr/local/bin/composer
Use it: php /usr/local/bin/composer
A continuación, verifique la versión de Composer con el siguiente comando:
composer -V
Deberías obtener el siguiente resultado:
Composer version 2.0.11 2021-02-24 14:57:23
Crear una base de datos
A continuación, deberá crear una base de datos y un usuario para Passbolt.
Primero, conéctese a MariaDB con el siguiente comando:
mysql
Una vez conectado, cree una base de datos y un usuario con el siguiente comando:
MariaDB [(none)]> CREATE DATABASE passbolt DEFAULT CHARACTER SET utf8mb4 COLLATE utf8mb4_unicode_ci;
MariaDB [(none)]> GRANT ALL ON passbolt.* TO 'passbolt'@'localhost' IDENTIFIED BY 'password';
A continuación, elimine los privilegios y salga de MariaDB con el siguiente comando:
MariaDB [(none)]> FLUSH PRIVILEGES;
MariaDB [(none)]> EXIT;
Una vez que haya terminado, puede continuar con el siguiente paso.
Instalar y configurar Passbolt
Primero, cambie el directorio al directorio raíz web de Nginx y descargue la última versión de Passbolt con el siguiente comando:
cd /var/www
git clone https://github.com/passbolt/passbolt_api.git passbolt
Una vez que se complete la descarga, cambie el directorio a passbolt e instale todas las dependencias requeridas con el siguiente comando:
cd passbolt
composer install --no-dev
A continuación, deberá instalar haveged para generar la clave GPG. Primero, instala haveged con el siguiente comando:
dnf install haveged
A continuación, inicie el servicio haveged con el siguiente comando:
systemctl start haveged
A continuación, genera la clave GPG con el siguiente comando:
gpg --full-generate-key
Responda todas las preguntas cuidadosamente. Deje el campo de contraseña en blanco cuando se le solicite establecer una contraseña:
gpg (GnuPG) 2.2.9; Copyright (C) 2018 Free Software Foundation, Inc.
This is free software: you are free to change and redistribute it.
There is NO WARRANTY, to the extent permitted by law.

gpg: directory '/root/.gnupg' created
gpg: keybox '/root/.gnupg/pubring.kbx' created
Please select what kind of key you want:
   (1) RSA and RSA (default)
   (2) DSA and Elgamal
   (3) DSA (sign only)
   (4) RSA (sign only)
Your selection?
RSA keys may be between 1024 and 4096 bits long.
What keysize do you want? (2048)
Requested keysize is 2048 bits
Please specify how long the key should be valid.
         0 = key does not expire
        = key expires in n days
      w = key expires in n weeks
      m = key expires in n months
      y = key expires in n years
Key is valid for? (0)
Key does not expire at all
Is this correct? (y/N) y

GnuPG needs to construct a user ID to identify your key.

Real name: Hitesh
Email address: [email protected]
Comment: Welcome
You selected this USER-ID:
    "Hitesh (Welcome) <[email protected]>"

Change (N)ame, (C)omment, (E)mail or (O)kay/(Q)uit? O
We need to generate a lot of random bytes. It is a good idea to perform
some other action (type on the keyboard, move the mouse, utilize the
disks) during the prime generation; this gives the random number
generator a better chance to gain enough entropy.
We need to generate a lot of random bytes. It is a good idea to perform
some other action (type on the keyboard, move the mouse, utilize the
disks) during the prime generation; this gives the random number
generator a better chance to gain enough entropy.
gpg: /root/.gnupg/trustdb.gpg: trustdb created
gpg: key 1A0448FECA43E1F9 marked as ultimately trusted
gpg: directory '/root/.gnupg/openpgp-revocs.d' created
gpg: revocation certificate stored as '/root/.gnupg/openpgp-revocs.d/40733A5076D11E86EF2FE5B51A0448FECA43E1F9.rev'
public and secret key created and signed.

pub   rsa2048 2021-03-12 [SC]
      40733A5076D11E86EF2FE5B51A0448FECA43E1F9
uid                      Hitesh (Welcome) <[email protected]>
sub   rsa2048 2021-03-12 [E]
Nota :Recuerda la clave secreta generada arriba.
A continuación, exporte la clave secreta al archivo serverkey_private.asc y serverkey.asc con el siguiente comando:
gpg --armor --export-secret-keys [email protected] > /var/www/passbolt/config/gpg/serverkey_private.asc
gpg --armor --export [email protected] > /var/www/passbolt/config/gpg/serverkey.asc
A continuación, establezca la propiedad adecuada en el directorio passbolt:
chown -R nginx:nginx /var/www/passbolt
A continuación, inicialice el conjunto de claves de Nginx con el siguiente comando:
sudo su -s /bin/bash -c "gpg --list-keys" nginx
Salida:
gpg: directory '/var/lib/nginx/.gnupg' created
gpg: keybox '/var/lib/nginx/.gnupg/pubring.kbx' created
gpg: /var/lib/nginx/.gnupg/trustdb.gpg: trustdb created
A continuación, cambie el nombre del archivo de configuración predeterminado de Passbolt:
cp config/passbolt.default.php config/passbolt.php
A continuación, edite el archivo passbolt.php y defina la configuración de su base de datos y la URL base:
nano config/passbolt.php
Cambie las siguientes líneas:
        'fullBaseUrl' => 'https://passbolt.linuxbuz.com',
    // Database configuration.
    'Datasources' => [
        'default' => [
            'host' => 'localhost',
            //'port' => 'non_standard_port_number',
            'username' => 'passbolt',
            'password' => 'password',
            'database' => 'passbolt',
            'serverKey' => [
                // Server private key fingerprint.
                'fingerprint' => '40733A5076D11E86EF2FE5B51A0448FECA43E1F9',
                'public' => CONFIG . 'gpg' . DS . 'serverkey.asc',
                'private' => CONFIG . 'gpg' . DS . 'serverkey_private.asc',
Guarde y cierre el archivo, luego instale Passbolt con el siguiente comando:
cd /var/www/passbolt
sudo su -s /bin/bash -c "./bin/cake passbolt install --no-admin" nginx
Deberías obtener el siguiente resultado:
All Done. Took 0.9595s

Import the server private key in the keyring
---------------------------------------------------------------
Importing /var/www/passbolt/config/gpg/serverkey_private.asc
Keyring init OK

Passbolt installation success! Enjoy! ?
Configurar Nginx para Passbolt
A continuación, deberá crear un archivo de configuración de Nginx para Passbolt. Puedes crearlo con el siguiente comando:
nano /etc/nginx/conf.d/passbolt.conf
Agregue las siguientes líneas:
server {
  listen 80;
  server_name passbolt.linuxbuz.com;
  root /var/www/passbolt;

  location / {
    try_files $uri $uri/ /index.php?$args;
    index index.php;
  }

  location ~ \.php$ {
    fastcgi_index           index.php;
    fastcgi_pass            unix:/var/run/php-fpm/www.sock;
    fastcgi_split_path_info ^(.+\.php)(.+)$;
    include                 fastcgi_params;
    fastcgi_param           SCRIPT_FILENAME $document_root$fastcgi_script_name;
    fastcgi_param           SERVER_NAME $http_host;
  }

  location ~* \.(jpe?g|woff|woff2|ttf|gif|png|bmp|ico|css|js|json|pdf|zip|htm|html|docx?|xlsx?|pptx?|txt|wav|swf|svg|avi|mp\d)$ {
    access_log off;
    log_not_found off;
    try_files $uri /webroot/$uri /index.php?$args;
  }
}
Guarde y cierre el archivo, luego verifique el Nginx para cualquier error de sintaxis:
nginx -t
Salida:
nginx: the configuration file /etc/nginx/nginx.conf syntax is ok
nginx: configuration file /etc/nginx/nginx.conf test is successful
A continuación, reinicie Nginx para aplicar los cambios:
systemctl restart nginx
Secure Passbolt con Let's Encrypt SSL
A continuación, deberá instalar el cliente Certbot para instalar Let's Encrypt SSL para Passbolt. Puede instalarlo con el siguiente comando:
dnf install letsencrypt python3-certbot-nginx
A continuación, obtenga e instale un certificado SSL para su dominio de Lets con el siguiente comando:
certbot --nginx -d passbolt.linuxbuz.com
Se le pedirá que proporcione su dirección de correo electrónico y acepte el término del servicio:
Saving debug log to /var/log/letsencrypt/letsencrypt.log
Plugins selected: Authenticator nginx, Installer nginx
Enter email address (used for urgent renewal and security notices)
 (Enter 'c' to cancel): [email protected]

- - - - - - - - - - - - - - - - - - - - - - - - - - - - - - - - - - - - - - - -
Please read the Terms of Service at
https://letsencrypt.org/documents/LE-SA-v1.2-November-15-2017.pdf. You must
agree in order to register with the ACME server. Do you agree?
- - - - - - - - - - - - - - - - - - - - - - - - - - - - - - - - - - - - - - - -
(Y)es/(N)o: Y

- - - - - - - - - - - - - - - - - - - - - - - - - - - - - - - - - - - - - - - -
Would you be willing, once your first certificate is successfully issued, to
share your email address with the Electronic Frontier Foundation, a founding
partner of the Let's Encrypt project and the non-profit organization that
develops Certbot? We'd like to send you email about our work encrypting the web,
EFF news, campaigns, and ways to support digital freedom.
- - - - - - - - - - - - - - - - - - - - - - - - - - - - - - - - - - - - - - - -
(Y)es/(N)o: Y
Account registered.
Requesting a certificate for passbolt.linuxbuz.com
Performing the following challenges:
http-01 challenge for passbolt.linuxbuz.com
Waiting for verification...
Cleaning up challenges
Deploying Certificate to VirtualHost /etc/nginx/conf.d/passbolt.conf
Redirecting all traffic on port 80 to ssl in /etc/nginx/conf.d/passbolt.conf

- - - - - - - - - - - - - - - - - - - - - - - - - - - - - - - - - - - - - - - -
Congratulations! You have successfully enabled https://passbolt.linuxbuz.com
- - - - - - - - - - - - - - - - - - - - - - - - - - - - - - - - - - - - - - - -
Subscribe to the EFF mailing list (email: [email protected]).


IMPORTANT NOTES:
 - Congratulations! Your certificate and chain have been saved at:
   /etc/letsencrypt/live/passbolt.linuxbuz.com/fullchain.pem
   Your key file has been saved at:
   /etc/letsencrypt/live/passbolt.linuxbuz.com/privkey.pem
   Your certificate will expire on 2021-06-09. To obtain a new or
   tweaked version of this certificate in the future, simply run
   certbot again with the "certonly" option. To non-interactively
   renew *all* of your certificates, run "certbot renew"
 - If you like Certbot, please consider supporting our work by:

   Donating to ISRG / Let's Encrypt:   https://letsencrypt.org/donate
   Donating to EFF:                    https://eff.org/donate-le
Registrar un usuario para Passbolt
A continuación, deberá registrar un usuario para Passbolt. Puedes hacerlo con el siguiente comando:
cd /var/www/passbolt
sudo su -s /bin/bash -c "./bin/cake passbolt register_user -u [email protected] -f howtoforge -l Demo -r admin" nginx
Deberías obtener el siguiente resultado:
     ____                  __          ____
    / __ \____  _____ ____/ /_  ____  / / /_
   / /_/ / __ `/ ___/ ___/ __ \/ __ \/ / __/
  / ____/ /_/ (__  |__  ) /_/ / /_/ / / /
 /_/    \__,_/____/____/_.___/\____/_/\__/

 Open source password manager for teams
---------------------------------------------------------------
User saved successfully.
To start registration follow the link provided in your mailbox or here:
https://passbolt.linuxbuz.com/setup/install/f81227bc-b0b6-44b5-99a7-6b490a4ba262/5a112de0-6ca4-4e1b-97c8-26453ef3828b
Puede utilizar el enlace anterior para acceder a Paabolt.
Configurar cortafuegos
A continuación, deberá permitir los puertos 80 y 443 a través del firewall. Puedes hacerlo con el siguiente comando:
firewall-cmd --permanent --add-port=80/tcp
firewall-cmd --permanent --add-port=443/tcp
Ahora, recarga el firewalld para aplicar los cambios:
firewall-cmd --reload
Acceder a la interfaz de usuario web de Passbolt
Ahora, abra su navegador web y escriba la URL https://passbolt.linuxbuz.com/setup/install/f81227bc-b0b6-44b5-99a7-6b490a4ba262/5a112de0-6ca4-4e1b-97c8-26453ef3828b . Será redirigido a la siguiente página:
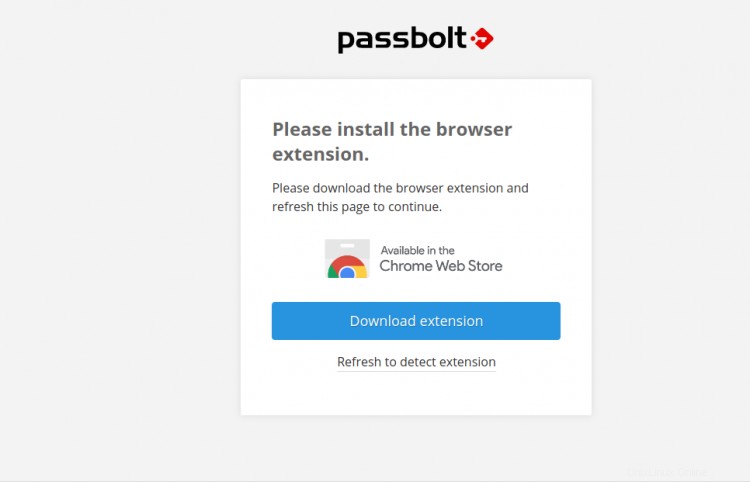
Aquí, deberá descargar las extensiones del navegador Passbolt y actualizar la página una vez instaladas. Debería ver la siguiente página:
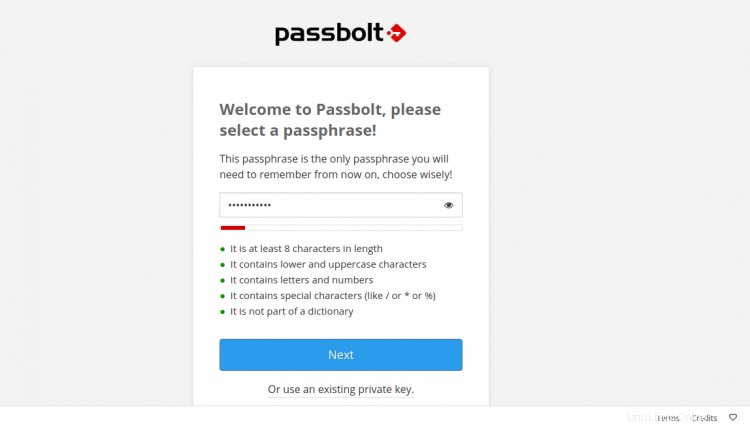
Especifique la contraseña segura y haga clic en Siguiente botón. Debería ver la siguiente página:
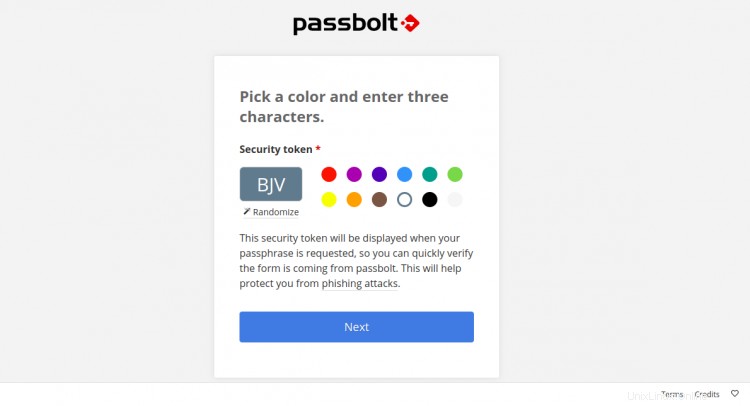
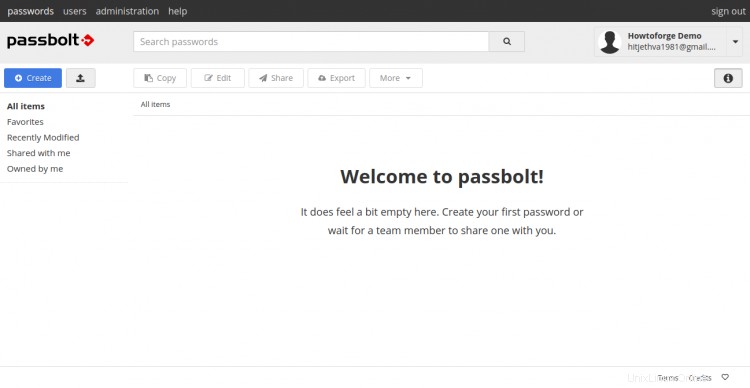
Elija un color, ingrese un token de seguridad y haga clic en Siguiente botón. Se le redirigirá al panel de control de Passbolt en la siguiente página:
Conclusión
¡Felicidades! Ha instalado con éxito el administrador de contraseñas Passbolt con Nginx y Let's Encrypt SSL en CentOS 8. Ahora puede implementar Passbolt en su organización y comenzar a almacenar y compartir las credenciales de inicio de sesión entre los miembros del equipo de forma segura.