Seafile es una solución gratuita, de código abierto y autohospedada para compartir archivos para Linux. Es un software de alojamiento de archivos multiplataforma que se puede utilizar para almacenar archivos en un servidor central y sincronizarlos con su computadora personal o dispositivo móvil. Seafile está escrito con el marco Python Django y es funcionalmente muy similar a Dropbox y Google Drive. Tiene muchas características que incluyen encriptación de archivos, control de versiones, autenticación de dos factores, edición en línea, bloqueo de archivos y muchas más.
En este tutorial, le mostraremos cómo instalar Seafile con Nginx como proxy inverso en CentOS 8.
Requisitos
- Un nuevo CentOS 8 VPS en la plataforma en la nube Atlantic.Net
- Un nombre de dominio válido dirigido a la IP de su servidor
- Una contraseña de root está configurada en su servidor
Paso 1:crear un servidor en la nube de Atlantic.Net
Primero, inicie sesión en su servidor en la nube de Atlantic.Net. Cree un nuevo servidor, eligiendo CentOS 8 como sistema operativo con al menos 2 GB de RAM. Conéctese a su servidor en la nube a través de SSH e inicie sesión con las credenciales resaltadas en la parte superior de la página.
Una vez que haya iniciado sesión en su servidor CentOS 8, ejecute el siguiente comando para actualizar su sistema base con los últimos paquetes disponibles.
yum update -y
Paso 2:instalar las dependencias requeridas
Primero, deberá instalar el repositorio EPEL en su sistema. Puede instalarlo con el siguiente comando:
yum install epel-release -y
Una vez instalado el repositorio EPEL, instale otras dependencias con el siguiente comando:
yum install python3 python3-devel python3-setuptools gcc gcc-c++ freetype-devel python3-pip
python3-ldap memcached java-1.8.0-openjdk libmemcached libreoffice-headless libreoffice-pyuno
libffi-devel pwgen curl tar -y
Una vez que todas las dependencias estén instaladas, use el comando pip para instalar otras dependencias:
pip3 install Pillow pylibmc captcha jinja2 sqlalchemy psd-tools django-pylibmc django-simple-
captcha
Una vez que todos los paquetes estén instalados, habilite el servicio de Memcached para que se inicie al reiniciar el sistema:
systemctl enable --now memcached
Paso 3:instalar Nginx y MariaDB
A continuación, deberá instalar el servidor Nginx y MariaDB en su sistema. Puede instalar ambos paquetes con el siguiente comando:
yum install nginx mariadb-server -y
Una vez instalado, inicie los servicios Nginx y MariaDB y habilítelos para que se inicien al reiniciar el sistema:
systemctl start nginx
systemctl start mariadb
systemctl enable nginx
systemctl enable mariadb
Paso 4:crear una base de datos para Seafile
Primero, deberá configurar la contraseña raíz de MariaDB y proteger la instalación de MariaDB. Puedes hacerlo usando el siguiente script:
mysql_secure_installation
Responda todas las preguntas como se muestra a continuación:
Enter current password for root (enter for none):
Set root password? [Y/n] Y
New password:
Re-enter new password:
Remove anonymous users? [Y/n] Y
Disallow root login remotely? [Y/n] Y
Remove test database and access to it? [Y/n] Y
Reload privilege tables now? [Y/n] Y
A continuación, inicie sesión en el shell de MariaDB con el siguiente comando:
mysql -u root -p
Una vez que haya iniciado sesión, cree una base de datos para Seafile con el siguiente comando:
create database `ccnetdb` character set = 'utf8';
create database `seafiledb` character set = 'utf8';
create database `seahubdb` character set = 'utf8';
A continuación, cree un usuario para Seafile con el siguiente comando:
create user 'seafile'@'localhost' identified by 'yourpassword';
A continuación, otorgue todos los privilegios a ccnetdb, seafiledb y seahubdb con el siguiente comando:
GRANT ALL PRIVILEGES ON `ccnetdb`.* to `seafile`@localhost;
GRANT ALL PRIVILEGES ON `seafiledb`.* to `seafile`@localhost;
GRANT ALL PRIVILEGES ON `seahubdb`.* to `seafile`@localhost;
A continuación, elimine los privilegios y salga del shell de MariaDB con el siguiente comando:
FLUSH PRIVILEGES;
EXIT;
Paso 5:instalar Seafile
Primero, descargue la última versión de Seafile con el siguiente comando:
wget https://s3.eu-central-1.amazonaws.com/download.seadrive.org/seafile-server_7.1.5_x86-
64.tar.gz
Una vez descargado, extraiga el archivo descargado con el siguiente comando:
tar -xvzf seafile-server_7.1.5_x86-64.tar.gz
A continuación, mueva el directorio extraído a /opt con el siguiente comando:
mv seafile-server-* /opt/seafile
cd /opt/seafile
A continuación, cambie el directorio a /opt/seafile y configure el servidor Seafile ejecutando el siguiente script:
./setup-seafile-mysql.sh
Se le pedirá que proporcione el nombre del servidor, el nombre de dominio válido y los detalles de la base de datos como se muestra a continuación.
Checking python on this machine ...

-----------------------------------------------------------------
This script will guide you to setup your seafile server using MySQL.
Make sure you have read seafile server manual at

https://download.seafile.com/published/seafile-manual/home.md

Press ENTER to continue
-----------------------------------------------------------------

What is the name of the server? It will be displayed on the client.
3 - 15 letters or digits
[ server name ] seafile

What is the ip or domain of the server?
For example: www.mycompany.com, 192.168.1.101
[ This server's ip or domain ] seafile.example.com

Which port do you want to use for the seafile fileserver?
[ default "8082" ]

-------------------------------------------------------
Please choose a way to initialize seafile databases:
-------------------------------------------------------

[1] Create new ccnet/seafile/seahub databases
[2] Use existing ccnet/seafile/seahub databases

[ 1 or 2 ] 2

What is the host of mysql server?
[ default "localhost" ]

What is the port of mysql server?
[ default "3306" ]

Which mysql user to use for seafile?
[ mysql user for seafile ] seafile

What is the password for mysql user "seafile"?
[ password for seafile ]

verifying password of user seafile ... done

Enter the existing database name for ccnet:
[ ccnet database ] ccnetdb

verifying user "seafile" access to database ccnetdb ... done

Enter the existing database name for seafile:
[ seafile database ] seafiledb

verifying user "seafile" access to database seafiledb ... done

Enter the existing database name for seahub:
[ seahub database ] seahubdb

verifying user "seafile" access to database seahubdb ... done
Proporcione cada detalle cuidadosamente. Una vez que se haya completado la instalación, debería ver el siguiente resultado:
---------------------------------
This is your configuration
---------------------------------

server name: seafile
server ip/domain: seafile.example.com

seafile data dir: /opt/seafile-data
fileserver port: 8082

database: use existing
ccnet database: ccnetdb
seafile database: seafiledb
seahub database: seahubdb
database user: seafile

---------------------------------
Press ENTER to continue, or Ctrl-C to abort

-----------------------------------------------------------------
Your seafile server configuration has been finished successfully.
-----------------------------------------------------------------

run seafile server: ./seafile.sh { start | stop | restart }
run seahub server: ./seahub.sh { start <port> | stop | restart <port> }

-----------------------------------------------------------------
If you are behind a firewall, remember to allow input/output of these tcp ports:
-----------------------------------------------------------------

port of seafile fileserver: 8082
port of seahub: 8000

When problems occur, Refer to

https://download.seafile.com/published/seafile-manual/home.md

for information.
Paso 6:configurar la cuenta de administrador
A continuación, deberá configurar una cuenta de administrador para acceder a Seafile. Primero, inicie el servicio Seafile con el siguiente comando:
/opt/seafile/seafile.sh start
A continuación, inicie el servicio Seahub para establecer una contraseña de administrador:
/opt/seafile/seahub.sh start
Se le pedirá que establezca un nombre de usuario y contraseña de administrador como se muestra a continuación.
LC_ALL is not set in ENV, set to en_US.UTF-8
Starting seahub at port 8000 ...

----------------------------------------
It's the first time you start the seafile server. Now let's create the admin account
----------------------------------------

What is the email for the admin account?
[ admin email ] example@unixlinux.online

What is the password for the admin account?
[ admin password ]

Enter the password again:
[ admin password again ]

----------------------------------------
Successfully created seafile admin
----------------------------------------
A continuación, detenga los servicios de Seafile y Seahub con el siguiente comando:
/opt/seafile/seafile.sh stop
/opt/seafile/seahub.sh stop
Paso 7:cree un archivo de servicio de Systemd para Seafile
A continuación, deberá crear archivos de servicio systemd para que Seafile y Seahub administren los servicios. Primero, cree un archivo de servicio para Seafile usando el siguiente comando:
nano /etc/systemd/system/seafile.service
Agregue las siguientes líneas:
[Unit]
Description=Seafile
After= mysql.service
After=network.target

[Service]
Type=forking
ExecStart=/opt/seafile-server-latest/seafile.sh start
ExecStop=/opt/seafile-server-latest/seafile.sh stop

[Install]
WantedBy=multi-user.target
Guarde y cierre el archivo, luego cree un archivo de servicio para Seahub con el siguiente comando:
nano /etc/systemd/system/seahub.service
Agregue las siguientes líneas:
[Unit]
Description=Seafile
After= mysql.service
After=network.target

[Service]
Type=forking
ExecStart=/opt/seafile-server-latest/seahub.sh start
ExecStop=/opt/seafile-server-latest/seahub.sh stop

[Install]
WantedBy=multi-user.target
Guarde y cierre el archivo, luego vuelva a cargar el demonio systemd con el siguiente comando:
systemctl daemon-reload
A continuación, inicie el servicio Seafile y Seahub y habilítelos para que se inicien al reiniciar el sistema con el siguiente comando:
systemctl start seafile
systemctl enable seafile
systemctl start seahub
systemctl enable seahub
En este punto, el servidor Seafile se inicia y escucha en el puerto 8000. Puede verificarlo con el siguiente comando:
ss -tunelp | grep 8000
Deberías obtener el siguiente resultado:
tcp LISTEN 0 128 127.0.0.1:8000 0.0.0.0:*
users:(("python3",pid=44925,fd=8),("python3",pid=44924,fd=8),("pyt
hon3",pid=44923,fd=8),("python3",pid=44922,fd=8),("python3",pid=44921,fd=8),("python3",pid=44916,fd=8)) ino:77620 sk:9
<->
Paso 8:configurar Nginx para Seafile
A continuación, deberá configurar Nginx como proxy inverso para acceder a Seafile mediante el puerto 80. Puede configurarlo con el siguiente comando:
nano /etc/nginx/conf.d/seafile.conf
Agregue las siguientes líneas:
server {
listen 80;
listen [::]:80;
server_name seafile.example.com;
autoindex off;
client_max_body_size 100M;
access_log /var/log/nginx/seafile.com.access.log;
error_log /var/log/nginx/seafile.com.error.log;

location / {
proxy_pass http://127.0.0.1:8000;
proxy_set_header Host $host;
proxy_set_header X-Real-IP $remote_addr;
proxy_set_header X-Forwarded-For $proxy_add_x_forwarded_for;
proxy_set_header X-Forwarded-Host $server_name;
proxy_read_timeout 1200s;
}

location /seafhttp {
rewrite ^/seafhttp(.*)$ $1 break;
proxy_pass http://127.0.0.1:8082;
proxy_set_header X-Forwarded-For $proxy_add_x_forwarded_for;
proxy_connect_timeout 36000s;
proxy_read_timeout 36000s;
proxy_send_timeout 36000s;
send_timeout 36000s;
}

location /media {
root /opt/seafile-server-latest/seahub;
}
}
Guarde y cierre el archivo, luego reinicie el servicio Nginx con el siguiente comando:
systemctl restart nginx
Si tiene algún error, edite el archivo Nginx.conf:
nano /etc/nginx/nginx.conf
Agregue la siguiente línea debajo de http {:
server_names_hash_bucket_size 64;
Guarde y cierre el archivo, luego reinicie el servicio Nginx:
systemctl restart nginx
Paso 9:acceda a la interfaz web de Seafile
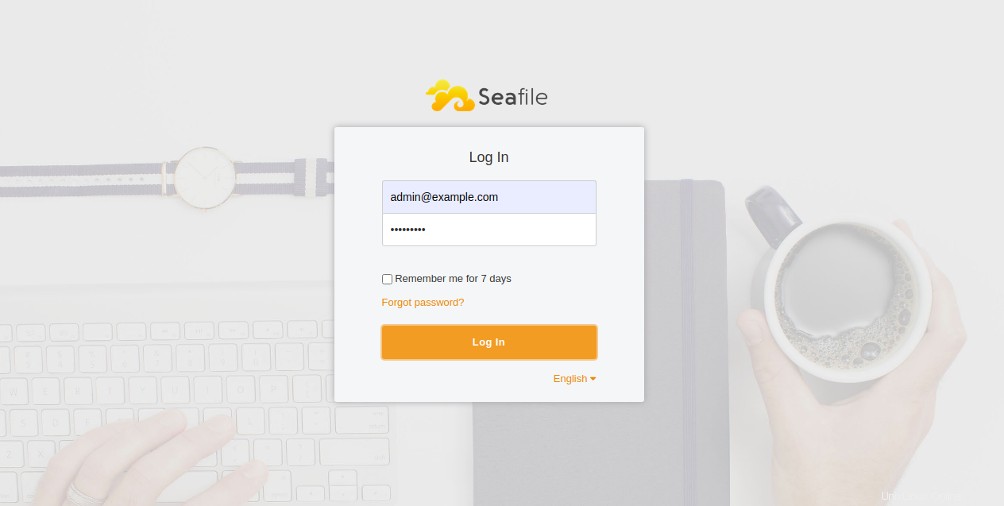
En este punto, Nginx está configurado para servir a Seafile. Ahora, abra su navegador web y acceda a la interfaz web de Seafile usando la URL http://seafile.example.com . Será redirigido a la página de inicio de sesión de Seafile:

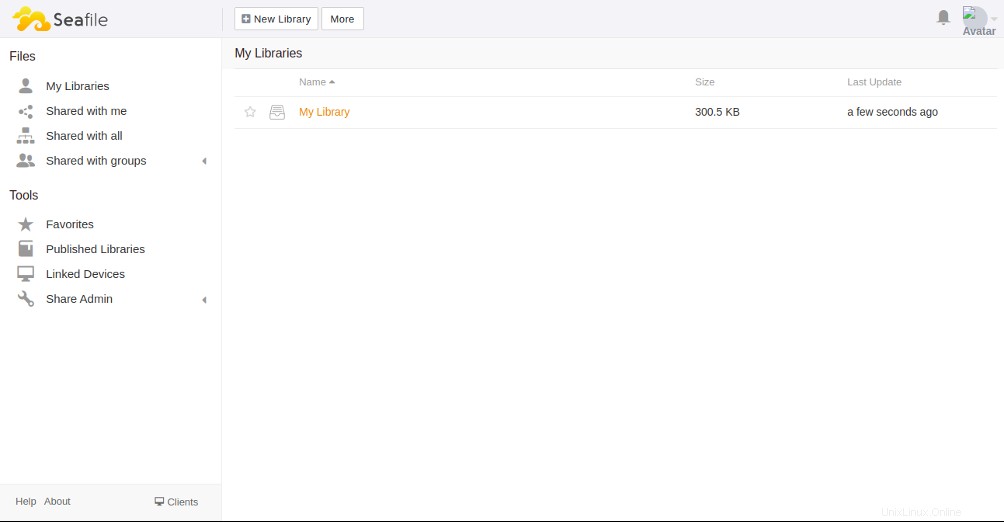
Proporcione su nombre de usuario y contraseña de administrador y haga clic en Iniciar sesión botón. Debería ver el panel de control de Seafile en la siguiente página:

Conclusión
En el tutorial anterior, aprendió cómo instalar el servidor Seafile con Nginx como proxy inverso en CentOS 8. Ahora puede cargar sus archivos y fotos personales en el servidor Seafile, compartirlos con sus amigos y acceder a ellos desde su computadora o dispositivo móvil. ¡Pruebe Seafile en VPS Hosting de Atlantic.Net utilizando el tutorial anterior!